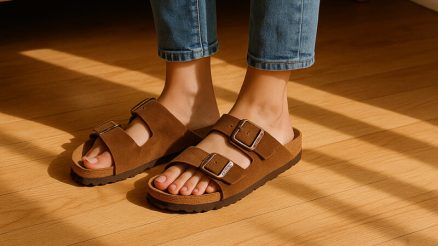
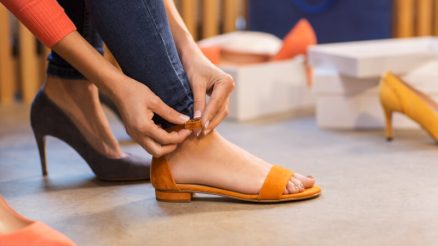
There’s nothing worse than finding the perfect pair of sandals, only to discover they pinch and rub in all the wrong places. Whether they’re a little snug from the start, or your feet swell in the heat, tight sandals can turn a stylish outfit into a painful ordeal. But before you banish them to the back of your closet or resign yourself to blisters, know that there are several effective ways to stretch your sandals for a more comfortable fit.
This guide will walk you through various methods, from simple at-home tricks to professional solutions, helping you reclaim comfort and enjoy your favorite footwear.
Why Do Sandals Feel Tight?
Before diving into solutions, it’s helpful to understand why sandals might feel tight:
- Material: Some materials, like genuine leather, have more give and stretch over time, while synthetics might be more resistant.
- Newness: Brand-new shoes often need a “break-in” period.
- Foot Swelling: Heat, prolonged standing, or certain health conditions can cause feet to swell, making previously comfortable sandals feel tight.
- Slight Mismatch: Sometimes, a half-size difference can make all the difference between comfort and constriction.
Methods to Stretch Your Sandals
Here are several tried-and-true methods to help stretch those stubborn sandals:
Method 1: Wear Them In (The Simplest Approach)
This is the most natural way to stretch sandals, especially if they’re only slightly snug. Your body heat and the pressure of your feet will gradually mold the material.
How to do it:
- Wear them around the house: Start by wearing your sandals for short periods (30 minutes to an hour) each day.
- Wear thick socks (optional, but effective): For a more aggressive stretch, put on a pair of thick socks (or even two pairs if you can manage) before putting on your sandals. This adds extra bulk to gently push the material outwards.
- Increase wear time: Gradually extend the time you wear them until they feel comfortable.
Best for: Minor tightness, leather, and fabric sandals.
Method 2: The “Heat and Wear” Method
Heat can make materials like leather and some synthetics more pliable, allowing them to stretch more easily.
What you’ll need:
- Hairdryer
- Thick socks (optional)
How to do it:
- Put on thick socks: If possible, put on the thickest socks you can comfortably wear with the sandals. If not, wear them bare.
- Heat the tight areas: Use a hairdryer on a medium setting, directing the heat at the specific tight areas of the sandal for about 20-30 seconds. Keep the hairdryer moving to avoid overheating one spot.
- Flex and move: While the material is warm and pliable, walk around in the sandals, flexing your feet, wiggling your toes, and making movements that would naturally stretch the areas that feel tight.
- Repeat: Allow the sandals to cool on your feet. You might need to repeat this process a few times for optimal results.
Caution: Be careful not to overheat the material, especially synthetics, as excessive heat can damage them. Avoid this method for delicate materials or those with embellishments that might melt or warp.
Method 3: The “Ice Bag” Method (For Overall Stretch)
This method uses the expansion of freezing water to gently stretch the sandal from the inside out.
What you’ll need:
- Sealable plastic bags (e.g., Ziploc bags)
- Water
- Freezer
How to do it:
- Fill the bags: Fill a sturdy, sealable plastic bag about halfway with water. Ensure the bag is completely sealed and there are no leaks. You might want to double-bag for extra security.
- Place in sandals: Carefully place the water-filled bag inside the sandal, ensuring it fills the areas you want to stretch (e.g., the toe box, straps). If the sandal has an open toe, you might need to strategically place smaller bags.
- Freeze: Place the sandals with the water bags in the freezer overnight. As the water freezes, it will expand, gently pushing outwards on the sandal material.
- Thaw and remove: Once frozen solid, remove the sandals from the freezer and let them sit at room temperature for about 20-30 minutes until the ice melts enough to easily remove the bag. Do not try to force the frozen bag out.
- Try them on: Test the fit. You may need to repeat the process if more stretching is required.
Best for: Most sandal materials, especially good for stretching the overall width or toe box.
Method 4: Use a Shoe Stretcher
A dedicated shoe stretcher is a professional tool that can apply targeted, consistent pressure to stretch specific areas of a shoe.
What you’ll need:
- Shoe stretcher (available online or at shoe stores)
- Shoe stretch spray (optional, but recommended for leather)
How to do it:
- Apply stretch spray (optional): If you have a leather sandal, apply a shoe stretch spray to the tight areas. These sprays contain conditioners that make the leather more pliable.
- Insert the stretcher: Insert the shoe stretcher into the sandal, positioning it to target the areas you want to expand (e.g., width, length, bunion spots).
- Adjust the stretcher: Slowly turn the handle or knob on the stretcher to expand it. You should feel tension but avoid over-tightening, which could damage the sandal.
- Leave it overnight: Leave the stretcher in the sandal for at least 6-8 hours, or ideally overnight, to allow the material to relax and conform to the new shape.
- Remove and test: Remove the stretcher and try on the sandals. Repeat if necessary.
Best for: Targeted stretching, consistent results, and use on various materials (ensure the stretcher is appropriate for the material).
Method 5: Potato Power (Unconventional but Effective for Leather)
An old-fashioned, surprisingly effective method for leather shoes.
What you’ll need:
- A potato (larger than the area you want to stretch)
- Paper towel or newspaper
How to do it:
- Peel and shape: Peel a potato and trim it slightly to fit snugly into the tight area of your leather sandal.
- Wrap it: Wrap the potato in a paper towel or a thin layer of newspaper. This will absorb excess moisture and prevent direct contact with the sandal’s lining.
- Insert: Push the wrapped potato firmly into the tight section of the sandal.
- Leave overnight: Leave it overnight. The moisture from the potato will gently soften the leather, and the potato’s expansion as it dries will subtly stretch the material.
- Remove and clean: Remove the potato and wipe any moisture from the sandal.
Best for: Leather sandals, targeted stretching.
Method 6: Professional Shoe Repair
If you’re hesitant to try these methods yourself, or if your sandals are made of delicate or expensive materials, a professional cobbler is your best bet.
Why choose a professional:
- Expertise: Cobblers have specialized tools and knowledge to stretch various materials safely.
- Specific issues: They can address complex issues like bunion spots or instep tightness with precision.
- Risk-free: Minimizes the risk of damaging your sandals.
Important Tips and Precautions
- Go slow: Stretching shoes takes time. Don’t rush the process, as impatient stretching can damage the material.
- Know your material: Leather stretches well. Synthetics are less forgiving and might only offer minor give. Patent leather is notoriously difficult to stretch.
- Targeted approach: Identify exactly where the sandal is tight and focus your efforts there.
- Condition leather: If stretching leather, always use a leather conditioner afterward to keep it supple and prevent cracking.
- Never soak sandals: Do not immerse your sandals in water, as this can damage the material, adhesives, and overall structure.
- Test first: If you’re unsure about a method, test it on an inconspicuous area of the sandal first.
- Don’t overstretch: You want a comfortable fit, not a loose one. Overstretching can ruin the sandal’s shape and support.
With these methods, you’re well-equipped to tackle tight sandals and ensure your feet stay happy and comfortable all season long. Happy walking!


