You don’t need a $200 appointment or a fancy resort to feel pampered. With a little planning, a few things you probably already own, and a free afternoon, you can turn your home into a calm, cozy spa and finish the day feeling refreshed from head to toe. Most of the treatments people pay for at a salon, like masks, scrubs, soaks, and pedicures, can be recreated in your own bathroom for a fraction of the price.
This guide walks you through everything you need: how to set the mood, DIY treatments for your face, hair, body, and feet, a sample spa-day schedule, themed ideas, and simple ways to turn it into a regular ritual. Whether you have a whole Saturday or just one quiet evening, you’ll find ideas that fit your time and budget.
Why an At-Home Spa Day Is Worth It
Taking a few hours just for yourself isn’t selfish. It’s maintenance. Between work, family, and endless notifications, most of us rarely give our bodies and minds a real pause. A slow, screen-free day of self-care can help you:
- Unwind and lower stress by giving your mind a real break from to-do lists and constant decisions
- Sleep better, especially when your day ends with a warm bath and a calm evening routine
- Care for your skin, hair, and feet in ways you usually rush through on busy mornings
- Save money compared to salon and spa prices, since most ingredients are already in your kitchen
- Reconnect with yourself and feel more like you again
The best part? You set the rules. There’s no booking, no driving, and no small talk. You can wear your comfiest robe, play your favorite music, and take as long as you like with each step. If you want to skip the face mask and spend an extra half hour in the bath, that’s completely up to you.
Step 1: Set the Spa Mood
The atmosphere is what turns “washing my face” into “spa day.” Professional spas feel relaxing because every detail, from the lighting to the scent to the soft towels, tells your brain it’s time to slow down. Spend about 15 minutes preparing your space before you start, and the whole day will feel more special.
Create a calm space
- Tidy up first. Clutter quietly adds stress. Clear the bathroom counter, wipe down the tub, and tidy the spot where you’ll relax afterward so you’re not staring at laundry piles.
- Dim the lights. Bright overhead lights feel clinical. Use candles (unscented or lightly scented), fairy lights, or a lamp with a warm bulb to create a soft, glowing atmosphere.
- Add scent. A diffuser with lavender, eucalyptus, or chamomile oil instantly feels spa-like. For an extra touch, hang a bundle of fresh eucalyptus from your shower head; the steam releases its fresh, clean aroma.
- Play soft music. Search for “spa music,” “lo-fi,” “rain sounds,” or a calm acoustic playlist. Gentle background sound helps quiet a busy mind and covers household noise.
Get your spa essentials ready
Gathering everything before you begin means you won’t have to interrupt your relaxation to hunt for a towel or clip. Here’s what to have on hand:
- Fluffy towels (pop them in the dryer for a few minutes so they’re warm and cozy)
- A soft robe and slippers
- Hair clips or a headband to keep hair off your face
- A water bottle or pitcher of infused water
- Your products and DIY ingredients, laid out neatly on a tray or basket
Go offline
Put your phone on “Do Not Disturb,” or better yet, leave it in another room. Let your household know you’re “at the spa” for a few hours so you won’t be interrupted. This is the secret ingredient most people skip, and it makes the biggest difference. Even one hour without scrolling can leave you feeling noticeably calmer and more present.
Step 2: Spa Drinks and Snacks
Real spas always offer something refreshing, like cucumber water or herbal tea, and it’s an easy detail to bring home. Staying hydrated also matters more than you’d think during a spa day, since warm baths and steam can leave you feeling a little dehydrated. Make your drinks and snacks feel special by serving them in a pretty glass or on a small tray.
Infused water ideas
Prepare a pitcher an hour or two before you start so the flavors have time to blend. Simply add sliced fruit, herbs, or spices to cold water and keep it in the fridge.
| Combination | Vibe |
|---|---|
| Cucumber + mint | Classic spa, cooling and fresh |
| Lemon + ginger | Zesty and warming |
| Strawberry + basil | Sweet and summery |
| Orange + cinnamon stick | Cozy, perfect for fall and winter |
| Raspberry + lime | Bright and tangy |
Warm drinks
If you prefer something warm, a cup of tea is a comforting way to wind down between treatments. Some cozy favorites include:
- Chamomile or peppermint tea, both naturally caffeine-free and calming
- Golden milk (warm milk with turmeric, cinnamon, and a little honey)
- A creamy matcha latte for a gentle energy boost
Light spa snacks
Choose foods that feel fresh and nourishing so you stay energized rather than sluggish. A heavy meal can make you sleepy before you’ve even reached the pedicure. Try:
- A colorful fresh fruit platter or fruit salad
- Greek yogurt with honey and berries
- A smoothie bowl topped with granola and seeds
- A few squares of dark chocolate
- Avocado toast or a light, crunchy salad
Step 3: Facial Treatments
Your face deserves the full spa experience. A proper facial routine takes about 30 to 40 minutes, and following the steps in order helps each product work better. Take your time, use gentle pressure, and treat it as a moment to relax rather than a chore.
1. Cleanse
Start by removing all your makeup, then wash with a gentle cleanser suited to your skin type. If you wear makeup or sunscreen, try a double cleanse: an oil-based cleanser first to dissolve makeup, followed by a water-based cleanser to clear away any leftover residue. Clean skin absorbs masks and serums much more effectively.
2. Steam
Fill a bowl with hot (not boiling) water, add a few chamomile tea bags or a handful of fresh herbs like mint or rosemary, and drape a towel over your head while leaning over the bowl for 5 to 8 minutes. Steam softens the skin, helps loosen dirt in your pores, and feels wonderfully relaxing. Keep your face at a comfortable distance so the heat never feels too intense.
Skip steaming if you have sensitive skin, rosacea, or broken capillaries, as heat can make redness worse.
3. Exfoliate (gently)
Exfoliating removes dead skin cells and reveals a brighter, smoother complexion. Use a gentle scrub or a mild chemical exfoliant, and limit it to once or twice a week. Over-exfoliating can strip your skin and leave it red, tight, or irritated, so less is definitely more here.
4. Apply a face mask
This is the fun part! Choose a store-bought sheet or cream mask, or whip up one of these simple DIY options using ingredients from your kitchen:
| DIY Mask | Ingredients | Best For |
|---|---|---|
| Honey glow mask | 1 tbsp raw honey | Dull or dry skin |
| Oatmeal soothing mask | 2 tbsp finely ground oats + 1 tbsp plain yogurt + 1 tsp honey | Sensitive or irritated skin |
| Banana hydrating mask | ½ mashed ripe banana + 1 tsp honey | Dry skin |
| Avocado nourishing mask | ¼ mashed avocado + 1 tsp honey | Very dry or mature skin |
| Clay purifying mask | Bentonite or kaolin clay + water | Oily or acne-prone skin |
Leave your mask on for 10 to 15 minutes. This is the perfect time to lie down, place chilled cucumber slices over your eyes, and listen to your playlist. Rinse with lukewarm water and pat your skin dry with a soft towel.
Important: Always patch-test a DIY mask on your inner arm or jawline first and wait a few minutes to check for any reaction. Avoid putting lemon juice, baking soda, or cinnamon on your face, as they can irritate or even burn the skin.
5. Tone, treat, and moisturize
Finish your facial by sweeping on a toner to refresh the skin, then apply any serum you love, such as vitamin C for brightness or hyaluronic acid for hydration. Gently tap a little eye cream around your eyes, and seal everything in with a good moisturizer. If your spa day is during the daytime and you’ll be near a window, add sunscreen too.
6. Bonus: facial massage
A facial massage feels incredibly soothing and can help your face look less puffy. Use a jade roller, gua sha stone, or just your clean fingertips, moving upward and outward from the center of your face toward your ears and hairline. For an extra cooling, de-puffing effect, chill your roller or stone in the fridge for 20 minutes beforehand.
Don’t forget your lips
Lips get dry and flaky, especially in colder months, and they’re easy to overlook. Mix a little sugar with honey or coconut oil, gently rub it over your lips in small circles, then wipe it away. Finish with a thick layer of lip balm and your lips will feel soft and smooth for days.
Step 4: Hair Treatments
Your hair goes through a lot, from heat styling to sun exposure to everyday brushing. A spa day is the perfect time to give it some extra nourishment, since you’ll have the time to let treatments sit and work properly.
Scalp massage
Before washing your hair, spend about 5 minutes massaging your scalp with your fingertips using small, firm circles. Start at your hairline and work your way back to the nape of your neck. It feels amazing, helps release tension you may be holding in your head and neck, and is one of the most relaxing parts of any spa visit.
Hot oil treatment
Warm a few tablespoons of coconut, argan, or olive oil by placing the container in a bowl of hot water for a few minutes. The oil should feel warm, never hot, so test it on your wrist first. Apply it from the mid-lengths to the ends of your hair, which tend to be the driest. Wrap your hair in a warm towel or shower cap and leave it on for 20 to 30 minutes while you move on to other treatments. When you’re ready, shampoo twice to remove all the oil.
DIY hair masks
If you’d like to try something different from oil, these simple masks target common hair concerns. Apply to damp hair, leave on for 15 to 20 minutes, and rinse thoroughly.
| Mask | Ingredients | Best For |
|---|---|---|
| Moisture boost | 1 ripe avocado + 1 tbsp olive oil | Dry, frizzy hair |
| Shine mask | 1 egg + 1 tbsp honey + 1 tbsp olive oil | Dull hair (rinse with cool water so the egg doesn’t cook!) |
| Strengthening mask | 2 tbsp plain yogurt + 1 tbsp honey | Weak or damaged hair |
| Scalp refresh | Aloe vera gel + a few drops of peppermint oil (diluted) | Oily or itchy scalp |
Finish with a cool-water rinse at the end of your wash. It helps smooth the hair cuticle, which adds shine and reduces frizz once your hair dries.
Step 5: Body Treatments
Luxurious bath soak
A warm bath is the centerpiece of any home spa day. It relaxes tired muscles, calms the mind, and gives you a peaceful moment to simply do nothing. Try one of these soothing soaks:
- Relaxing soak: 1 to 2 cups Epsom salt + 5 to 10 drops of lavender oil (mixed into a carrier oil or bath gel first so it disperses safely)
- Milk and honey bath: 1 cup milk (or powdered milk) + ¼ cup honey, for skin that feels silky soft
- Oatmeal bath: 1 cup finely ground oats, which is very soothing for dry or itchy skin
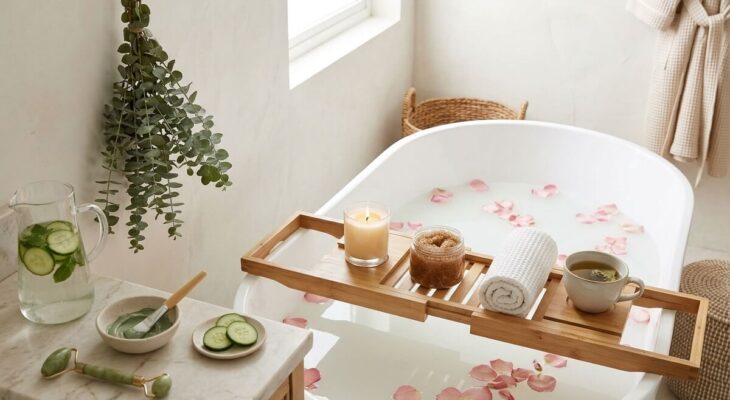
- Rose petal bath: Fresh or dried rose petals scattered on the water for a romantic, indulgent touch
- Bath bombs: Store-bought or homemade, for color, fizz, and fragrance
Keep the water warm rather than hot and soak for 15 to 20 minutes. Very hot water can dry out your skin and leave you feeling light-headed. Add a bath pillow, a good book, and a candle on the side, and let yourself fully switch off.
No bathtub? You can still turn your shower into a spa. Hang fresh eucalyptus from the shower head, place a scented shower steamer on the floor away from the direct stream, and take your time with a body scrub. Dimming the lights and playing music makes a quick shower feel like a real treat.
DIY body scrubs
Body scrubs remove dry, dull skin and leave you feeling smooth all over. They’re also incredibly easy to make with pantry staples. Mix the ingredients in a jar and use them right away, or store them in the fridge for up to a week.
| Scrub | Recipe | Feel |
|---|---|---|
| Coffee scrub | ½ cup used coffee grounds + ¼ cup coconut oil + 2 tbsp sugar | Energizing, great before a self-tan |
| Brown sugar scrub | ½ cup brown sugar + ¼ cup coconut or almond oil + vanilla | Gentle and sweet |
| Sea salt scrub | ½ cup sea salt + ¼ cup olive oil + citrus zest | Stronger exfoliation for elbows, knees |
| Lavender sugar scrub | ½ cup white sugar + ¼ cup oil + dried lavender | Calming |
Apply the scrub to damp skin using gentle circular motions, focusing on rough areas like elbows, knees, and the backs of your arms. Rinse off with warm water. Avoid salt scrubs on freshly shaved skin, because it will sting!
Tip: Oil-based scrubs can make the tub or shower floor slippery. Rinse the surface afterward and step out carefully.
Dry brushing
Dry brushing is a simple exfoliating technique that leaves skin feeling soft and invigorated. Before you shower, use a natural-bristle body brush on dry skin, starting at your feet and using light, sweeping strokes toward your heart. Work up your legs, then your arms and torso, using gentler pressure on sensitive areas. It only takes about five minutes and makes a lovely energizing start to your body treatments.
Lock in moisture
Moisturizing is the step that makes all your other body treatments last. Right after your bath or shower, while your skin is still slightly damp, apply a rich body butter, lotion, or body oil. Damp skin absorbs moisture more easily, so you’ll get softer results. Pay extra attention to dry spots like elbows, knees, and heels, and take a moment to massage the product in slowly.
Step 6: The At-Home Pedicure (Don’t Skip Your Feet!)
Your feet carry you all day, yet they’re often the most neglected part of a self-care routine. Tight shoes, long hours of standing, and dry weather can leave them tired, rough, and cracked. A little care goes a long way, and a proper pedicure feels just as relaxing as it looks. Here’s how to give yourself a salon-worthy pedicure at home.
1. Remove old polish
Start with a clean slate by removing any old nail polish. Use an acetone-free remover if your nails tend to be dry or brittle, since acetone can strip natural oils from the nail. This also lets you check the condition of your nails before you begin.
2. Soak
Fill a basin or large bowl with warm water and add:
- ½ cup Epsom salt
- A few drops of peppermint or tea tree oil (diluted in a little carrier oil)
- Optional: a splash of milk or a few lemon slices for a fresh, softening touch
Soak your feet for 10 to 15 minutes. This softens the skin and nails, making the next steps easier, and it’s a wonderfully relaxing moment to sip your tea or read a few pages of your book.
3. Exfoliate
After soaking, use a foot scrub to smooth away rough, dry patches. The sea salt or sugar scrubs from the body section work perfectly here. Massage the scrub over your soles, heels, and the tops of your feet, then rinse.
4. Smooth heels
While your feet are still damp, gently use a pumice stone or foot file on your heels and any calluses. Use light pressure and short strokes, and stop before the skin feels sore or tender. Never use razors or blades to remove calluses, as they can easily cut the skin and lead to infection.
5. Trim and shape nails
Cut your toenails straight across rather than rounding the corners, which helps prevent painful ingrown nails. Smooth any rough edges with a nail file. Then gently push back your cuticles with a wooden stick while they’re still soft from soaking. Avoid cutting cuticles, as they protect your nails from bacteria.
6. Massage
Treat your feet to a soothing massage with lotion or oil. Press your thumbs firmly along the arch, rub each toe individually, and knead the ball of your foot and heel. For deeper relief, roll your foot slowly over a tennis ball or massage ball for a minute or two. This is especially lovely if you spend a lot of time on your feet.
7. Moisturize overnight
For truly soft feet, apply a thick foot cream before bed. Look for ingredients like urea or shea butter, which are great for dry, cracked heels. Slip on a pair of cotton socks to lock in the moisture, and you’ll wake up with noticeably softer, smoother feet.
8. Polish (optional)
If you love a pop of color, finish with polish. Apply a base coat to protect your nails, two thin coats of your chosen color, and a top coat for shine and longer wear. Toe separators help keep everything neat while it dries. Or keep your nails natural and simply buff them for a clean, healthy look.
Note: If you have diabetes or poor circulation, check with your doctor before using foot files or hot soaks, and never treat corns or calluses yourself. A podiatrist can help you care for your feet safely.
Step 7: Hand Care and Manicure
Our hands work hard every day, from typing to cooking to cleaning, and frequent handwashing can leave them dry and rough. A simple at-home manicure makes them feel soft and look polished.
- Soak: Place your hands in a bowl of warm water with a little gentle soap or a few drops of oil for about five minutes to soften the skin and cuticles.
- Scrub: Massage a sugar scrub over your hands and wrists to smooth away dryness, then rinse.
- Care for cuticles: Gently push back your cuticles and apply a drop of cuticle oil to each nail, massaging it in to keep the area healthy and hydrated.
- Shape nails: File your nails into your preferred shape, moving the file in one direction to avoid splitting.
- Paraffin-style treatment: Apply a thick layer of hand cream, put on cotton gloves, and wear them for 20 minutes or even overnight. Your hands will feel incredibly soft.
- Polish: Paint your nails with your favorite color, or keep them natural and buffed for a clean, elegant look.
Step 8: Relax Your Mind
A spa day isn’t only about your skin. The real benefit comes from giving your mind a chance to rest too. Weave a few of these calming activities between your treatments, or save them for the end of the day:
- Gentle yoga or stretching: Spend 10 to 20 minutes on slow movements like child’s pose, cat-cow, and gentle neck rolls to release tension in your neck, shoulders, and back.
- Meditation: Try a 5 to 10 minute guided meditation, or simple deep breathing. Inhale for 4 counts, hold for 4, and exhale slowly for 6. Repeat a few times and notice how your body softens.
- Journaling: Write down three things you’re grateful for, set an intention for the week ahead, or simply free-write whatever is on your mind. Getting thoughts onto paper often makes them feel lighter.
- Read for pleasure: Pick up a novel, a magazine, or that book that’s been waiting on your nightstand for months. Reading something you enjoy is a gentle escape.
- Nap: Yes, a nap counts as self-care. A short 20-minute rest can leave you feeling refreshed without making you groggy.
- Self-massage: Use a foam roller or massage ball on tight areas like your upper back, hips, and calves to ease built-up tension.
Sample At-Home Spa Day Schedule
Not sure how to fit everything in? Use this schedule as a template, then adjust it to suit your time and favorite treatments. Notice how some treatments overlap, like leaving the hair oil on while you do your facial, so you make the most of your day.
| Time | Activity |
|---|---|
| 10:00 AM | Tidy your space, light candles, put on music, make infused water |
| 10:20 AM | Gentle yoga or stretching + 5-minute meditation |
| 10:45 AM | Healthy breakfast or smoothie bowl |
| 11:15 AM | Apply hot oil hair treatment |
| 11:20 AM | Cleanse, steam, and apply face mask |
| 11:40 AM | Relaxing bath soak with a book |
| 12:10 PM | Body scrub in the shower, wash out hair oil |
| 12:30 PM | Moisturize body, finish skincare, facial massage |
| 1:00 PM | Light spa lunch |
| 1:45 PM | At-home pedicure and manicure |
| 2:45 PM | Journal, read, or nap |
| 3:30 PM | Tea and a little treat |
| Evening | Cozy pajamas, a comfort movie, early bedtime with foot cream and socks |
Short on time? You can still enjoy a meaningful break with a 1-hour mini spa. Spend 10 minutes setting the mood, 15 minutes with a face mask, 20 minutes in the bath, and 15 minutes on a quick foot soak and moisturizing routine. It’s the perfect weeknight reset when you can’t spare a whole day.
Themed Spa Day Ideas
Want to make your spa day even more fun? Pick a theme and build your drinks, treatments, and music around it. Themes make the day feel like a little event and give you a reason to try something new each time.
- Cozy winter spa: Sip cinnamon-orange water or hot cocoa, soak in an oatmeal bath, use a warm vanilla sugar scrub, and finish in fuzzy socks under a soft blanket.
- Tropical escape: Treat your hair to a coconut oil mask, blend a pineapple smoothie, use a coconut body scrub, and play a beachy playlist to feel like you’re on vacation.
- Rose garden spa: Scatter rose petals in your bath, spritz on a rosewater face mist, sip strawberry-basil water, and paint your nails a soft pink.
- Detox and refresh: Use a clay face mask, try dry brushing, drink a green smoothie, rest with cucumber eye pads, and end with a calming yoga session.
- Galentine’s spa party: Invite your best friends over, set up a face mask bar and a nail station, serve fruity mocktails, and watch a feel-good movie together.
- Mother-daughter spa day: Enjoy gentle masks, simple manicures, and healthy snacks for a sweet afternoon of bonding and relaxation.
Budget-Friendly Spa Tips
You really don’t need to spend much to create a luxurious spa experience. In fact, most spa staples are probably already sitting in your kitchen cupboards. Here’s how everyday ingredients can do double duty:
- Honey: a natural moisturizer for face masks, lip scrubs, hair masks, and milk baths
- Oats: gently soothing in face masks and bath soaks, especially for sensitive skin
- Sugar: the perfect base for body, lip, and hand scrubs
- Coconut or olive oil: a hair treatment, scrub base, cuticle oil, and body moisturizer all in one
- Coffee grounds: an energizing body scrub that’s a great way to reuse your morning coffee
- Cucumber: cool, refreshing eye pads and a classic addition to infused water
- Tea bags: use them for a steam facial, or chill used bags for a soothing under-eye compress
If you’d like to invest in a few extras, choose items you’ll use again and again: a bag of Epsom salt, one good essential oil (lavender is the most versatile), a pumice stone, and a soft, cozy robe. These small purchases will last for many spa days to come.
Safety Tips for Your At-Home Spa
A spa day should leave you feeling great, so keep these simple safety tips in mind:
- Patch-test every DIY ingredient before applying it to your face or body, even natural ones.
- Dilute essential oils in a carrier oil like almond or coconut oil. Never apply them undiluted to your skin.
- Avoid irritating DIY ingredients on your face, such as lemon juice, baking soda, and undiluted vinegar.
- Keep water warm, not hot, for baths and foot soaks to protect your skin and avoid feeling dizzy.
- Never leave candles unattended, and keep them away from towels, curtains, and anything flammable.
- Stay hydrated, especially after long, warm baths, by sipping water throughout the day.
- Be careful with slippery surfaces after oil treatments and scrubs.
- If you’re pregnant, have a skin condition, diabetes, or circulation problems, check with your doctor before using hot baths, essential oils, or foot treatments.
Make It a Self-Care Ritual
The magic of an at-home spa day grows when it becomes a habit rather than a once-in-a-while treat. Regular self-care gives you something to look forward to and helps you handle busy weeks with more calm and energy. Here are a few ways to make it part of your routine:
- Schedule a full spa day once a month and treat it like an appointment you never cancel.
- Enjoy a mini spa night every Sunday to reset your mind and body for the week ahead.
- Keep a spa basket stocked with your favorite products, candles, and tools so it’s always ready to go.
- Rotate themes each time to keep it fresh, fun, and exciting.
Self-care doesn’t have to be expensive or complicated. It simply has to be intentional. So light that candle, slip on your robe, pour yourself a glass of cucumber water, and give yourself the slow, soft day you truly deserve.