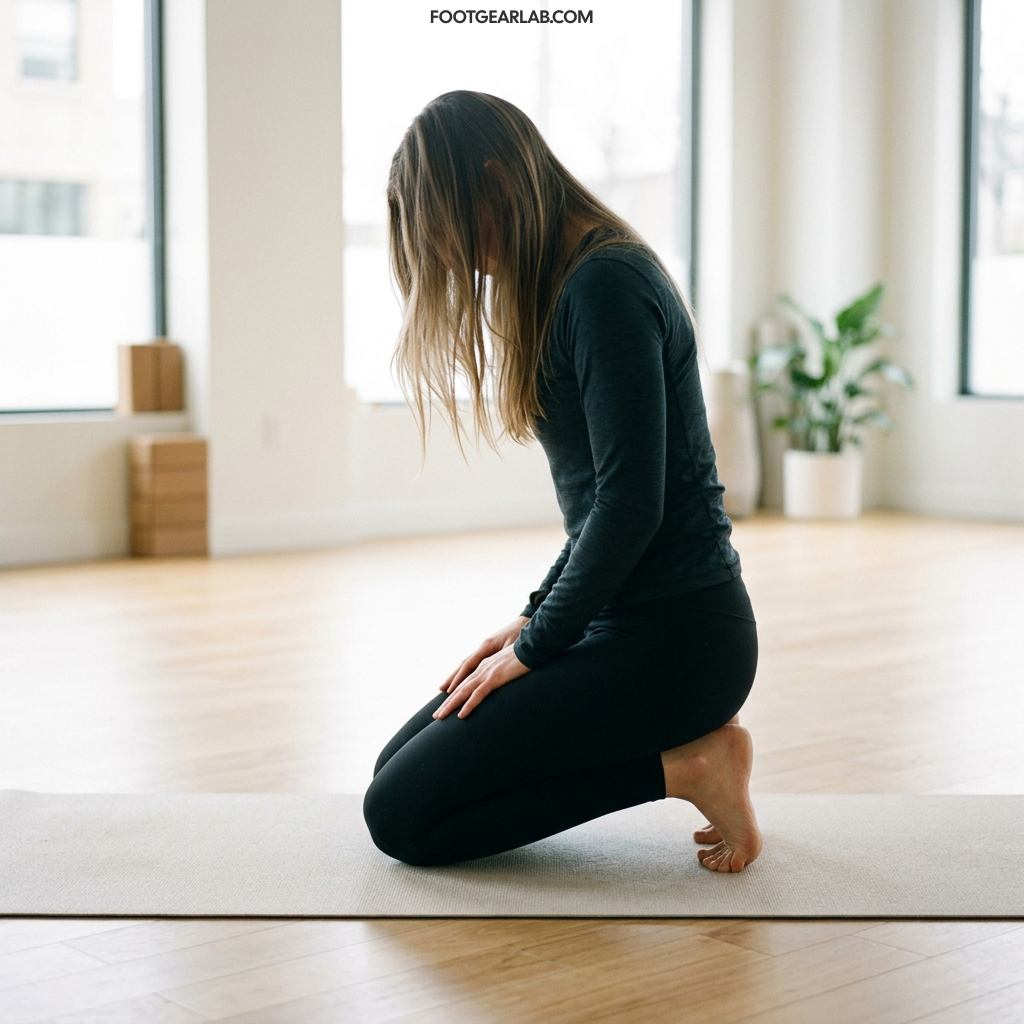
4. Toe Squat Stretch
The toe squat stretches the thick band of tissue along the bottom of the foot (the plantar fascia) and improves toe flexibility. For individuals with flat feet (pes planus), maintaining flexibility in the arches and toes is essential for absorbing shock, preventing stiffness, and relieving strain on the soles of the feet.
Step-by-Step Instructions
-
Starting Position: Kneel on a soft surface or exercise mat with your knees together and your torso upright.
-
Tuck Your Toes: Tuck all ten toes under so your toe pads are resting flat against the floor. Ensure the small toes are not curled awkwardly underneath.
-
Sit Back Slowly: Gently lower your hips onto your heels, keeping your torso upright to apply gradual pressure across the arches and toes.
-
Hold the Position: Remain in this position for 30 to 60 seconds, breathing slowly. You should feel a firm stretch along the bottom of your feet and arches.
-
Release: Slowly lean forward onto your hands to relieve the pressure, untuck your toes, and gently tap the tops of your feet on the floor to restore circulation.
-
Frequency: Perform this stretch 1 to 2 times daily.
Key Form & Safety Tips
-
Modify Intensity: If sitting all your weight on your heels feels too intense, keep your hands on the floor in front of you or rest your hands on a yoga block to support some of your body weight.
-
Keep Heels Upright: Avoid letting your heels flop outward to the sides; try to keep your heels aligned vertically to ensure an even stretch across the entire arch.
-
Ease Into It: The plantar fascia can be very sensitive in people with flat feet. Start with shorter holds (15–20 seconds) and gradually build up as your flexibility improves.
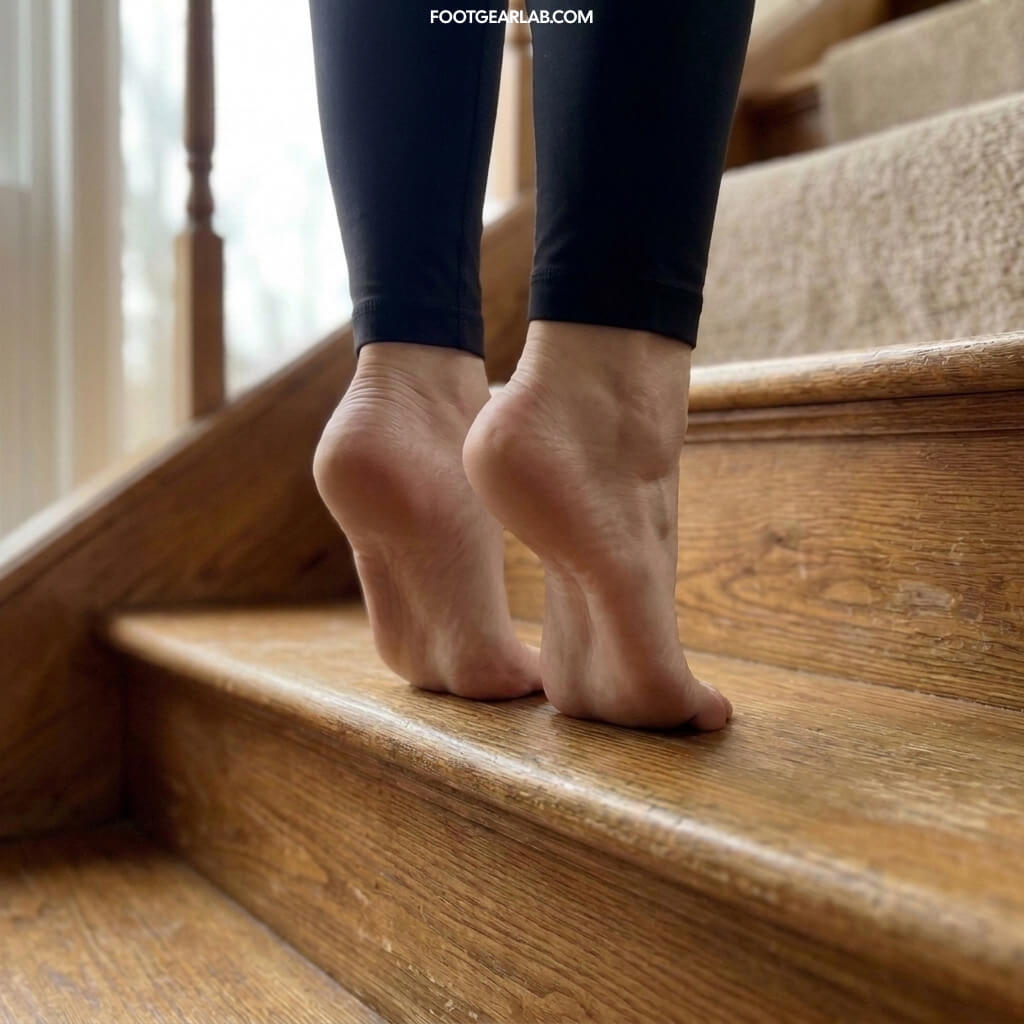
5. Stair Heel Raises
Stair heel raises strengthen the lower leg muscles, improve ankle stability, and build controlled eccentric strength through a full range of motion. For individuals with flat feet (pes planus), this exercise helps train the ankles to resist collapsing inward, supporting the structural integrity of the foot’s arch during movement.
Step-by-Step Instructions
-
Position Yourself: Stand facing a staircase, placing the balls of your feet on the edge of a step so your heels hang off the back. Firmly hold onto a wall, handrail, or banister for balance and support.
-
Lift Your Heels: Press through the balls of your feet (ensuring your weight is distributed evenly across the foot, rather than rolling onto the outer or inner edges) and slowly raise your heels as high as possible.
-
Lower with Control: Slowly lower your heels down below the level of the step to achieve a gentle, controlled stretch in your calves and Achilles tendons.
-
Alternate or Sync: Perform the movement with both feet together, or alternate by raising and lowering your right and left heels in turns to vary the intensity and focus.
-
Repetition: Complete 10 to 15 smooth, controlled repetitions per set, aiming for 2 to 3 sets daily.
Key Form & Safety Tips
-
Maintain Proper Ankle Alignment: A common mistake with flat feet is letting the ankles roll inward (overpronate) as you rise up onto your toes. Keep your ankles tracking straight forward, aligning with your second and third toes.
-
Control the Descent: Do not rush the downward phase. Lowering your heels slowly (eccentric loading) is crucial for building strength and flexibility in the lower calf and Achilles tendon.
-
Prioritize Balance: Always keep a secure hold on the handrail or wall. If balance is a challenge initially, perform these on flat ground before moving to the edge of a stair.
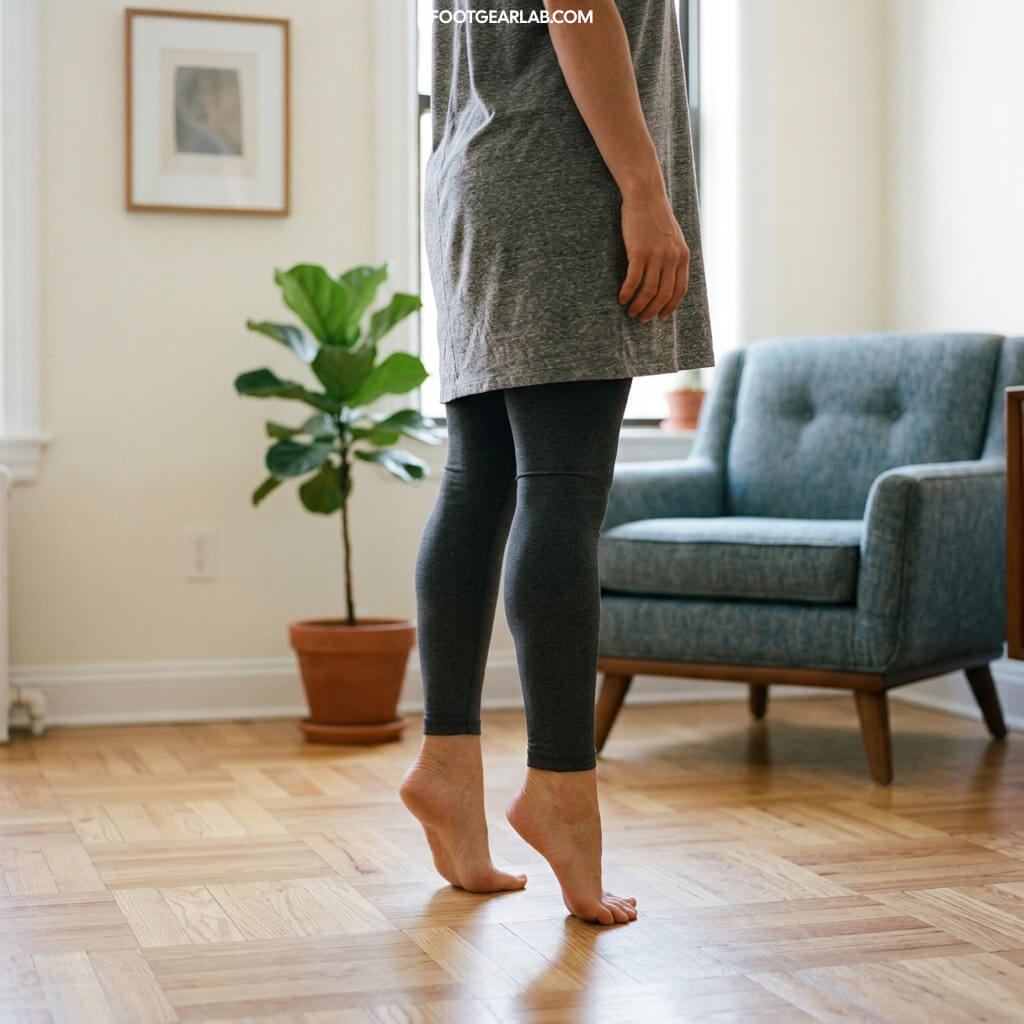
6. Heel Raises
Heel raises strengthen the calf muscles and Achilles tendon while improving lower-body circulation and ankle stability. For individuals with flat feet (pes planus), this exercise directly engages the posterior tibialis muscle—the primary dynamic support structure for the foot’s inner arch.
Step-by-Step Instructions
-
Position Yourself: Stand upright with your feet hip-width apart and your toes pointing straight forward. Stand near a wall or sturdy chair for balance if needed.
-
Raise Your Heels: Push down evenly through the balls of both feet and slowly lift your heels as high as possible, coming up onto your toes.
-
Engage the Arches: Keep your weight distributed evenly across the base of all your toes (avoid rolling your weight onto the outer edges or allowing your ankles to cave inward).
-
Hold Briefly: Pause at the top of the movement for 1 to 2 seconds to maximize muscle activation.
-
Lower with Control: Slowly lower your heels back down flat to the floor in a smooth, controlled motion.
-
Repetition: Complete 12 to 15 controlled repetitions per set, aiming for 2 to 3 sets daily.
Key Form & Safety Tips
-
Prevent Overpronation: People with flat feet often roll their ankles inward as they lift up. Focus on keeping your ankles straight and stable, pressing through the base of the big toe to keep the inner arch engaged.
-
Control the Tempo: Avoid using momentum or bouncing. Lowering your heels slowly builds eccentric strength, which helps protect the arch and tendon from strain.
-
Progress Gradually: Once performable on flat ground with good form, you can progress to doing heel raises off a step edge for a greater range of motion, or transition to single-leg raises to build targeted stability.
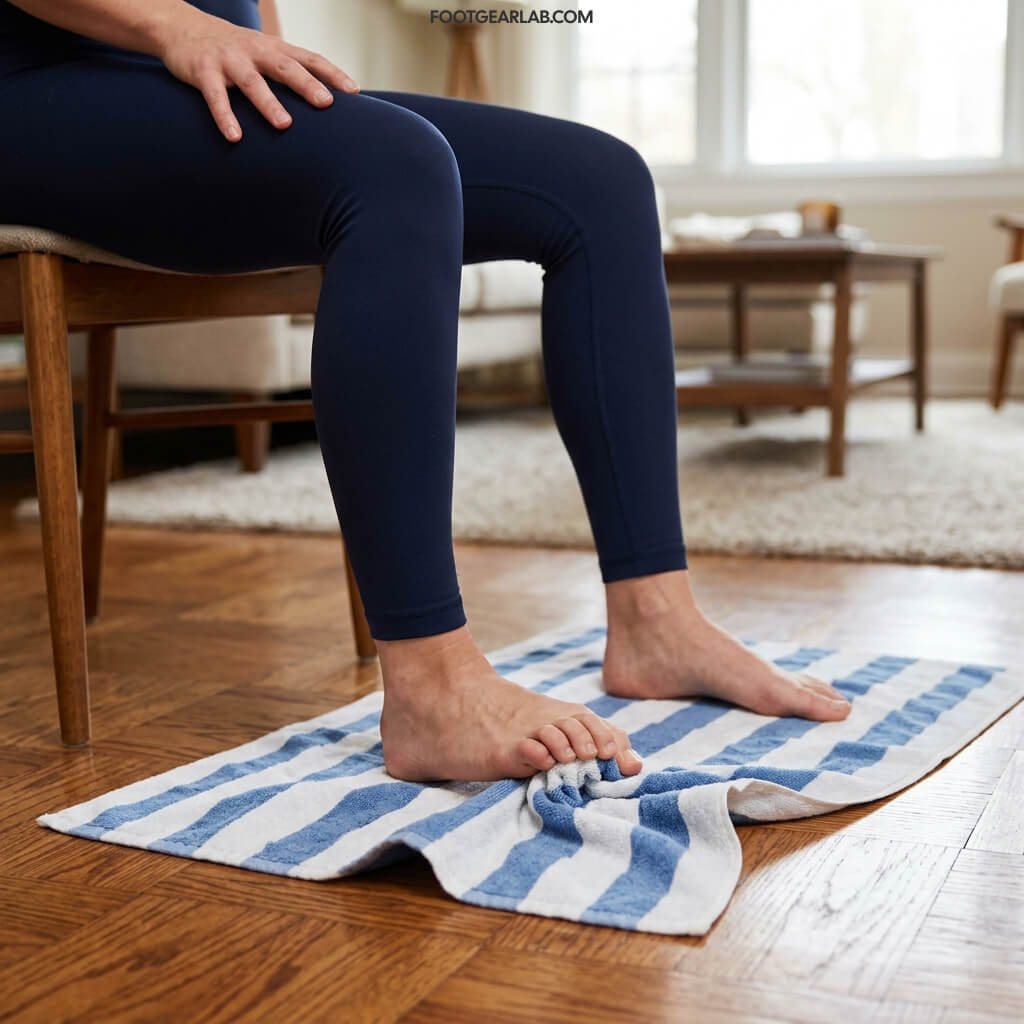
7. Towel Toe Curls
Towel toe curls target the flexor muscles along the bottom of the foot to build strength in the foot bed and support the plantar arch. For individuals with flat feet (pes planus), this exercise directly engages the intrinsic foot muscles, helping to lift collapsed arches, improve foot stability, and reduce strain during daily standing and walking.
Step-by-Step Instructions
-
Starting Position: Sit comfortably in a chair with your feet flat on the floor. Place a small hand towel spread flat on a smooth surface in front of you.
-
Position Your Foot: Place the heel of your foot firmly on the edge of the towel, leaving your forefoot and toes resting on the body of the towel.
-
Grasp and Crunch: Keeping your heel anchored to the floor, spread your toes wide, then curl them downward to grip the fabric of the towel.
-
Pull Toward You: Contract the muscles in your sole to pull the towel toward your heel, scrunched under your foot.
-
Release and Repeat: Flatten your toes, reach forward, and grab another section of the towel. Repeat until you have scrunched the entire length of the towel toward you.
-
Repetition: Perform 3 to 5 full towel pulls per foot, 1 to 2 times daily. (To add difficulty, place a light weight, like a small book or shoe, on the opposite end of the towel.)
Key Form & Safety Tips
-
Keep the Heel Fixed: Ensure your heel stays planted on the floor throughout the movement. The work should come entirely from flexing your toes and contracting your foot’s arch.
-
Maintain Steady Progress: If your foot begins to cramp, pause, release the curl, and gently massage the arch before continuing. Cramping is common when starting out as dormant arch muscles begin working.
-
Focus on Range of Motion: Try to open your toes as wide as possible before each crunch to maximize engagement across the entire sole.
8. Plantar Fascia Stretch
Stretching the thick band of tissue running along the sole of your foot (the plantar fascia) relieves tension and flexibility limitations associated with low arches. For individuals with flat feet (pes planus), regular plantar fascia stretching prevents micro-tears, reduces heel and arch pain, and improves overall foot mobility during daily activities.
Step-by-Step Instructions
-
Option 1: Big Toe Extension Stretch
-
Position: Sit comfortably in a chair and cross one leg so your ankle rests on your opposite knee.
-
Stretch: Grab your big toe with your hand and gently pull it backward toward your shin until you feel a comfortable stretch along the bottom arch of your foot.
-
Hold: Hold for 20 to 30 seconds. Perform 3 repetitions per foot.
-
-
Option 2: Towel Arch Stretch
-
Position: Sit on the floor or in a chair with your leg extended straight out in front of you. Wrap a folded towel or strap around the ball and arch of your foot.
-
Stretch: Keep your back straight, hold both ends of the towel, and gently pull your foot backward toward your body while keeping your knee straight.
-
Hold: Hold for 30 seconds. Perform 3 repetitions per foot.
-
-
Option 3: Arch Rolling (Myofascial Release)
-
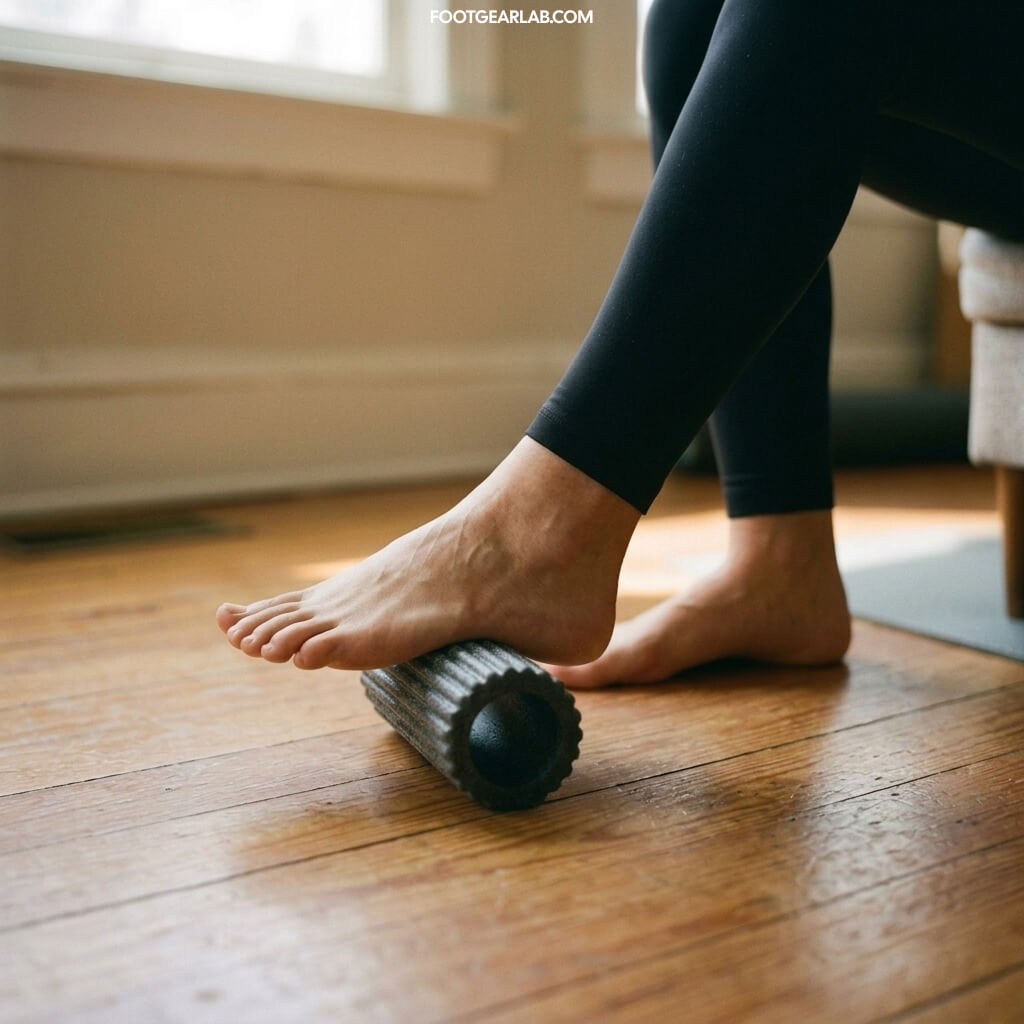
Position: Sit in a chair with your foot placed on top of a small foam roller, massage ball, or frozen water bottle.
-
Action: Apply gentle pressure and slowly roll the object back and forth along the bottom of your foot from the heel to the ball for 1 to 2 minutes.
-
-
Frequency: Perform these stretches 2 to 3 times daily, especially first thing in the morning.
Key Form & Safety Tips
-
Keep It Gentle: Never pull forcing sharp pain. You should feel a mild, comfortable tension along the arch and heel.
-
Maintain Upright Posture: Keep your back straight and shoulders relaxed when using the towel stretch to protect your lower back.
-
Use Proper Support: Perform seated stretches on a supportive chair, and start arch rolling with lighter pressure before gradually applying more weight.