
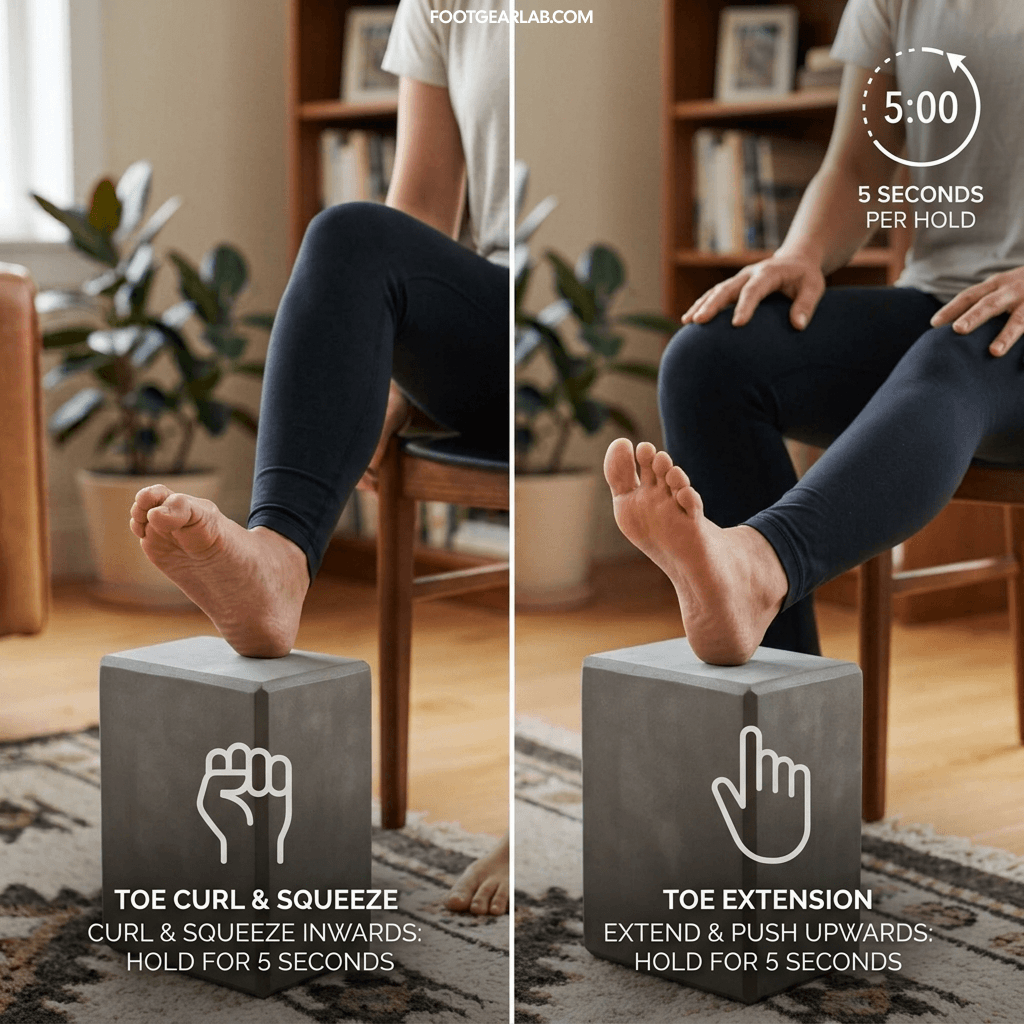
6. Toe Flex & Contract (Curl & Extension)
This dual-action exercise strengthens the deep muscles under the sole while stretching the top of the toes and foot, supporting proper alignment and foot mechanics.
How to Perform:
-
Starting Position: Sit comfortably in a chair. Place a low prop (such as a small yoga block, step, rolled towel, or small ball) on the floor in front of you.
-
Setup: Rest the heel or midfoot of one leg onto the prop so your toes are slightly elevated above the floor.
-
Toe Curl (Flexion): Curl all your toes downward and inward, squeezing tightly as if trying to grab an object with your foot.
-
Hold: Maintain this contraction for 5 seconds.
-
Toe Lift (Extension): Uncurl your toes and extend them upward toward the ceiling as far as comfortably possible.
-
Hold: Maintain the upward lift for 5 seconds.
-
Repetitions: Complete 8–10 full cycles (curl + lift) on one foot, then repeat on the opposite foot.
Benefits:
-
Intrinsic Muscle Strength: Squeezing inward strengthens the plantar muscles along the arch and sole, helping to support the arch structure.
-
Tendon & Joint Mobility: Lifting upward stretches the extensor tendons along the top of the foot and improves joint flexibility at the base of the toes.
-
Muscle Relaxation: Alternating between active contraction and stretching releases deep-seated tension in overactive foot muscles.
Pro Tip for Comfort: If your arch feels tight or prone to cramping during the inward squeeze, reduce the intensity of the curl and build up strength gradually.
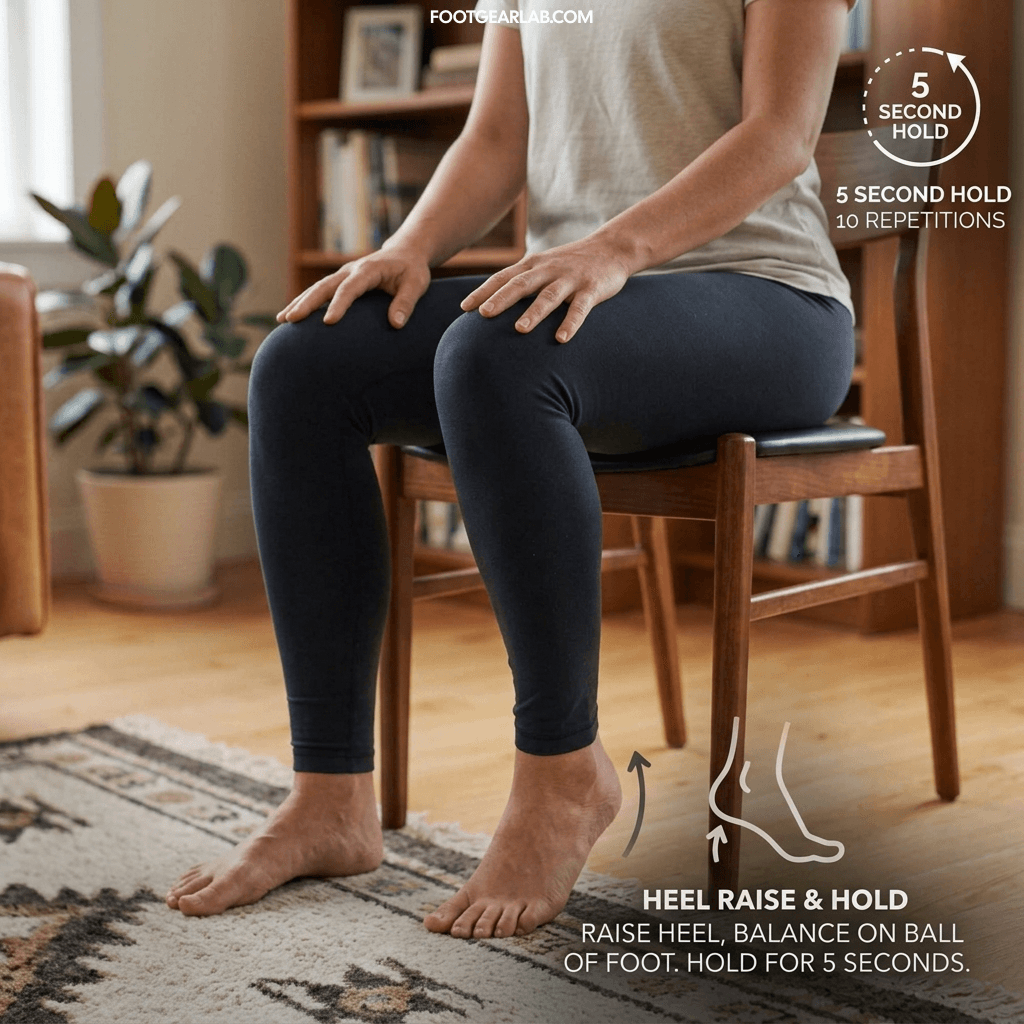
7. Seated Heel Raises
This strengthening and mobility exercise targets the calf muscles and improves weight-bearing tolerance across the forefoot and toes.
How to Perform:
-
Starting Position: Sit upright in a firm chair with your back straight, knees bent at a $90^\circ$ angle, and both feet flat on the floor.
-
Execution: Keep the balls of your feet and toes firmly grounded, and slowly lift your heels off the floor as high as comfortable.
-
Hold: Pause at the top of the movement—resting on the balls of your feet and toes—for 5 seconds.
-
Return: Lower your heels back to the ground gently and under control.
-
Repetitions: Perform 10 repetitions per foot. You can perform these one leg at a time or both legs together.
Benefits:
-
Joint Mobility: Gently flexes the first metatarsophalangeal (MTP) joint under light pressure, keeping the big toe joint flexible.
-
Calf & Ankle Strength: Strengthens the gastrocnemius, soleus, and ankle stabilizer muscles that aid in a healthy walking gait.
-
Low-Impact Conditioning: Prepares the ball of the foot for standing and walking without aggravating bunion pain.
Pro Tip for Alignment: Pay attention to where your weight rests as you lift your heels. Ensure your weight is distributed evenly across the ball of your foot rather than rolling outward onto the pinky toes.
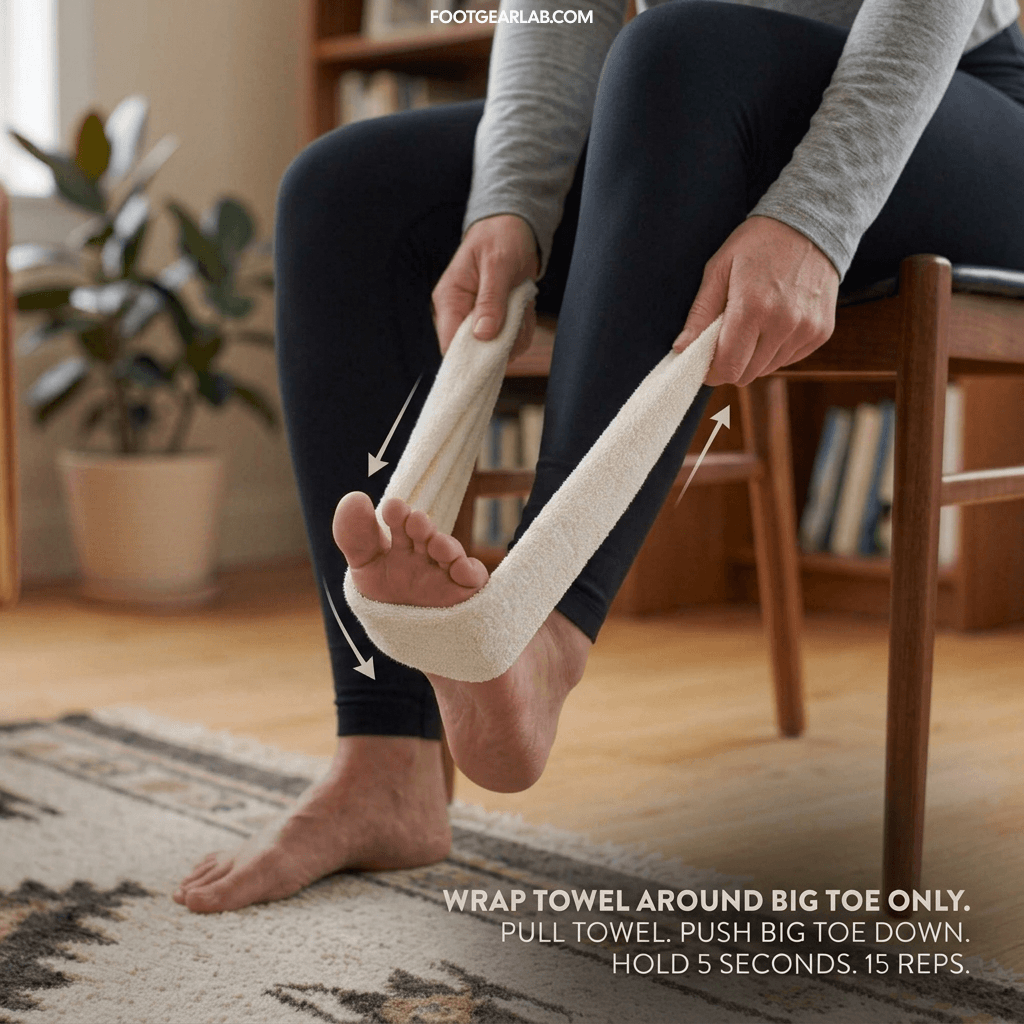
8. Big Toe Resistance Exercise
This isometric resistance exercise strengthens the muscles responsible for downward movement and stabilization of the big toe.
How to Perform:
-
Starting Position: Sit comfortably in a chair with your leg extended slightly or your foot resting on the floor.
-
Setup: Wrap a small hand towel, belt, or resistance strap securely around your big toe. Hold both ends firmly with your hands to create slight tension.
-
Execution: Gently pull the towel toward you while simultaneously pressing your big toe downward against the towel (creating an opposing push-and-pull resistance).
-
Hold: Maintain this active contraction for 5 seconds, then release the tension.
-
Repetitions: Complete 15 repetitions per session.
Benefits:
-
Strength & Stability: Builds targeted muscular strength in the flexor tendons and surrounding muscles of the big toe.
-
Controlled Resistance: Allows you to easily regulate the intensity of the exercise using a towel or strap to match your comfort level.
-
Joint Support: Reinforces the structural integrity of the first metatarsophalangeal (MTP) joint against inward deviation.
Pro Tip for Safety: Balance the resistance carefully—push down only as hard as you can comfortably resist with the towel. Avoid straining or pulling to the point of triggering a foot cramp.
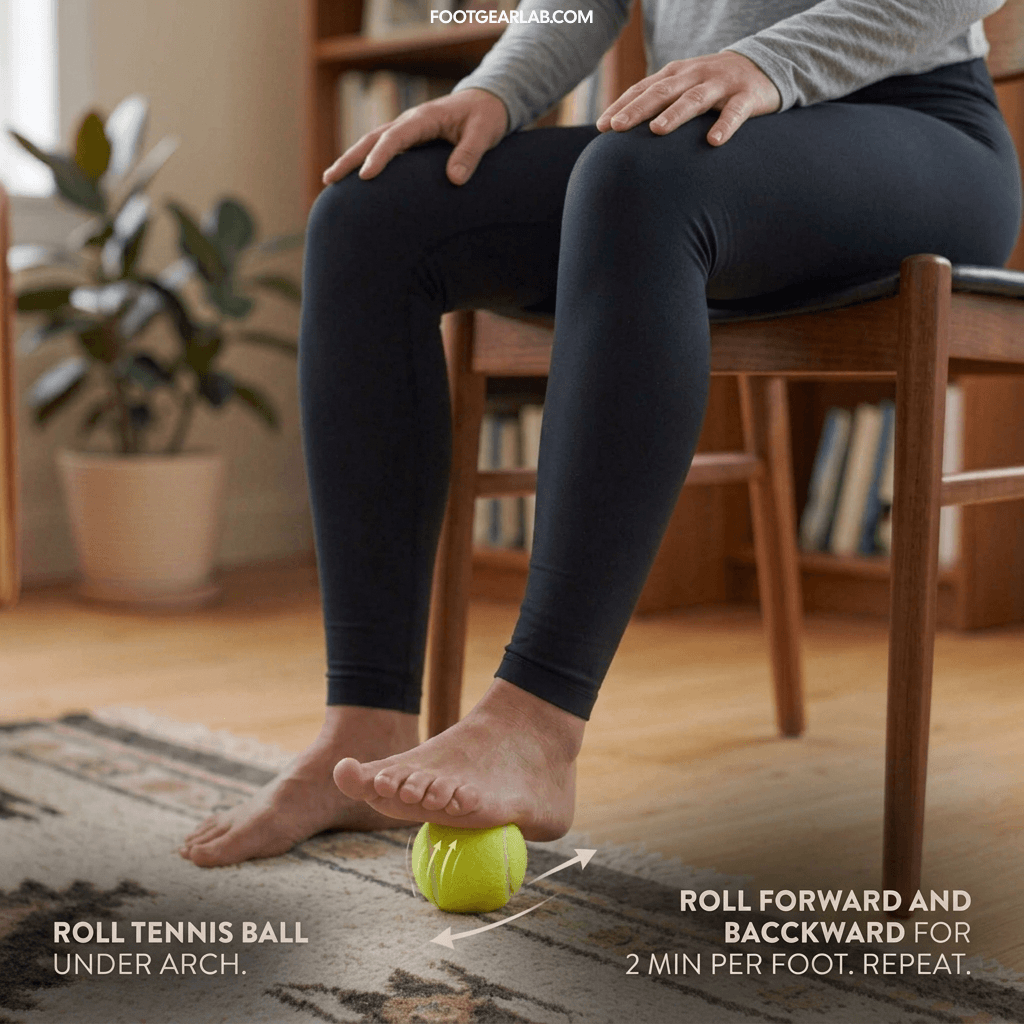
9. The Golf Ball Roll
This therapeutic rolling exercise helps release tension in the plantar fascia while boosting blood flow to the joints and soft tissues of the foot.
How to Perform:
-
Starting Position: Sit upright in a comfortable chair with both feet flat on the floor.
-
Setup: Place a golf ball, tennis ball, or massage ball on the floor near your feet.
-
Execution: Place the sole of one foot on top of the ball. Apply gentle to moderate downward pressure—enough to feel a deep massage, but well within your comfort zone.
-
Rolling Action: Slowly roll the ball forward toward your toes and backward toward your heel, covering the entire length of your foot arch.
-
Duration: Continue rolling for 2 minutes on the first foot.
-
Switch: Repeat the procedure on the opposite foot for 2 minutes.
Alternative Option: If you do not have a ball available, you can easily improvise by using a plastic bottle filled with frozen water. The frozen bottle provides the added benefit of cold therapy to help soothe inflammation and aching arches.
Benefits:
-
Arch & Plantar Relief: Relieves tension and pain along the plantar fascia and the arches of the feet.
-
Enhanced Circulation: Stimulates blood flow to the foot joints, supporting flexibility around the bunion area.
-
Relaxation: Massages key pressure points across the sole, helping to relax tired feet after a long day of standing or walking.
Pro Tip for Comfort: Control the intensity entirely with your body weight. If the pressure feels too intense (especially with a hard golf ball), start with a softer tennis ball or reduce the amount of downward pressure you apply.
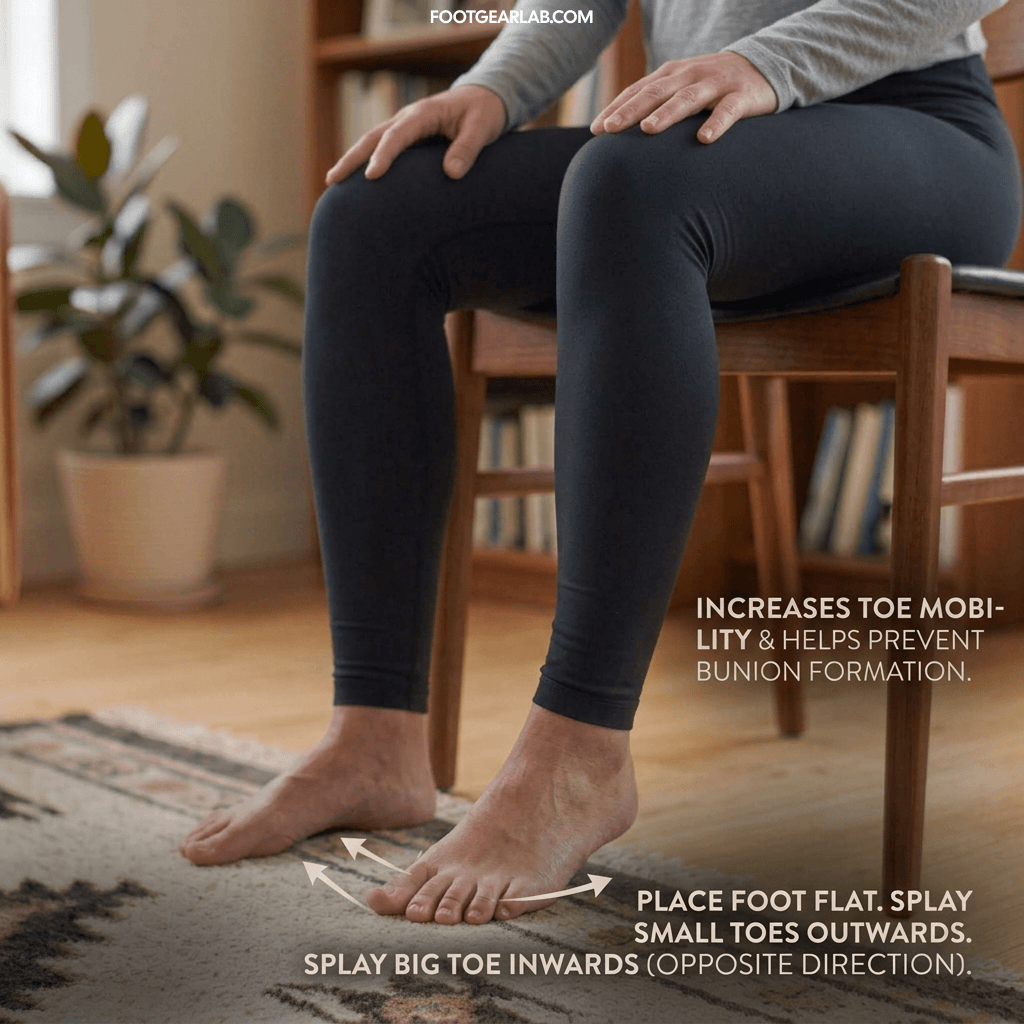
10. Assisted Toe Abduction
This targeted separation exercise trains the foot muscles to move in opposing directions, improving lateral mobility and relieving pressure across the forefoot.
How to Perform:
-
Starting Position: Sit comfortably in a chair or stand with your foot resting flat on the floor.
-
Execution: Actively attempt to spread your toes apart. Direct your four smaller toes outward to one side, while actively pulling or abducting your big toe in the opposite direction.
-
Hold: Maintain this separated position for 5 seconds, focusing on muscle engagement.
-
Release & Repeat: Relax your toes, then repeat the separation movement.
-
Repetitions: Perform 10–15 repetitions per foot.
Benefits:
-
Bunion Prevention & Management: Helps counteract the inward drift of the big toe and the outward crowding of the smaller toes.
-
Muscle Engagement: Strengthens the abductor hallucis muscle, which is crucial for stabilizing the big toe joint.
-
Enhanced Mobility: Increases lateral flexibility and neuromuscular control across the entire forefoot.
Pro Tip for Beginners: If you find it difficult to move your toes independently at first, you can use your fingers to gently guide your big toe outward and your smaller toes in the opposite direction during the first few sessions to build muscle memory.