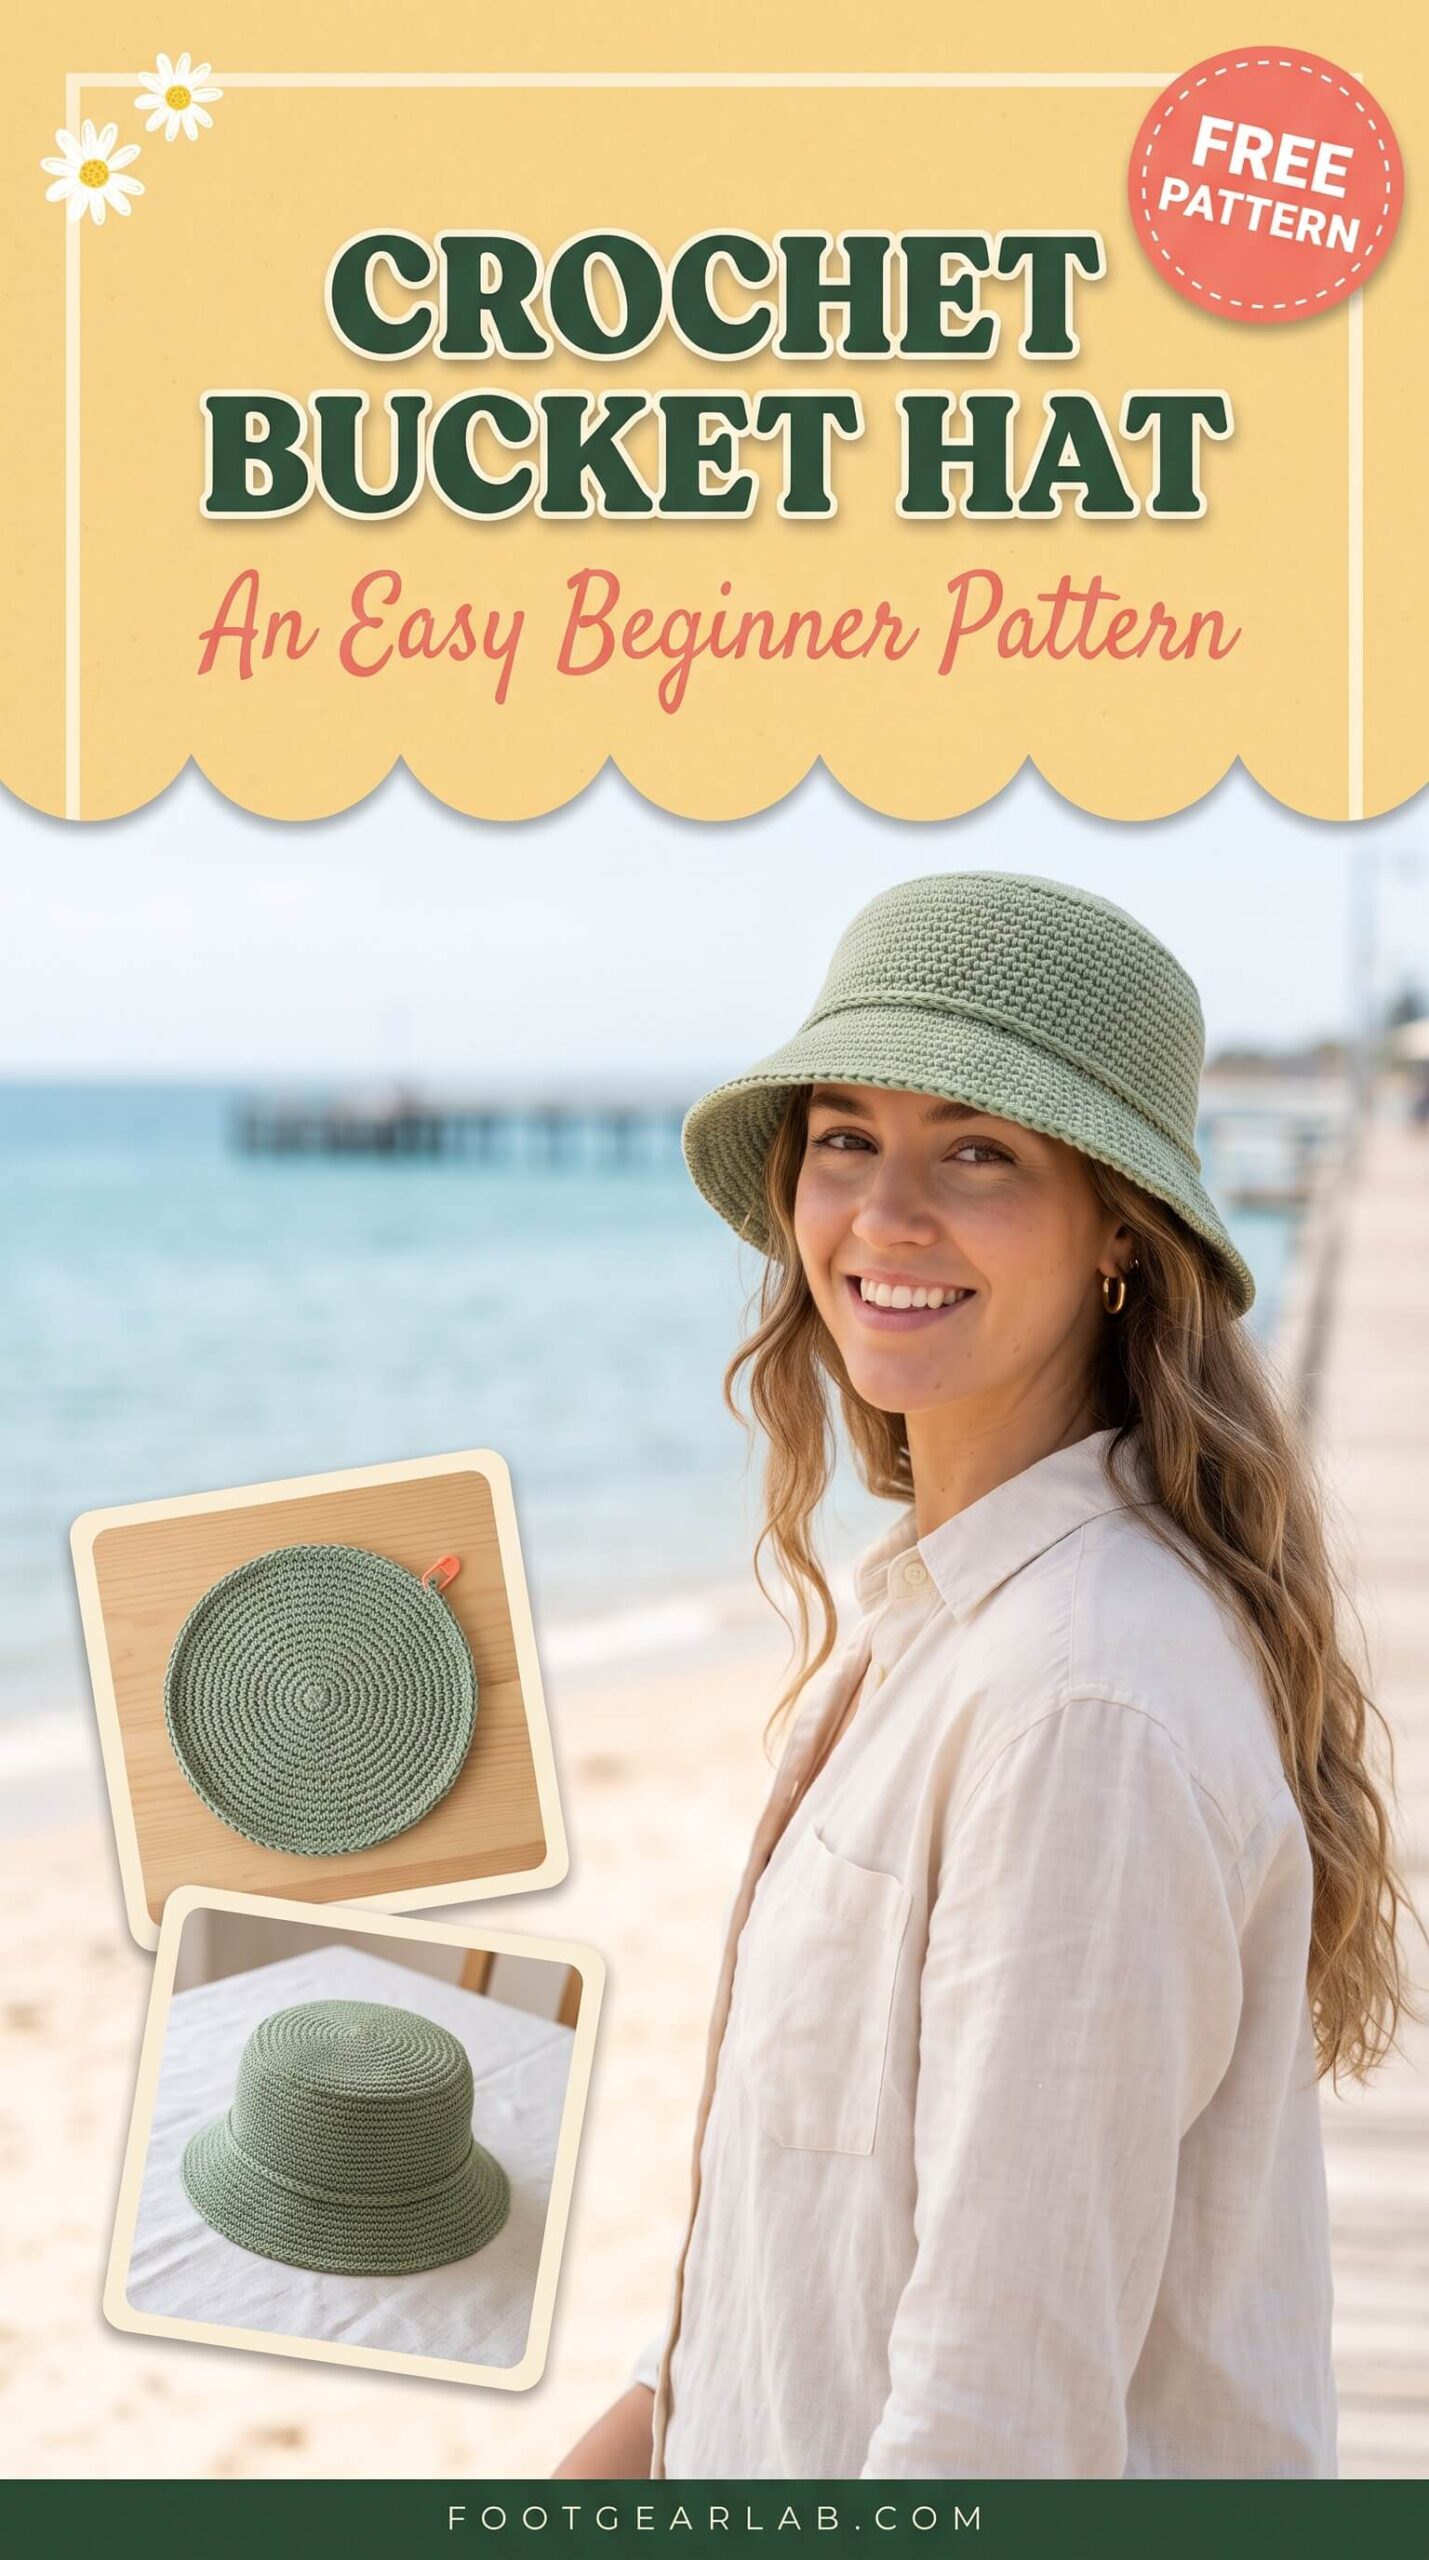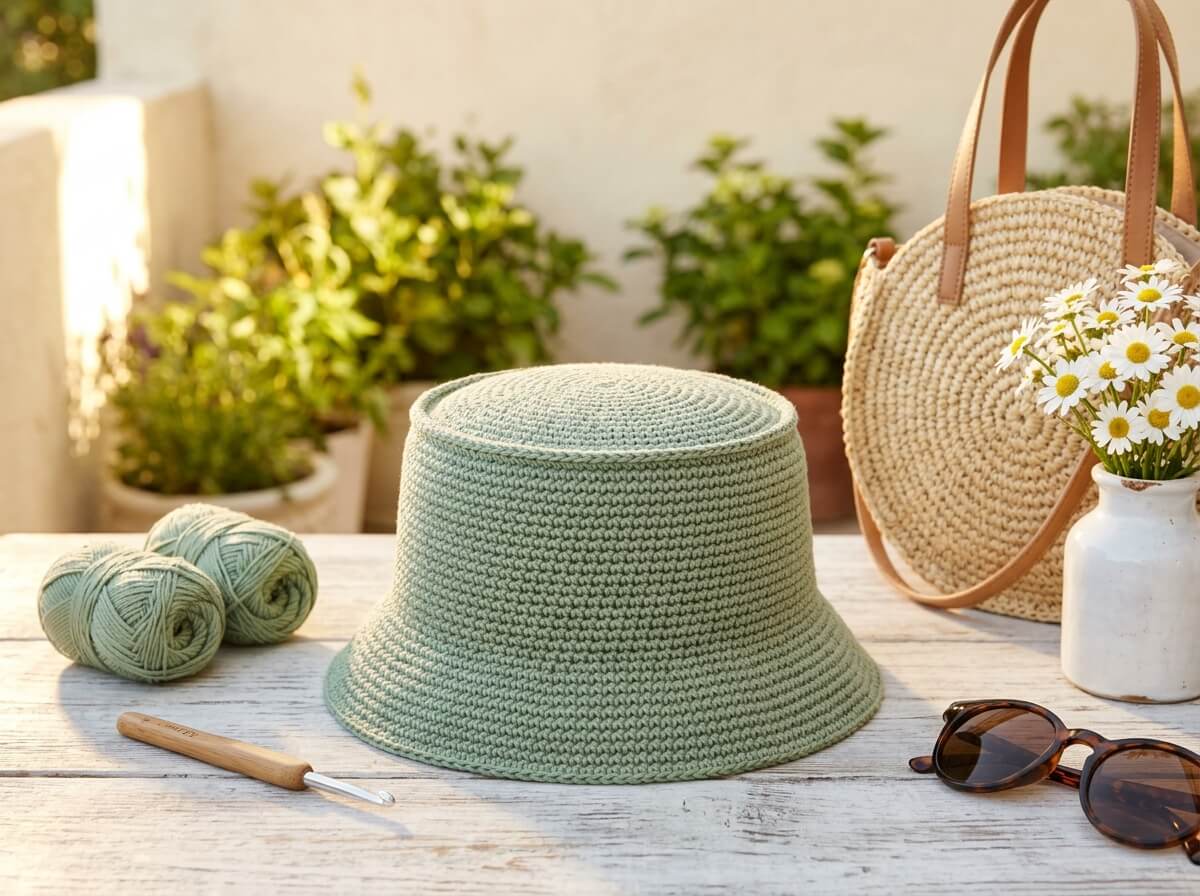
There is something special about wearing a hat you made yourself. A crochet bucket hat is one of the most satisfying projects you can pick up. It is stylish and practical, and it is much easier than it looks. Bucket hats work at a summer picnic or a beach weekend, and they suit a casual coffee date in early fall. They shade your face, add instant personality to a simple outfit, and work up quickly with basic stitches.
This guide gives you everything you need to make your own: a clear materials list, two adult sizes, a sizing formula for custom fits, and round-by-round instructions for the crown, sides, and brim. You will also find troubleshooting help, easy variations, styling ideas, and care tips, so your hat still looks good after a whole season of wear. If you can make a single crochet stitch and count to twelve, you can make this hat.
Why You’ll Love Making a Crochet Bucket Hat
It uses only one main stitch. This pattern is worked almost entirely in single crochet. The stitch is small and tight, so the hat holds its shape and the brim keeps a gentle slope. You won’t need any fancy techniques, just steady increases and a little counting.
It’s quick and portable. The whole hat fits in a small tote bag, so you can work on it in a waiting room, on a train, or on the sofa while a show plays. Most beginners finish in four to six relaxed hours. Experienced crocheters can often finish in a single afternoon.
It’s easy to make your own. Once you understand how the crown, sides, and brim fit together, you can change everything: stripe two colors, switch to raffia for a beach version, or add a flower appliqué. One pattern can fill your whole summer hat wardrobe.
It makes a thoughtful handmade gift. A bucket hat is a gift people actually wear. Make one in a friend’s favorite color and it becomes a personal, lasting present that took real time and care.
What You’ll Need
Yarn: about 250 yards (230 m) for S/M or 300 yards (275 m) for M/L of worsted weight (#4) cotton or cotton-blend yarn. Cotton is the best choice for a bucket hat. It is breathable for warm days, it has very little stretch so the hat keeps its shape, and it shows single crochet stitches beautifully. Cotton blends (cotton with bamboo or acrylic) are a little softer and lighter. Always buy one extra skein from the same dye lot, so you won’t run short just before the brim.
Crochet hook: 5.0 mm (US H-8). This size gives a firm, dense fabric with worsted cotton. A firm fabric is what keeps the brim from flopping. If you crochet loosely, go down to a 4.5 mm hook. If your stitches are very tight and hard to work into, try 5.5 mm.
One locking stitch marker. You will place it in the first stitch of every round. This makes it easy to find where each round begins and to join neatly. A safety pin or a scrap of contrast yarn works in a pinch.
Tapestry needle, scissors, and a soft measuring tape. The needle weaves in your ends. The measuring tape checks your gauge, your head size, and the depth of the sides as you go.
Abbreviations and Stitches
This pattern uses US crochet terms. If you usually follow UK patterns, remember that a US single crochet is a UK double crochet.
| Abbreviation | Meaning | How It’s Used in This Pattern |
|---|---|---|
| ch | Chain | Used for the 1 chain at the start of each round. It never counts as a stitch. |
| sc | Single crochet | The main stitch for the entire hat, giving a dense, structured fabric. |
| inc | Increase | Work 2 sc into the same stitch. This is how the crown and brim grow wider. |
| sl st | Slip stitch | Used to join each round and to make the neat final edging on the brim. |
| BLO | Back loop only | Used for one round to create a crisp ridge where the crown turns into the sides. |
| MR | Magic ring | An adjustable loop that closes tightly, so there’s no hole at the top of the crown. |
| st(s) | Stitch(es) | The numbers in parentheses at the end of each round tell you the stitch total. |
Sizing and Gauge
Gauge: 16 sc and 18 rounds = 4 inches (10 cm) with a 5.0 mm hook and worsted cotton. Gauge matters more for a hat than for almost any other project. If your stitches are even slightly larger or smaller, the hat can end up noticeably loose or tight. An easy way to check is to measure your crown at the end of Step 1 and compare it with the diameter in the table below.
| Size | Fits Head Circumference | Last Crown Round | Crown Stitches | Crown Diameter | Side Depth | Final Brim Stitches |
|---|---|---|---|---|---|---|
| S/M | 20–21.5 in (51–55 cm) | Round 14 | 84 | about 6¾ in (17 cm) | about 3½ in (9 cm) | 132 |
| M/L | 22–23 in (56–58.5 cm) | Round 15 | 90 | about 7 in (18 cm) | about 4 in (10 cm) | 140 |
How to measure your head: Wrap a soft measuring tape around your head where the hat will sit. That’s usually across the middle of your forehead, just above your ears, and around the fullest part at the back. Keep the tape snug but not tight. If you fall between sizes, choose the larger one. Cotton has little stretch, and a bucket hat should sit comfortably rather than squeeze.
Custom sizing formula: Divide your head circumference by 3.14 to find the crown diameter you need. Keep working crown increase rounds (adding 6 stitches each round) until your circle reaches that measurement. Then continue with the sides, keeping that stitch count. The total should be close to a multiple of 6 for the crown, and you can adjust the brim increases to fit evenly.
Pattern Notes Before You Begin
This hat is worked in joined rounds. At the end of every round, slip stitch into the first sc of that round, chain 1 (this chain does not count as a stitch), and work the first sc of the new round into the same stitch you joined into. Move your stitch marker up into that first sc each time. Joined rounds make counting much easier than working in a spiral, and the small join line can be turned to the back of the hat when you wear it.
Increases are staggered. In some crown rounds the increase sits in the middle of the repeat instead of at the end. This keeps the circle round instead of turning it into a hexagon with visible corners. Follow each round exactly as written, and your crown will lie flat and smooth.
Count your stitches at the end of every round. It takes ten seconds and saves you from ripping back several rounds later. The number in parentheses is the total you should have.
Step-by-Step Crochet Bucket Hat Pattern
Step 1: Crochet the Crown
The crown is the flat circle at the very top of the hat. It sets the size of the whole hat, so take your time here.
Start with a magic ring, chain 1, and work 6 sc into the ring. Pull the tail firmly to close the center, then join with a sl st to the first sc. If you find the magic ring tricky, you can chain 2 and work 6 sc into the second chain from the hook. It leaves a tiny hole that you can close later with the yarn tail.
| Round | Instructions | Stitch Count |
|---|---|---|
| 1 | 6 sc in MR, join | 6 |
| 2 | Inc in each st around, join | 12 |
| 3 | (1 sc, inc) 6 times, join | 18 |
| 4 | (1 sc, inc, 1 sc) 6 times, join | 24 |
| 5 | (3 sc, inc) 6 times, join | 30 |
| 6 | (2 sc, inc, 2 sc) 6 times, join | 36 |
| 7 | (5 sc, inc) 6 times, join | 42 |
| 8 | (3 sc, inc, 3 sc) 6 times, join | 48 |
| 9 | (7 sc, inc) 6 times, join | 54 |
| 10 | (4 sc, inc, 4 sc) 6 times, join | 60 |
| 11 | (9 sc, inc) 6 times, join | 66 |
| 12 | (5 sc, inc, 5 sc) 6 times, join | 72 |
| 13 | (11 sc, inc) 6 times, join | 78 |
| 14 | (6 sc, inc, 6 sc) 6 times, join. S/M: stop here. | 84 |
| 15 | (13 sc, inc) 6 times, join. M/L: stop here. | 90 |
When you finish your last crown round, lay the circle flat on a table and measure straight across the center. It should be about 6¾ inches (17 cm) for S/M or about 7 inches (18 cm) for M/L. If your circle ruffles like a wavy plate, your stitches are looser than the gauge, so try a smaller hook. If it curls up into a bowl, your stitches are tighter, so try a larger hook.
Step 2: Work the Turning Round
This one round makes the flat crown bend down into the sides of the hat, and it gives your bucket hat that crisp, polished edge you see on store-bought ones.
Side Round 1: Chain 1, then work 1 sc in the back loop only of each stitch around. Join with a sl st to the first sc (84 / 90 stitches).
Working only into the back loops leaves the front loops unworked on the outside of the hat. Together they form a small raised ridge right where the top meets the sides. After this round, you’ll see the edge of your circle start to tip downward and form a shallow cup. That means it’s working. Do not add any increases from now on. The sides need to go straight down.
Step 3: Build the Sides
The sides are the easiest and most relaxing part of the hat. You simply work even rounds with no increases.
Side Round 2 and onward: Chain 1, sc in both loops of each stitch around, join (84 / 90 stitches).
Repeat this round until the sides measure about 3½ inches (9 cm) for S/M or 4 inches (10 cm) for M/L, measured straight down from the ridge. That’s usually about 16 rounds for S/M or 18 rounds for M/L, counting the turning round. Check your stitch count every few rounds. A missed or extra stitch shows up quickly as sides that slant inward or flare outward.
This is the perfect moment to try the hat on. Slip it over your head with the join at the back. The bottom edge should sit about an inch above your eyebrows and cover the top of your ears slightly. If you want a deeper, slouchier fit, add one or two more rounds. If you like a shorter, more fitted look, stop a round early.
Step 4: Crochet the Brim
The brim is shaped with gradual increases every other round. This gives it a soft, gentle downward slope, the classic bucket hat look. If you increased every round, it would turn into a flat, stiff ledge. Work all brim rounds in both loops. Find your size below and follow it round by round.
| Brim Round | S/M Instructions | S/M Count | M/L Instructions | M/L Count |
|---|---|---|---|---|
| B1 | (6 sc, inc) 12 times, join | 96 | (8 sc, inc) 10 times, join | 100 |
| B2 | Sc in each st, join | 96 | Sc in each st, join | 100 |
| B3 | (7 sc, inc) 12 times, join | 108 | (9 sc, inc) 10 times, join | 110 |
| B4 | Sc in each st, join | 108 | Sc in each st, join | 110 |
| B5 | (8 sc, inc) 12 times, join | 120 | (10 sc, inc) 10 times, join | 120 |
| B6 | Sc in each st, join | 120 | Sc in each st, join | 120 |
| B7 | (9 sc, inc) 12 times, join | 132 | (11 sc, inc) 10 times, join | 130 |
| B8 | Sc in each st, join | 132 | Sc in each st, join | 130 |
| B9 | Sc in each st, join | 132 | (12 sc, inc) 10 times, join | 140 |
| B10 | Sc in each st, join | 132 | Sc in each st, join | 140 |
Your finished brim will be about 2¼ inches (5.5 cm) wide. If you notice small points forming where the increases stack, start the next increase round with half the single crochet count before the first increase. For example, begin B5 for S/M with 4 sc, inc, and then continue with (8 sc, inc). Finish the round with the remaining 4 sc. This shifts the increases so they never line up, and the brim stays smooth and round.
If you want a wider, sun-shading brim for the beach, add two more pairs of rounds: one increase round followed by one even round, continuing the same pattern.
Step 5: Edge and Finish Your Hat
Final Round: Chain 1, then slip stitch loosely into each stitch around. Join to the first slip stitch, cut the yarn leaving a 6-inch (15 cm) tail, and pull it through to fasten off.
The slip stitch round gives the brim a clean, firm edge that looks finished and stops the outer edge from stretching out over time. Keep your tension relaxed while you work it. If you pull too tight, the brim edge will curl inward. For a slightly decorative, rope-like edge, you can work reverse single crochet (also called crab stitch) instead.
Thread the yarn tail onto your tapestry needle and weave it in on the inside of the hat. Go in at least three different directions so it doesn’t work loose. Do the same with the starting tail at the center of the crown, pulling it gently once more to make sure the center is completely closed. Finally, steam the hat lightly or mist it with water and shape it over a bowl (see the care section below) for a crisp, professional finish.
Tips for a Brim That Holds Its Shape
Keep your tension consistent and firm. The brim gets its structure from dense stitches. If your brim feels floppy, the most common fix is simply going down half a hook size. Tight stitches leave fewer gaps, so the fabric supports itself.
Hold two strands together for a sturdier hat. If you’re using a lighter cotton or want a thick, structured hat, hold two strands of DK or sport weight cotton together and treat them as one worsted strand. Check your gauge first, since doubled yarn can work up slightly thicker.
Crochet over a thin cord in the last brim round. For a beach hat that truly keeps its shape in the wind, lay a thin cotton cord or a length of plastic craft cord along the edge. Work your last single crochet round over it, enclosing the cord inside the stitches. It’s invisible from the outside and gives the brim a gentle, flexible stiffness.
Use a fabric stiffener as a final option. A light spray of fabric starch, or a diluted fabric stiffener brushed on while the hat dries over a bowl, will set the shape. Keep it light so the hat stays soft and comfortable on your head.
Troubleshooting Common Problems
| Problem | Why It Happens | How to Fix It |
|---|---|---|
| The crown ripples or looks wavy | Your stitches are looser than the gauge, or you accidentally added extra increases. | Count each round. If the counts are correct, start over with a 4.5 mm hook. |
| The crown curls into a bowl | Your stitches are tighter than the gauge, so the increases can’t keep up. | Try a 5.5 mm hook, or relax your grip on the yarn while working. |
| The crown looks like a hexagon | The increases are stacking directly on top of each other. | Follow the staggered rounds exactly. The middle-placed increases fix this. |
| The hat is too tight or too loose | Gauge is off, or the size doesn’t match your measurement. | Measure your crown against the size table, then adjust the hook size or the last crown round. |
| The sides slant inward or flare outward | Stitches were dropped or added during the sides. | Count every few rounds and keep exactly 84 or 90 stitches until the brim. |
| The brim is floppy | Loose tension or a soft, drapey yarn. | Use a smaller hook, hold a double strand, crochet over cord, or lightly starch. |
| The join line slants across the hat | Joined rounds naturally drift a little each round. | It’s normal. Wear the join at the back, or work the first sc into the same stitch as the join every time. |
Easy Variations to Try
Two-tone stripes. Change colors every two or three rounds on the sides, or crochet the crown in one color and the sides and brim in another. Sage with cream, terracotta with blush, or navy with white all look fresh. Always change color on the final yarn-over of the joining slip stitch, so the stripes start cleanly.
Raffia beach hat. Swap the cotton for paper raffia or a raffia-style yarn for a summer straw hat look. Raffia is stiffer, so the brim holds a lovely shape on its own. You may need a slightly larger hook. Raffia doesn’t stretch at all, so try the hat on often while you work the sides.
Cozy fall version. Use a soft acrylic, a wool blend, or a fuzzy mohair-look yarn in warm shades like rust, mustard, or chocolate brown. The pattern stays the same, but the result feels completely different. It’s perfect with chunky knit sweaters and boots.
Floral or granny square details. Sew small crocheted flowers around the sides, or add a simple granny square patch at the front. These touches add a playful, vintage feeling and are a great way to use up leftover yarn from other projects.
Windy-day chin cord. Braid three strands of yarn into a cord about 24 inches long, and stitch each end securely to the inside of the hat just above the brim on each side. It keeps the hat on your head on breezy beach days and adds a sweet retro detail.
How to Style Your Crochet Bucket Hat
Beach and pool days. Pair a sage or cream bucket hat with a linen button-down worn open over a swimsuit, woven sandals, and a straw tote. The hat shades your face and shoulders while keeping the whole outfit relaxed and pulled together.
Casual city outings. A bucket hat instantly upgrades simple basics. Try it with a white tee, straight-leg jeans, and clean white sneakers. Add a slim gold necklace and a crossbody bag for a laid-back look that still feels styled.
Festival and picnic looks. Bright colors and stripes shine here. Pair a colorful hat with a flowy midi dress or denim shorts and a crochet top. Add a few layered bracelets for a cheerful, carefree vibe.
Fall layering. In cooler months, a crochet bucket hat in a warm color goes beautifully with a cozy oversized cardigan, a slip skirt or wide-leg trousers, and ankle boots. Earthy tones like rust and olive feel especially seasonal.
How to Care for Your Crochet Bucket Hat
Hand wash gently in cool water. Fill a basin with cool water and a small amount of mild detergent or wool wash. Submerge the hat, press gently with your hands, and let it soak for about ten minutes. Never wring or twist it. That stretches the stitches and can distort the brim.
Rinse and press out the water. Rinse in clean cool water until no soap remains. Then roll the hat in a clean towel and press gently to absorb most of the moisture.
Dry it over a bowl to keep the shape. Turn a bowl upside down that’s about the same size as your head (a large mixing bowl works well). Place the damp hat over it, smooth the crown flat, and pull the sides straight. Arrange the brim so it slopes evenly all the way around. Let it air dry completely, away from direct heat and strong sun, which can fade cotton colors.
Store it with care. Keep your hat on a shelf or stuffed lightly with tissue paper, so the crown and brim don’t get crushed. Avoid hanging it on a hook for long periods, since that can stretch one spot of the sides out of shape.
Frequently Asked Questions
Is a crochet bucket hat good for beginners? Yes, it’s one of the best first wearable projects. You only need chains, single crochet, slip stitches, and simple increases. The pattern teaches you how flat circles and three-dimensional shaping work, and those skills carry over to bags, baskets, and amigurumi later.
How long does it take to crochet a bucket hat? Most beginners finish in four to six hours, spread over a few evenings. Experienced crocheters usually finish in about three hours. The crown takes the most focus because of the counting, while the sides go quickly once you settle into a rhythm.
Can I use acrylic yarn instead of cotton? Yes. Acrylic works well and comes in endless colors. It’s softer and slightly stretchier than cotton, so the hat will feel a little more relaxed and the brim may be softer. For summer, cotton is more breathable and comfortable in the heat, but for fall and spring, acrylic is a great budget-friendly option.
How do I make a bucket hat for a child? Measure the child’s head and divide by 3.14 to find the crown diameter. Stop the crown when the circle reaches that size. Toddlers usually need about Round 11 or 12, and older children about Round 12 or 13. Work the sides about 2½ to 3 inches deep, then increase the brim in the same every-other-round rhythm. Make it a little narrower, about 1½ to 2 inches.
Why does my hat keep sliding off my head? The hat is probably slightly too large, or the cotton has relaxed with wear. Try one round of single crochet decreases on the last side round before the brim: decrease once every 14 stitches (6 decreases for 84 stitches). This snugs the opening gently. A chin cord is another easy fix for windy days.
Can I wear a crochet bucket hat in the sun? Yes, and it does give your face and the back of your neck some shade. However, crochet fabric has small gaps between stitches, so it doesn’t block the sun the way a tightly woven hat does. On very sunny days, keep applying sunscreen to your face, and choose a wider brim for extra coverage.
Final Thoughts
A crochet bucket hat is proof that a simple pattern can become something you’ll love wearing season after season. Once you’ve made your first one, you’ll understand exactly how the crown, sides, and brim work together. From there, you can create stripes, raffia beach hats, cozy fall versions, and handmade gifts for everyone you love. Pick a yarn color that makes you smile, grab your hook, and enjoy every round. Your new favorite accessory is only a few evenings away.
Save this pattern to your crochet board, so you can come back to it whenever you’re ready to make your next hat.