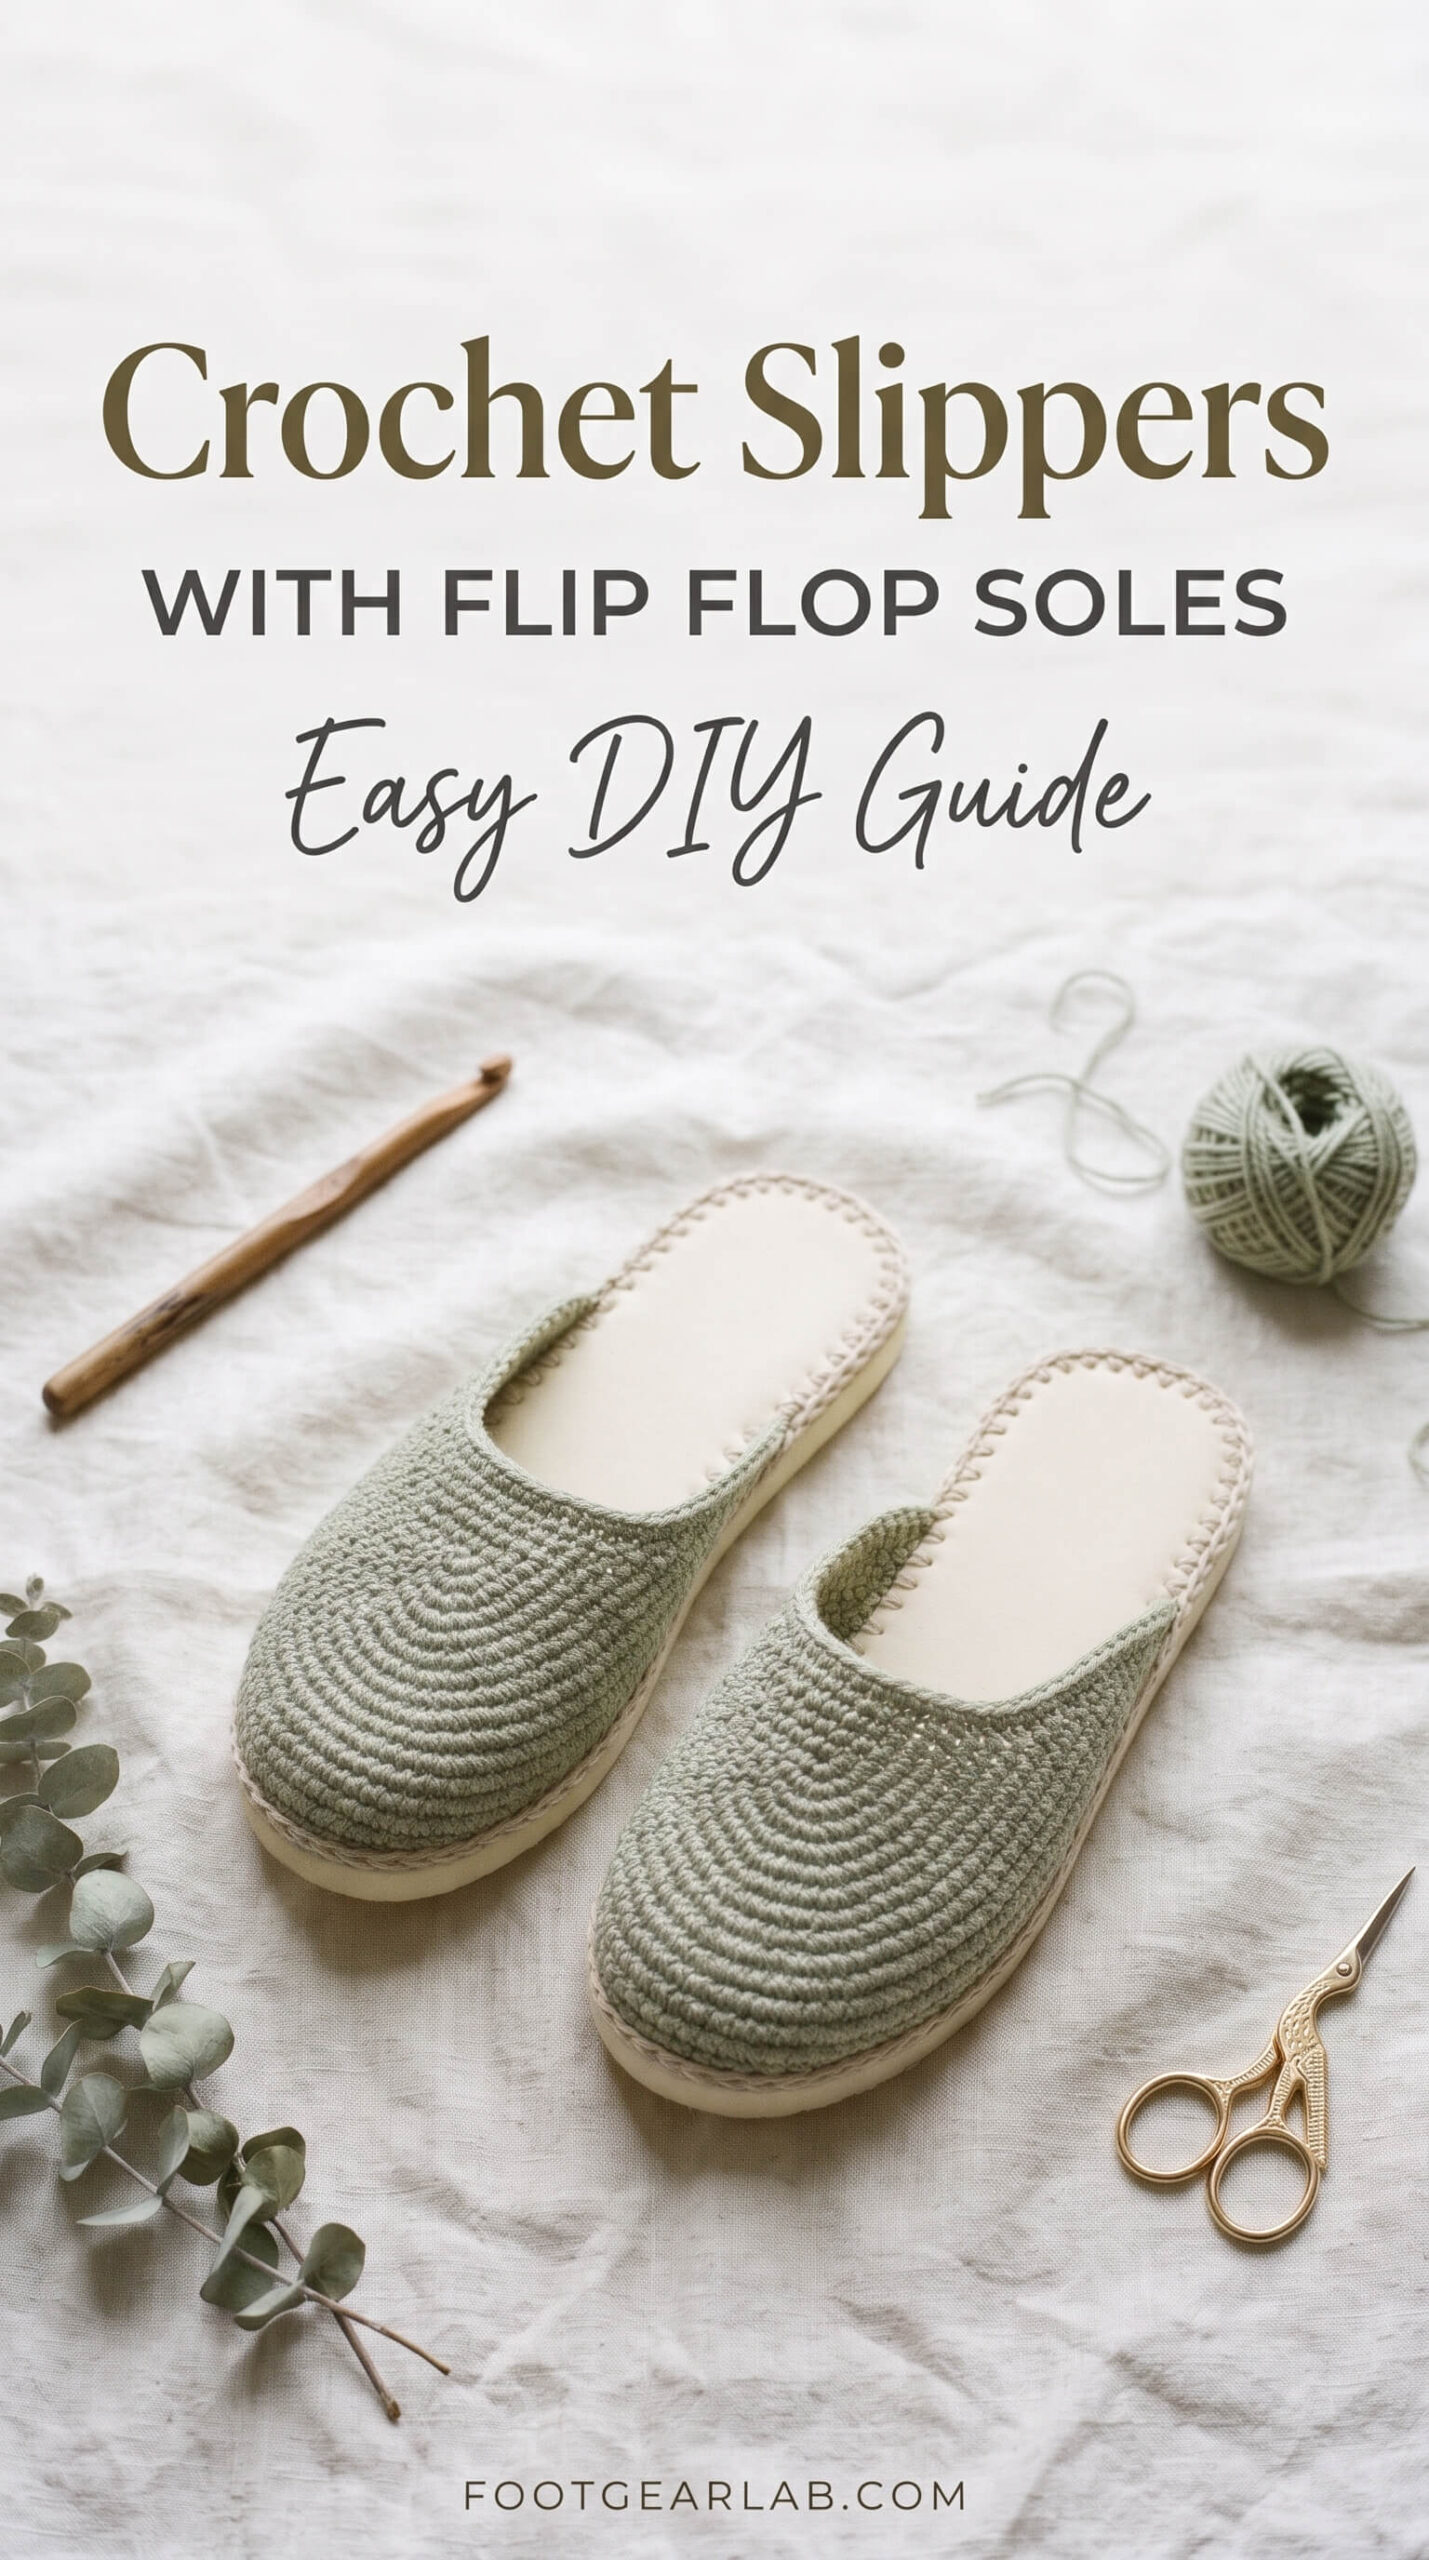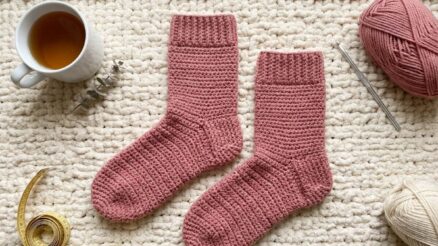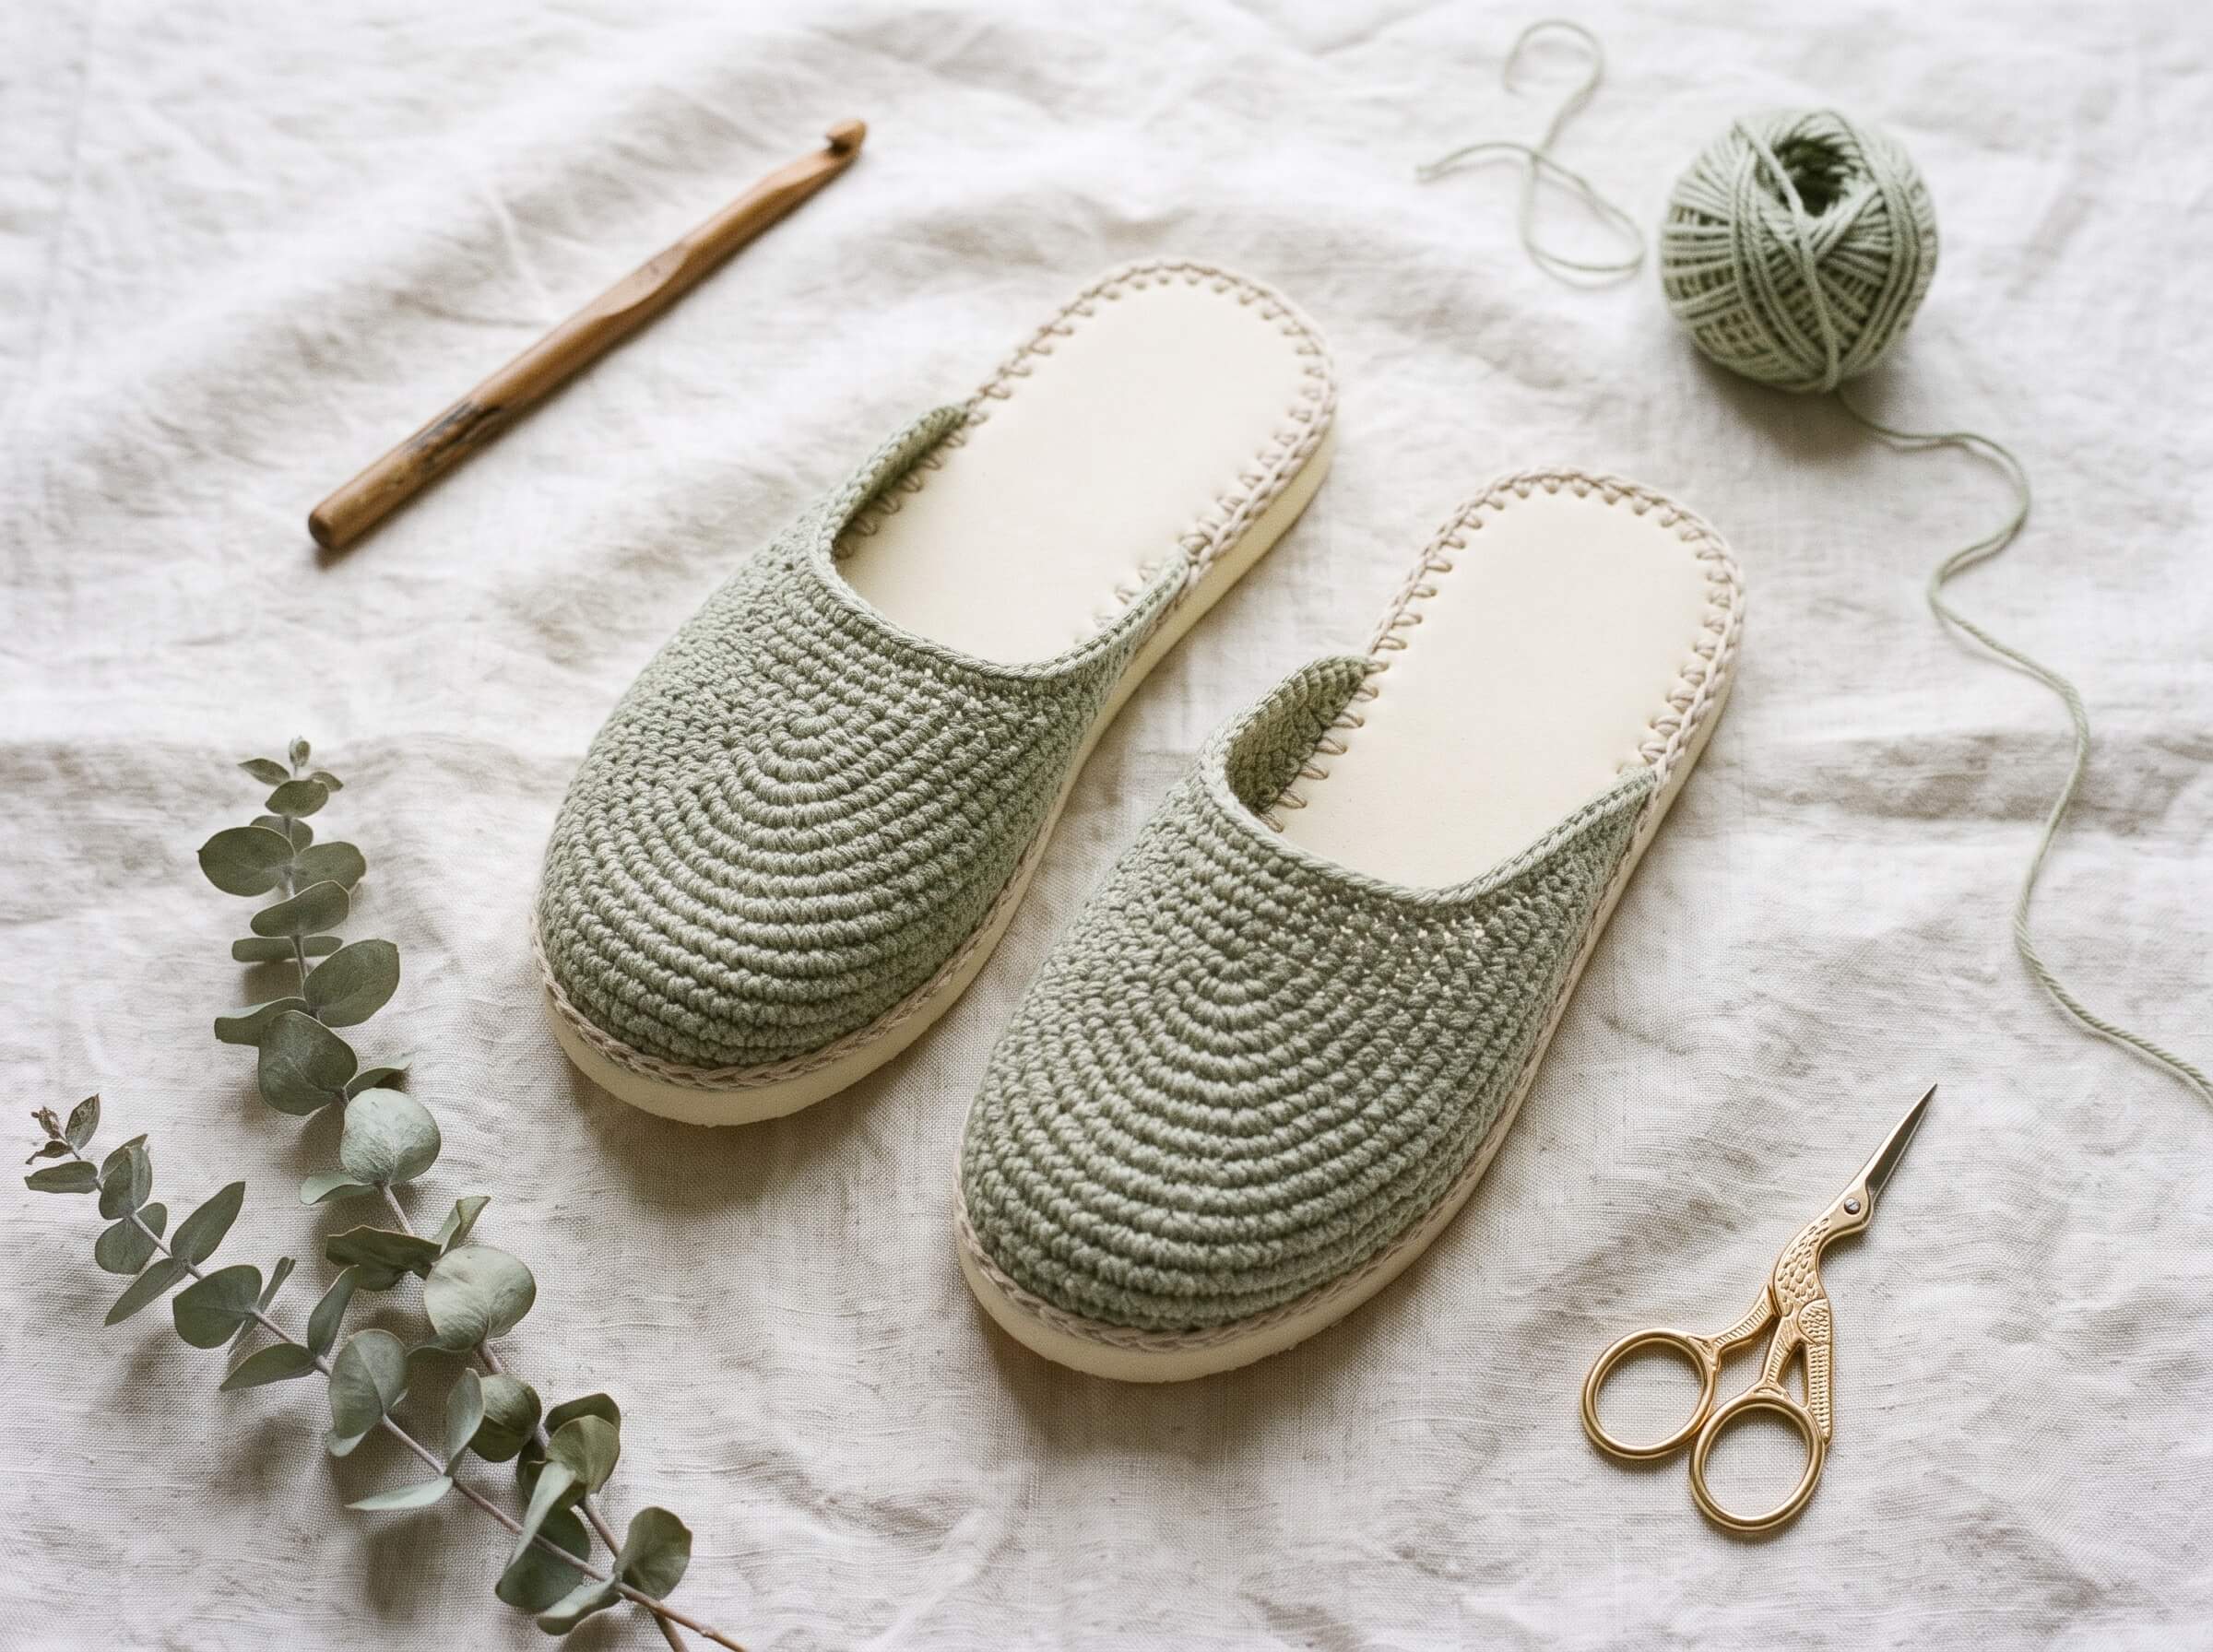
If you love crochet but hate how quickly handmade slippers slide around on hard floors or wear thin at the bottom, flip flop soles are the clever fix you’ve been looking for. By crocheting directly onto a cheap pair of flip flops, you get the soft, cozy, handmade upper you love paired with a real rubber sole that grips the floor, handles a quick trip to the mailbox, and lasts far longer than an all-yarn slipper ever could.
This project is also one of the most satisfying ways to upcycle. That pair of dollar-store flip flops sitting in your closet, or the ones with a broken toe strap you were about to throw away, can become a pair of slippers that look like they came from a boutique. In this guide, you’ll learn exactly what you need, how to prepare the soles so your stitches stay put, and how to crochet three different upper styles, from a cozy closed-toe slipper to a breezy open-toe slide.
Why Crochet on Flip Flop Soles?
Traditional crochet slippers are wonderfully warm, but they come with a few well-known problems. The yarn soles flatten quickly, they can be dangerously slippery on tile or wood floors, and they wear through at the heel and ball of the foot within a season or two. Many crocheters try to fix this with puffy paint or sewn-on leather patches, but those solutions are fiddly and often peel off.
Flip flop soles solve all of these issues at once. The foam or rubber base gives you built-in cushioning and arch shape, a non-slip bottom, and a sturdy foundation that keeps the slipper’s shape wash after wash. Because the sole is already cut to a foot shape, you also skip the trickiest part of slipper making, which is getting the sole size and curve right. Your crochet work goes only into the upper, so the project is faster and much more forgiving for beginners.
There’s a style benefit too. Since the sole is waterproof, these slippers work beautifully as indoor-outdoor house shoes, poolside slides, or beach-cottage footwear. With the right yarn, they look intentional and polished rather than homemade.
Materials You’ll Need
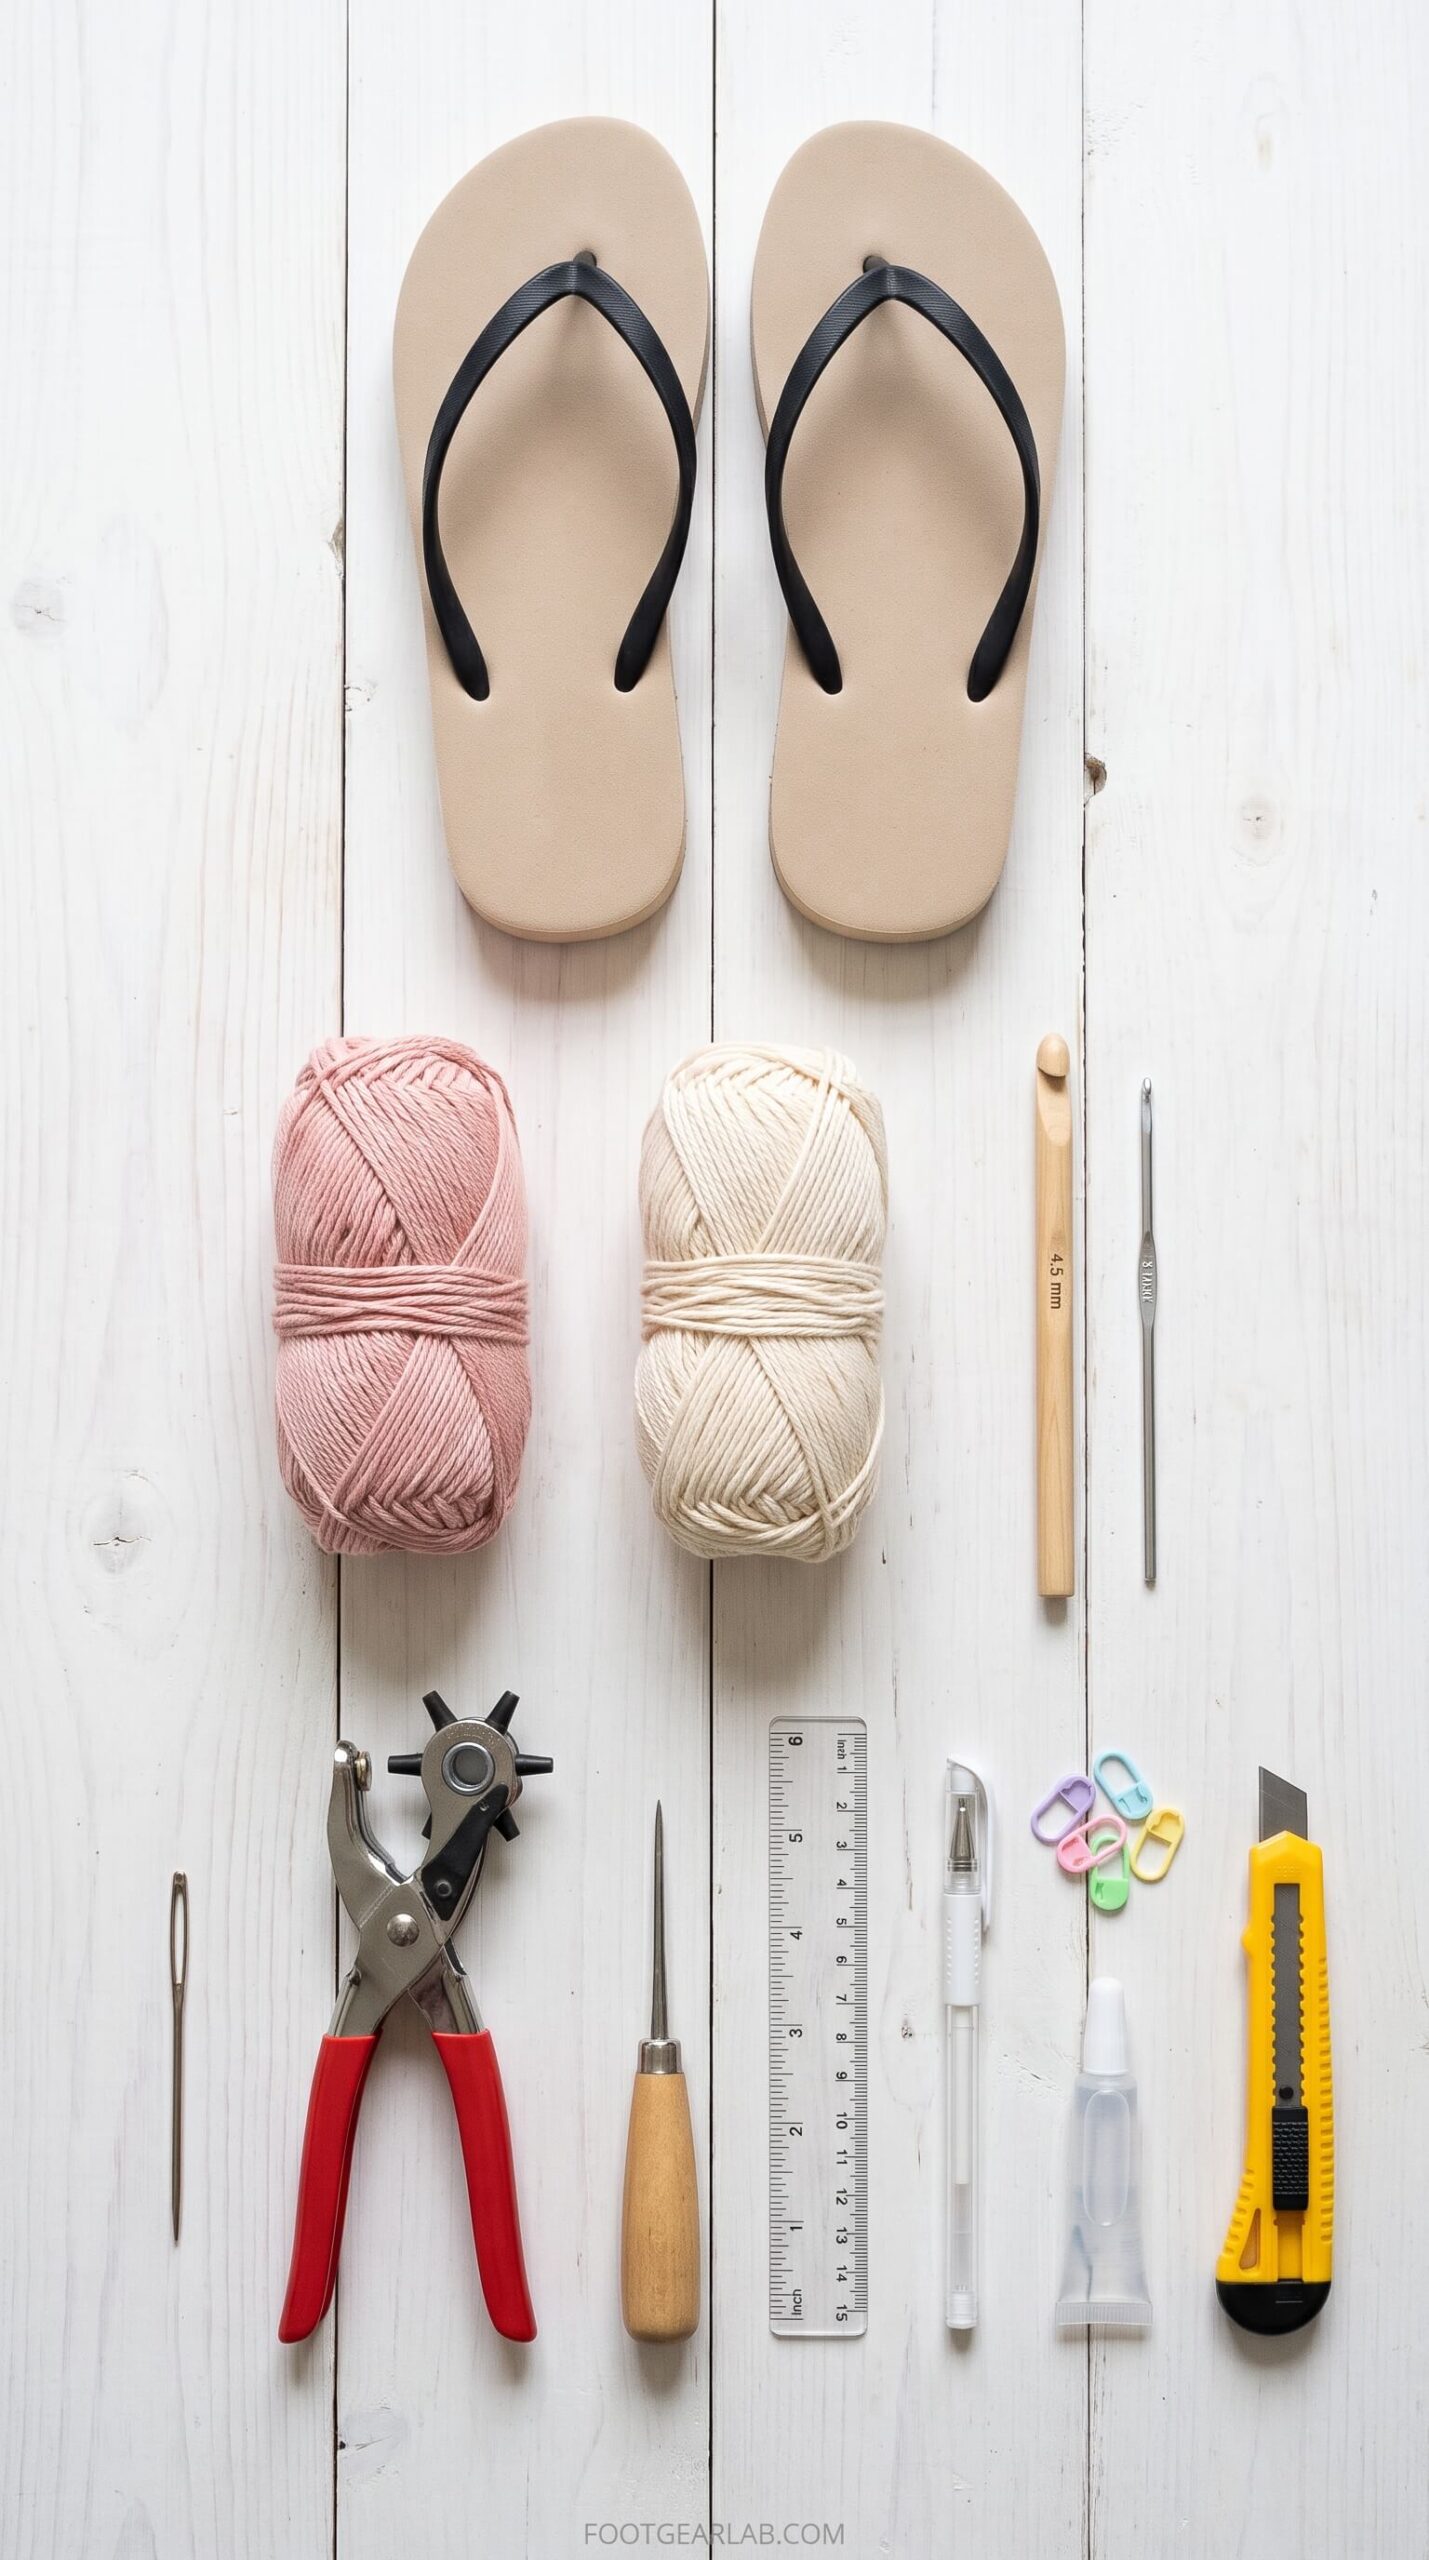
Before you start, gather everything in one place. Most of these supplies are inexpensive, and you may already own many of them if you crochet regularly.
- A pair of flip flops in your size. Choose a pair with a thick foam sole, ideally at least 1 cm (about 3/8 inch) thick, because thicker soles hold holes more securely and won’t tear when you pull your stitches tight. Thin, flimsy rubber flip flops can rip along the edge, so it’s worth spending a little more for a sturdier pair.
- Yarn. A worsted-weight (category 4) cotton or cotton blend is the best all-around choice because it holds its shape, is breathable, and washes well. You’ll need roughly 100 to 150 grams (about 200 to 300 yards) for a pair of closed-toe slippers in an average women’s size, and less for open-toe styles.
- A crochet hook. A 4 mm to 5 mm hook (US G-6 to H-8) works well with worsted yarn for the upper. If you plan to crochet directly into the holes in the sole, a smaller 2.5 mm to 3.5 mm hook makes that first round much easier.
- A large-eyed tapestry or yarn needle. This is used for the easiest foundation method (blanket stitching around the sole) and for weaving in ends at the end of the project.
- A tool to make holes. A leather hole punch, a sharp awl, or a metal skewer will all work. Some crafters heat a thick nail and melt holes through the foam, which creates very clean holes, but this requires extra care (more on that below).
- A craft knife or sharp scissors for removing the toe thong strap.
- A fine-tip marker or white gel pen and a small ruler for marking evenly spaced holes.
- Stitch markers to mark the toe center and the sides of the upper.
- Flexible waterproof glue (optional), such as E6000 or Shoe Goo, to seal the three small holes left behind after removing the straps. If you plan to seal them, also keep a little masking tape, a popsicle stick or toothpick, and some rubbing alcohol on hand.
Choosing the Best Yarn
The yarn you choose affects how your slippers look, feel, and wear over time. Here’s a quick comparison to help you decide.
| Yarn Type | Best For | Pros | Things to Know |
|---|---|---|---|
| 100% Cotton | Spring, summer, indoor-outdoor wear | Breathable, sturdy, holds shape, machine-washable | Less stretchy, so fit needs more care |
| Cotton-Acrylic Blend | Everyday all-season slippers | Soft, slightly stretchy, durable, budget-friendly | Can pill slightly over time |
| Acrylic | Cozy winter slippers | Warm, inexpensive, huge color range | Feet can get warm; less breathable |
| Wool or Wool Blend | Cold-weather house shoes | Very warm, naturally odor-resistant | Usually hand-wash only; can felt if washed hot |
| T-Shirt Yarn / Macramé Cord | Chunky beach-style slides | Very fast to work, modern look, tough | Heavier and needs a larger hook |
For your first pair, a cotton-acrylic blend is the friendliest option. It’s soft enough to be comfortable, stretchy enough to forgive small fit mistakes, and strong enough to handle being pulled through holes in the sole.
Step 1: Remove the Toe Strap
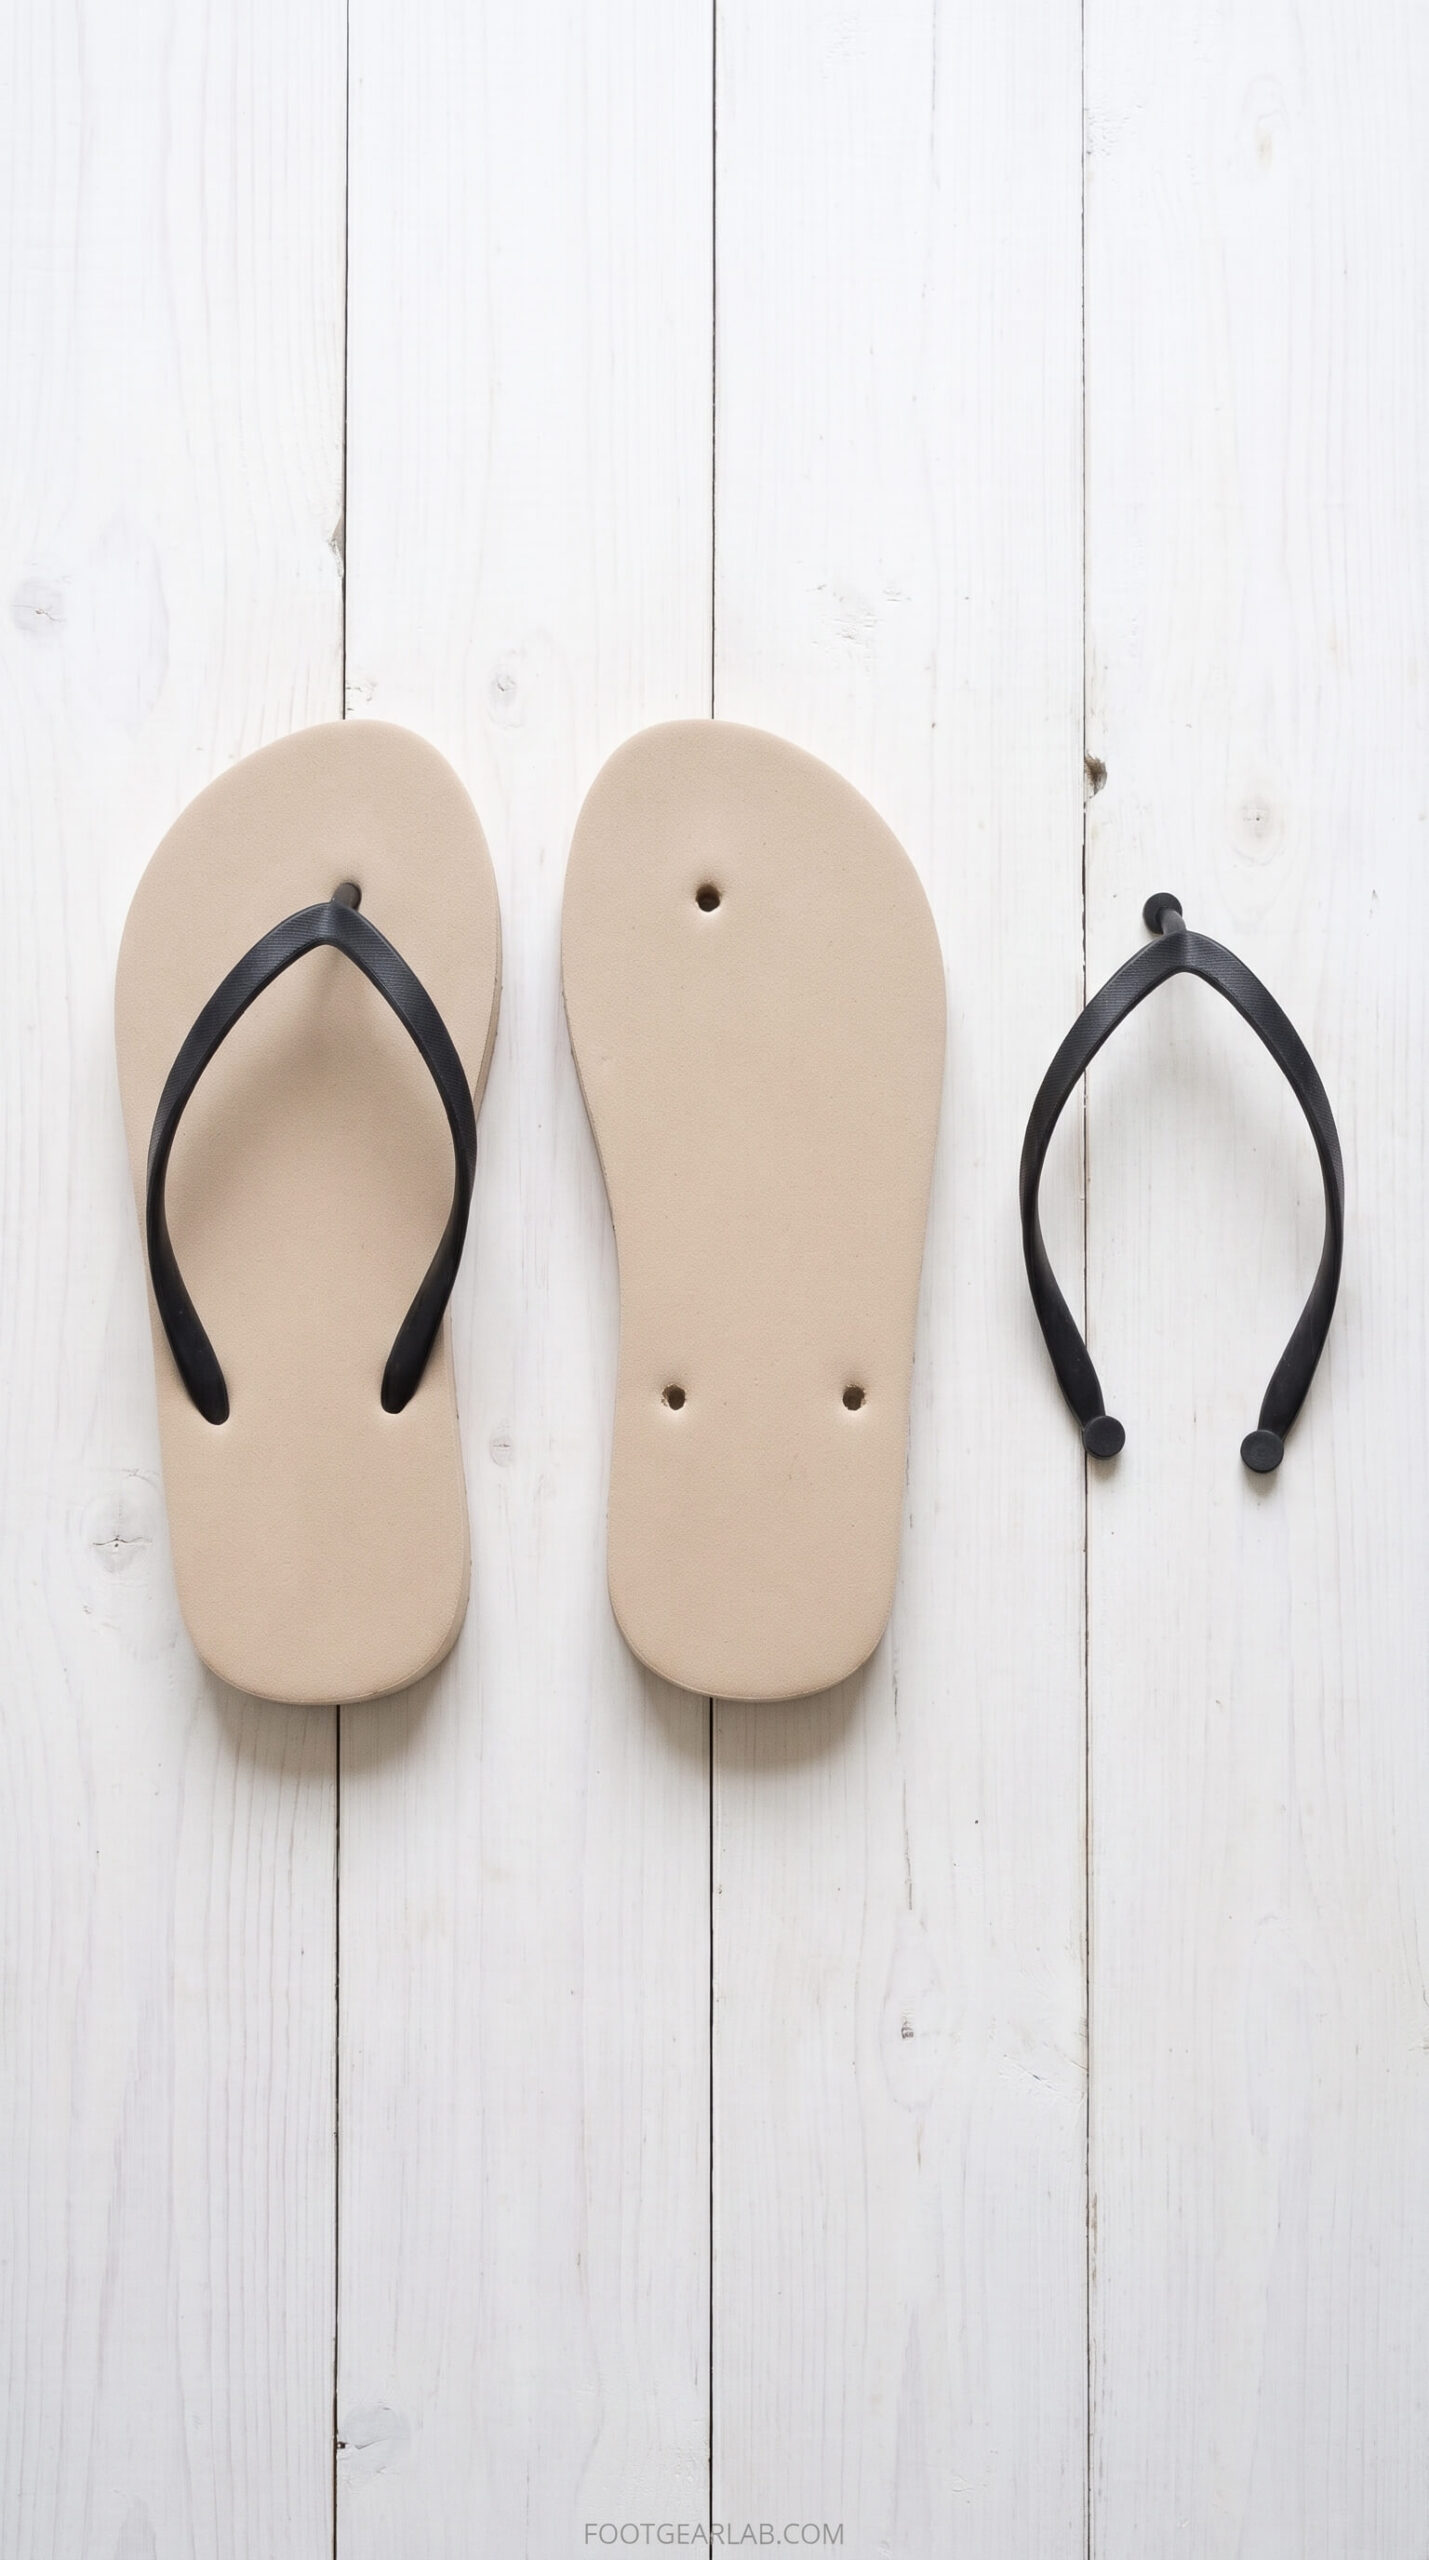
Start by removing the original Y-shaped thong strap. On most flip flops, the strap is held in place by three small plugs that push through the sole. Turn the flip flop over and push those plugs back up through the holes with your thumb, or grip the strap firmly from the top and pull it out. If the strap is glued or molded into the sole and won’t come out, cut it off as close to the footbed as you can with a craft knife, then trim the remaining stub flush with the surface so you won’t feel it under your foot.
You’ll now have three small holes in the sole: one near the toe and one on each side at mid-foot. The next section explains what to do with them.
What to Do With the Three Strap Holes
You have two choices here, and the right one depends on where you plan to wear your slippers.
- Leave them open (indoor slippers only). If your slippers will only be worn around the house, you can simply leave the holes as they are. They’re small, your foot covers them completely, and you won’t feel them through the cushioned footbed. The only downside is that dust or a little water can come up through them, which doesn’t matter on clean indoor floors.
- Fill them with glue (indoor-outdoor slippers). If you plan to wear your slippers on the patio, in the garden, or near the pool, sealing the holes keeps water, sand, and grit from coming up under your foot. This takes about five minutes of work plus drying time, and it gives your slippers a cleaner, more finished look.
- Plug them with foam (the neatest finish). For the smoothest result, cut small plugs from the leftover foam of an old flip flop or a craft foam sheet, roughly the same width as the holes. Dip each plug in glue, push it snugly into its hole, and trim it flush with the footbed once it’s dry. This uses less glue and leaves a patch that feels exactly like the rest of the sole.
How to Seal the Holes With Glue
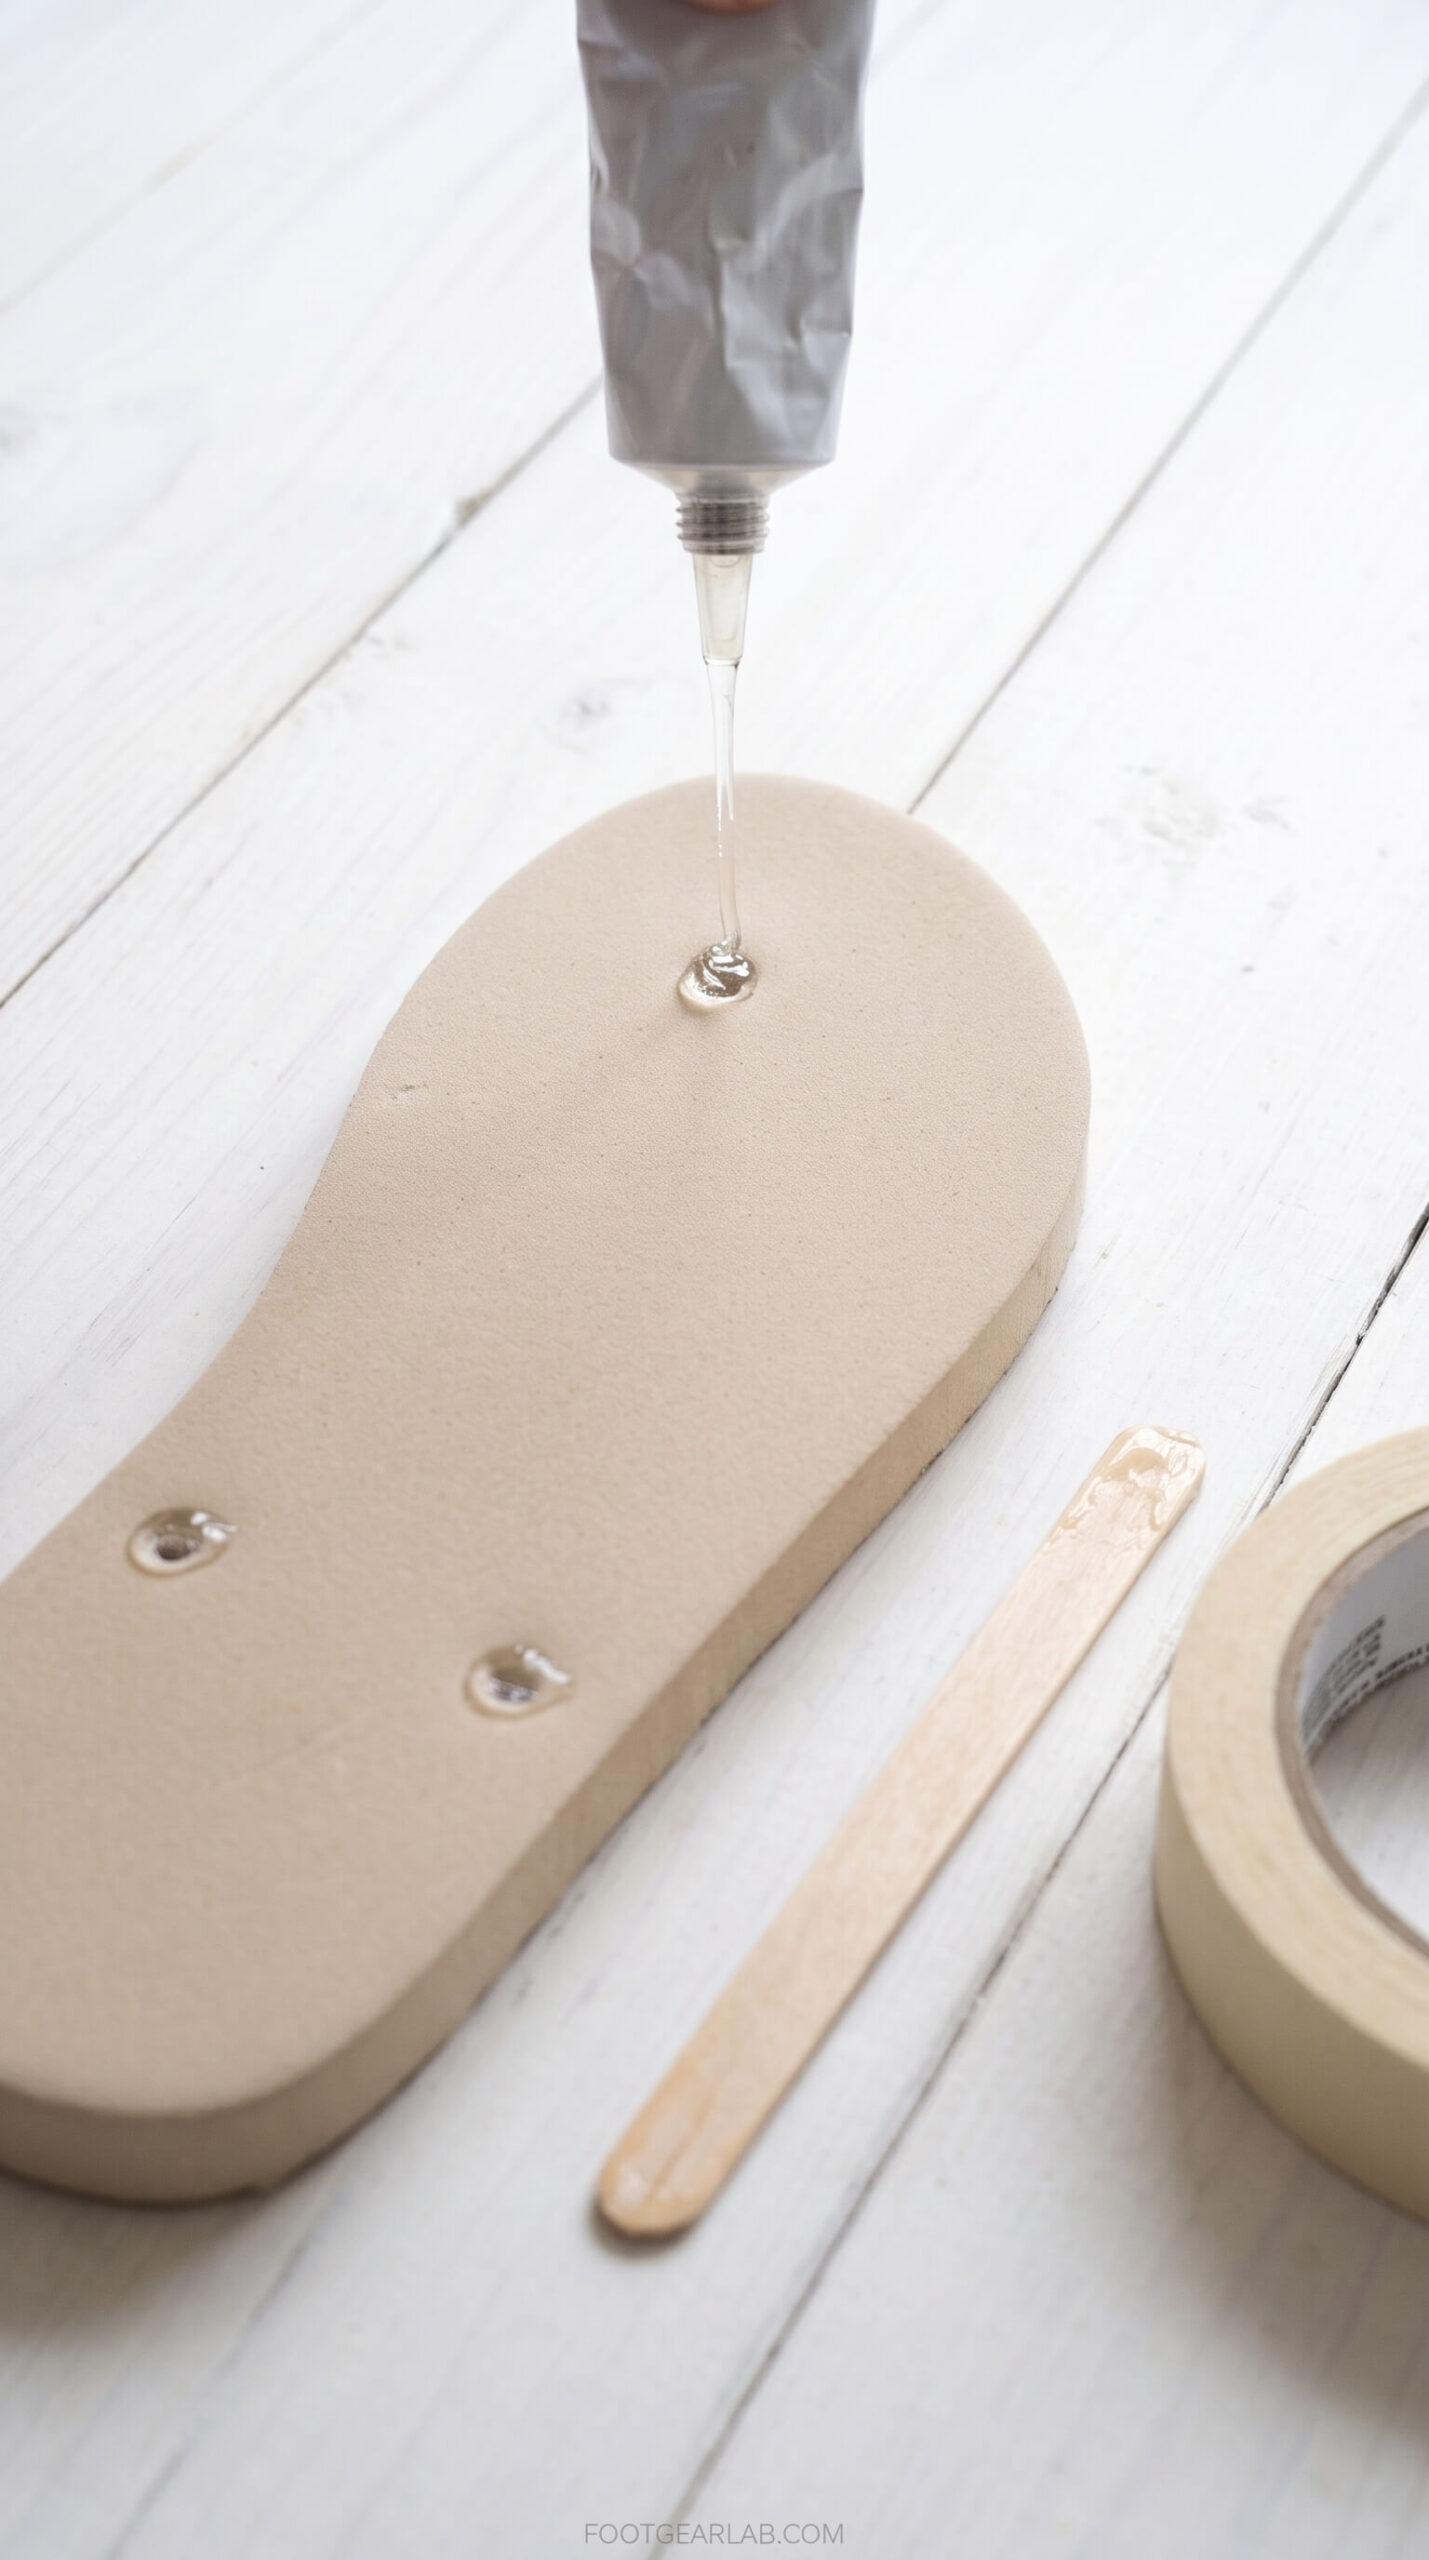
Start by wiping the holes with a cotton swab dipped in rubbing alcohol to remove dust and any rubber residue, then let them dry for a minute. Next, place a small piece of masking tape over each hole on the bottom of the sole. The tape acts like a little floor that stops the glue from dripping out while it sets.
Turn the sole right side up and squeeze a flexible, waterproof glue such as E6000 or Shoe Goo into each hole until it’s filled just to the surface of the footbed. Flexible glue is important because flip flop foam bends with every step, and a hard glue like superglue can crack and pop out over time. Smooth the top with a toothpick or a popsicle stick so it sits level with the footbed. Any bump left on top will be noticeable under your toes, especially at the toe hole.
Let the glue cure for a full 24 hours in a well-ventilated spot before peeling off the tape. If the glue has shrunk slightly and left a small dip, add a thin second layer and let it cure again. Once fully cured, the patched holes blend into the footbed and won’t get in the way of any of the following steps.
Step 2: Mark the Holes Around the Sole
Now you’ll create a row of evenly spaced holes around the entire edge of the sole. These holes are the anchor points for your crochet, so taking your time here makes everything else easier.
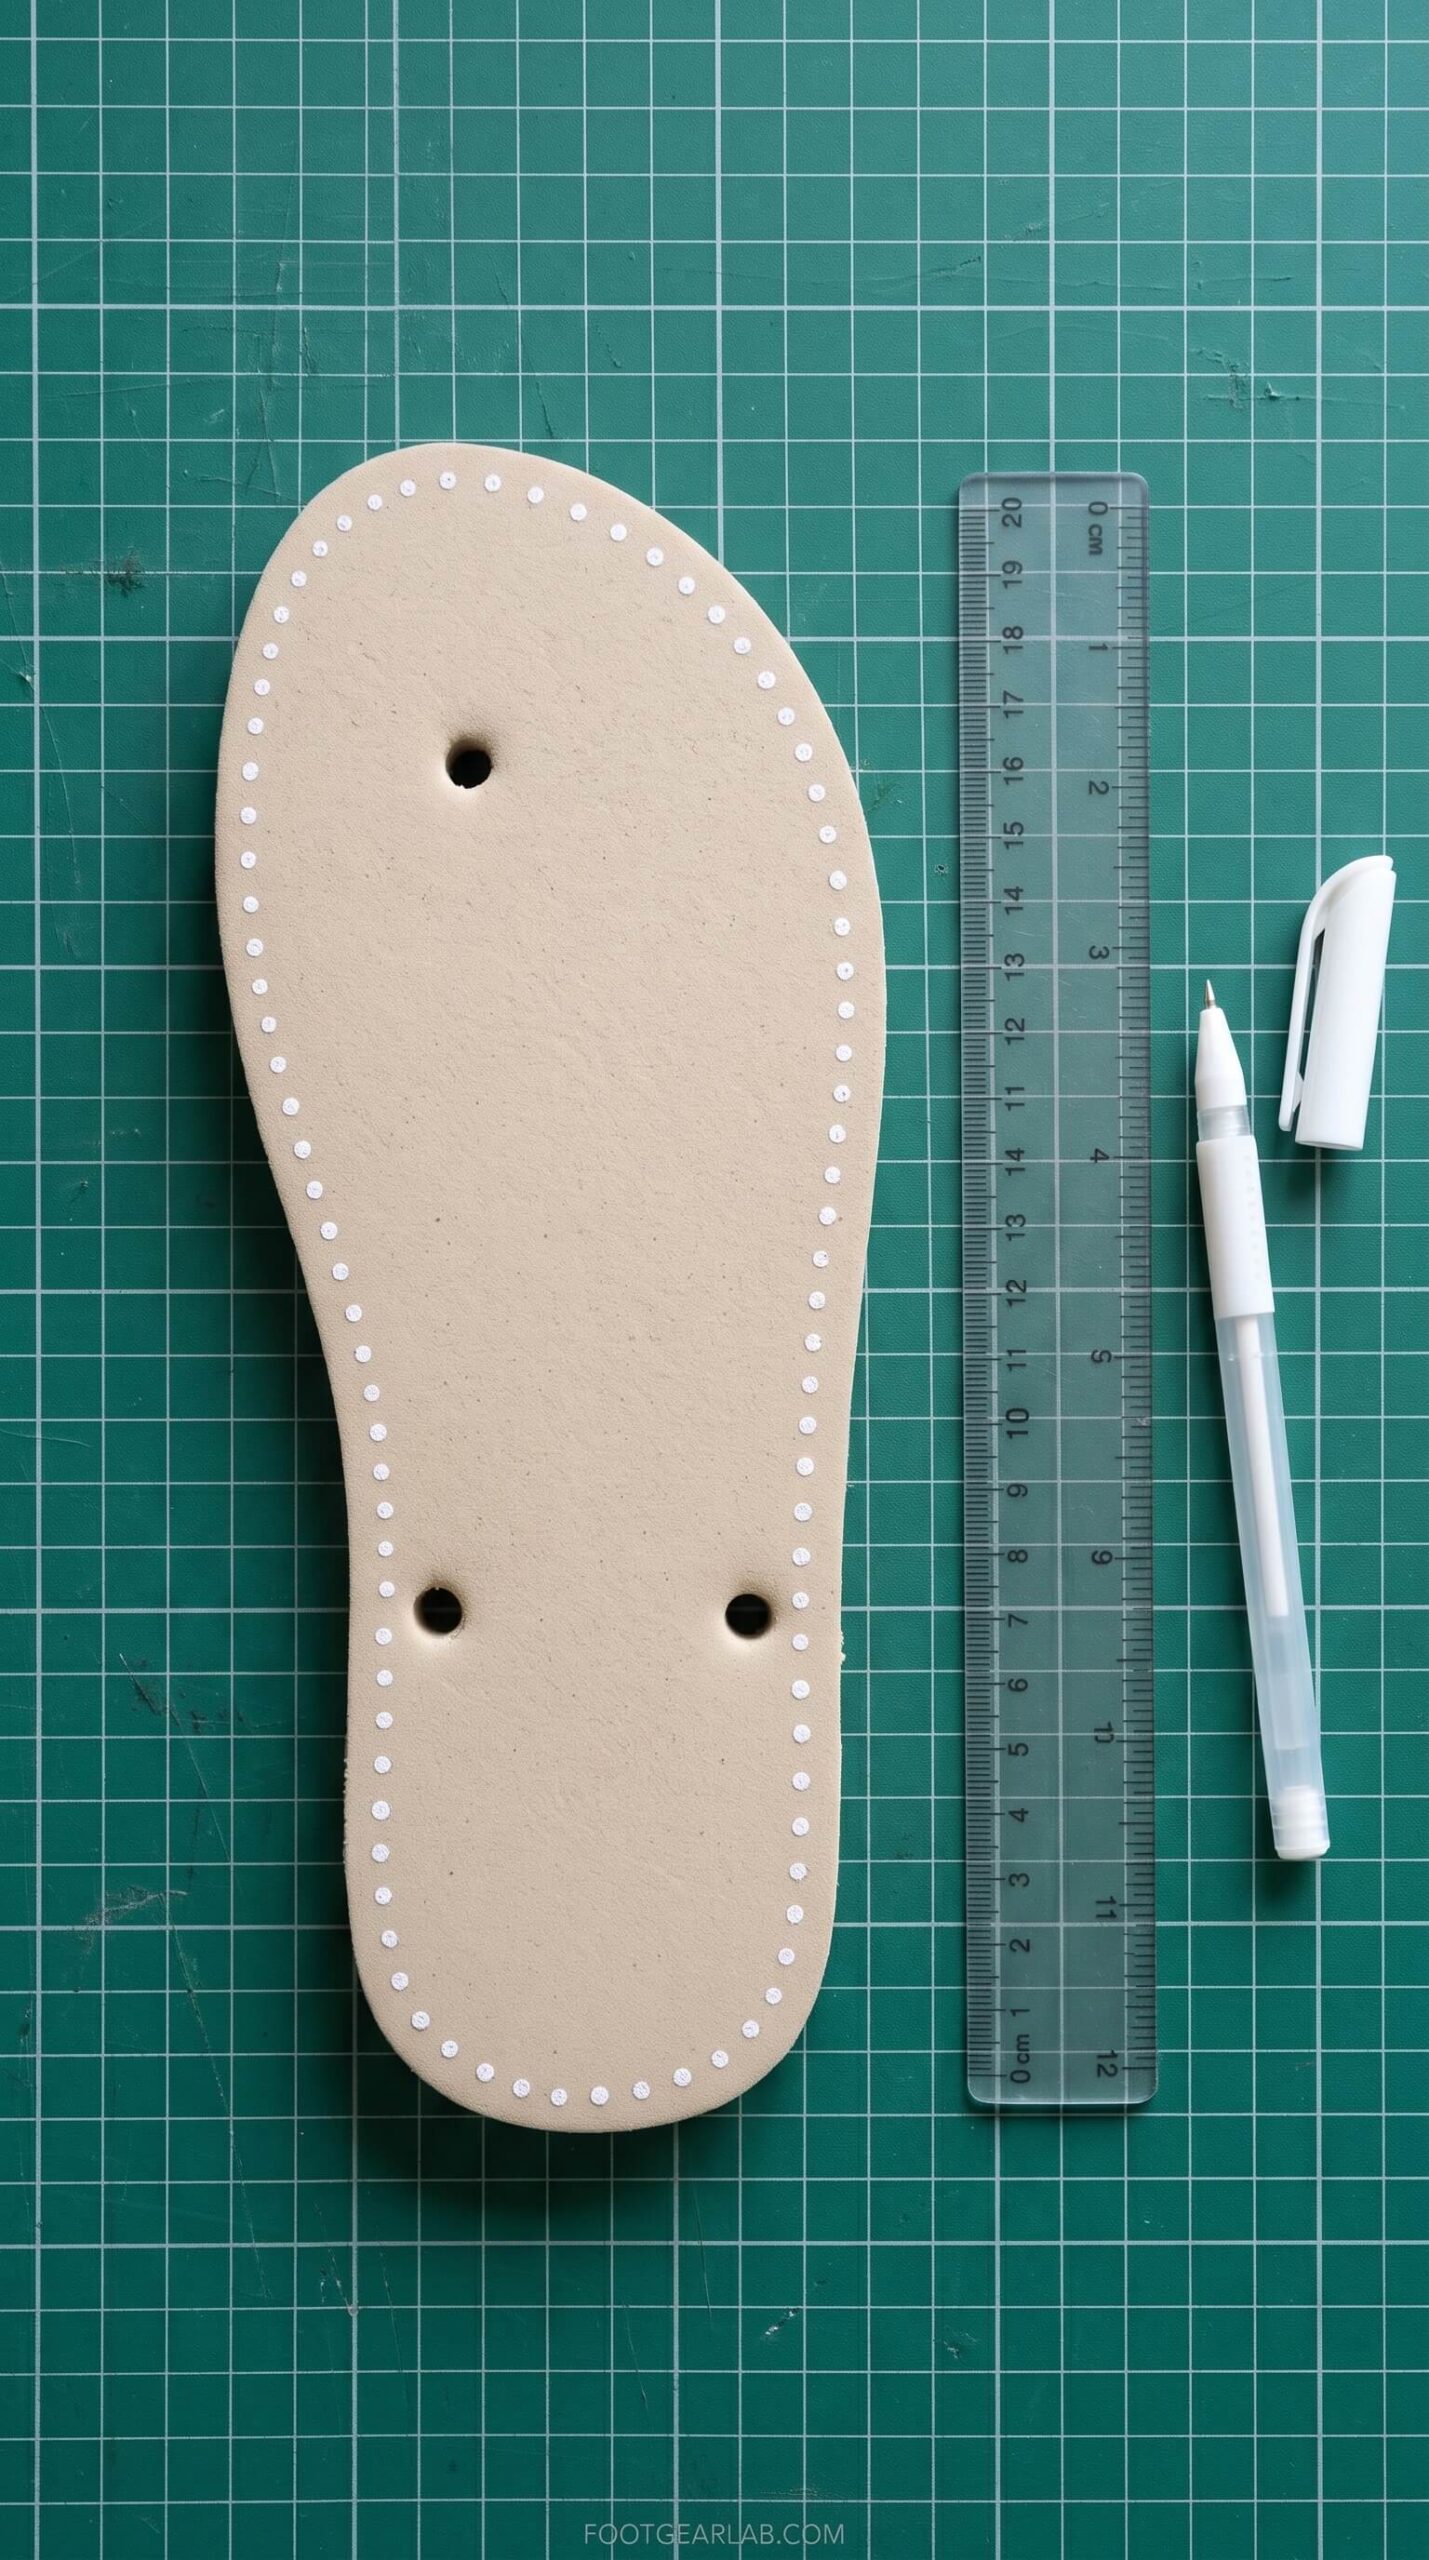
Using your ruler and a fine-tip marker or white gel pen, draw small dots all the way around the top of the sole about 0.5 cm (1/4 inch) in from the outer edge. Space the dots roughly 1 cm (3/8 inch) apart. Staying close to the edge helps the finished upper wrap neatly around the foot, while keeping that small margin prevents the holes from tearing out when you pull your stitches tight.
A helpful trick is to mark the center of the toe and the center of the heel first, then work outward from those points along each side. This keeps the spacing symmetrical so your stitches line up evenly on both sides. For an average women’s size, you’ll end up with somewhere around 50 to 60 dots per sole. Once the first sole is marked, lay the second sole on top, mirror-image, and use the first as a guide so both slippers match.
Step 3: Punch the Holes
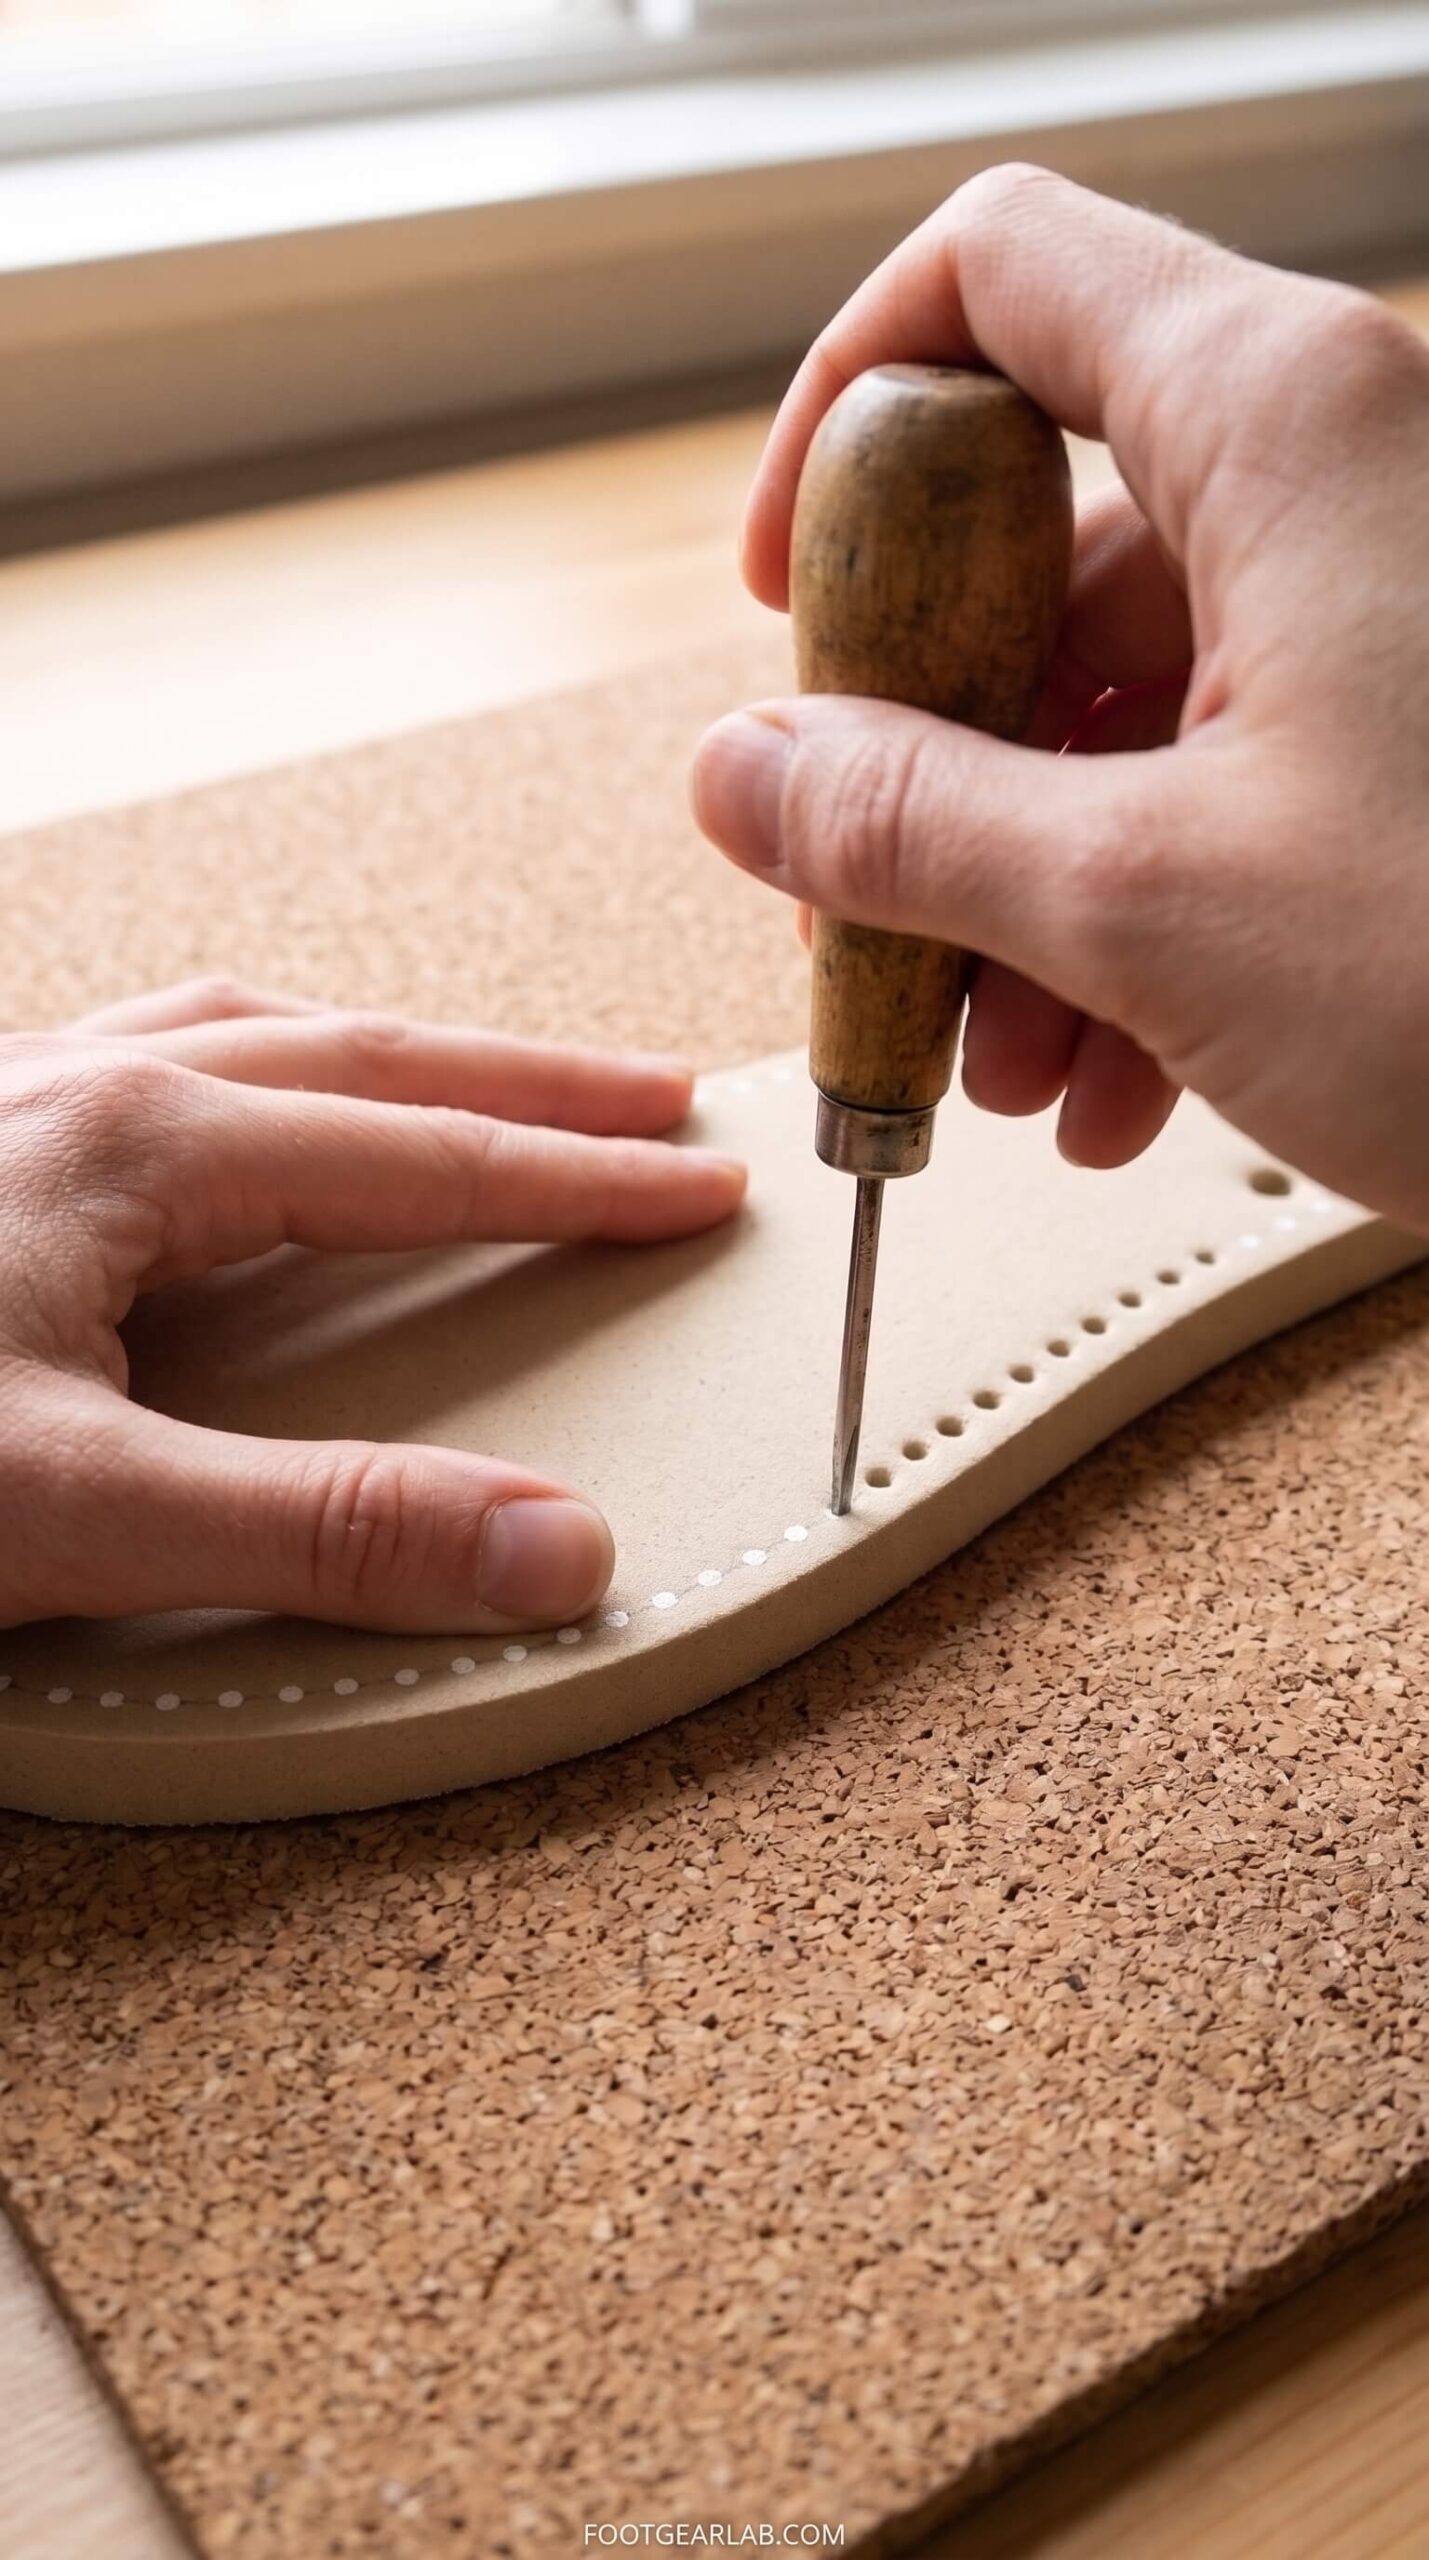
Next, turn each dot into a clean hole that goes all the way through the sole. A rotary leather hole punch set to a small size (about 2 to 3 mm) is the neatest and safest option if your sole is thin enough to fit in the jaws. For thicker soles, press a sharp awl or metal skewer straight down through each dot, keeping the tool vertical so the hole exits directly beneath where it entered. Wiggling the tool slightly as you push it through will widen the hole just enough for yarn to pass easily.
Some crafters prefer to heat the tip of a thick nail over a candle or with a lighter and melt holes through the foam. This makes very smooth, round holes, but please be careful if you choose this method. Hold the nail with pliers rather than your fingers, work in a well-ventilated area or near an open window since melting foam produces fumes, and keep a bowl of water nearby. Never leave a heat source unattended, and keep children and pets away from your workspace.
When you’re done, hold the sole up to the light and check that every hole goes cleanly through. Any hole that’s blocked or too narrow will make the next step frustrating, so it’s worth fixing now.
Step 4: Create the Foundation Round
The foundation round is where your yarn first attaches to the sole. There are two ways to do this, and the first is the easiest option if you’re a beginner.
Option A: Blanket Stitch Foundation (Easiest)
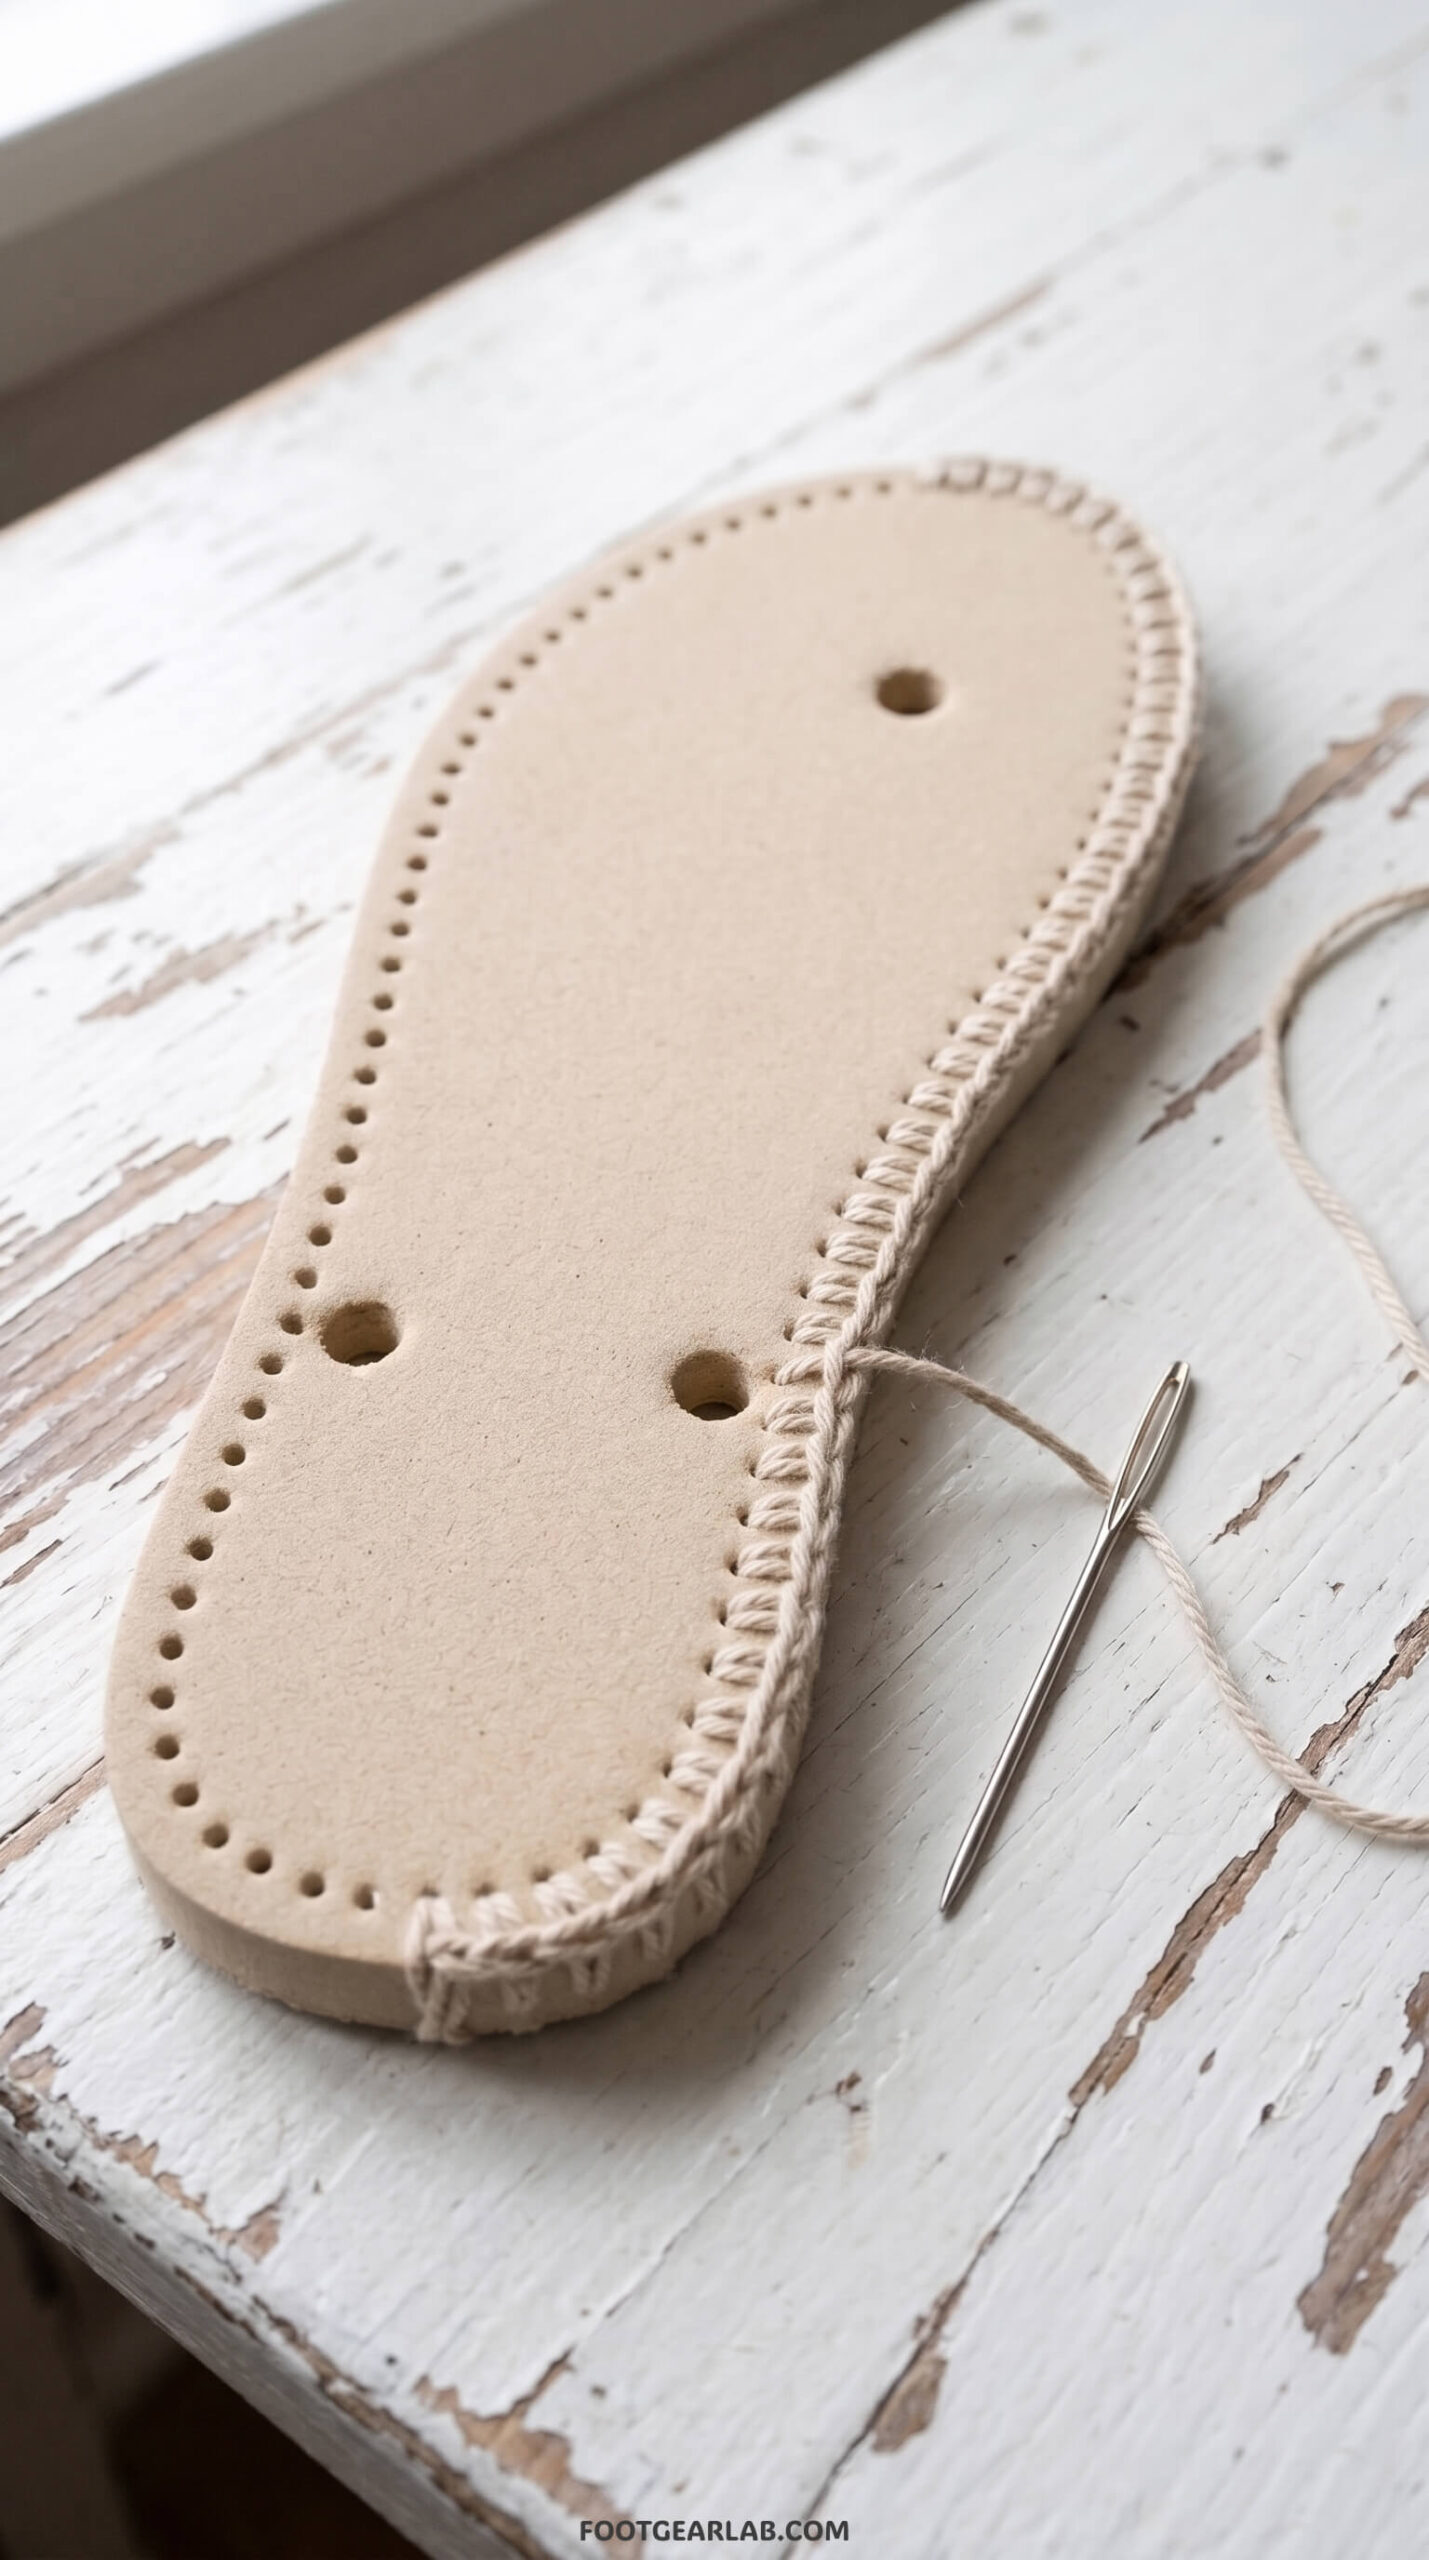
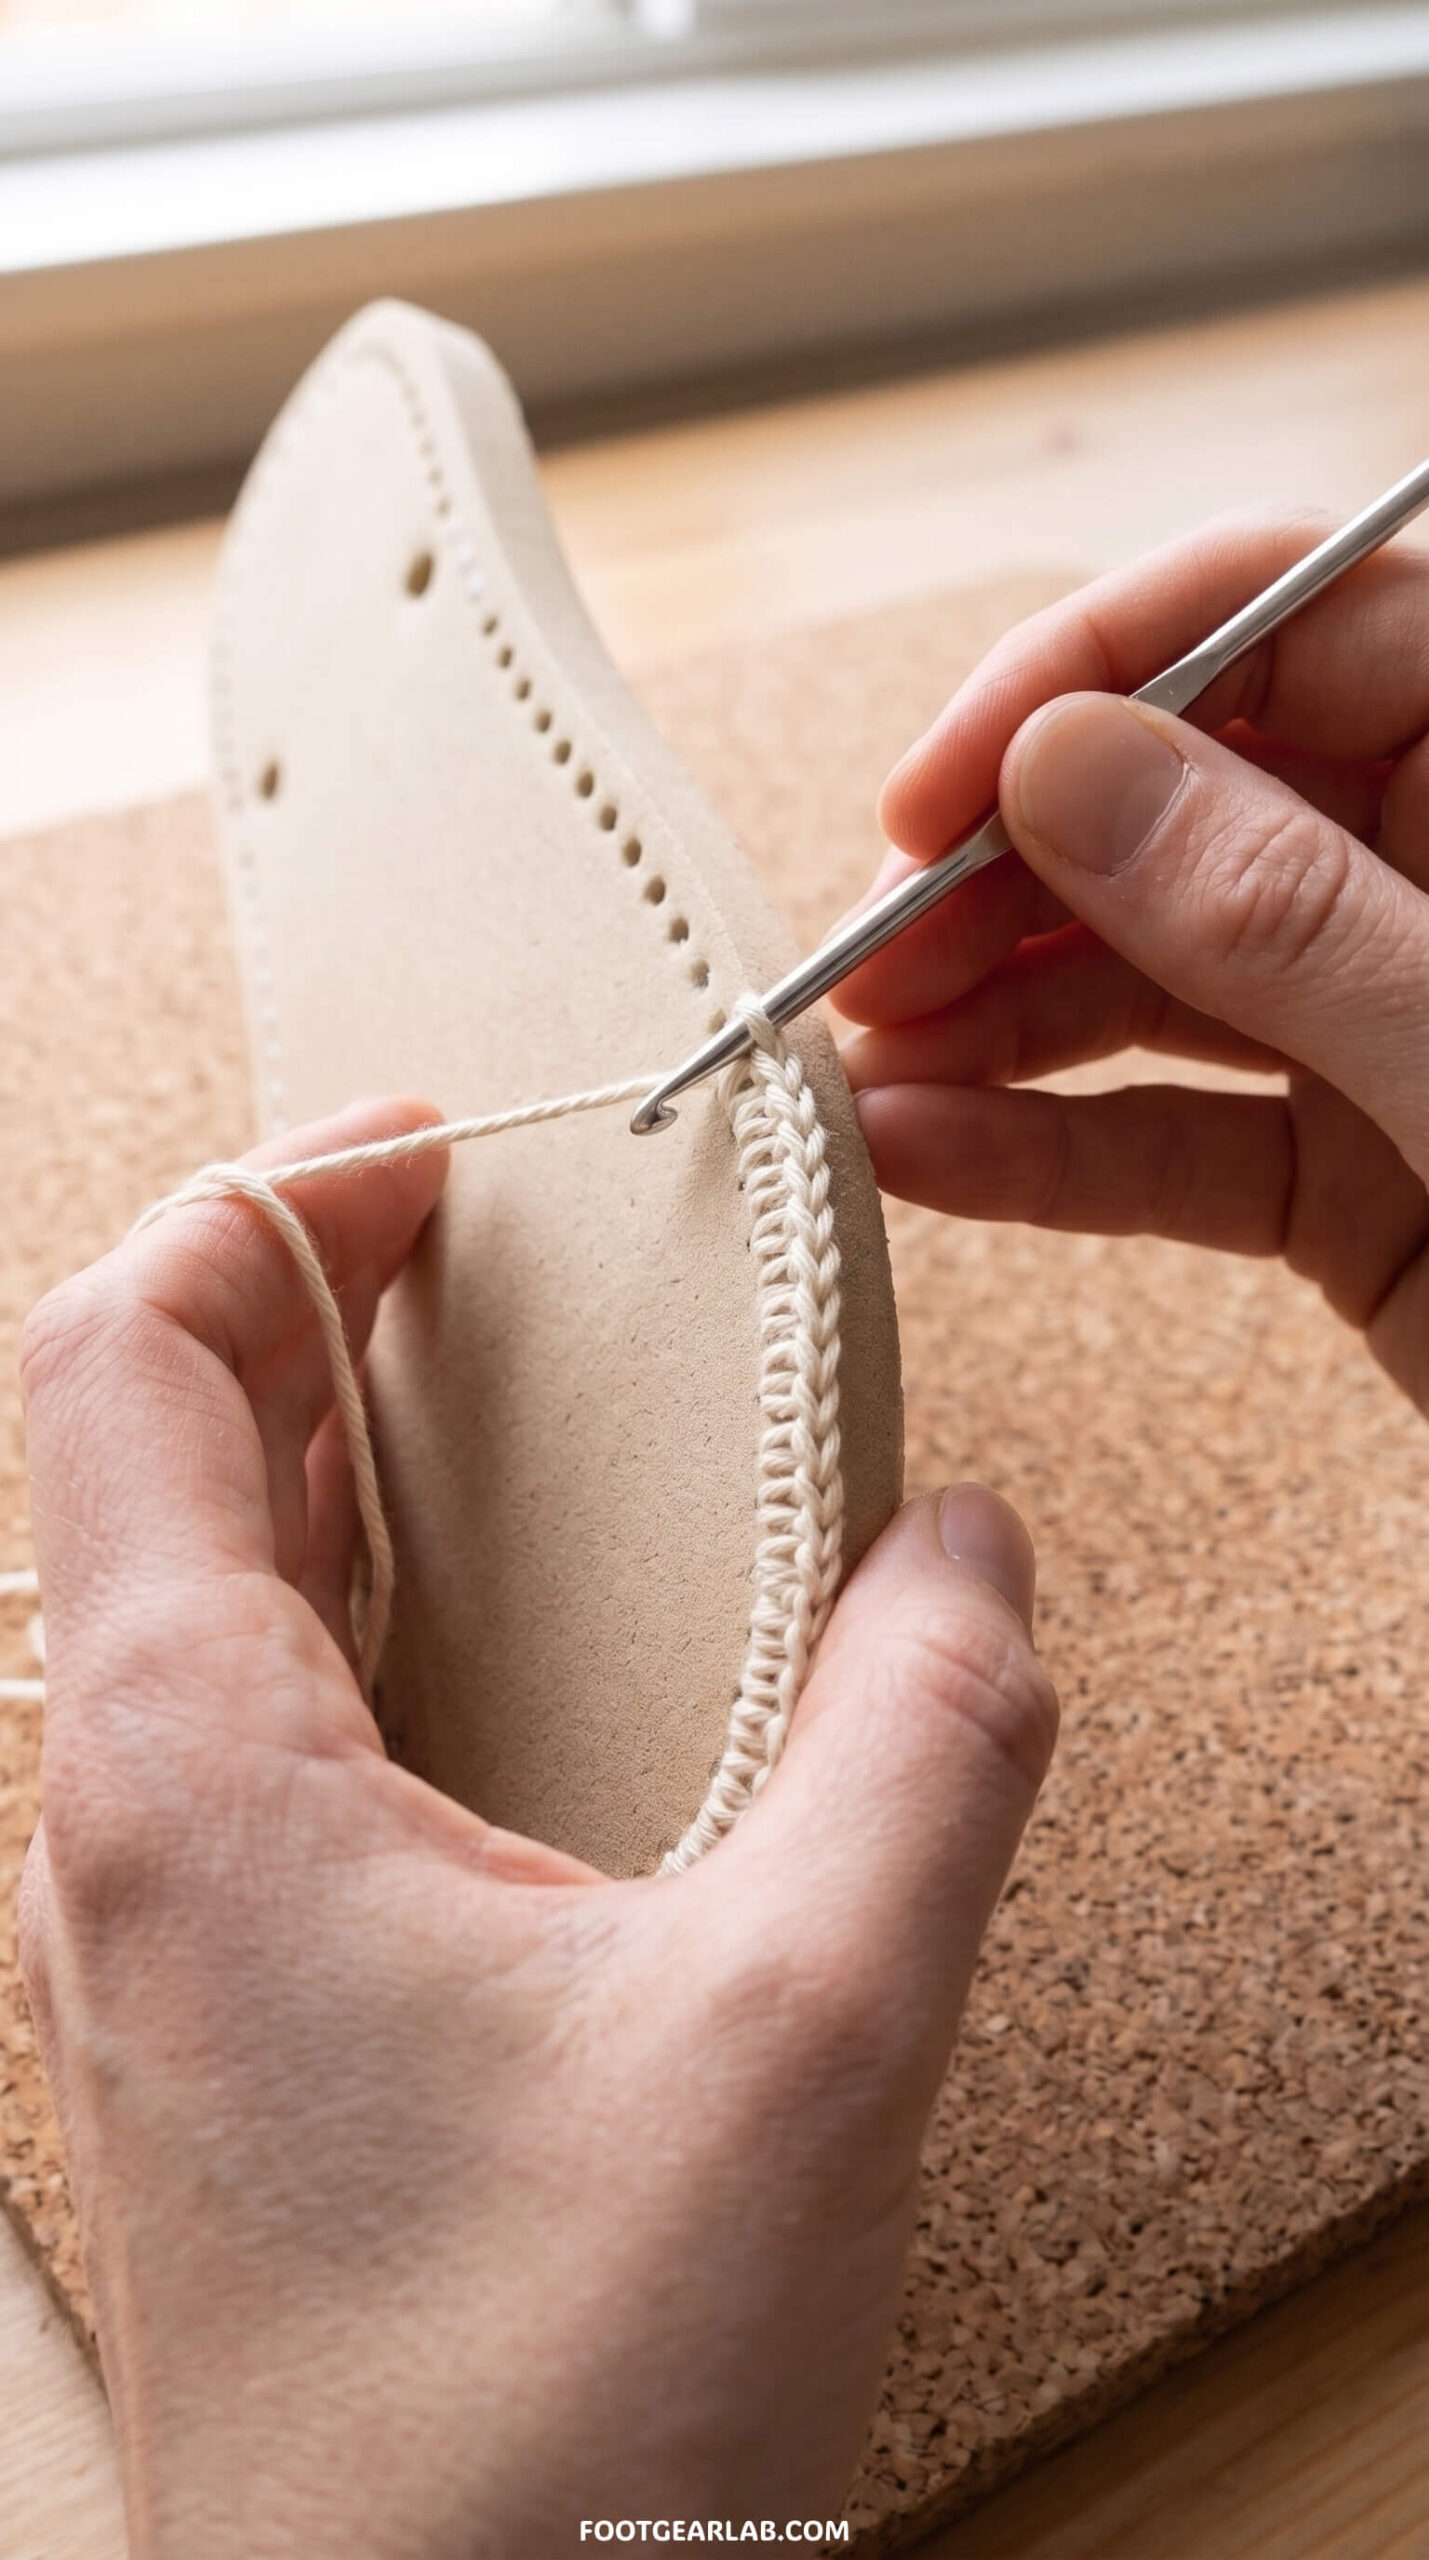
Thread your tapestry needle with a long length of yarn, about 2 to 3 meters for one sole, and work a blanket stitch around the entire edge. To do this, bring the needle up through the first hole from the bottom, leaving a tail. Then, for each following hole, push the needle down through the hole from the top, bring it around the outer edge of the sole, and pass it through the loop of yarn before pulling it snug. This creates a neat row of loops sitting along the top edge of the sole.
The beauty of this method is that you then crochet into those yarn loops with your regular-size hook rather than wrestling a hook through foam. It’s faster, kinder to your hands, and produces a very even base. Keep the tension firm but not so tight that it bends the sole.
Option B: Crochet Directly Into the Holes
If you’d rather crochet straight onto the sole, use your smaller hook. Insert the hook down through the first hole from the top, pull up a loop of yarn from underneath, and work a single crochet (sc). Continue working single crochets into each hole all the way around. On the straight sides, one or two sc per hole is usually enough. Around the curves of the toe and heel, work two or three sc into each hole so the edge stays flat and doesn’t pucker or pull the sole into a curl. Join with a slip stitch to the first sc when you reach the start.
Whichever method you use, aim for an even, relaxed edge that lies flat on the table. If the sole starts curling upward, you’re working too few stitches or pulling too tight; if the edge ruffles, you’re adding too many.
Step 5: Build the Side Wall
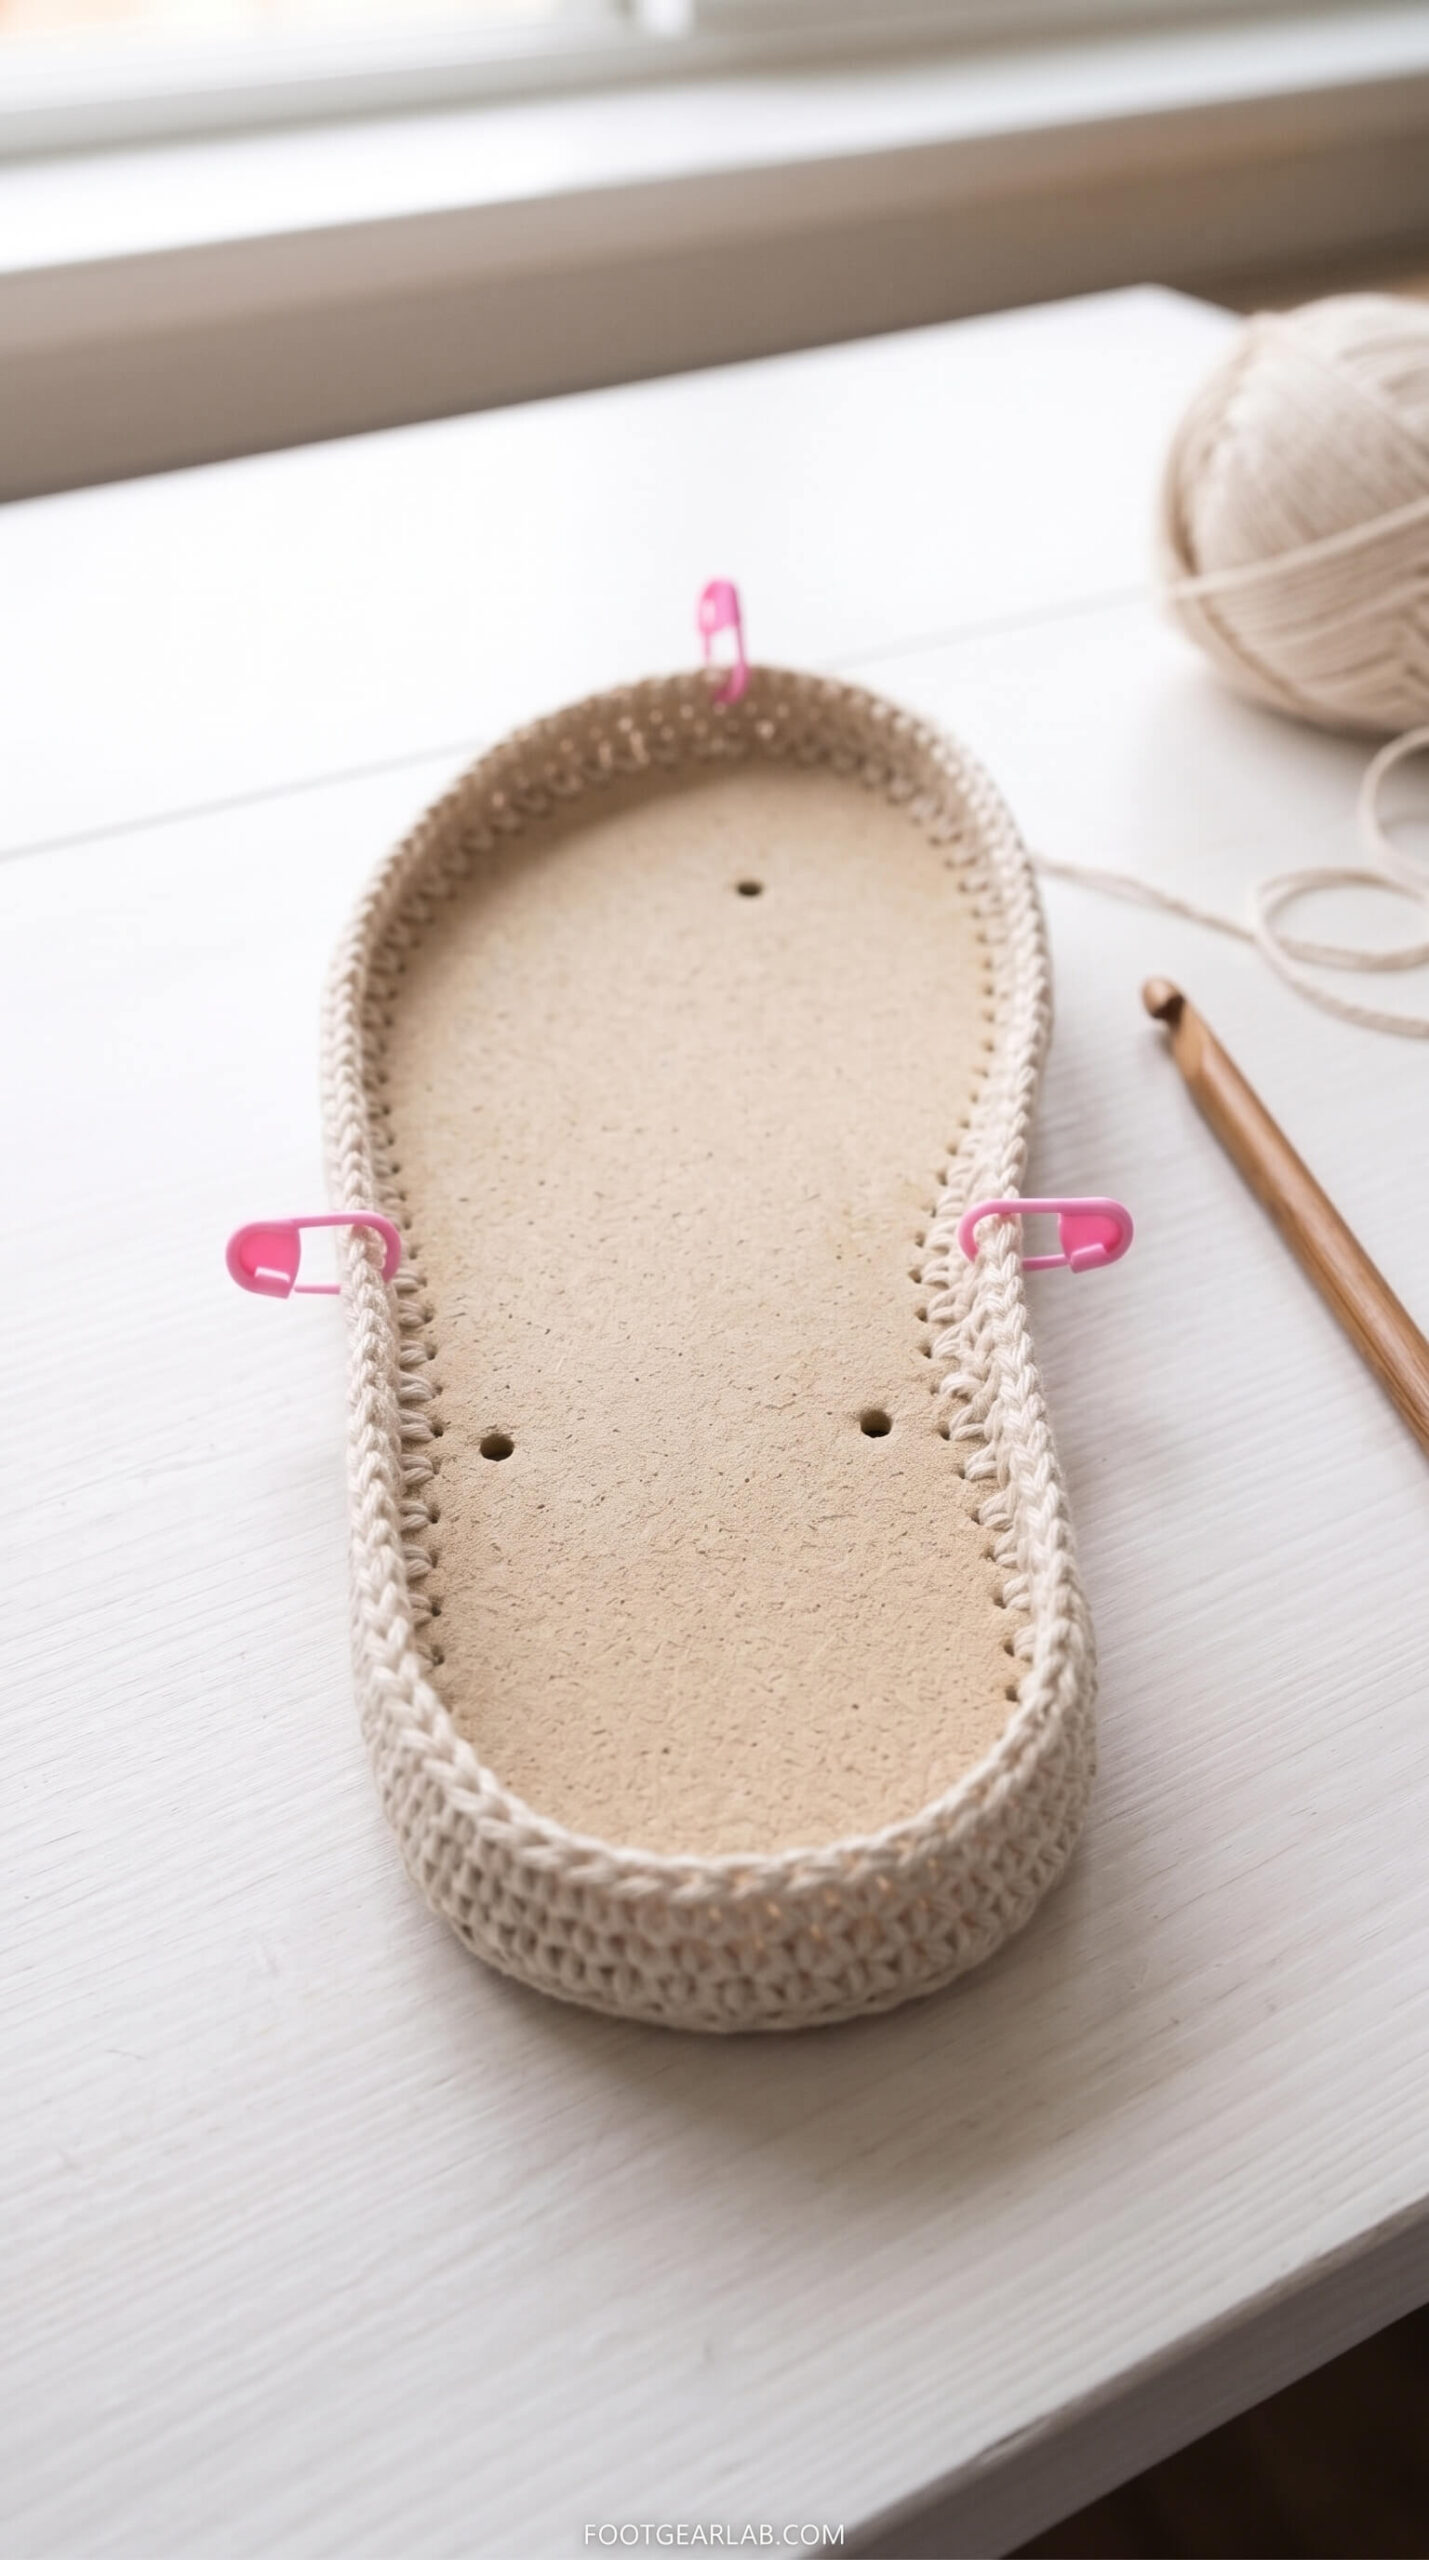
Switch to your main 4 mm to 5 mm hook. Working in rounds into the foundation stitches, crochet two to three rounds of single crochet all the way around without increasing. Join each round with a slip stitch and chain one before starting the next.
These rounds form a short wall, roughly 1 to 1.5 cm high, that rises straight up from the sole. This wall is important because it hides the foam edge, gives the slipper a finished look, and creates a sturdy base for the upper. If you want a more decorative edge, you can work the last wall round in a contrasting color or switch to back-loop-only single crochet, which creates a pretty horizontal ridge line where the wall meets the upper.
Before you move on, place stitch markers in three spots: one at the exact center of the toe, and one on each side at the widest part of your foot, roughly where the ball of your foot sits. The stitches between the two side markers across the front are where your toe cover or strap will go.
Step 6: Choose and Crochet Your Upper
This is the fun part, where your slippers get their personality. Below are three popular upper styles, ranging from the warmest and most traditional to the lightest and quickest. All three use standard US crochet terms.
Style 1: Cozy Closed-Toe Slipper
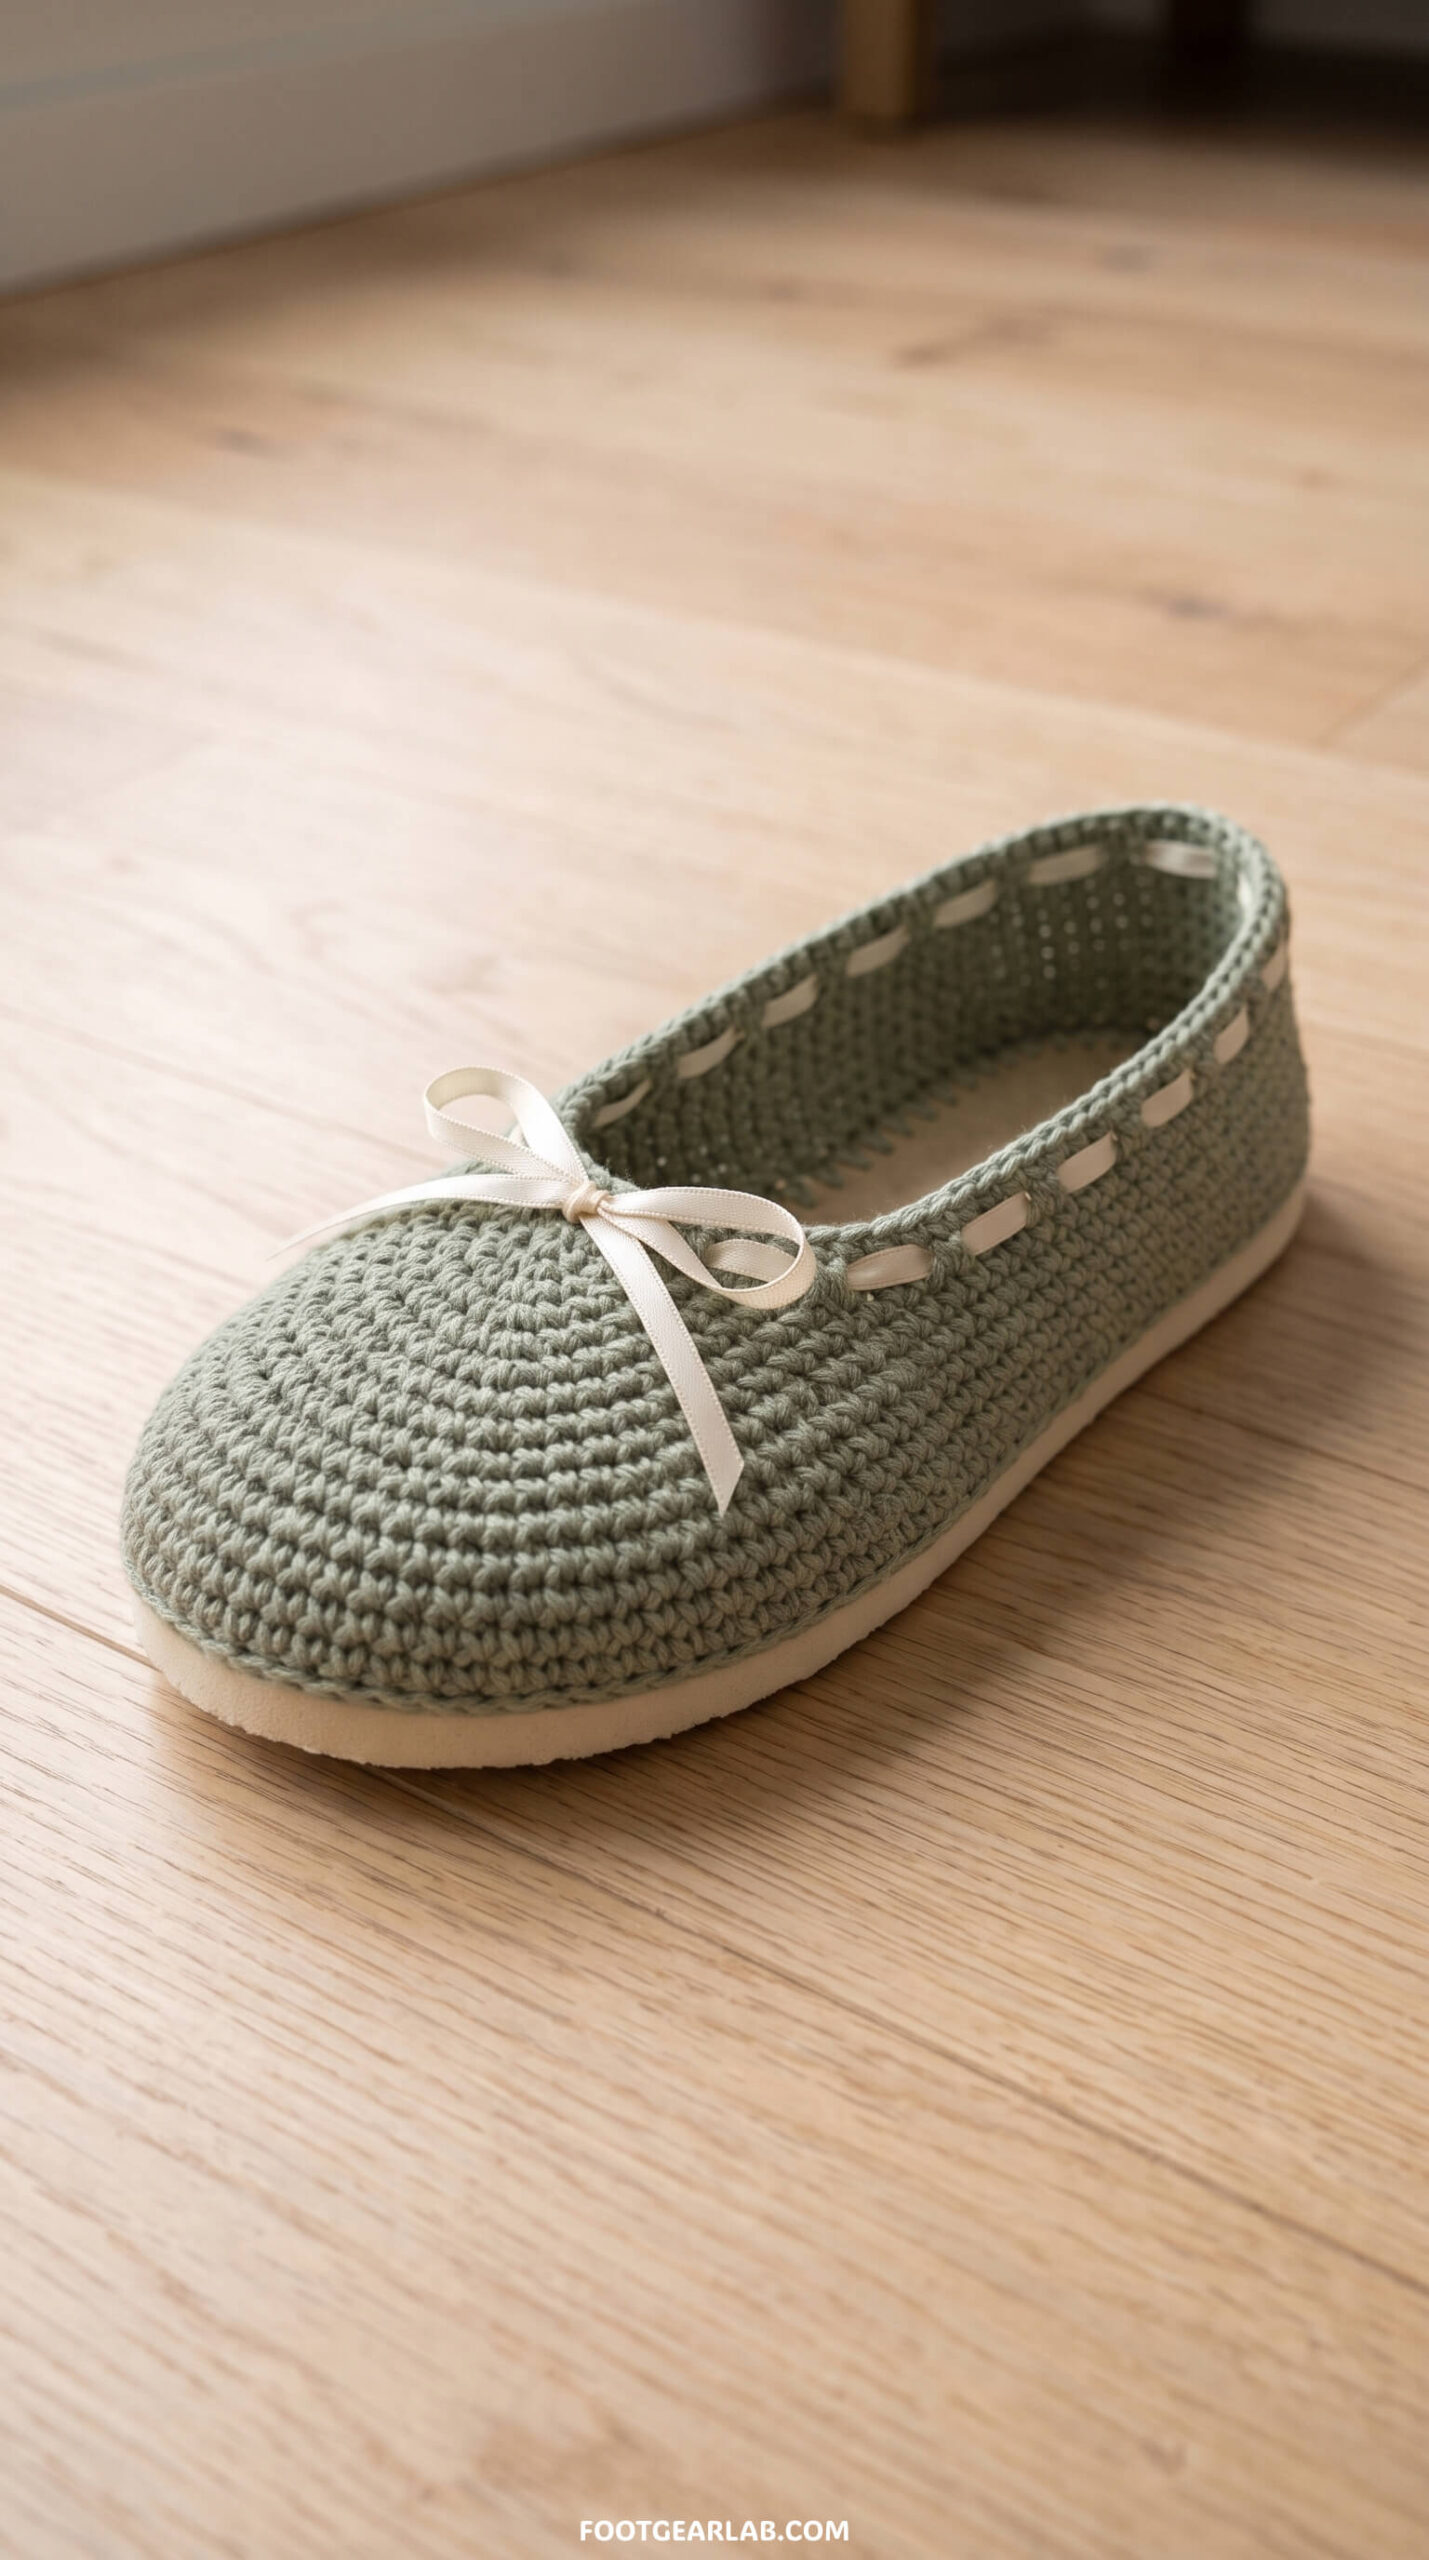
This style covers the toes and top of the foot like a classic house slipper and is perfect for cooler months.
Start by continuing to work in rounds, but now begin decreasing around the toe area. On each round, work single crochet two together (sc2tog) several times in the stitches across the toe section between your side markers, while working regular single crochet everywhere else. As you decrease, the wall will begin to curve inward and over the toes, forming a rounded toe box. Try the slipper on after every round, because the number of decreases you need depends on your foot shape and the thickness of your yarn.
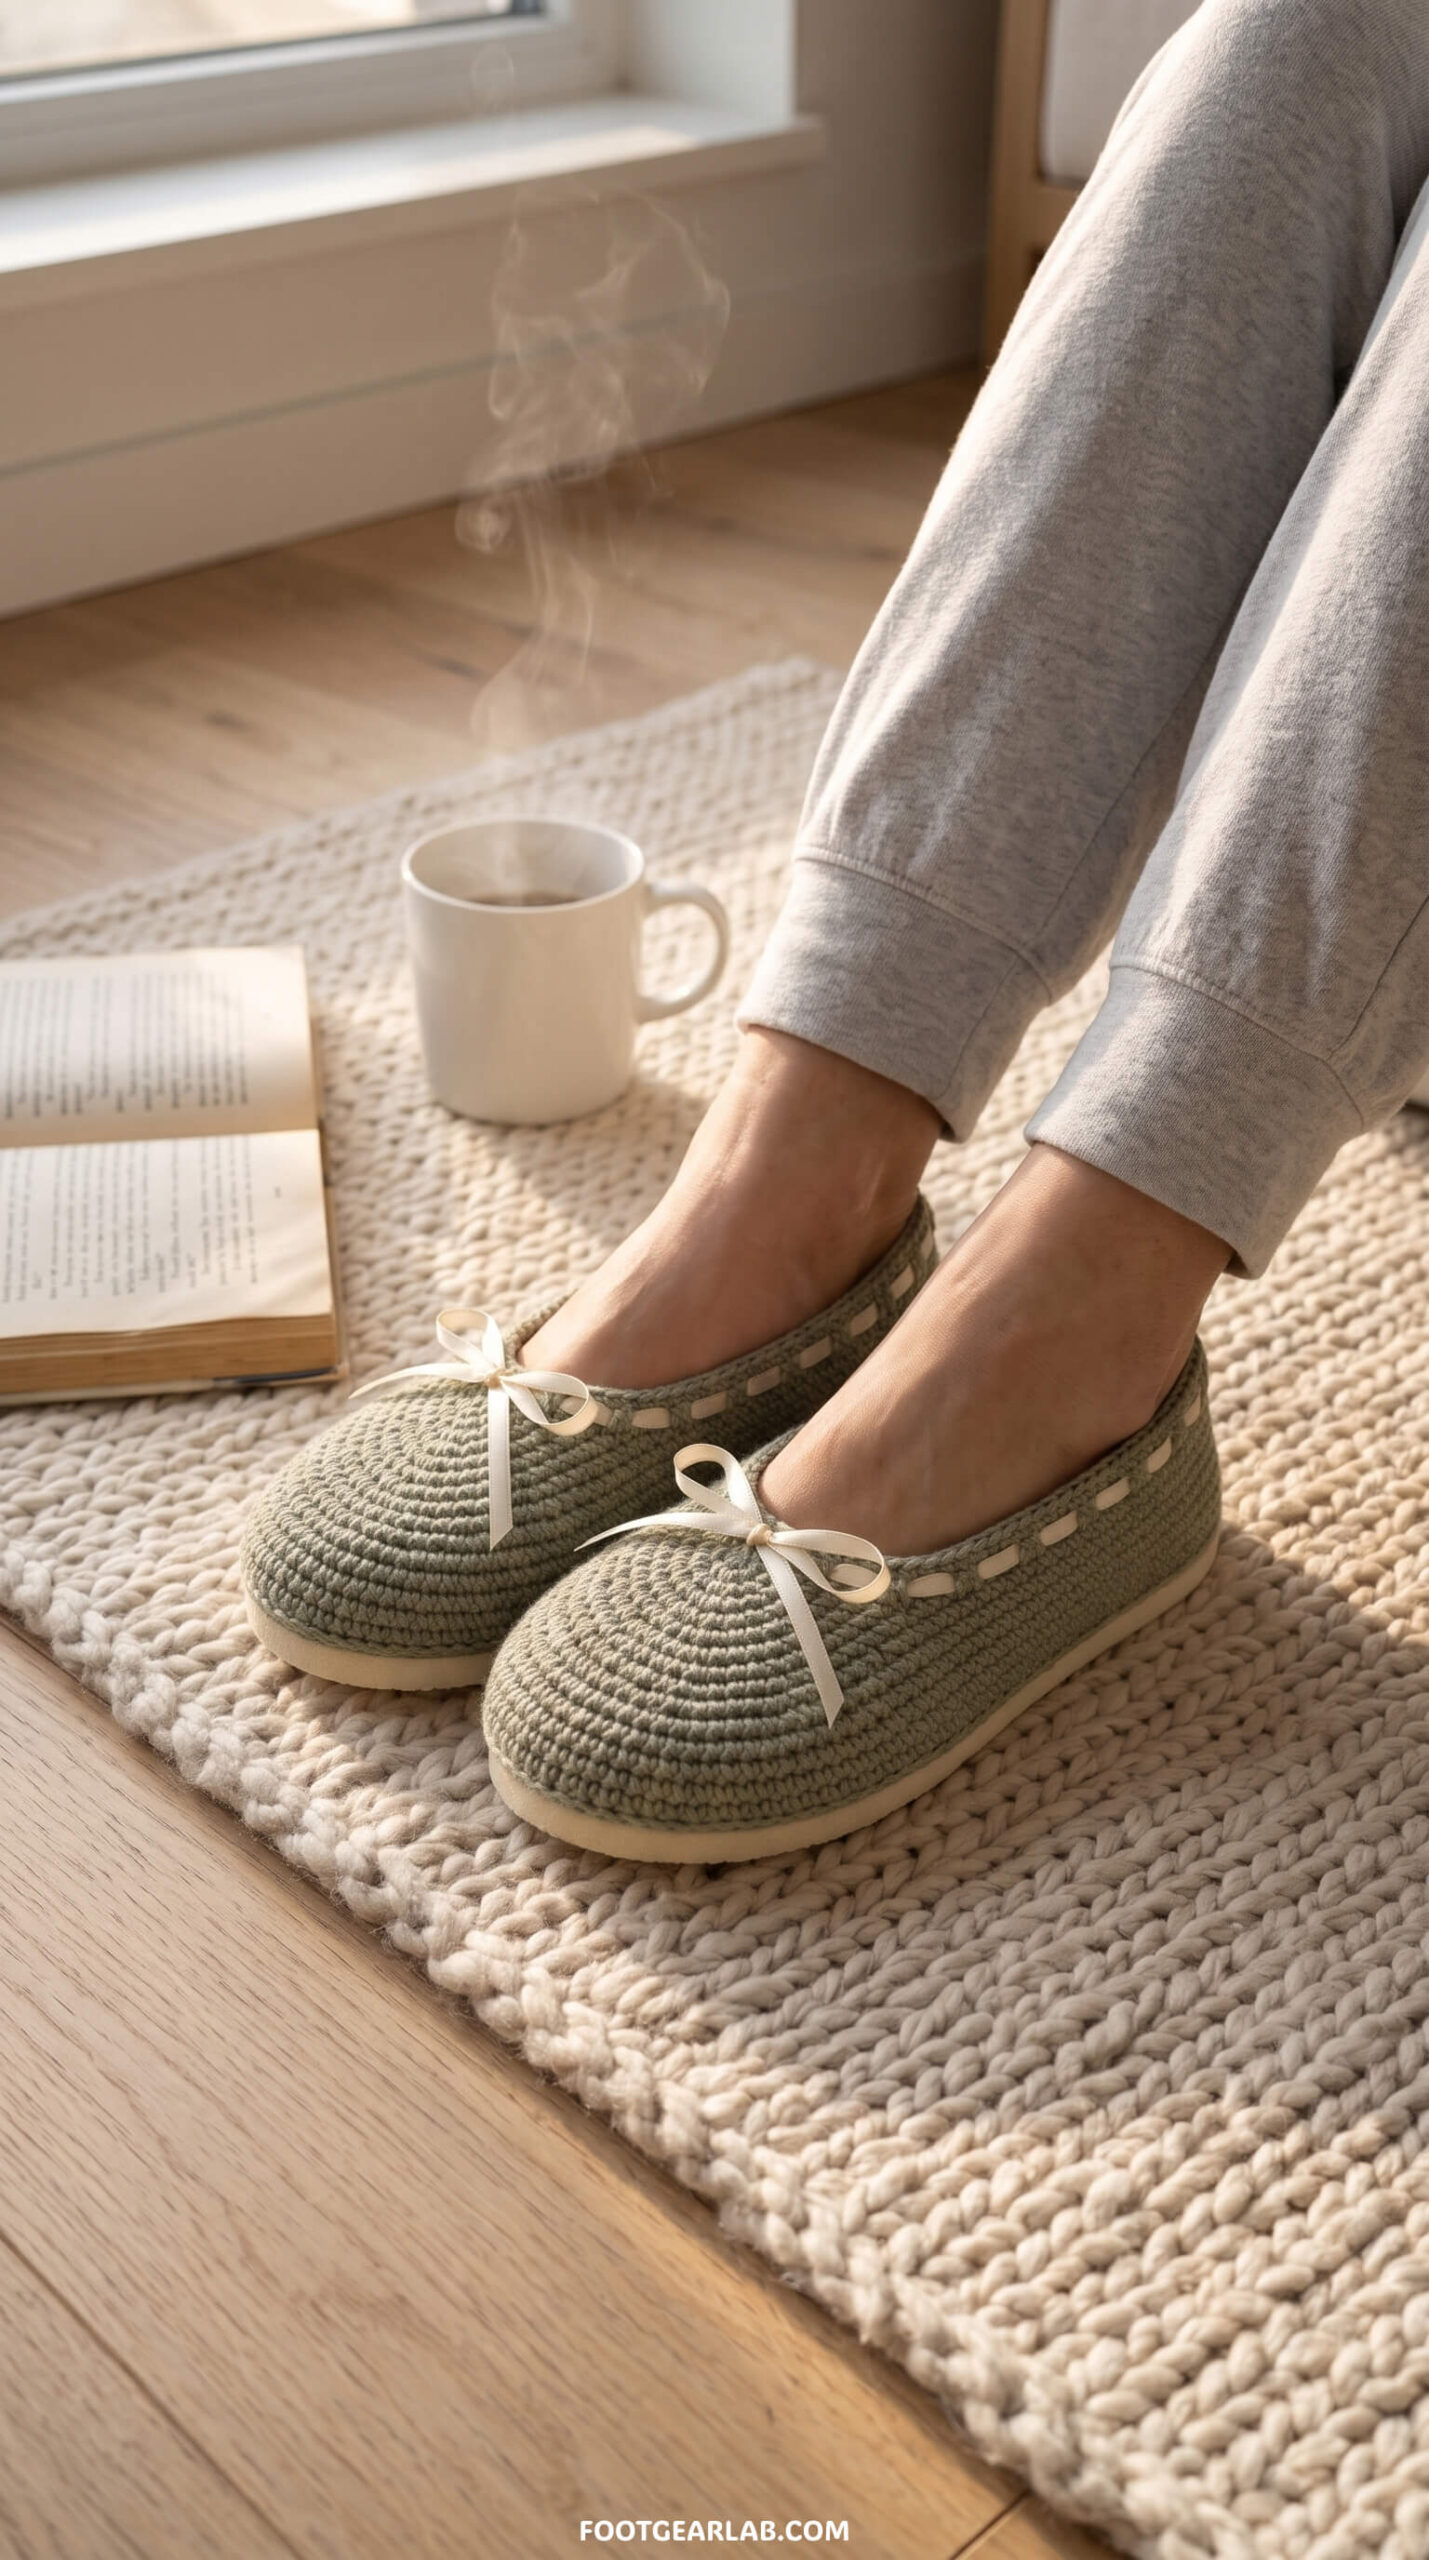
Once the toe cover reaches the base of your toes, stop working in full rounds. From here, work back and forth in rows only across the front stitches between the side markers, leaving the heel section uncovered. Turn at the end of each row and continue in single or half double crochet (hdc) until the upper reaches comfortably across the top of your foot to your instep. Finish by working one round of single crochet around the entire opening, including along the heel wall, to neaten the edge. For a snugger slipper, you can thread a length of yarn or ribbon through this final round and tie it in a small bow at the front.
Style 2: Open-Toe Slide
This style is fast, breezy, and works beautifully as a summer house shoe or poolside slide.
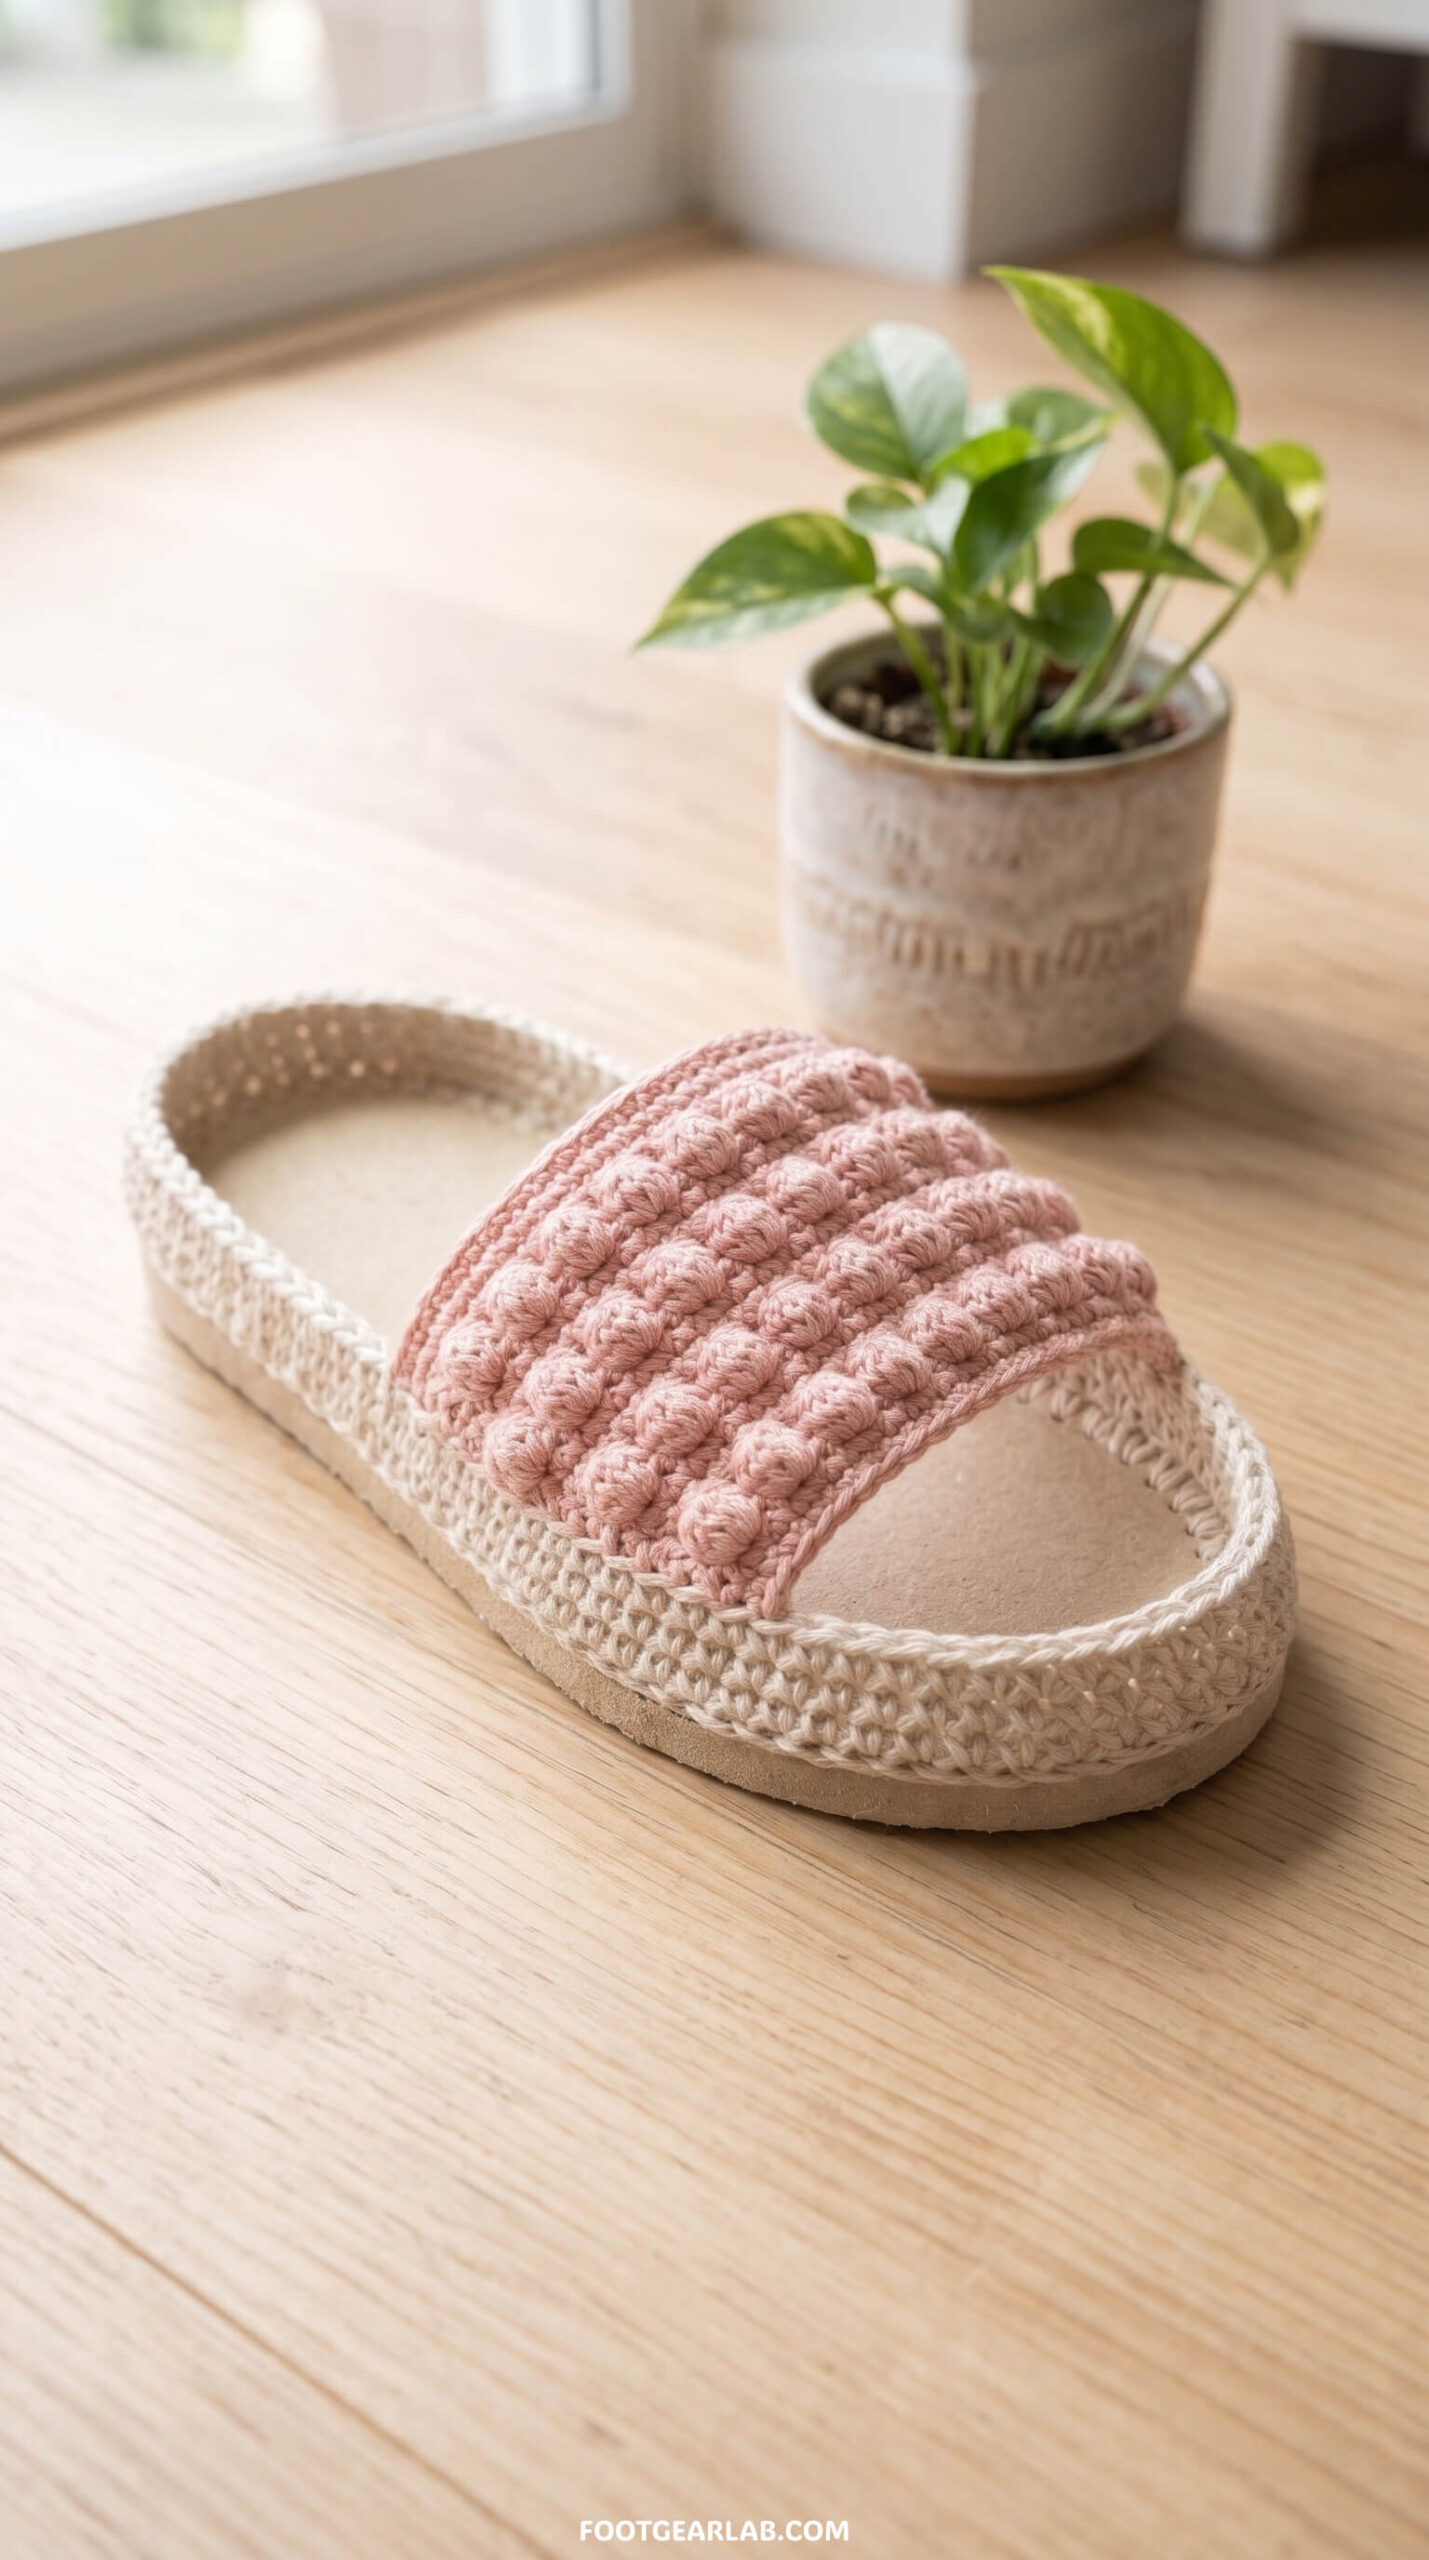
Instead of building over the toes, you’ll create a single wide band across the top of the foot. Attach your yarn at one side marker and work back and forth in rows across the front of the slipper, but this time you’ll build a strap that goes up and over the foot. Chain enough stitches to reach across the top of your foot from one side marker to the other, roughly 18 to 25 chains depending on your foot width, and attach the end with a slip stitch to the opposite side of the wall. Then work rows of single or half double crochet back and forth along this chain, attaching to the side wall at the end of each row, until the band is about 6 to 8 cm (2.5 to 3 inches) wide.
Slip your foot in to check the fit as you go. The band should hold the slipper on securely without pressing into the top of your foot. Textured stitches such as the bobble stitch, the moss stitch, or simple shells make this style look especially charming.
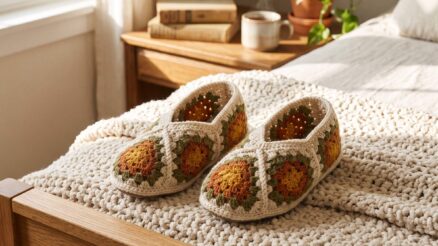
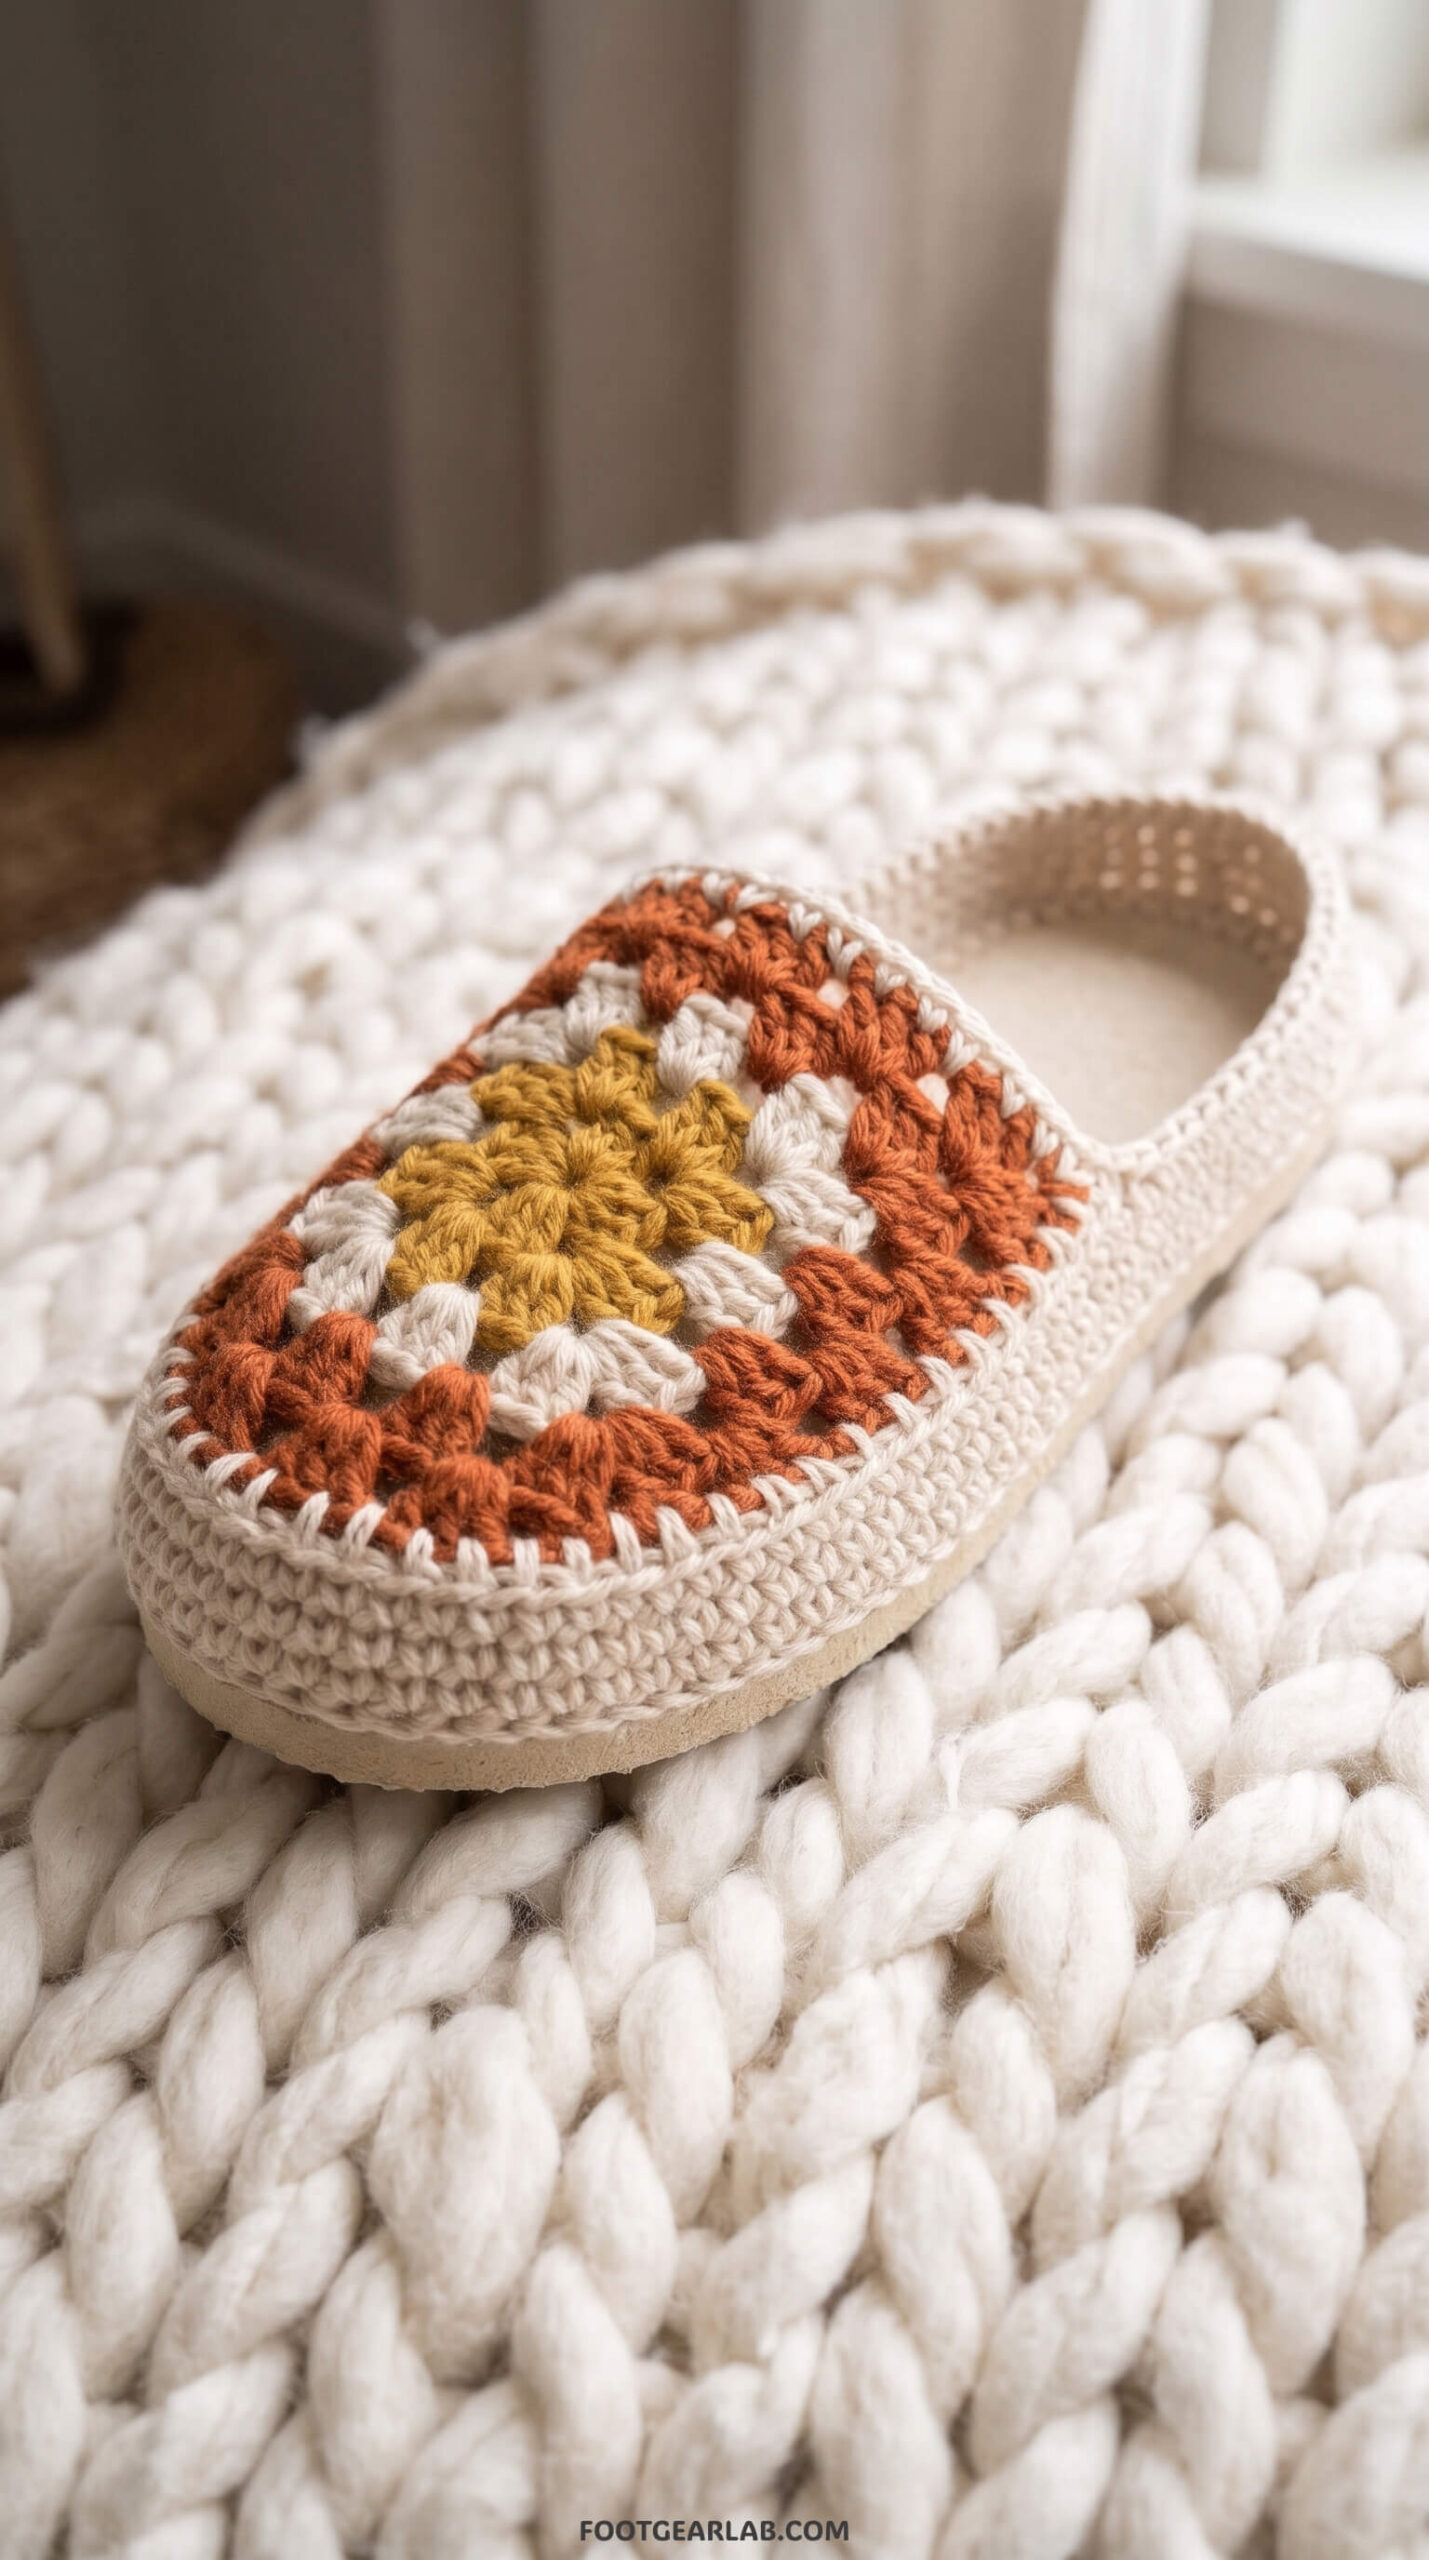
Style 3: Granny Square Top
If you love a vintage or cottagecore look, this style is a showstopper. Crochet one or two small granny squares, about 8 to 10 cm (3 to 4 inches) across, in colors that coordinate with your wall. Fold or position the square over the front of the slipper so it covers your toes and the top of your foot, then pin it in place along the wall. Using a tapestry needle and matching yarn, sew the edges of the square securely to the top round of the side wall, or join them with a round of slip stitches for a raised seam.
You can also use two granny squares side by side to form a wider strap, or a single granny square folded into a triangle for a pointed toe. This is a wonderful way to use up leftover scrap yarn, and no two pairs ever look exactly alike.
Step 7: Finish and Weave In Your Ends
Once your upper is complete, fasten off and leave a tail of about 15 cm (6 inches). Thread the tail through your tapestry needle and weave it back and forth through several stitches on the inside of the slipper, changing direction at least once so it won’t work loose. Repeat for every loose end, including the starting tail from the foundation round.
If you’re worried about the yarn on the underside wearing through from walking, you can protect it by brushing a thin line of flexible craft glue over the stitches on the bottom of the sole, just along the edge. Let the glue dry fully before wearing. Finally, make the second slipper following the same steps, counting your rows and decreases as you go so both slippers match perfectly.
Getting the Perfect Fit
Fit is what separates slippers you’ll wear every day from slippers that sit in a drawer. The most important habit is to try the slipper on frequently, ideally after every round or every couple of rows on the upper. Feet vary a lot in width and height, and no written pattern can perfectly predict yours.
Remember that cotton has very little stretch, so if you’re using 100% cotton yarn, make the upper just slightly roomier than feels perfect when you first try it on. Acrylic and blends stretch a little with wear, so a snug fit at the start is ideal for those. If your slippers feel loose after a few weeks, you can tighten them by threading a drawstring or ribbon through the final edge round.
Common Problems and Easy Fixes
Even experienced crocheters run into small hiccups with this project. Here are the most common ones and how to solve them quickly.
| Problem | Likely Cause | How to Fix It |
|---|---|---|
| Sole curls up at the edges | Foundation stitches pulled too tight, or too few stitches around curves | Loosen your tension and add 2 to 3 stitches per hole around the toe and heel |
| Wall ruffles or waves | Too many stitches in the foundation round | Rework the round with fewer stitches on the straight sides |
| Holes tearing through the foam | Holes punched too close to the edge, or sole too thin | Punch new holes slightly farther in, or choose a thicker pair of flip flops |
| Upper feels too tight | Not enough rows, or cotton yarn with no stretch | Add an extra row or two, or switch to a hook one size larger for the upper |
| Slipper slides off the heel | Upper doesn’t reach far enough up the instep | Add more rows to the upper, or add a drawstring or heel strap |
| Hook keeps snagging in the holes | Holes too small for the hook | Widen holes with an awl, or use the blanket stitch method instead |
How to Care for Your Crochet Flip Flop Slippers
Because these slippers combine yarn with a foam sole, gentle care will keep them looking fresh much longer. Hand washing is the safest option. Fill a basin with cool water and a small amount of mild detergent, swish the slippers gently, and use a soft brush or old toothbrush on any dirty spots, especially along the sole edge. Rinse well in clean water.
Avoid wringing or twisting them, as this can stretch the stitches and stress the holes in the sole. Instead, press out excess water with a towel and let the slippers air dry flat or standing upright, away from direct heat or harsh sunlight, which can warp foam soles and fade yarn. Never put them in the dryer. If you used wool yarn, wash only in cool water to prevent felting and shrinking.
Creative Ideas to Make Your Slippers Unique
Once you’ve made your first pair, it’s easy to get creative. Try a two-tone look by working the wall in one color and the upper in another, or add a row of contrasting stripes across the toe. Little embellishments such as crocheted flowers, wooden buttons, pom-poms, or a few beads stitched along the band can turn a simple pair into something special.
These slippers also make thoughtful handmade gifts. Pick up flip flops in a friend’s size, match the yarn to her favorite colors, and pair them with a candle or bath bombs for a cozy self-care gift set. Matching mother-daughter pairs, bridesmaid slippers for the wedding morning, or holiday-themed pairs in red and white are all lovely ideas.
Frequently Asked Questions
Can I wear crochet flip flop slippers outside? Yes, that’s one of their biggest advantages. The rubber or foam sole gives you real grip and protection for short outdoor trips like the garden, patio, or beach. Just keep in mind that the yarn upper will get dirty faster outdoors, so cotton or a washable blend is the best choice if you plan to wear them outside often.
Do I need to be an advanced crocheter to make these? Not at all. If you can chain, single crochet, and work a decrease, you can make these slippers. The open-toe slide is the easiest style for beginners, and the blanket stitch foundation method removes the trickiest part of attaching yarn to the sole.
How long does it take to make a pair? Most crafters can finish a pair of open-toe slides in an afternoon, roughly 3 to 4 hours including sole prep. Closed-toe slippers usually take a little longer, around 5 to 7 hours, because of the shaping and frequent fittings.
Can I use old flip flops? Absolutely, as long as the soles are still in good shape with no deep cracks or worn-through spots. Upcycling an old pair with a broken strap is one of the best ways to use this technique. Just clean them thoroughly with warm soapy water and let them dry completely before you start.
What if my flip flops have a printed or textured footbed? That’s completely fine, since your foot will rest on the original footbed. If the surface feels rough, you can glue a thin felt or foam insole cut to the same shape on top for extra softness.
Final Thoughts
Crochet slippers with flip flop soles are one of those projects that feel almost too clever to be so easy. You get the comfort and charm of handmade slippers with the grip, cushioning, and durability of a real shoe, all for the cost of a cheap pair of flip flops and a skein or two of yarn. Whether you choose a cozy closed-toe style for winter evenings, a breezy slide for summer, or a colorful granny square design to show off your scrap yarn, you’ll end up with a pair you’re proud to wear and gift.
Save this guide to your crochet board so you have the steps handy, and once you’ve made your first pair, try experimenting with new colors and textures. Before long, you may find yourself making a pair for every season.