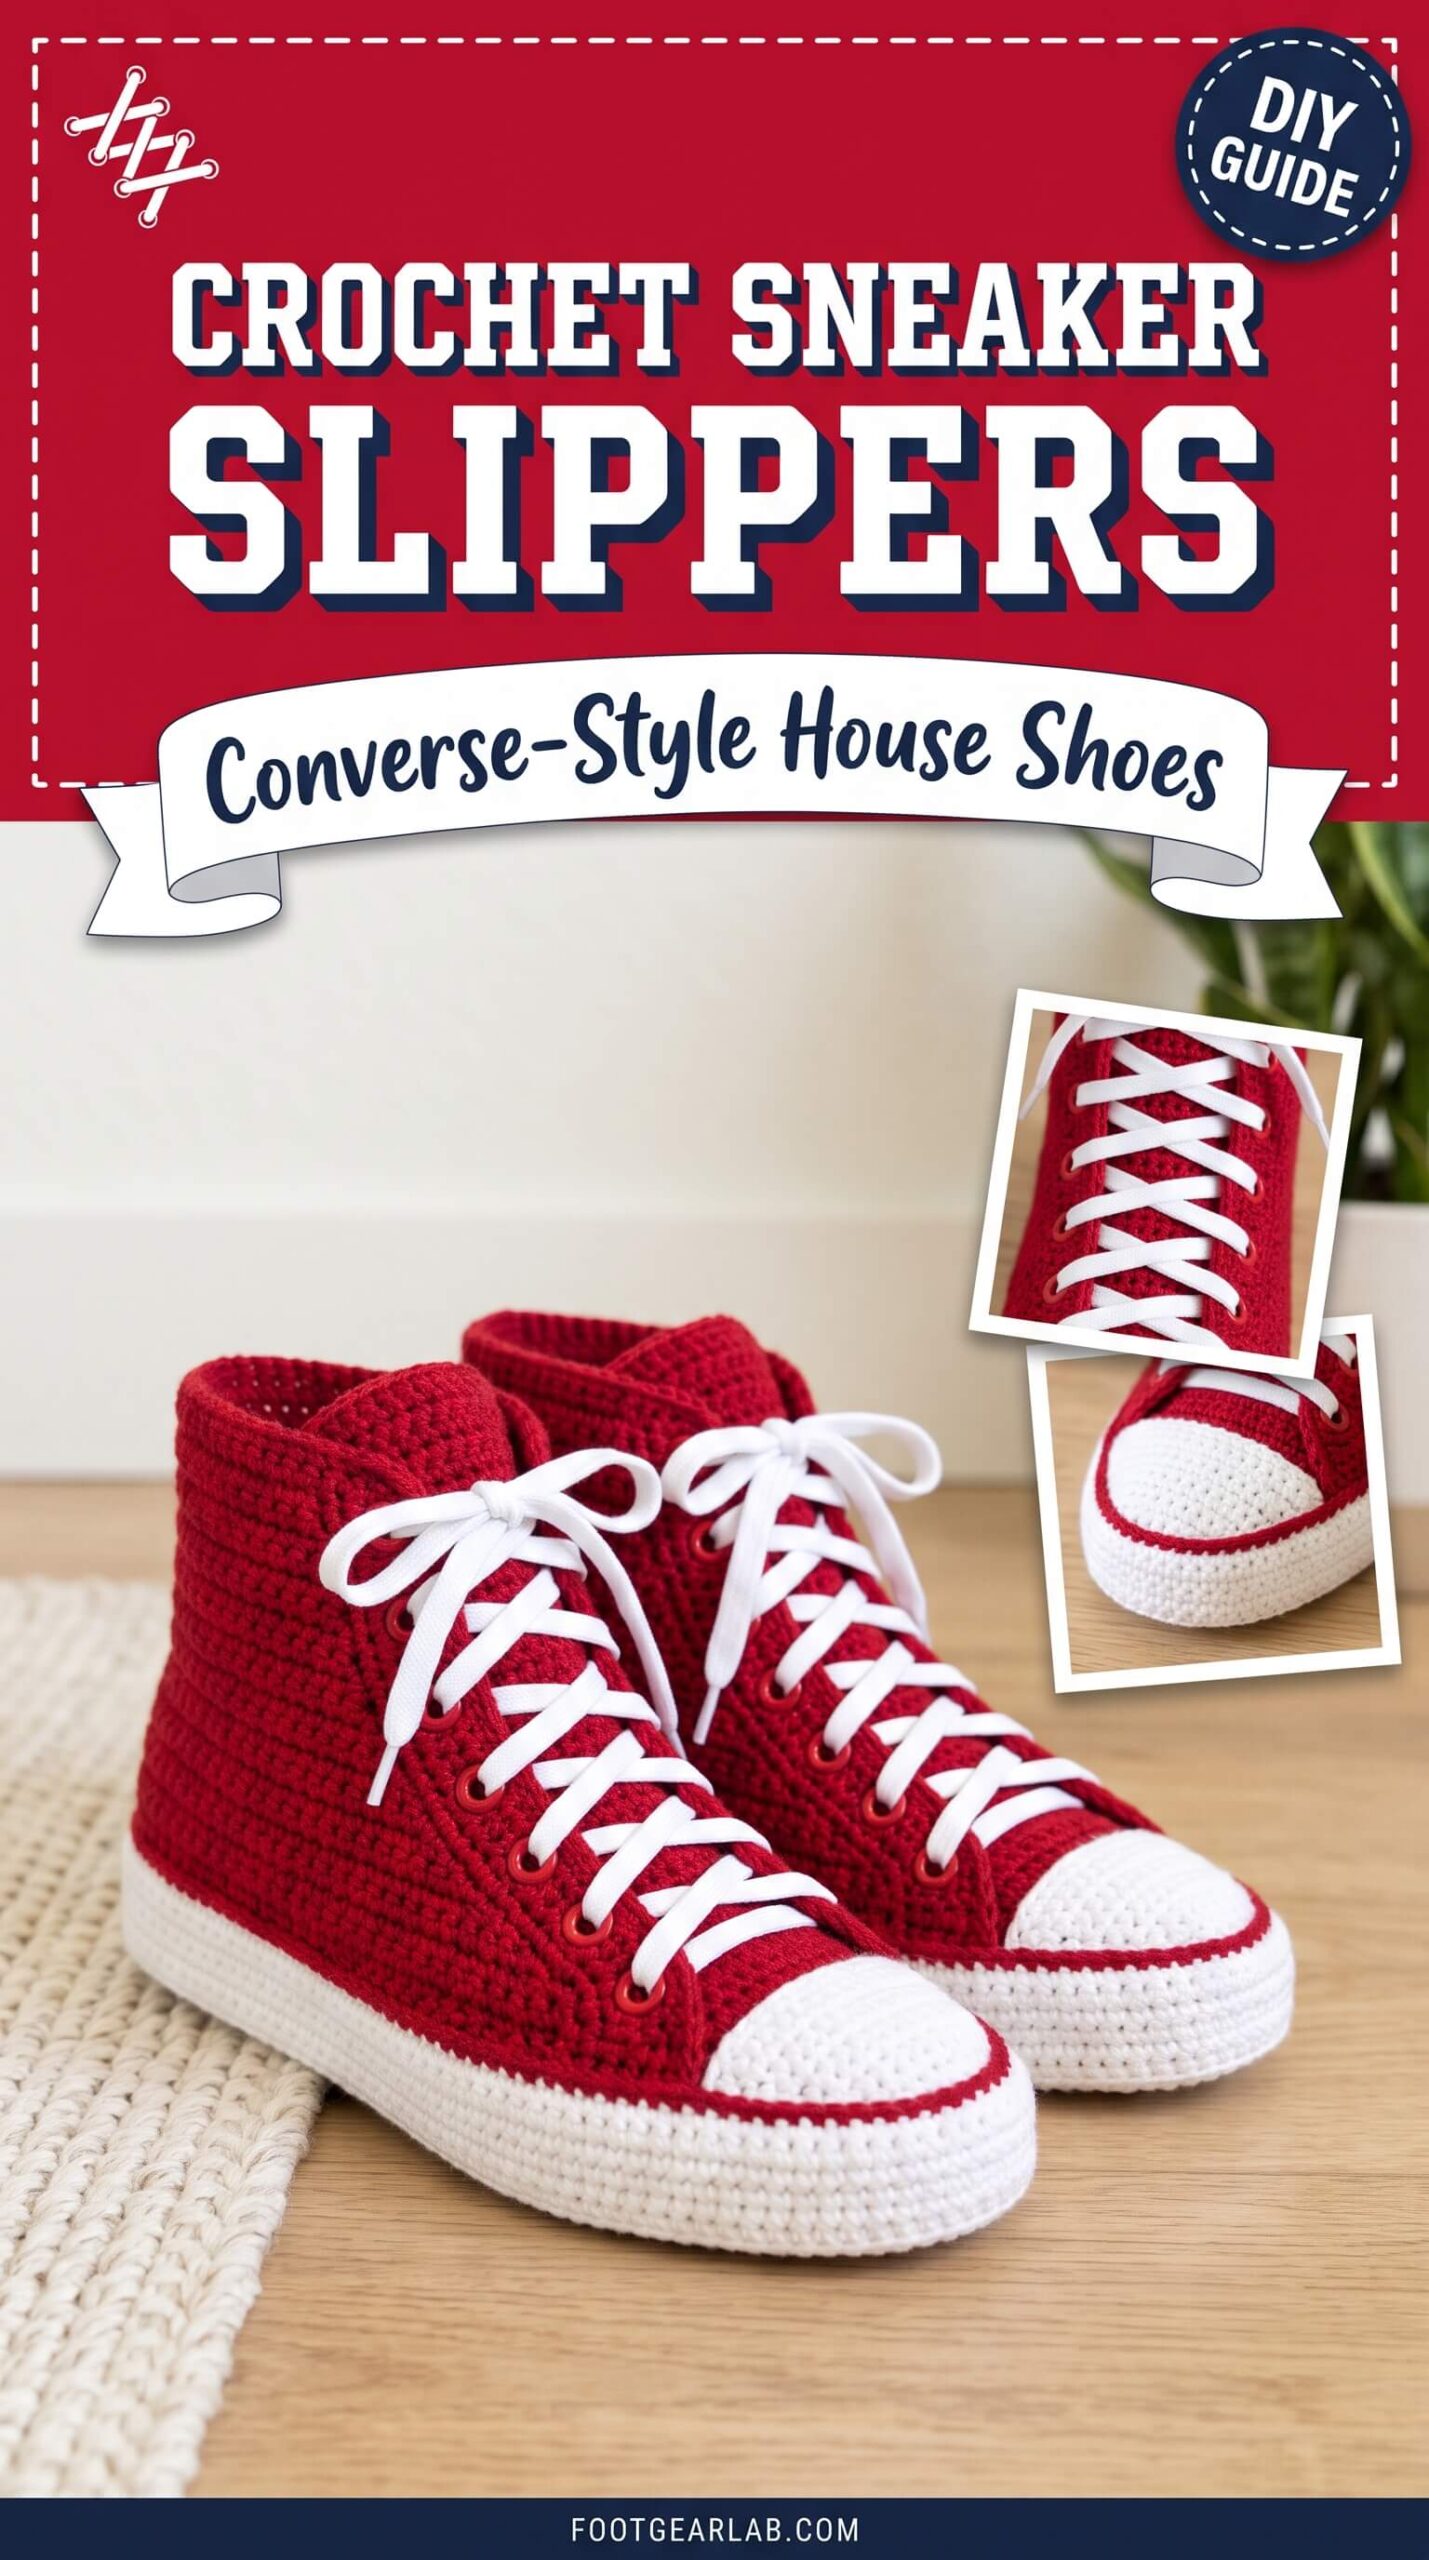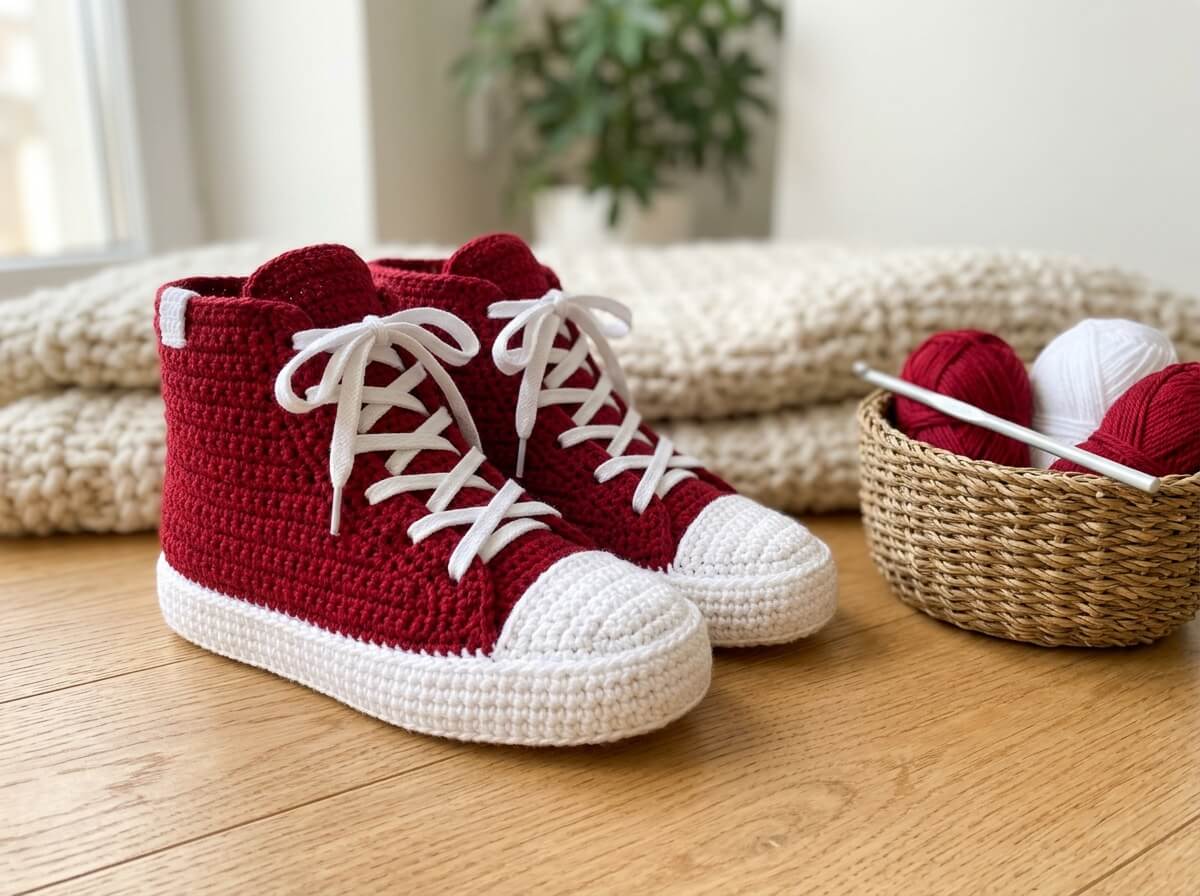
There is something irresistible about a pair of classic canvas high-tops. They go with everything, they never really go out of style, and they make even the simplest outfit look relaxed and cool. Now imagine that same iconic look, but soft, cozy, and made for padding around the house in your pajamas. That is exactly what crochet sneaker slippers are: handmade house shoes with a thick white “rubber” sole, a rounded white toe cap, a laced-up front, and a high-top shape that hugs your ankles.
These Converse-style slippers have become a favorite on Pinterest and among crochet lovers because they are fun to make, adorable to wear, and surprisingly practical. The laces let you adjust the fit, the high-top keeps your ankles warm, and the double-layer sole feels comfortable underfoot. They also make a wonderful handmade gift, since almost everyone owns (or once loved) a pair of canvas sneakers.
In this guide, you will learn what makes a crochet slipper look like a real sneaker, which yarn and tools to use, how to get the right size, and how to make your own pair step by step. You will also find six cute color ideas, tips for a polished finish, and easy care advice so your slippers stay crisp and cheerful for a long time.
Why You’ll Love Crochet Sneaker Slippers
Crochet sneaker slippers combine two things many of us adore: the comfort of house shoes and the playful style of everyday sneakers. Here is why they deserve a spot on your hook this season.
- They look like real sneakers. Thanks to the white sole wall, the toe cap, and the laces, these slippers instantly read as “sneakers” from across the room. Friends and family will often do a double take before realizing they are handmade.
- The laces give you a custom fit. Unlike slip-on slippers that can stretch out and slide off, a laced front lets you tighten or loosen the fit every time you put them on. This is especially helpful if you have narrow heels, high insteps, or feet that swell a little by the end of the day.
- They keep your ankles warm. The high-top shaft covers the ankle bone, so cold drafts cannot sneak in the way they do with low slippers. It is a small detail that makes a big difference on chilly mornings.
- They are a fun skill builder. If you can work single crochet, half double crochet, and simple decreases, you can make these. Along the way, you will practice shaping, working in rounds and rows, and sewing pieces together, which will make many future projects easier.
- They are endlessly customizable. Change the main color, swap the laces, add a contrast stripe, or turn them into low-tops. Every pair can match a different personality, which makes them perfect for gifts and matching family sets.
What Makes a Crochet Slipper Look Like a Sneaker?
Before you pick up your hook, it helps to understand the few details that create the classic high-top look. When these elements are in place, your slippers will look like sneakers even in simple yarn.
The thick white sole wall. Real canvas sneakers sit on a tall white rubber sole, so the most important feature of a crochet version is a crisp white wall that rises straight up around the bottom of the slipper. You create this by crocheting a flat oval sole, then working into the back loops only so the edge turns upward like the sides of a tray. A double-layer sole underneath adds cushioning and makes the wall look even more solid.
The rounded toe cap. The white rubber toe cap is the signature detail that makes people instantly recognize the style. In crochet, it is easiest to make the toe cap as a small separate D-shaped piece and sew it over the front of the toe, so its curved edge meets the white sole wall. This gives you a clean, sharp line between the white toe and the colored upper.
The laced front and tongue. A front opening with two eyelet bands, a tongue underneath, and criss-crossed laces completes the sneaker look. You can crochet the eyelets directly into the fabric or add metal eyelets for an extra-realistic finish.
The high-top shaft. The upper rises just above the ankle bone at the back and sides. This is worked in rows, back and forth, which leaves the front open for the laces.
A small heel tab. A narrow vertical strip of white at the center back of the heel is a subtle finishing touch. It is optional, but it adds to the sporty look and gives you a handy loop-free spot to grab when pulling the slippers on.
Materials and Tools You’ll Need
The right materials make a huge difference with this project, because a sneaker look depends on a firm, crisp fabric rather than a floppy one.
- Yarn in your main color. Worsted weight (category 4) cotton or a cotton blend gives the cleanest sneaker look, because it holds its shape and shows each stitch clearly. Acrylic works too and is softer and warmer, while a wool blend is the coziest choice for winter. For an average women’s pair, plan on roughly 150 to 200 grams (about 300 to 400 yards) of your main color, depending on your size and how tall you make the shaft.
- White yarn for the sole and toe cap. Choose the same weight and fiber as your main color so the pieces match in thickness. About 100 grams (around 200 yards) of white is usually enough for a pair of women’s slippers with double soles.
- A crochet hook. A 4.5 mm (US 7) hook is a good starting point for worsted cotton. Using a hook a little smaller than the yarn label suggests creates a denser fabric that will not stretch out and looks more like canvas.
- Locking stitch markers. You will need at least two for marking the toe section, plus a few extras to mark the beginning of your rounds.
- A tapestry needle. A blunt yarn needle is used for sewing on the toe cap, tongue, and heel tab and for weaving in ends.
- Laces. Flat white cotton shoelaces look the most authentic. You can also crochet your own laces from a simple chain.
- A measuring tape and scissors. You will measure your foot before starting and check your sole as you go.
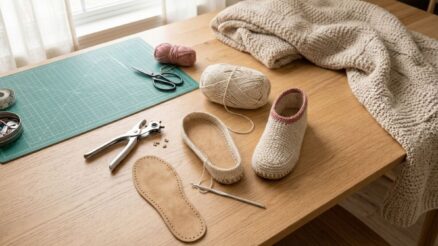
- Optional extras. Suede slipper soles, fabric puffy paint, or a liquid non-slip coating will make the slippers safer on smooth floors. Metal eyelets with a small setting tool give an extra-realistic finish.
Getting the Right Size
A good fit is what turns cute slippers into slippers you actually wear every day, so take a few minutes to measure before you start.
Stand on a piece of paper and measure your foot from the back of the heel to the tip of your longest toe, then measure the width across the widest part of your foot (the ball of the foot). Measure both feet and use the larger numbers, since many people have one foot that is slightly longer than the other.
Your finished crochet sole should be about 1/4 to 1/2 inch (0.5 to 1 cm) shorter than your foot. This small amount of “negative ease” matters because crochet fabric stretches as you wear it, and slippers that are exactly your foot size often end up too loose after a few weeks. The laces will help fine-tune the fit, but they cannot fix a sole that is too long.
To find your starting chain, subtract the width of your foot from its length. For example, a foot that is 9.5 inches (24 cm) long and 3.5 inches (9 cm) wide needs a starting chain of about 6 inches (15 cm). The rounds you work around the chain will add the rest of the length at both ends.
| Women’s US size | EU size | Approx. foot length | Target sole length |
|---|---|---|---|
| 6 | 36–37 | 9.25 in (23.5 cm) | 8.75–9 in (22.5–23 cm) |
| 7 | 37–38 | 9.6 in (24.4 cm) | 9.1–9.4 in (23.4–23.9 cm) |
| 8 | 38–39 | 9.9 in (25.2 cm) | 9.4–9.7 in (24.2–24.7 cm) |
| 9 | 39–40 | 10.25 in (26 cm) | 9.75–10 in (25–25.5 cm) |
| 10 | 40–41 | 10.6 in (26.8 cm) | 10.1–10.4 in (25.8–26.3 cm) |
These numbers are a guide, not a rule. Always measure your own feet, because size charts vary between brands and countries.
How to Crochet Sneaker Slippers: Step by Step
This tutorial uses US crochet terms: ch (chain), sl st (slip stitch), sc (single crochet), hdc (half double crochet), sc2tog (single crochet two together, a decrease), and BLO (back loop only). Instead of fixed stitch counts, it shows you how to shape each part to your own foot, so you can make any size with any worsted yarn. Make both slippers at the same time, one step after the other, and write down your stitch and round counts as you go so the pair comes out identical.
Step 1: Crochet Two Oval Sole Layers in White
Each slipper has a double-layer sole, so you will make two identical white ovals per slipper (four in total for the pair). With white yarn, chain the length you calculated in the sizing section, plus 2 extra chains.
Round 1: Work 1 hdc in the 3rd chain from the hook and in each chain across to the last one. Work 6 hdc into the last chain to round the end, then continue along the other side of the chain, working 1 hdc in each chain back to the start, and finish with 5 more hdc in the very first stitch to round the second end. Join with a sl st to the first hdc. You now have a long, narrow oval.
Round 2 and beyond: Ch 2 (it does not count as a stitch), work 1 hdc in each stitch along the straight sides, and work 2 hdc in each stitch around both rounded ends. On the next round, increase in every other stitch around the ends, and on the following round, in every third stitch. Always place the same number of increases at both ends so the sole stays an even racetrack oval with straight, parallel sides. Keep adding rounds until the sole reaches your target length and is about as wide as your foot, then fasten off. With worsted yarn, this usually takes four to five rounds.
Step 2: Join the Two Layers into One Thick Sole
Place two sole layers on top of each other with their wrong sides facing in and their edges lined up. Join white yarn at the middle of one long side and work 1 sc through both layers at the same time in every stitch around. Since both ovals have the same number of stitches, the edges will match up perfectly. Join with a sl st to the first sc, but do not fasten off.
This joining round gives the sole a firm, cushioned feel and creates a neat edge that you will build the sidewall on. If one layer seems slightly bigger, gently stretch the smaller one as you go rather than skipping stitches, so the sole stays flat and even.
Step 3: Build the White Sole Wall
This is the step that makes your slipper look like a sneaker. Ch 1 and work 1 sc in the back loop only of each stitch around, then join. Working in the back loops makes the edge fold upward, turning your flat sole into a shallow tray.
Now work 3 more rounds of regular sc in each stitch around, with no increases or decreases. The white wall will rise straight up, about 0.75 inch (2 cm) tall. Keep your tension firm and even so the wall stands up crisply instead of flaring outward. Fasten off the white yarn at the end of the last round, centered at the heel, so the color change will be hidden at the back.
Step 4: Shape the Red Toe Box
Join your main color at the center back of the heel and work 2 rounds of sc in each stitch around. Now mark the toe section: lay the slipper flat with the toe facing you, find the stitch at the very tip of the toe, and place one locking stitch marker on each long side, mirrored, about 2.5 inches (6 cm) back from the toe tip. The stitches between the two markers, running around the tip, are your toe section.
On the next round, work sc as normal until you reach the first marker, then alternate (1 sc, sc2tog) across the toe section until you reach the second marker, and work sc to the end. On the following two rounds, work sc2tog across the toe section and regular sc everywhere else, moving the markers up as you go. The decreases pull the toe stitches in and up, so the fabric curves over the top of your toes like the front of a sneaker.
Try the slipper on after each round. When the toe box covers your toes and reaches just behind them, stop decreasing. The remaining open area on top of the foot will become the lace opening.
Step 5: Work the High-Top Shaft in Rows
Find the center stitch at the top of the toe box. Count 2 or 3 stitches to each side of it and leave those 4 to 6 center stitches unworked; this is the bottom of your lace opening, where the tongue will sit later. Join your yarn in the next stitch, ch 1, and work sc in each stitch along the side, around the heel, and up the other side, stopping just before the unworked center stitches. Turn.
From now on, work back and forth in rows of sc, turning at the end of each row. Because you never cross the front, the opening stays open and the two front edges run parallel, just like a real high-top. Keep going until the shaft reaches just above your ankle bone, usually about 4 to 5 inches (10 to 12 cm) above the top of the white wall. Fasten off.
If the shaft feels too tight around the ankle when you try it on, work 1 or 2 increases at the back of the heel on a few rows. If it feels loose, a hook one size smaller for the shaft will tighten it up nicely.
Step 6: Add the Eyelet Bands
The eyelet bands frame the lace opening and hold your laces. Join your main color at the bottom of one front edge and work the band along the row ends:
Row 1: Work sc evenly up the edge, about 1 sc per row end. Turn.
Row 2: Work 2 sc, then (ch 1, skip 1 stitch, sc 3) repeatedly up the edge, so the ch-1 spaces are evenly spaced. Aim for 6 or 7 eyelets. Turn.
Row 3: Work 1 sc in each sc and 1 sc in each ch-1 space. The holes stay open below, creating neat eyelets. Fasten off.
Repeat on the other front edge, working the same number of stitches and placing the eyelets in exactly the same positions so they line up across the opening. If you prefer a very realistic finish, you can skip the ch-1 spaces and add metal eyelets through the band with an eyelet setting tool instead.
Step 7: Crochet the Tongue, Toe Cap, and Heel Tab
Tongue: With your main color, chain enough stitches to make a piece about 1 inch (2.5 cm) wider than your lace opening. Work rows of sc until the tongue is as long as the opening plus about 0.5 inch (1 cm), then decrease 1 stitch at each end of the last two rows to round the top.
Toe cap: With white yarn, ch 7. Work 1 hdc in the 3rd chain from the hook and in each chain across, 6 hdc in the last chain, then 1 hdc in each chain back along the other side, and turn. On the next rows, work hdc along the sides and increase around the curved end, as you did for the sole, until the piece is a D shape that covers the front of your toe box from the white wall up to about halfway to the lace opening. Usually two or three rows are enough.
Heel tab: With white yarn, ch 4 and work rows of sc until the strip is about 2.5 inches (6 cm) long. Make one of each piece for both slippers.
Step 8: Sew Everything Together
Pin or hold the tongue in place first. Center it in the lace opening with its straight bottom edge lined up along the unworked stitches at the top of the toe box, so the tongue sits underneath the eyelet bands. Whip stitch the bottom edge to the inside of the toe box with matching yarn. Stuffing the slipper with crumpled paper or a sock while you sew makes it much easier to keep everything straight.
Next, place the toe cap over the front of the toe with its curved edge following the toe tip and touching the top of the white wall, and its straight edge across the top of the toe box, facing the lace opening. Sew it all the way around with white yarn and small, even stitches. Finally, sew the heel tab vertically at the center back of the heel, starting at the top of the white wall. Weave in all your ends on the inside of the slipper.
Step 9: Lace Up Your Sneakers
Thread your laces starting from the bottom pair of eyelets, bringing both ends up from underneath, then criss-cross them up to the top just as you would on a real sneaker. For 6 or 7 pairs of eyelets, laces about 45 to 54 inches (114 to 137 cm) long usually work well. You can always shorten crochet laces, but store-bought laces should be long enough to tie a comfortable bow.
If you would like to make your own laces, crochet a long chain in white yarn, then work a row of sl st back along it for a firmer cord. Dip the ends in clear-drying fabric glue or wrap them tightly with a little tape to make them easier to thread through the eyelets.
Step 10: Add a Non-Slip Sole
Crochet soles can be slippery on wood, tile, and laminate floors, so this step is worth the extra effort. The most durable option is a pair of suede slipper soles with pre-punched holes, which you sew to the bottom of each slipper with a blanket stitch using strong yarn or embroidery thread. Suede adds grip, protects the crochet from wear, and makes the slippers last much longer.
A quicker option is fabric puffy paint or a liquid non-slip coating made for socks and slippers. Apply small dots or lines across the bottom, let them dry completely according to the bottle’s instructions (often a full day), and test the grip before wearing them on smooth floors.
6 Cute Color Ideas for Your Sneaker Slippers
Once you have made your first pair, the fun really begins. Here are six easy ideas to give your sneaker slippers a different personality, all using the same basic method.
1. Classic Cherry Red
Red uppers with crisp white soles and white laces are the most iconic sneaker combination, and they look just as bold in crochet. This is the perfect choice for your first pair because the contrast between red and white makes every detail stand out, from the toe cap to the laces. Choose a true cherry or tomato red instead of a darker burgundy for the most cheerful look.
This color is also wonderful for gifts and the holiday season. A pair of red sneaker slippers tucked into a gift box with a little card feels festive without being too themed, so they can be worn all year long.
2. Black and White
Black high-tops are a timeless favorite, and in crochet they look chic, modern, and very easy to wear. Black uppers also hide everyday marks better than light colors, which makes them practical if you wear your slippers every day.
The only challenge with black yarn is that stitches are harder to see, so work in good light and use a locking stitch marker at the start of each round. A cotton yarn with a slight sheen will show the stitch texture better than a fuzzy acrylic.
3. Blush Pink Low-Tops
If you prefer a lighter, airier slipper for spring and summer, try a low-top version in soft blush pink. Simply stop the shaft rows just below your ankle bone, about 1.5 to 2 inches (4 to 5 cm) above the white wall, and use 4 or 5 pairs of eyelets instead of 7. Low-tops are quicker to make, use less yarn, and are easier to slip on and off.
Blush pink with white soles and white laces looks fresh, feminine, and very Pinterest-friendly. For an extra sweet touch, swap the white laces for pale pink satin ribbon.
4. Lavender Platform
Platform sneakers are a fun trend, and they are very easy to recreate in crochet. Just work 3 or 4 extra rounds on the white sole wall so it rises about 1.5 inches (4 cm) instead of 0.75 inch (2 cm). The taller white base gives your slippers a playful, retro look and adds a little extra warmth between your feet and cold floors.
Soft lavender is a dreamy match for a chunky white platform. Pair it with white laces for a clean look, or lilac laces for a softer, tone-on-tone finish.
5. Denim Blue with a Navy Stripe
Classic sneakers often have a thin colored stripe around the sole, and adding one is a simple way to make your slippers look even more realistic. Work the first 2 rounds of the white wall as usual, change to navy for 1 round, then finish with 1 more round of white before you start the upper. The thin stripe adds a sporty detail without any extra shaping.
A soft denim blue upper with a navy stripe looks relaxed and casual, almost like a favorite pair of jeans. It is also a great unisex choice if you are making slippers for a partner, a brother, or a dad.
6. Mommy-and-Me Matching Pair
Matching sneaker slippers for you and your little one are one of the sweetest things you can make with this pattern. Measure the child’s foot the same way, use the same yarn and hook, and simply work a shorter starting chain and fewer sole rounds. For toddlers and young children, a low-top version with 3 or 4 pairs of eyelets is easiest to put on and take off.
Choose a fun shared color, like sunshine yellow or mint green, so the pair looks coordinated in photos. Remember that small children need extra grip, so always add a non-slip sole to children’s slippers.
Tips for a Polished, Store-Bought Look
A few small habits make the difference between slippers that look homemade and slippers that look like they came from a boutique.
- Keep your fabric dense. A tight, even fabric is the secret to the canvas look. If you can see your fingers through the stitches when you hold the fabric up to the light, try a hook half a size or one size smaller.
- Use bright, clean white yarn. The white sole wall and toe cap are the first things people notice, so choose a crisp optical white rather than an off-white or cream. Wash your hands before working with white yarn, and keep the project in a clean bag between sessions.
- Hide your color changes at the heel. Start and end your rounds at the center back of the heel so the small jog where rounds meet is hidden behind the heel tab.
- Make both slippers step by step. Finish the soles for both slippers, then the walls for both, and so on. Write down your stitch counts and the number of rows in the shaft so the second slipper is an exact match.
- Shape the slippers while you sew. Stuff each slipper firmly with paper or a rolled towel while you attach the tongue and toe cap. This keeps the pieces centered and helps the slipper hold its sneaker shape.
- Block the toe cap. Lightly mist the toe cap with water and let it dry while the slipper is stuffed. This smooths the stitches and makes the curve look sharp and neat.
How to Care for Your Crochet Sneaker Slippers
With a little care, your slippers will stay fresh and keep their shape for many seasons.
Remove the laces before washing, so they do not tangle or stretch the eyelets. Hand wash the slippers in cool water with a small amount of gentle detergent or wool wash, squeezing them softly instead of wringing or twisting. If your slippers have suede soles, avoid soaking them completely; spot clean the crochet with a damp cloth instead, since suede can harden when it gets very wet.
To dry, roll the slippers in a towel to press out extra water, then reshape them while they are still damp. Stuff them with a small towel or paper so they keep their high-top form, and let them air dry flat away from direct heat or sunlight. Never put crochet slippers in the dryer, as heat can shrink cotton and wool or make acrylic go limp and lose its shape.
Between washes, let your slippers air out after wearing, and brush off any lint or dust with a soft clothes brush. If the white parts start to look dull, a gentle spot clean on the sole wall and toe cap is usually enough to bring back that crisp sneaker look.
Frequently Asked Questions
Are crochet sneaker slippers good for beginners? They are a great project for an adventurous beginner. You only need basic stitches like single crochet, half double crochet, and simple decreases. The trickiest parts are shaping the toe box and sewing on the toe cap, so take your time and try the slipper on often. If you are brand new to crochet, practicing a simple oval sole first is a good warm-up.
How long does it take to make a pair? Most makers finish a pair of high-tops in about 8 to 12 hours of crochet time, which is easy to spread over a weekend or a week of evenings. Low-tops are faster, while extra details like a contrast stripe, metal eyelets, or a suede sole will add a little more time.
Which yarn is best: cotton, acrylic, or wool? Cotton gives the crispest, most sneaker-like look and holds its shape well, which makes it the best choice for a realistic finish and for warmer months. Acrylic is softer, more affordable, and easy to wash. A wool blend is the warmest and coziest option for winter, though it needs gentler care.
Can I wear crochet sneaker slippers outside? They are designed for indoor use. Crochet absorbs water and dirt quickly, and the fabric can stretch or wear through on rough surfaces. If you want to step out to the balcony or mailbox now and then, a sewn-on suede sole will help, but for regular outdoor use, real sneakers are the better choice.
How do I stop them from stretching out? Use a dense fabric, make the sole a little shorter than your foot, and choose cotton or a firm wool blend instead of a very soft, loosely twisted acrylic. The laces also help a lot, since you can tighten them as the fabric relaxes over time. Washing and reshaping the slippers while damp usually brings them back close to their original size.
Can I make them for men or children? Yes. The method works for any size because you shape the sole to the foot you measured. For men’s sizes, you will need a longer starting chain, an extra sole round or two, and a bit more yarn. For children, use a shorter chain, fewer rounds, and a low-top shaft, and always add a non-slip sole.
Conclusion
Crochet sneaker slippers bring together everything we love about classic canvas high-tops and cozy house shoes. With a thick white sole wall, a rounded toe cap, a laced-up front, and a high-top shape that keeps your ankles warm, they look playful and stylish while feeling soft and comfortable on your feet.
Start with a classic red and white pair to learn the shape, then let your creativity run wild with black and white, blush pink low-tops, lavender platforms, a denim pair with a navy stripe, or a matching set for you and your little one. Focus on a dense fabric, a snug fit, and a non-slip sole, and you will have handmade sneakers you will reach for every single day.