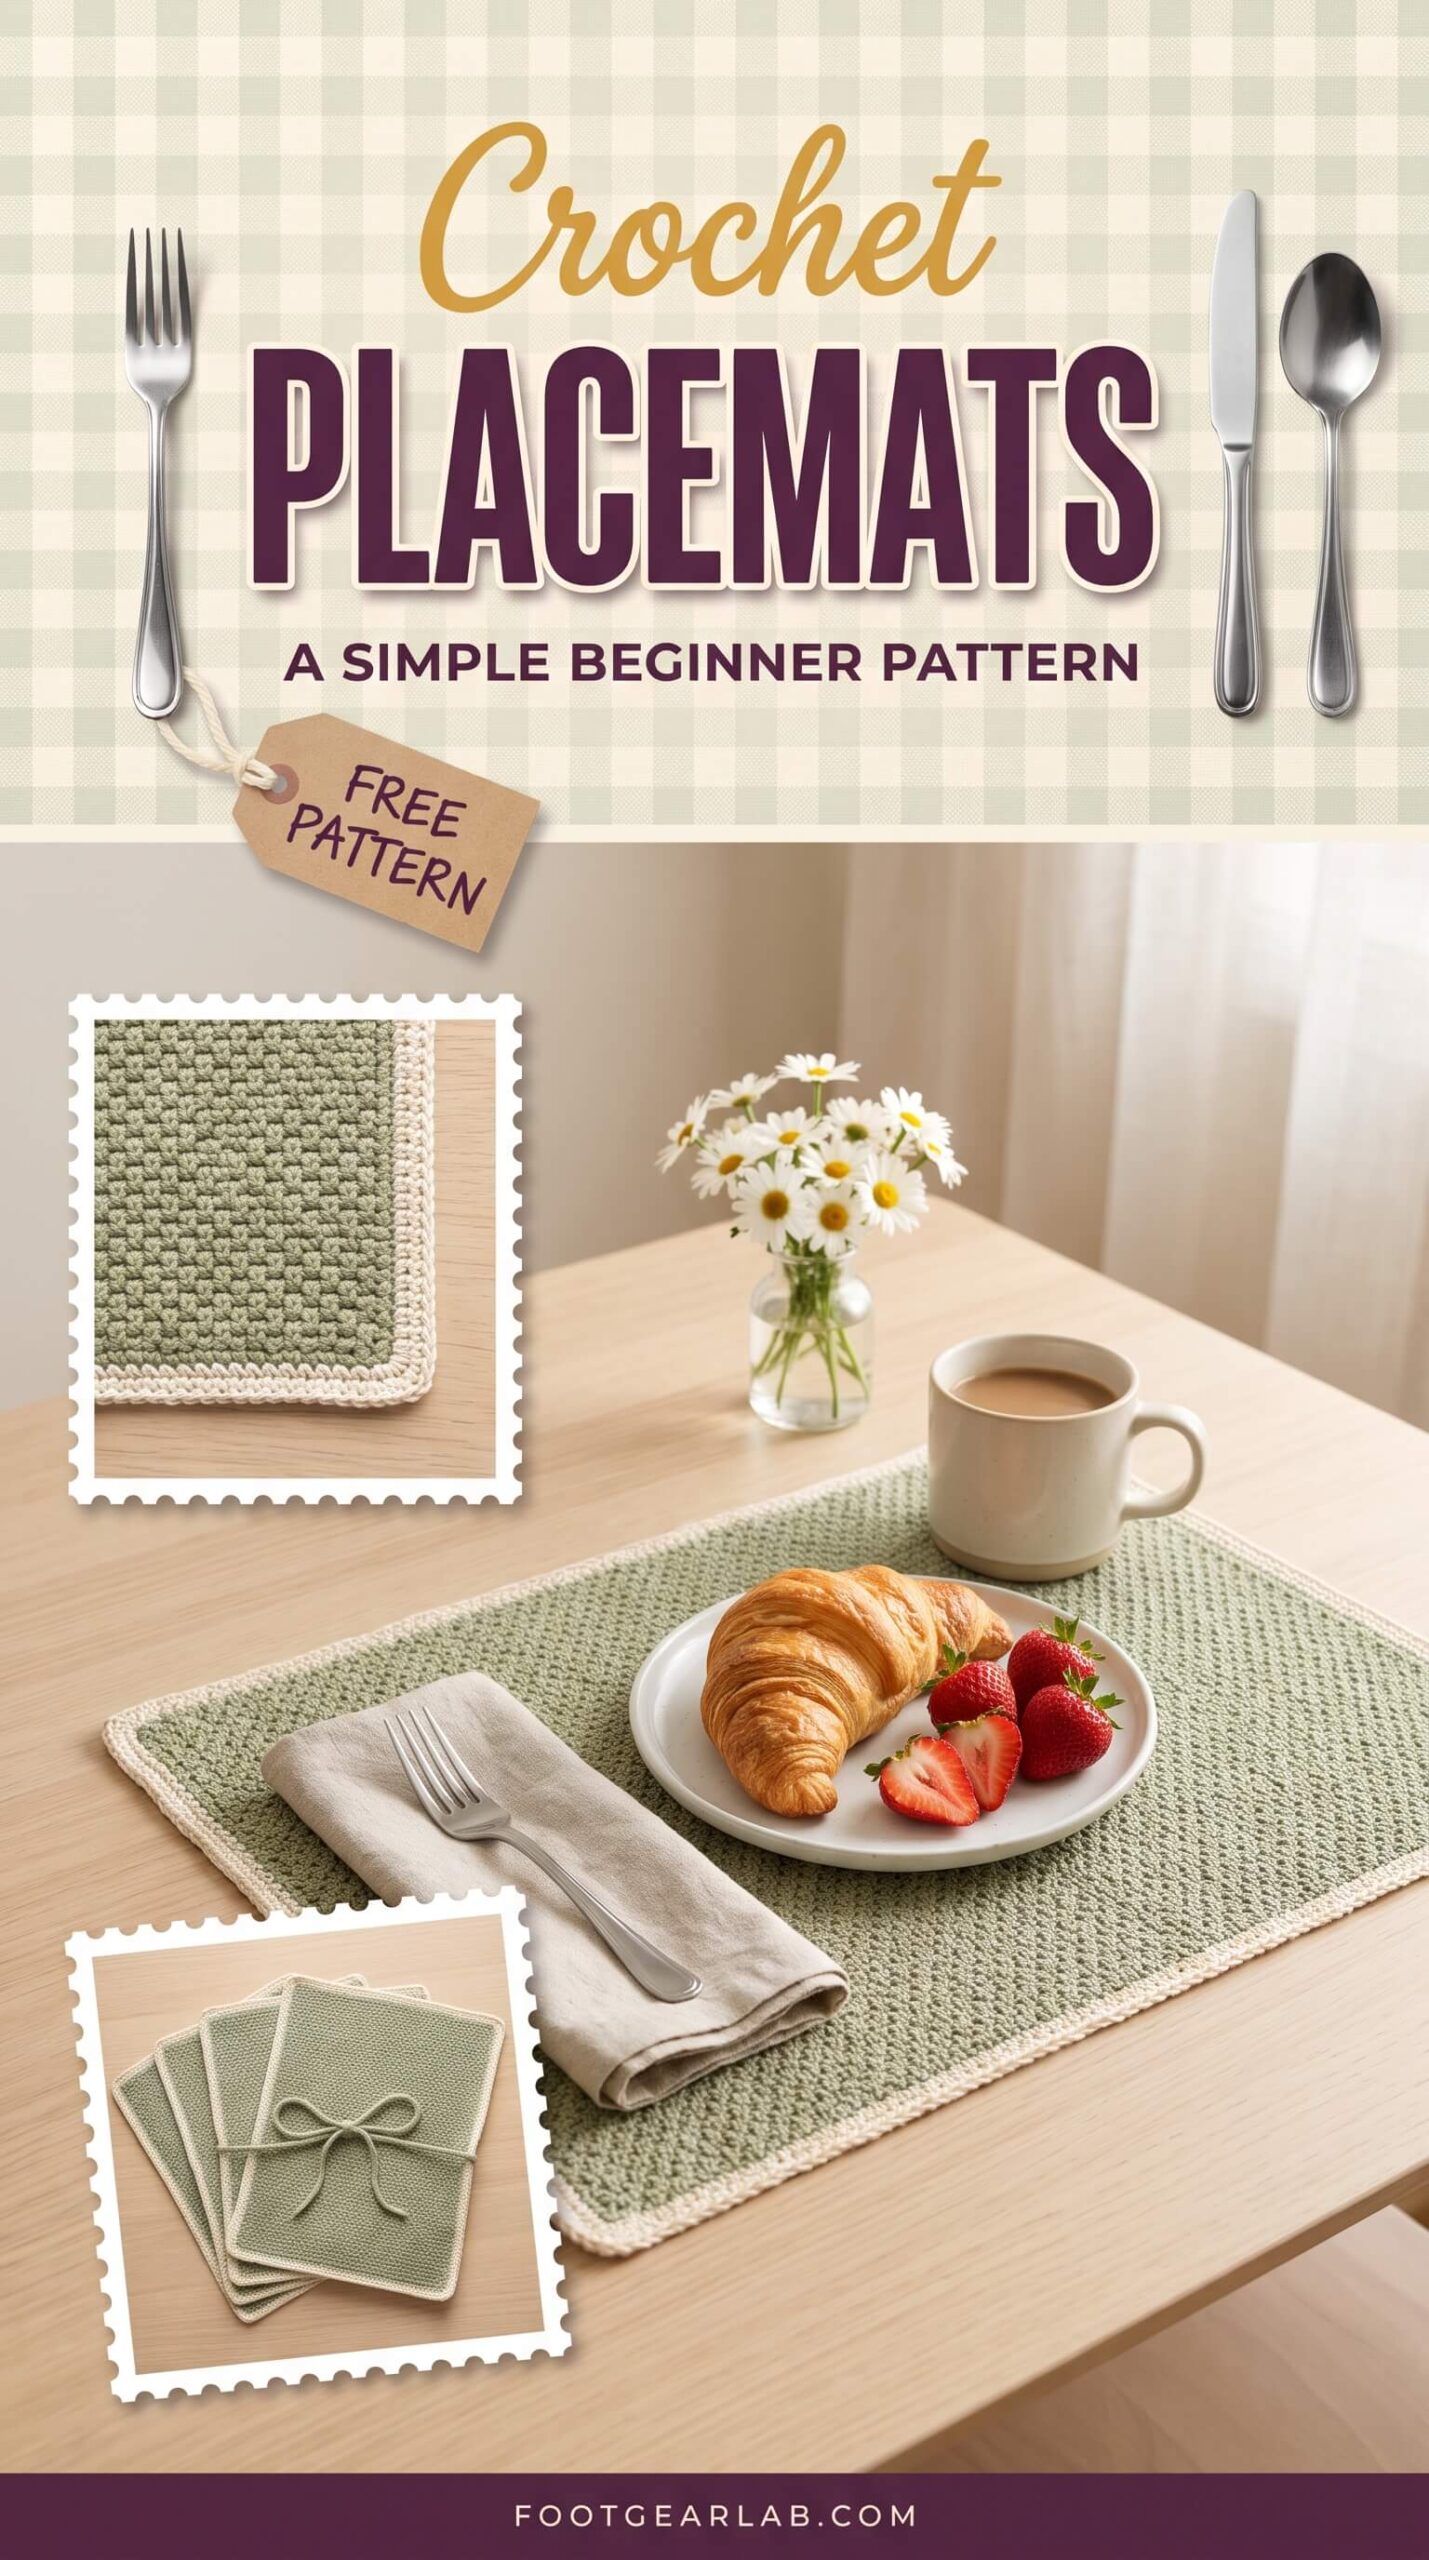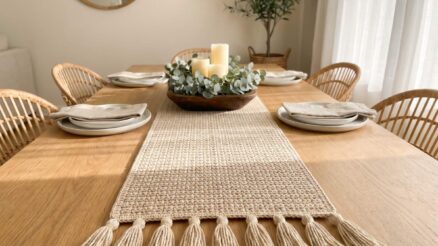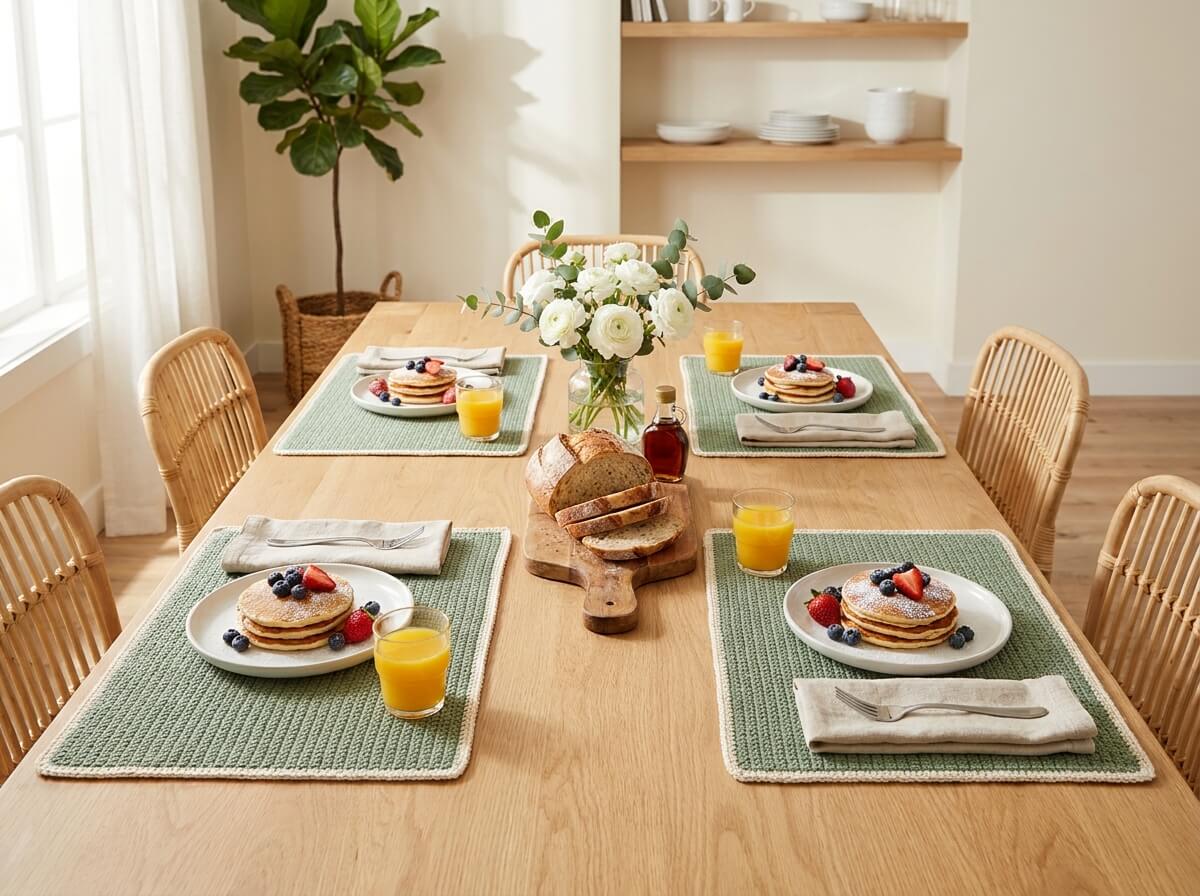
There is something special about sitting down to a meal at a table dressed with handmade pieces. Crochet placemats bring warmth, texture and a little personality to everyday breakfasts, family dinners and holiday gatherings, and they are one of the most rewarding projects you can make with a hook and a few balls of cotton yarn. They protect your table from scratches and spills, soften the clink of plates and cutlery, and instantly make even a simple bowl of soup feel like a thoughtful moment.
The best part is that placemats are a perfect beginner project. They are flat, rectangular and worked in straight rows, so you can focus on building a steady rhythm instead of following complicated shaping. In this guide, you’ll learn how to choose the right yarn, pick a size that fits your table, and crochet a textured placemat step by step using the beginner-friendly griddle stitch. You’ll also find six pretty placemat ideas, styling and care tips, a troubleshooting table and answers to the most common questions, so you can make a full matching set you’ll be proud to use and gift.
Why Crochet Placemats Are Worth Making
Crochet placemats are both practical and beautiful, which is why they have become such a favorite with home crafters. A dense cotton placemat creates a soft cushion between your dishes and the table, protecting wood and painted surfaces from scratches, water rings and warm plates. Unlike thin fabric placemats that slide around and wrinkle, a crocheted mat has a pleasant weight that keeps it lying flat and in place throughout the meal.
They are also a wonderful way to express your style. You can match them to your kitchen colors, switch them out for each season, or make a neutral set that works with every dish you own. Because each placemat is a manageable size, you can finish one in a few relaxed evenings, which makes them ideal for building confidence before moving on to larger projects such as blankets or table runners.
Finally, crochet placemats make lovely gifts. A set of four tied with a ribbon is a thoughtful housewarming present, wedding gift or holiday surprise, and it carries the kind of personal touch that store-bought linens simply can’t match.
Choosing the Right Yarn
The yarn you choose will decide how your placemats look, feel, wash and protect your table, so it’s worth taking a moment to pick the right one. Here are the most common options and what each one brings to the table.
- 100% cotton (the best all-round choice): Cotton is the classic yarn for kitchen and dining projects because it is absorbent, sturdy, machine washable and handles warm plates well. A worsted-weight (medium #4) cotton such as Lily Sugar’n Cream or a similar kitchen cotton creates a dense, structured fabric that lies flat and holds its shape. It has a soft matte finish that looks natural and elegant on any table, and it gets even softer with every wash.
- Cotton blends: Cotton mixed with a little acrylic or bamboo is slightly softer and lighter, and it comes in a wider range of bright colors. These blends are easy to work with and wash well, although they are a little less absorbent than pure cotton and may not handle very warm dishes quite as well.
- Acrylic yarn: Acrylic is affordable and colorful, but it is not ideal for placemats. It doesn’t absorb spills, it can look fuzzy after washing, and it can be damaged by very hot dishes. If acrylic is all you have, save it for decorative mats that won’t sit under hot plates.
- T-shirt yarn (fabric yarn): This chunky, stretchy yarn is made from strips of jersey fabric. It works up very quickly on a large hook and creates thick, modern placemats with a bold texture, which is perfect if you want a fast, contemporary look.
- Jute or natural twine: Jute gives a rustic, boho look that pairs beautifully with wooden tables and neutral dishes. It is stiff and a little rough on the hands, so it’s best for crocheters who already feel comfortable with their tension, and it should be spot cleaned rather than machine washed.
For the pattern in this guide, we’ll use worsted-weight 100% cotton in two colors: a soft sage green for the main body and a warm cream for the final border round. These colors feel fresh, calm and timeless, and they suit both everyday meals and special occasions.
Placemat Sizes and Shapes
Before you start, it helps to know which size will fit your table and your dishes. A placemat should be large enough to hold a dinner plate, cutlery and a glass, but not so large that neighboring placemats overlap or hang over the table edge. Most dinner plates are 10 to 11 inches across, so a placemat at least 12 inches deep gives your plate a comfortable frame with a little border showing all around.
| Placemat type | Common size | Best for |
|---|---|---|
| Standard rectangle | 12 x 18 inches | Most dining tables and everyday place settings |
| Compact rectangle | 11 x 16 to 12 x 17 inches | Smaller tables, breakfast nooks and kids’ places |
| Round | 14 to 15 inches across | Round tables, charger-style settings and boho looks |
| Oval | 13 x 19 inches | Larger plates and a soft farmhouse look |
The pattern below creates a placemat that measures about 12 x 17 inches, which is a comfortable, slightly compact standard size that fits most tables beautifully. If you’d like a different size, the griddle stitch makes it easy to adjust. Add or remove stitches in pairs, since each pair adds or removes about 0.6 inch of width, and remember that your starting chain is always one more than your stitch count. To change the depth, add or remove rows, since each row adds or removes about 0.3 inch.
What You’ll Need
Gathering everything before you begin keeps the process smooth and enjoyable. Here is the full list of materials for one placemat.
- Sage green worsted-weight cotton yarn (about 280 yards): This is the main color for the body and the first border round. Most 2.5 oz balls of kitchen cotton hold around 120 yards, so plan on three balls per placemat. Always check the label of the yarn you buy, since yardage varies from brand to brand.
- Cream worsted-weight cotton yarn (about 25 yards): This is used for the final border round only, so one ball is enough for a full set of four placemats.
- 5 mm (H-8) crochet hook: This size gives a dense fabric with worsted cotton that protects your table well while still feeling soft. An ergonomic handle is a nice bonus if you crochet for long sessions.
- Tapestry needle: A blunt-tip needle with a large eye is used to weave in your yarn ends neatly so they never show or come loose.
- Scissors: Any small, sharp scissors will do for trimming yarn.
- Stitch markers (optional but helpful): A locking stitch marker placed in the first stitch of each border round makes it easy to find where to join.
- Tape measure: You’ll use it to check your gauge swatch and the size of your placemat as you work.
- Spray bottle and blocking mat or towel: These help you shape and flatten your placemat at the end, which gives it a crisp, professional finish.
Skill level: Beginner. You only need to know how to make a chain, a single crochet (sc), a double crochet (dc) and a slip stitch (sl st).
Time: About 4 to 6 hours per placemat, depending on your speed.
Yarn note: The yarn amounts above are estimates based on the griddle stitch’s dense texture. Because every crocheter’s tension is a little different, it’s a good idea to buy one extra ball of the main color, especially if you’re making a full set.
Checking Your Gauge
Gauge simply means how many stitches and rows fit into a set measurement. It may sound technical, but it’s what makes sure your placemat ends up the size you expect, and it’s especially important when you’re making a matching set.
Gauge for this pattern: 14 stitches and 13 rows = 4 inches in griddle stitch, using a 5 mm hook and worsted-weight cotton.
To check it, chain 21 and work the griddle stitch (explained below) for about 16 rows, so you have a small square of about 5 x 5 inches. Lay it flat without stretching it, place your tape measure across the middle and count how many stitches fit into 4 inches. If you have more than 14 stitches, your tension is tight, so switch to a larger hook (5.5 mm). If you have fewer than 14 stitches, your tension is loose, so try a smaller hook (4.5 mm). Your swatch is also a great place to practice the stitch before starting the real thing, and you can test-wash it to see if your cotton shrinks.
Understanding the Griddle Stitch
The griddle stitch is one of the best stitches for placemats, and it’s surprisingly simple. It uses only two basic stitches, the single crochet and the double crochet, worked one after the other across the row. The magic happens in the next row: you work a single crochet into each double crochet, and a double crochet into each single crochet. Because the short and tall stitches keep swapping places, they lock together into a thick, pebbly fabric that looks a little like a fine checkerboard.
This stitch is ideal for placemats for three reasons. First, it creates a dense fabric with no holes, so crumbs and spills stay on the surface and your table stays protected. Second, it lies beautifully flat and resists curling. Third, it has a lovely texture that looks far more complicated than it really is, so your placemats will look polished even if this is one of your very first projects.
The only thing to watch is your stitch count. Every row in this pattern starts with a single crochet and ends with a double crochet, and every row has the same number of stitches. If you keep that rhythm and count your stitches at the end of each row, your placemat will stay perfectly rectangular.
How to Crochet a Placemat: Step-by-Step Pattern
Finished size: About 12 x 17 inches after blocking.
Abbreviations (US terms): ch = chain, sc = single crochet, dc = double crochet, sl st = slip stitch, st(s) = stitch(es).
Pattern notes: The ch 1 at the start of each row does not count as a stitch. Every row has 56 stitches, starts with a sc and ends with a dc. The border is worked in two rounds: the first in sage and the second in cream.
Step 1: Make the Foundation Chain
With sage yarn, make a slip knot on your hook and chain 57. Keep your chains relaxed and even, because a tight foundation chain will make the bottom edge of your placemat pucker and narrower than the rest. If you tend to chain tightly, use a hook one size larger (5.5 mm) just for the chain, then switch back to your 5 mm hook for Row 1.
Before moving on, lay the chain flat and make sure it isn’t twisted. It should measure about 16 inches, which will be the long side of your placemat. Counting your chains twice now saves a lot of frustration later, so take a moment to check that you have exactly 57.
Step 2: Work Row 1
Row 1: Sc in the 2nd ch from the hook, dc in the next ch, *sc in the next ch, dc in the next ch; repeat from * across. You should have 56 stitches (28 sc and 28 dc), ending with a dc in the last chain.
The skipped chain at the start acts as your turning chain, which is why the first sc goes into the second chain from the hook. As you work, you’ll notice that the top of this first row looks gently uneven, with low and high stitch tops alternating across. That’s completely normal: the next row will fill in the gaps and create the griddle texture. Count your stitches when you reach the end of the row, because catching a missed stitch now keeps the edges straight later.
Step 3: Work Row 2 and Set the Pattern
Row 2: Ch 1 and turn. Sc in the first st (which is the last dc of the previous row), dc in the next st (a sc); *sc in the next dc, dc in the next sc; repeat from * across, ending with a dc in the last st. You should have 56 stitches.
This is the row where the griddle stitch really comes to life. The rule is easy to remember: short goes on tall, and tall goes on short. Each sc lands on top of a dc, and each dc lands on top of a sc, so the stitches lock together into that pebbly, staggered texture. If you ever lose your place, just look at the stitch you’re about to work into: if it’s tall, make a sc; if it’s short, make a dc.
Step 4: Repeat Until the Body Is Complete
Rows 3 to 36: Repeat Row 2. At the end of Row 36, your placemat body should measure about 16 inches wide and 11 inches tall. Do not fasten off.
This is the relaxing part of the project, so put on a favorite podcast or show and settle into the rhythm. Every few rows, lay your work flat and measure it to make sure it’s growing evenly. You’ll notice that the side edges look slightly bumpy, because each row starts with a short stitch and ends with a tall one. That’s perfectly normal, and the border in the next step will smooth the edges into clean, straight lines.
If your placemat is getting narrower or wider as you go, you’re likely missing or adding a stitch at the ends of the rows. The most common culprit is the last stitch of the row, which can be hard to see. Counting to 56 at the end of every row, at least for the first ten rows, will keep your rectangle perfectly square.
Step 5: Work Border Round 1 (Sage)
Round 1: Ch 1 and turn. Work 3 sc in the first st (this is your first corner; place a stitch marker in the first of these 3 sc). Sc in each of the next 54 sts, then work 3 sc in the last st (second corner). Turn the placemat so you’re working down the side edge, and work 1 sc into the end of each row, for 36 sc. At the bottom corner, work 3 sc in the first foundation chain, then 1 sc in each of the next 54 foundation chains, and 3 sc in the last foundation chain. Work 36 sc up the remaining side edge, one in each row end. Join with a sl st to the first sc (the one with the marker). You should have 192 sc.
The 3 sc in each corner are what let the border turn smoothly without pulling, so your corners stay crisp and square. Along the sides, working one sc into each row end gives an even edge, but every crocheter’s tension is different. If the side starts to ripple, skip a row end now and then; if it pulls in and puckers, add an extra sc here and there. Your goal is an edge that lies completely flat.
Step 6: Work Border Round 2 (Cream)
To change colors, insert your hook into the first sc of Round 1 for the joining sl st, but complete the sl st by pulling the cream yarn through instead of the sage. Cut the sage, leaving a 6-inch tail.
Round 2: With cream, ch 1. Sc in each st around, working 3 sc into the center sc of each 3-sc corner. Join with a sl st to the first sc. You should have 200 sc. Fasten off, leaving a 6-inch tail.
This single cream round frames the sage body like a picture frame, and it’s the detail that makes your placemat look finished and boutique-quality. Work it at an even, relaxed tension so it doesn’t pull the edges inward. If you’d rather keep things simple, you can work this round in sage too, and your placemat will still look lovely.
Step 7: Weave in the Ends and Block
Thread each yarn tail onto your tapestry needle and weave it through the back of the stitches for about 2 inches in one direction, then turn and weave back for another inch. Weaving in two directions locks the tail in place so it never works loose in the wash. Weave sage tails into sage stitches and the cream tail into the cream border, so nothing shows on the front, then trim the ends close to the fabric.
Blocking is the finishing touch that turns a nice placemat into a beautiful one. Lay your placemat on a blocking mat or a folded towel, mist it evenly with water until it is damp but not soaking, and gently pat it into a 12 x 17 inch rectangle with straight edges and square corners. Pin it in place with rustproof pins if you have them, and let it dry completely. This relaxes the stitches, flattens any curling and makes every placemat in your set exactly the same size.
Your Finished Placemat
Once it’s dry, unpin your placemat and admire your work. You’ll have a sturdy, textured sage placemat with a crisp cream frame that lies perfectly flat and is ready for its first meal. Repeat the pattern three more times for a set of four, or six times for a larger family table.
6 Pretty Crochet Placemat Ideas to Try Next
Once you’ve made your first placemat, it’s easy to put your own spin on the design. Here are six ideas that range from quick weekend projects to colorful statement pieces, so you can create a set for every room, mood and season.
1. Round Mandala Placemats
Round placemats bring a soft, welcoming feel to the table and look especially beautiful on round dining tables. They are worked from the center outward in rounds of double crochet, adding stitches evenly in each round so the circle stays flat. Changing colors every round or two creates a cheerful mandala effect, and you can use up leftover cotton from other projects. Aim for a diameter of about 15 inches so a dinner plate sits comfortably in the center with a colorful ring showing around it.
The secret to a flat circle is even increases: if your mandala starts to ruffle, you’re adding too many stitches, and if it begins to cup like a bowl, you need a few more. Lay it flat after every round to check.
2. Chunky T-Shirt Yarn Placemats
If you love quick results, chunky t-shirt yarn placemats are for you. Worked with a 10 to 12 mm hook in single crochet, they grow in no time, and many crocheters finish one in a single evening. An oval shape suits this yarn especially well: start with a chain about 5 inches long and work single crochet rounds around both sides of it, adding stitches only at the two rounded ends, so the long sides stay straight and parallel. The result is a thick, cushioned, modern placemat that is perfect for casual breakfasts and outdoor meals.
T-shirt yarn has a little stretch, so keep your tension relaxed and lay the mat flat often to make sure the ends aren’t ruffling.
3. Striped Farmhouse Placemats
Stripes give the griddle stitch pattern a fresh farmhouse charm, and they’re easy to add. Follow the main pattern in navy and cream, changing colors every four rows: start with navy, switch to cream, and keep alternating until you’ve worked all 36 rows, so the placemat begins and ends with a navy stripe. Change colors on the last stitch of a row by pulling the new color through the final loop, and carry the unused yarn loosely up the side edge so you don’t have extra ends to weave in. Finish with both border rounds in navy to frame the stripes.
Navy and cream feel classic and coastal, but you can try any combination you love, such as mustard and white for a sunny kitchen or terracotta and oatmeal for a warm, earthy table.
4. Scalloped Edge Placemats
A scalloped edge adds a sweet, feminine touch that’s perfect for brunches, bridal showers and spring tables. Make the main pattern in soft blush pink, then add a third border round in cream: *skip 1 st, work 5 dc in the next st, skip 1 st, sl st in the next st; repeat from * around. With the 200 stitches from Round 2, this gives you about 50 small, even shells. Adjust slightly as you approach each corner so a shell sits right at the corner tip, which keeps the corners looking pretty and balanced.
The shells add about an inch to each side, so your placemat will measure roughly 14 x 19 inches with the scalloped edge, which suits larger plates and chargers beautifully.
5. Granny Square Placemats
Granny square placemats are playful, nostalgic and a wonderful way to use up colorful leftover cotton. Crochet six granny squares of about 6 inches each, then join them in two rows of three to create a 12 x 18 inch placemat. Using the same color for the joining seams and the outer border, such as cream, ties all the colors together and keeps the look tidy rather than busy. Because each square is small, this is a great on-the-go project you can work on during lunch breaks or while waiting for appointments.
For a coordinated set, keep the same color order in every square, or give each placemat its own color story so every family member has a favorite.
6. Holiday Placemats
Seasonal placemats are one of the easiest ways to make your table feel festive. Simply work the main pattern in a holiday color: deep cranberry red with a cream border for Christmas, pumpkin orange with an oatmeal border for Thanksgiving, or pastel yellow with a white border for Easter. Because the pattern stays the same, you can make a new set each season without learning anything new, and swapping them out becomes a sweet little ritual that marks the changing year.
Holiday placemats also make wonderful hostess gifts. Tie a set of two with a velvet ribbon and a sprig of greenery, and you’ll have a present that gets used every year.
Tips for Making a Matching Set
A set of placemats looks its best when every piece is the same size and shape, and a few simple habits make that easy.
- Use the same yarn and dye lot: Buy all the yarn for your set at once and check that the dye lot number on each label matches. Different dye lots can vary slightly in shade, and the difference becomes very noticeable when placemats sit side by side on the table.
- Keep the same hook throughout: Even two hooks marked with the same size can work up slightly differently, so use the exact same hook for every placemat in the set.
- Measure as you go: Check the width after the first few rows of each new placemat and compare it with the first one you made. If your tension has relaxed or tightened, you’ll catch it early instead of ending up with one mat that’s noticeably larger.
- Block them together: Block all your placemats at the same time to the same measurements. This is the easiest way to even out small differences and give the whole set a crisp, uniform look.
- Take breaks between mats: Crocheting four placemats in a row can make your tension drift as your hands get tired. Short breaks keep your stitches consistent and your hands comfortable.
How to Style Your Crochet Placemats
Your placemats are finished, so now comes the fun part: setting a table you’ll love sitting down to. The textured cotton pairs beautifully with simple, natural pieces, so let the crochet be the star.
- Everyday meals: Pair sage or neutral placemats with white stoneware plates, simple linen napkins and clear glasses. This clean combination lets the texture of the crochet shine and works with any meal, from morning oatmeal to weeknight pasta.
- Layering: For special occasions, layer your placemat under a charger plate or add a contrasting runner down the center of the table. The mix of textures creates depth and makes the table feel thoughtfully styled without much effort.
- Seasonal touches: Add a small seasonal detail to each place setting, such as a sprig of rosemary in spring, a slice of dried orange in autumn, or a little pine branch in winter. These tiny accents make your table feel fresh and intentional every time you change them.
- Beyond the dining table: Crochet placemats aren’t just for meals. Use one under a fruit bowl on the kitchen island, a plant on a sideboard, a tea tray on the coffee table or your perfume bottles on a dresser, where it adds softness and protects the surface underneath.
How to Care for Crochet Placemats
With a little care, cotton placemats stay beautiful for years and get softer with every wash.
- Washing: Machine wash cotton placemats on a gentle cycle in cold or warm water with a mild detergent. Placing them in a mesh laundry bag protects the stitches from catching on other items. Avoid bleach, which weakens cotton fibers and can fade colors, especially on the colored body against a cream border.
- Drying: Lay them flat to dry on a towel or drying rack, gently patting them back into shape while they’re damp. Tumble drying can shrink cotton and make the edges curl, so air drying is the safest choice.
- Spot cleaning: For small spills, dab the area with a damp cloth and a drop of dish soap right away, then rinse with clean water. Treating stains quickly keeps them from setting into the dense griddle texture.
- Ironing: If your placemats need a little refresh, steam them lightly or press with a warm iron through a cotton cloth. Avoid pressing hard, since it can flatten the lovely raised texture of the stitches.
- Heat: Cotton placemats handle warm plates and serving dishes well, but always place a trivet under pots and pans that come straight from the stove or oven. Very hot cookware can scorch cotton and will damage acrylic yarn.
- Storage: Store placemats flat in a drawer or stacked on a shelf. Rolling or folding them for long periods can leave creases that are hard to remove.
Troubleshooting Common Problems
Every crocheter runs into a hiccup now and then. Here’s how to fix the most common placemat problems quickly.
| Problem | Likely cause | How to fix it |
|---|---|---|
| Placemat gets narrower as you go | Missing the last stitch of the row | Count to 56 at the end of every row, and make sure you work into the last stitch, which can be small and easy to miss. |
| Placemat gets wider as you go | Working two stitches into the first stitch | Remember that the ch 1 doesn’t count as a stitch, and work the first sc into the very first stitch only once. |
| Bottom edge puckers | Foundation chain is too tight | Make your foundation chain with a hook one size larger, then switch back to your 5 mm hook for Row 1. |
| Border ripples or looks wavy | Too many stitches along the side edges | Work slightly fewer sc along the sides, skipping a row end every so often until the edge lies flat. |
| Border pulls in or puckers | Too few stitches, or border worked too tightly | Add an extra sc here and there along the sides and relax your tension on the border rounds. |
| Corners curl or look rounded | Missing the 3 sc in the corner | Always work 3 sc in each corner stitch on Round 1, and 3 sc in the center corner stitch on Round 2. |
| Placemat is too small or too large | Gauge doesn’t match the pattern | Check your gauge swatch and switch to a larger or smaller hook until you get 14 stitches in 4 inches. |
| Placemat curls at the edges | Fabric hasn’t been blocked | Mist with water, pin flat to the correct size and let it dry completely. |
Frequently Asked Questions
How much yarn do I need for a set of four placemats? Plan on about 1,120 yards of the main color (around 10 balls of 120 yards each) and about 100 yards of the border color (one ball) for a set of four. Because tension varies, buying one extra ball of the main color is a smart safety net, and any leftovers are perfect for coasters.
Can I use acrylic yarn for placemats? You can, but cotton is the better choice. Acrylic doesn’t absorb spills, can look fuzzy after washing and may be damaged by very hot dishes. If you love a particular acrylic color, use it for decorative placemats that won’t sit under hot plates.
How long does it take to crochet one placemat? Most beginners finish one placemat in about 4 to 6 hours, which is a few relaxed evenings. Once you’re comfortable with the griddle stitch, you’ll find yourself working much faster, and a full set of four becomes a very doable weekend-and-weeknights project.
Are crochet placemats machine washable? Yes, cotton placemats are machine washable on a gentle cycle in cold or warm water. Lay them flat to dry to keep their shape, and avoid tumble drying, which can cause shrinking and curling.
Do crochet placemats protect the table from heat? A dense cotton placemat protects your table from warm plates and serving dishes, but it’s not designed for very hot cookware. Always use a trivet under pots and pans that come straight from the stove or oven.
Can I make this pattern larger or smaller? Absolutely. To change the width, add or remove stitches in pairs, since each pair changes the width by about 0.6 inch, and remember that your starting chain is always one more than your stitch count. To change the depth, add or remove rows, since each row changes it by about 0.3 inch.
Is the griddle stitch good for other kitchen projects? Yes, it’s one of the most useful stitches for the kitchen. Its dense, textured fabric makes it perfect for dishcloths, coasters, pot holders and table runners, so once you’ve mastered it, you can make a whole coordinated kitchen set.
Final Thoughts
Crochet placemats are proof that simple projects can make a beautiful difference in your home. With just two basic stitches, a few balls of cotton and some cozy evenings, you can create a set of textured, handmade placemats that protect your table, bring warmth to every meal and make your dining space feel truly yours. Start with the sage and cream pattern in this guide, then let your creativity lead you to round mandalas, cheerful stripes, sweet scallops or festive holiday sets.
Every time you set the table, you’ll have a little reminder of what your hands can create, and every meal will feel just a bit more special because of it.