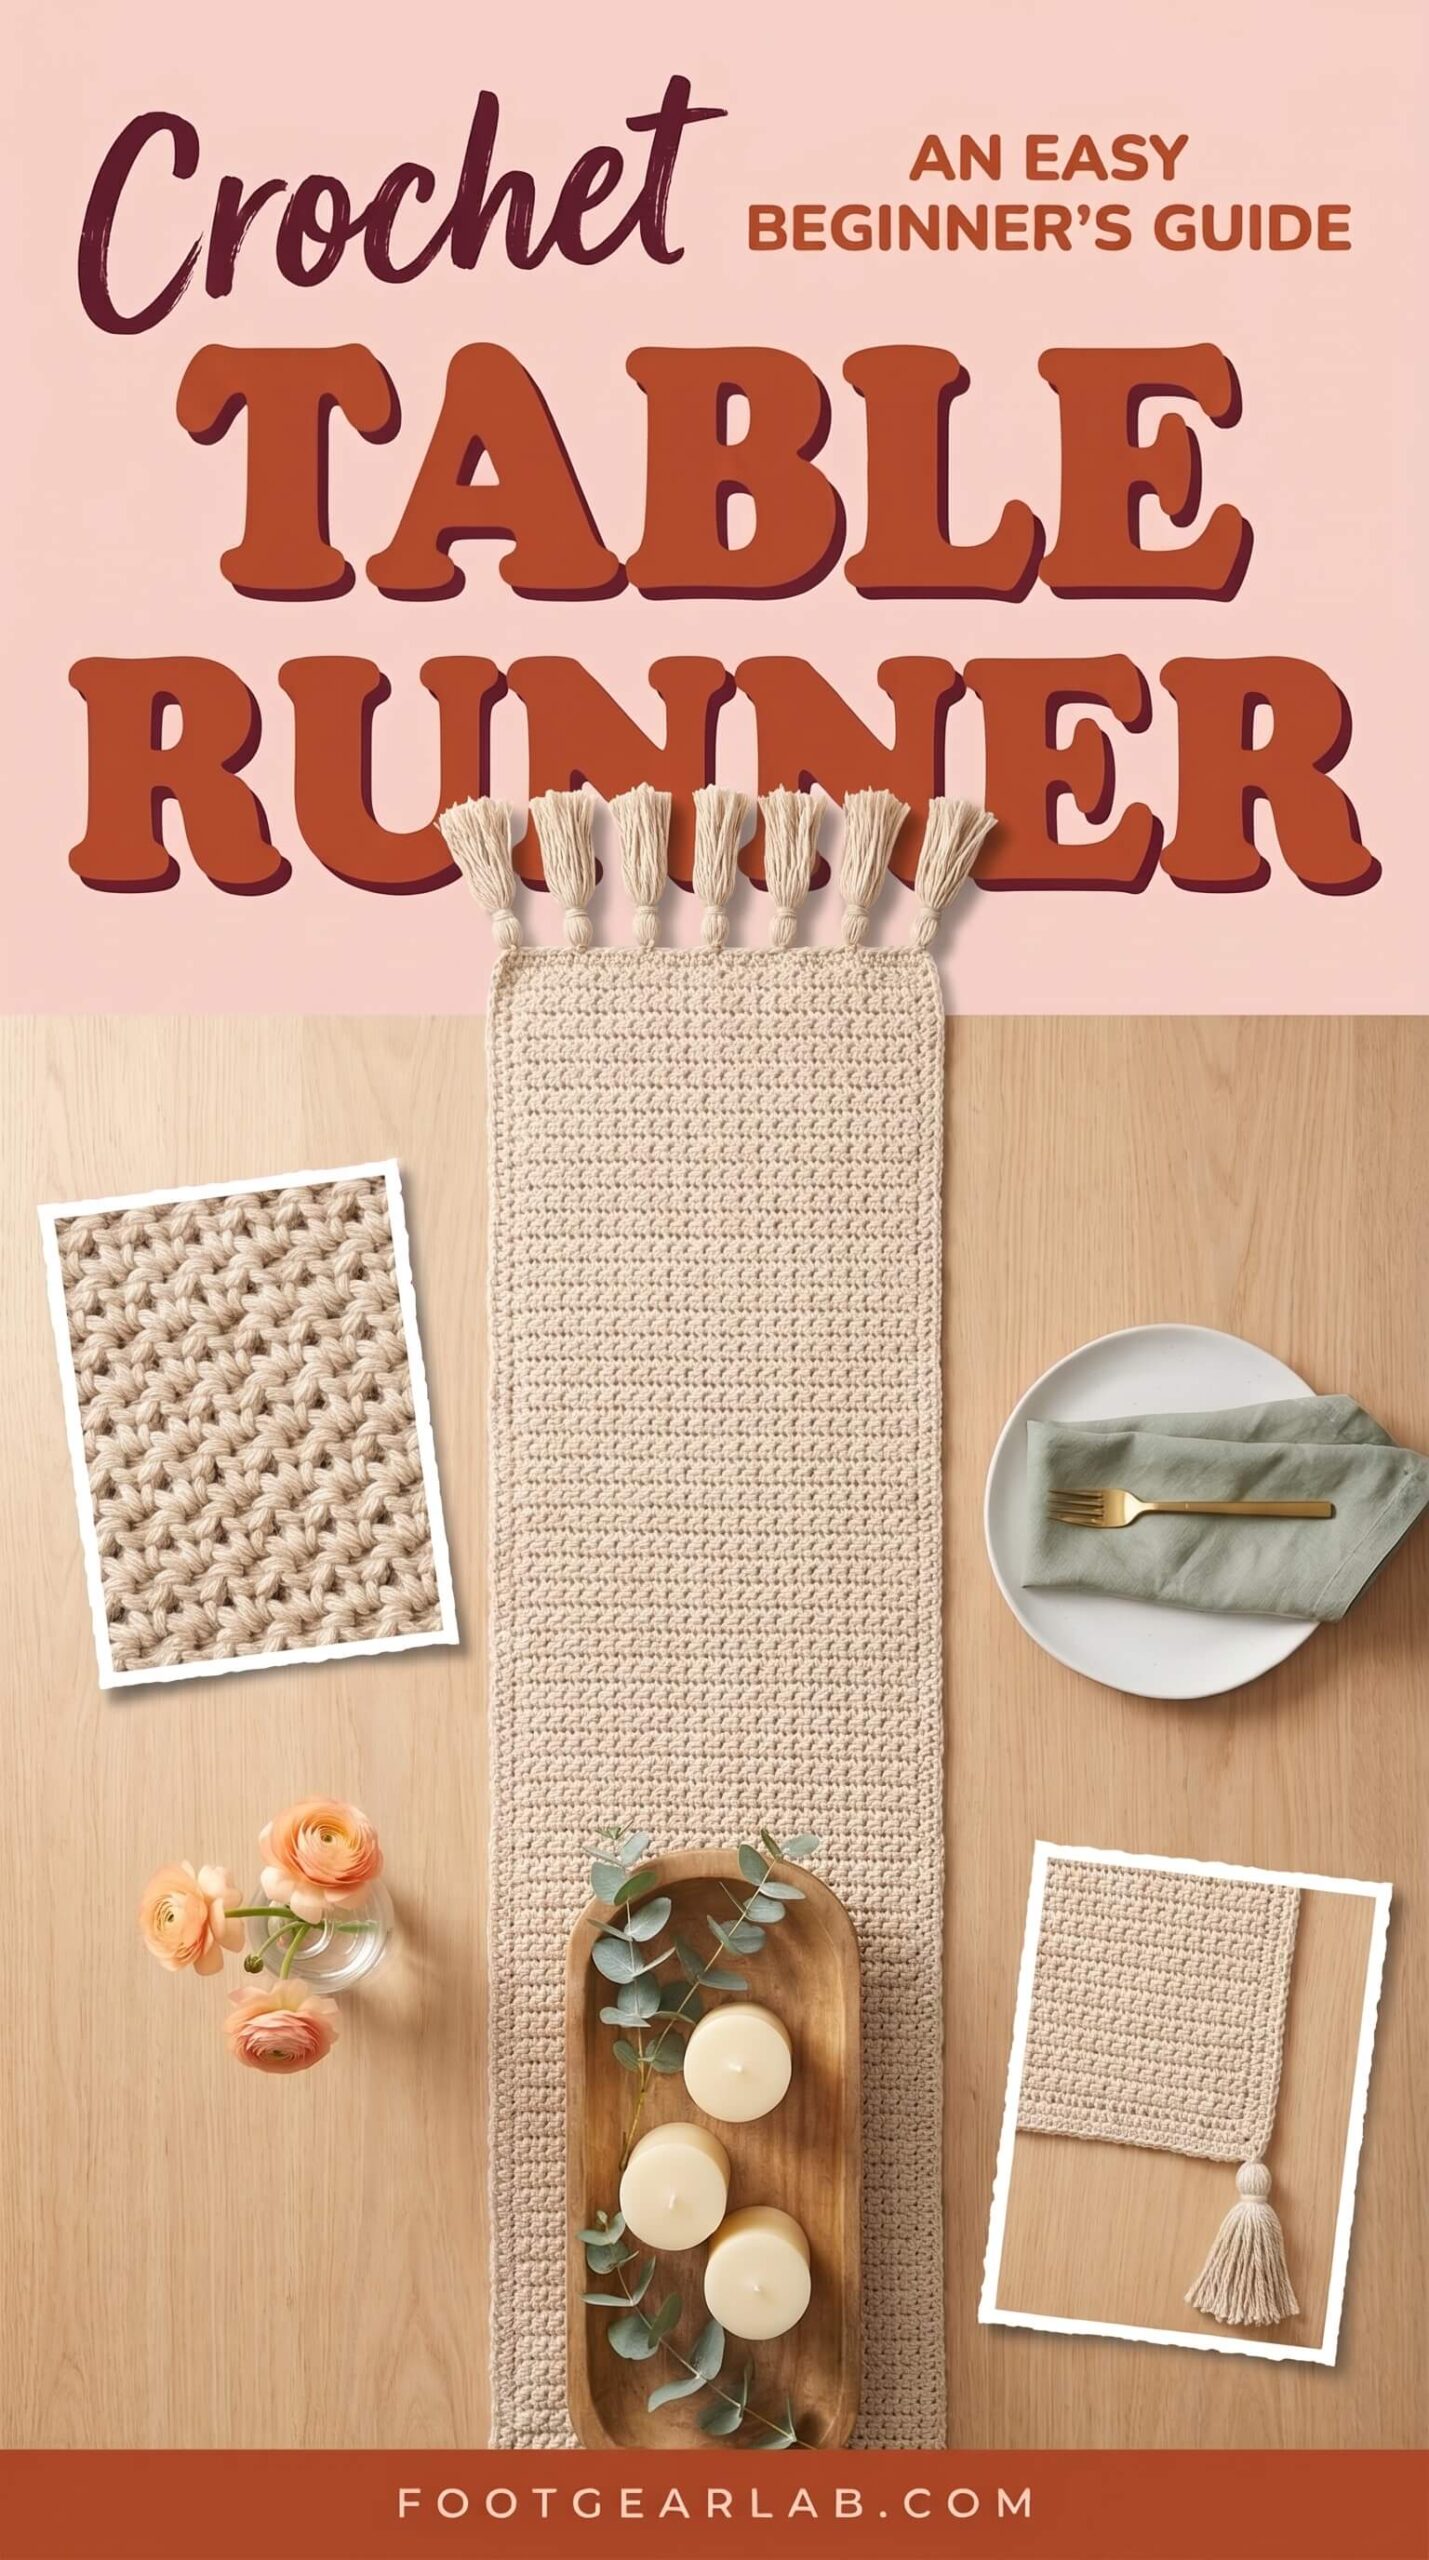
Crochet Table Runner: An Easy Beginner’s Guide
A crochet table runner is one of those projects that quietly changes a whole room. Lay one down the center of your dining table and the space suddenly feels warmer, more finished and more you. It softens hard wood and glass surfaces, frames your centerpiece, and gives you an easy way to bring color, texture and seasonal charm into your home without buying new furniture or decor.
The best part is that a table runner is a wonderful project for beginners. It is simply a long rectangle, so there is no shaping, no tricky increases and no complicated assembly. If you can make a chain and a single crochet, you can make a beautiful runner. And if you already crochet, a runner is the perfect canvas for trying new stitches, playing with color or making a handmade gift that looks truly heirloom-worthy.
In this guide, you will find everything you need to make your own: how to choose the right yarn and size for your table, a free beginner pattern for a textured moss stitch runner with optional tassels, eight pretty runner ideas for every style and season, styling tips, care advice and an easy troubleshooting guide. Make yourself a cup of tea, grab your hook, and let’s create something lovely for your table.
Why a Crochet Table Runner Is the Perfect Home Project
A runner may look simple, but it offers a surprising number of benefits, which is exactly why it is such a popular choice for makers of every level.
- It is beginner friendly. Because a runner is a straight rectangle worked in rows, you only need to repeat the same two or three rows over and over. That rhythm is relaxing, it builds muscle memory quickly, and it lets you watch your skills and your tension improve as the runner grows.
- It makes a big visual impact. Unlike small projects that sit in a drawer, a table runner is front and center in your home every day. A single handmade runner can tie together your dishes, flowers and candles and make an ordinary dinner feel special.
- It protects your table. A cotton runner helps guard your table from scratches caused by vases, candle holders and decorative bowls, and it catches small drips and crumbs. It will not replace a trivet under a hot pan, but it adds a gentle layer of protection to the most-used part of your table.
- It is easy to customize. You decide the length, the width, the color and the texture. You can make it fit a small round bistro table, a long farmhouse table, a coffee table, a dresser or even a fireplace mantel, simply by adjusting the number of stitches and rows.
- It is a meaningful gift. A handmade runner is the kind of present people keep for years. It is perfect for weddings, housewarmings, Mother’s Day and the holidays, and it is often passed down as a family keepsake.
Choosing the Right Yarn for a Crochet Table Runner
The yarn you choose shapes how your runner looks, how it lies on the table and how well it survives spills and washing. Since a runner lives in the middle of your meals, fiber content matters a lot.
Cotton Yarn: The Best All-Around Choice
100% cotton yarn is the top choice for a table runner. Cotton has a crisp stitch definition that shows off texture beautifully, it lies flat and heavy on the table instead of sliding around, and it can be washed again and again. It also has a natural matte look that suits farmhouse, Scandinavian, boho and classic interiors alike. A worsted weight (weight 4) cotton is the easiest to work with as a beginner, and it is what the pattern in this guide uses.
Cotton Thread for Lacy Runners
If you dream of a delicate, vintage-style lace runner like the ones you may remember from your grandmother’s table, you will use crochet cotton thread instead, usually size 10. Thread runners take longer and use a much smaller steel hook, so they are best saved for when you feel comfortable reading patterns and counting stitches.
Other Good Options
Cotton blends with linen or bamboo have a soft drape and a subtle sheen that looks elegant on formal tables. Recycled cotton and cotton-acrylic blends are budget friendly and lightweight, which is handy for very long runners. Acrylic yarn can work for purely decorative runners on coffee tables or dressers, but it tends to look shinier, can pill over time and does not lie as flat, so it is not the best choice for a dining table.
Colors That Work Beautifully
Neutral shades such as oatmeal, ivory, flax and soft gray are the most versatile because they work with every season and every set of dishes. If you would like more personality, earthy sage, terracotta and mustard feel warm and cozy, while soft blues and whites suit coastal homes. Lighter colors show stitch texture best, while darker colors hide stains better, so think about how often your table is used for messy family meals.
Tools and Materials You Will Need
You do not need anything fancy to make a crochet table runner. Here is everything used for the beginner pattern in this guide.
- Worsted weight 100% cotton yarn, about 1,000 yards (915 m). The runner and border use roughly 850 yards and the optional tassels use about 90 yards. Exact amounts vary with your tension, so it is always wise to buy one extra ball from the same dye lot.
- A 5 mm (US H-8) crochet hook. Choose a hook with a comfortable handle, since a runner involves many rows. If your stitches look very tight, you can move up to a 5.5 mm hook.
- A blunt yarn needle with a large eye. You will use it to weave in the yarn ends neatly and to attach the tassels securely.
- Sharp scissors and a tape measure. You will measure your gauge swatch, your runner length and your tassels, so a soft tape measure that bends easily is ideal.
- Two locking stitch markers. These help you keep track of the first stitch of each row, which is the secret to perfectly straight edges.
- A 5-inch (12.5 cm) piece of cardboard (optional). This is your tassel maker. Any sturdy piece from a cereal box or shipping box works well.
- Blocking mats or thick towels and rust-proof pins. Blocking gives your runner crisp, straight edges and helps it lie perfectly flat on the table.
How to Choose the Right Size Runner for Your Table
Before you start crocheting, take two minutes to measure your table. The right size is what makes a runner look intentional and elegant rather than too skimpy or too bulky.
Width. A good rule of thumb is that a runner should be about one-third of your table’s width. Most rectangular dining tables are 36 to 40 inches wide, so a runner of 12 to 15 inches looks balanced. Narrower runners of 10 to 12 inches suit coffee tables, consoles and dressers.
Length. You have two pretty options. A runner that sits on top of the table without hanging over the ends should be about 12 inches shorter than the table, which leaves roughly 6 inches of bare wood at each end. A runner with a drop hangs over each end of the table by about 6 inches, so it should be about 12 inches longer than the table. A drop looks more formal and traditional, while a runner that stays on top feels modern, casual and family friendly, and it keeps little hands from pulling on the ends.
| Table | Seats | Runner That Sits on Top | Runner With a 6-Inch Drop |
|---|---|---|---|
| 48-inch round or square | 4 | 36 inches | 60 inches |
| 60-inch rectangle | 4 to 6 | 48 inches | 72 inches |
| 72-inch rectangle | 6 | 60 inches | 84 inches |
| 84 to 96-inch rectangle | 8 | 72 to 84 inches | 96 to 108 inches |
| Coffee table, 48 inches | — | 36 inches | Not recommended |
| Dresser or console, 60 inches | — | 48 inches | 60 to 66 inches |
The beginner pattern below makes a runner about 14 x 48 inches, which sits beautifully on top of a 60-inch table and works well on a 72-inch table too. You can easily make it longer or shorter, and the pattern explains exactly how.
Crochet Stitches and Abbreviations Used
This pattern uses US crochet terms and only a few basic stitches. If you are new to crochet, practice a small piece of single crochet first, and the moss stitch will feel easy.
| Abbreviation | Meaning | What It Means in This Pattern |
|---|---|---|
| ch | chain | Used for the foundation chain and for the small spaces in the moss stitch. |
| sc | single crochet | The main stitch of the runner and its border. |
| sk | skip | Skip the next stitch or chain without working into it. |
| sp | space | The small gap created by a ch-1 in the row below. |
| sl st | slip stitch | Used to join the border rounds neatly. |
| st(s) | stitch(es) | In this pattern, each sc and each ch-1 counts as one stitch. |
| RS | right side | The side that faces up when the runner is on the table. |
About the Moss Stitch
The moss stitch, also called the linen stitch or woven stitch, is made by alternating single crochets with chain-1 spaces. On each new row, you work your single crochets into the chain spaces of the row below and chain over the single crochets. The result is a dense, flat, woven-looking texture that resembles fine linen fabric. It does not curl the way plain single crochet sometimes does, it hides small tension differences beautifully, and it looks just as lovely on the back as on the front, which is perfect for a runner.
Free Pattern: Easy Moss Stitch Crochet Table Runner
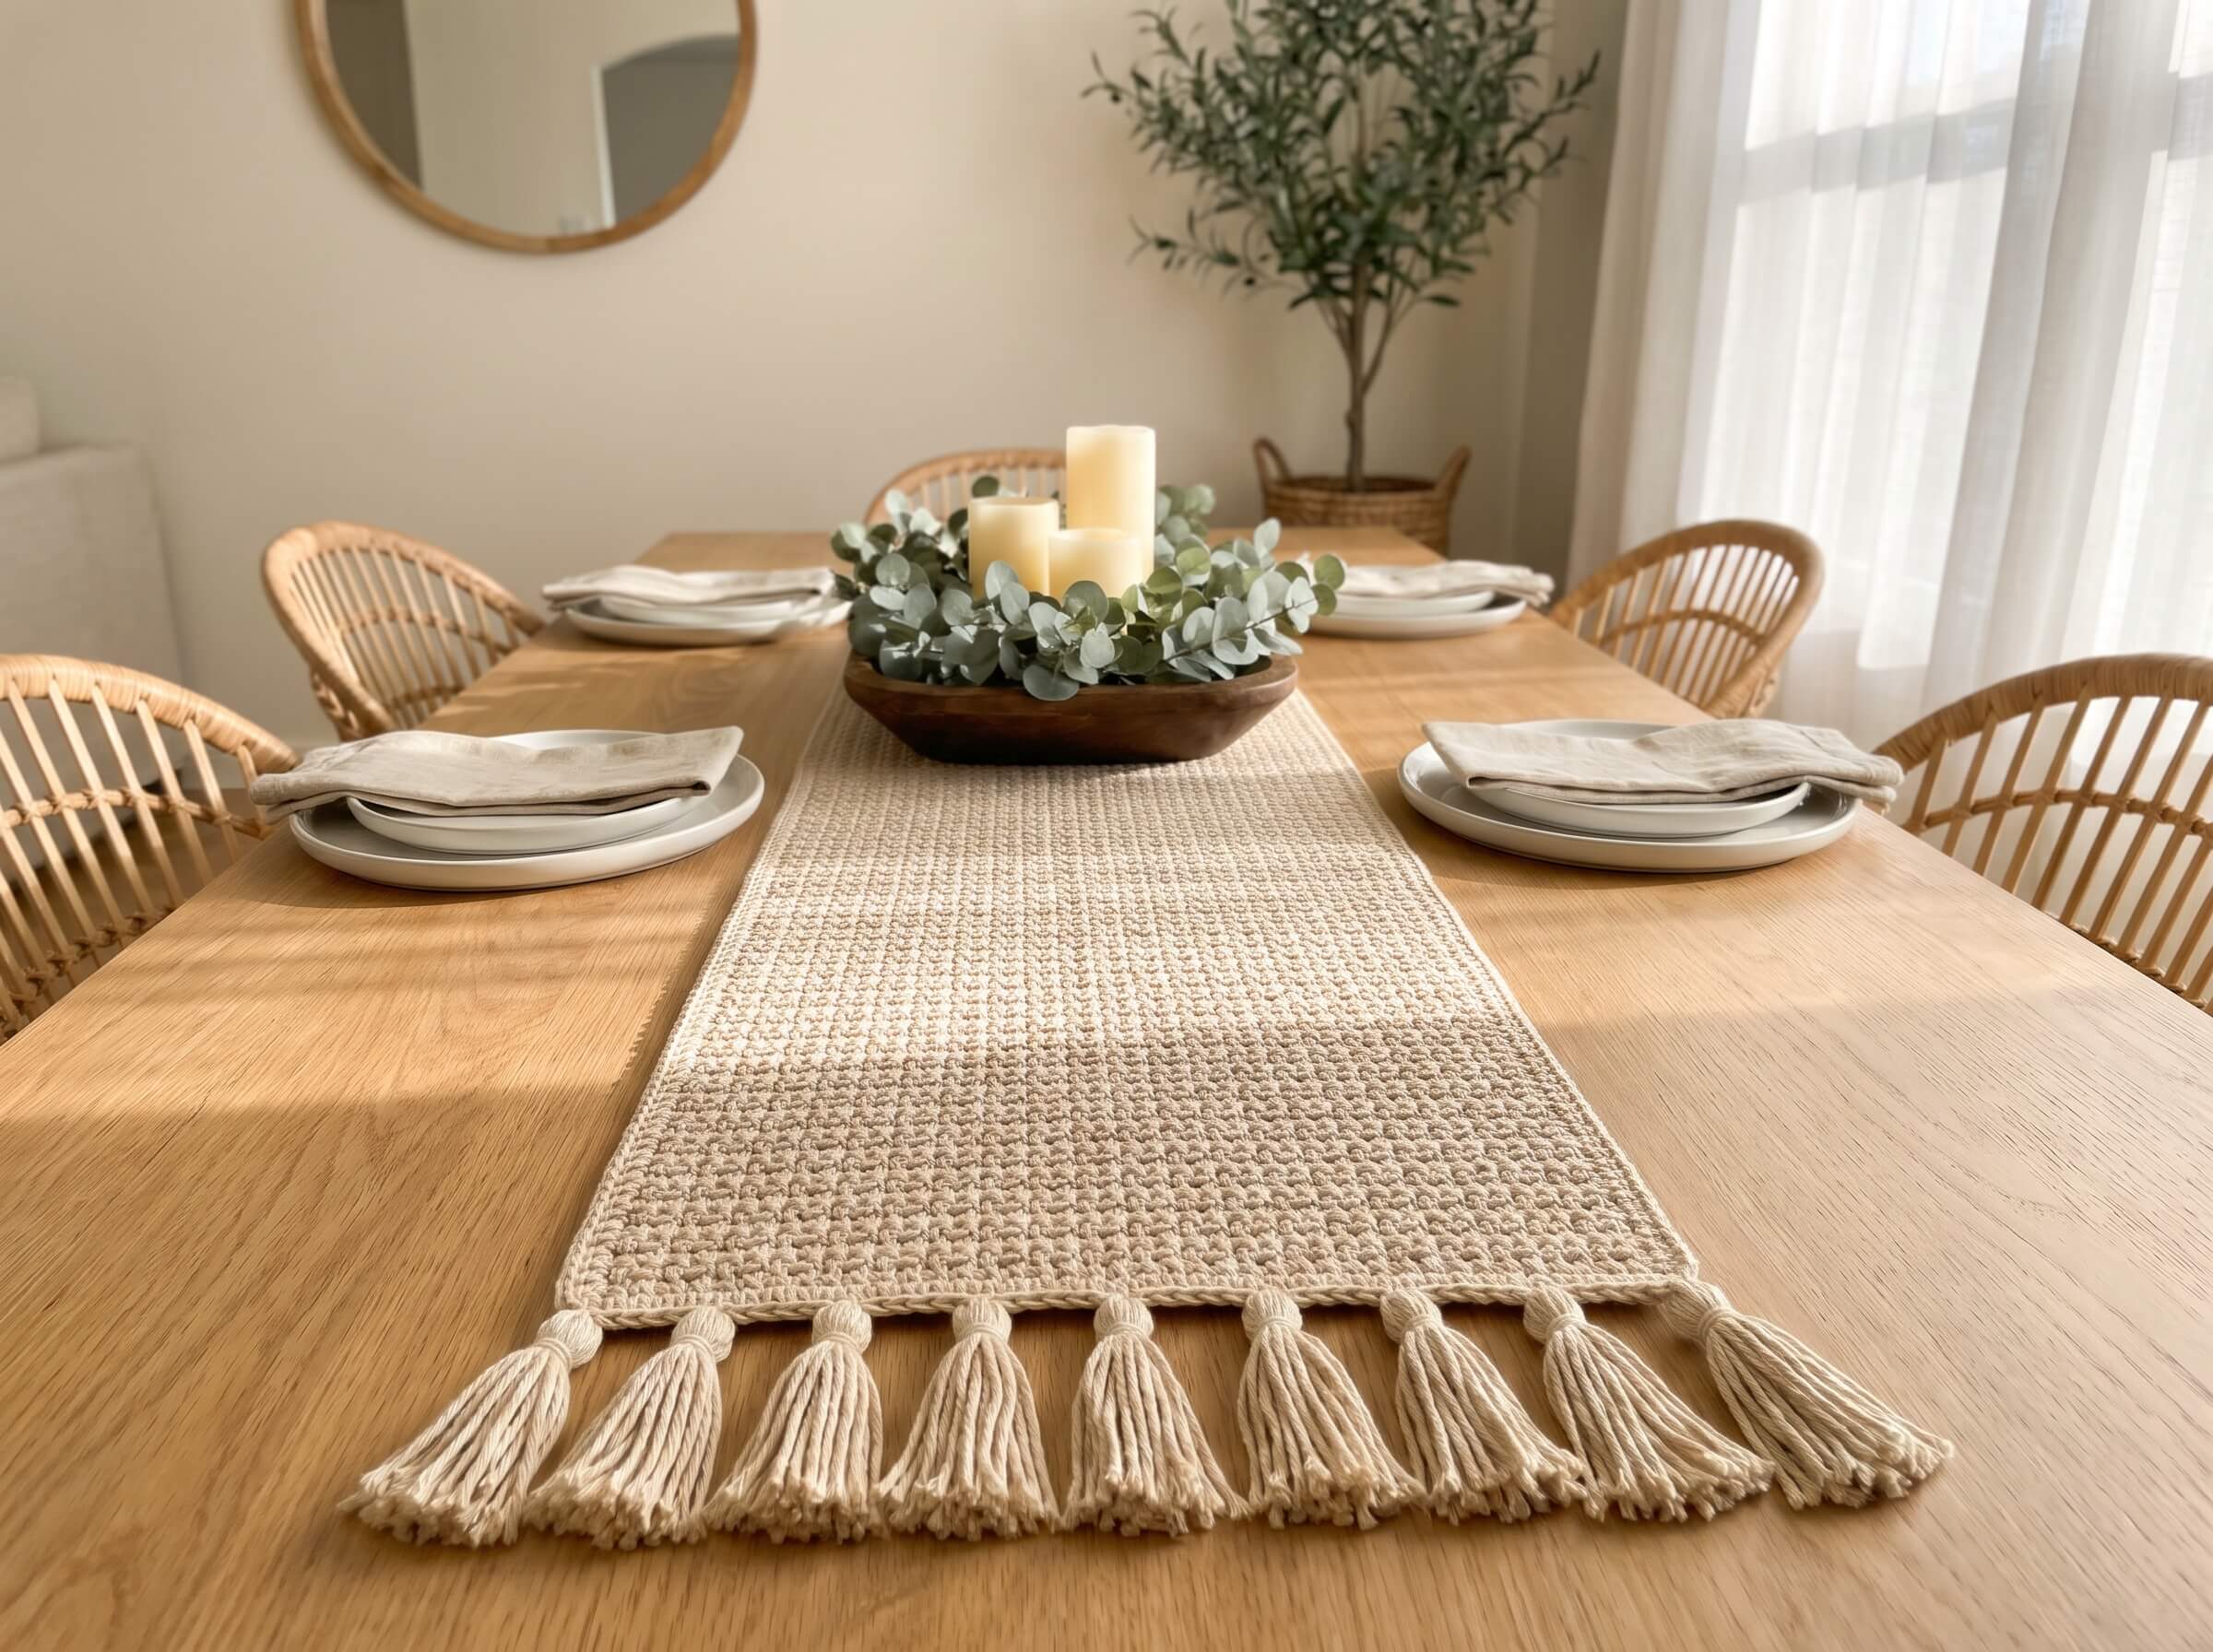
This is a relaxing, beginner-friendly runner worked in short rows across the width, so you can stop at any length that suits your table. It is finished with a simple two-round border and optional tassels for a cozy, boho-meets-farmhouse look.
Pattern at a Glance
| Detail | Information |
|---|---|
| Skill level | Easy beginner |
| Finished size | About 14 x 48 inches (35.5 x 122 cm), not including tassels |
| Yarn | Worsted weight 100% cotton, about 850 yards for the runner and border, plus about 90 yards for tassels |
| Hook | 5 mm (US H-8) |
| Gauge | 16 sts and 16 rows = 4 inches (10 cm) in moss stitch, counting each sc and each ch-1 as one stitch |
| Time | Roughly 15 to 25 hours, depending on your speed |
Step 1: Make a Gauge Swatch
Gauge simply means how many stitches and rows fit into 4 inches with your yarn, hook and hands. Checking it first is how you make sure your runner ends up the size you planned instead of a surprising few inches too wide or too narrow.
Chain 18. Then work Rows 1, 2 and 3 of the pattern below, and keep repeating Rows 2 and 3 until you have 18 rows in total. Fasten off and lay the swatch flat without stretching it. Place your tape measure across the middle of the swatch and count the stitches in 4 inches, remembering that every single crochet and every chain-1 space counts as one stitch.
If you have more than 16 stitches in 4 inches, your tension is tight, so try a larger hook. If you have fewer than 16 stitches, your tension is loose, so try a smaller hook. Being off by half a stitch is perfectly fine for a runner, since exact fit is not as critical as it is for clothing, but checking now saves you from running out of yarn later.
Step 2: Make the Foundation Chain and Row 1
Foundation: Chain 54.
Row 1 (RS): Sc in the 2nd ch from the hook. Ch 1, sk the next ch, sc in the next ch. Repeat from * across. Turn. You should have 53 stitches: 27 single crochets and 26 chain-1 spaces.
Take your time on this first row, because it is the hardest row of the whole runner. The foundation chain can feel tight and fiddly, so if your chains are snug, try making them with a hook one size larger and then switching back to your 5 mm hook for Row 1. Count your stitches when you finish, because a correct Row 1 makes every following row easy.
Step 3: Work the Moss Stitch Rows
Row 2: Ch 1 (this does not count as a stitch). Sc in the first sc, then sc in the next ch-1 sp. Ch 1, sk the next sc, sc in the next ch-1 sp. Repeat from * until only the last sc remains, then sc in the last sc. Turn. You should have 53 stitches: 28 single crochets and 25 chain-1 spaces.
Row 3: Ch 1. Sc in the first sc. Ch 1, sk the next sc, sc in the next ch-1 sp. Repeat from * until 2 single crochets remain, then ch 1, sk the next sc, and sc in the last sc. Turn. You should have 53 stitches: 27 single crochets and 26 chain-1 spaces.
Rows 4 and onward: Repeat Rows 2 and 3 until the runner measures about 47 inches (119 cm) from the foundation chain, ending after a Row 3. Do not fasten off, because you will go straight into the border.
Here is a simple way to remember the rhythm: every single crochet goes into a chain space, and every chain-1 sits on top of a single crochet. The only exceptions are the edge stitches, which always go into the first and last single crochet of the row. Those edge stitches are what keep your runner’s sides straight.
Beginner tip for straight edges: Clip a locking stitch marker into the first single crochet of each row as you work it. When you come back along the next row, that marked stitch is the last stitch you need to work into, so you will never accidentally skip it. Move the marker up as you go. It also helps to count your single crochets every ten rows or so: rows alternate between 28 and 27 single crochets, and if that number changes, you can catch the mistake before it shows.
Adjusting the size: For a longer or shorter runner, simply work more or fewer rows. About 4 rows equal 1 inch, so adding 48 rows makes the runner about 12 inches longer. For a wider or narrower runner, add or subtract chains in multiples of 2, keeping the foundation chain an even number. Each 2 chains add or remove about half an inch of width.
Step 4: Add the Border
A simple single crochet border frames the runner and hides any small bumps along the side edges, so even your very first runner looks polished.
Round 1: Ch 1 and turn. Working across the top edge, work 3 sc in the first stitch (this is your first corner). Sc in each stitch and each ch-1 sp across until 1 stitch remains, then work 3 sc in the last stitch (second corner). Now rotate the runner and work down the long side, making 1 sc in the end of each row. At the bottom corner, work 3 sc in the first remaining loop of the foundation chain. Sc in each remaining loop of the foundation chain across until 1 loop remains, then work 3 sc in the last loop. Rotate again and work up the second long side, making 1 sc in the end of each row. Join with a sl st to the first sc of the round.
Round 2: Ch 1. Sc in each sc around, working 3 sc in the center sc of each 3-sc corner. Join with a sl st to the first sc. Fasten off and weave in all ends securely with your yarn needle.
Check your border as you go. If the long sides start to ripple or wave, you are adding too many stitches, so skip a row end every 10 rows or so. If the edges pull in and the runner looks pinched, add an extra sc every 10 rows. A flat, smooth border is the goal.
Step 5: Block Your Runner
Blocking is the step that makes handmade look professional. It relaxes the stitches, evens out small tension differences and gives your runner straight, crisp edges that lie flat on the table.
Soak the runner in cool water for about 15 minutes, then gently press out the water without wringing or twisting. Roll it in a large dry towel to remove more moisture. Lay it flat on interlocking blocking mats or a thick layer of towels, and gently shape it to about 14 x 48 inches, using your tape measure to check that both long sides are the same length and both short ends are the same width. Pin it in place every 2 to 3 inches along all four edges with rust-proof pins, keeping the edges perfectly straight. Let it dry completely, which usually takes about 24 hours. Block the runner before adding tassels so they stay fluffy and neat.
Step 6: Make and Attach the Tassels (Optional)
Tassels give your runner a relaxed boho charm and a lovely sense of movement. You will make 7 tassels for each short end, 14 in total.
To make one tassel, wrap your yarn around the 5-inch length of your cardboard 20 times. Cut a 12-inch strand of yarn, slip it under all the wraps at the top edge of the cardboard and tie it tightly in a double knot, leaving the long ends free for attaching. Cut through all the wraps along the bottom edge of the cardboard. Next, cut a 10-inch strand and wrap it tightly around the tassel about three-quarters of an inch below the top, wind it around three or four times, tie a secure knot and use your yarn needle to hide the ends inside the tassel. Finally, trim the bottom of the tassel so all strands are an even 4.5 inches long.
To attach the tassels, place one at each corner of a short end and space the other 5 evenly between them, about 2.25 inches apart. Thread the long tie ends onto your yarn needle, pass them through the border from front to back, knot them securely on the wrong side and weave the ends in. Repeat on the other short end. For extra-neat tassels, lightly steam them with an iron held above the yarn, never touching it, then give them a final trim.
Your Finished Runner
Lay your runner down the center of your table, fluff the tassels and step back to admire it. You have just made a piece that can stay on your table every day, change with your centerpieces through the seasons, and remind you every time you sit down to eat that you made it with your own hands.
8 Beautiful Crochet Table Runner Ideas for Every Style
Once you have made your first runner, you may find it hard to stop. Here are eight gorgeous ideas to inspire your next project, from relaxed boho to timeless vintage lace.
1. Boho Fringe Runner
A boho runner pairs a simple textured stitch with long, swingy fringe for a relaxed, free-spirited look. Try a natural cream base with a few bands of mustard and terracotta stripes near each end, then add 6 to 8 inches of fringe made from bundled strands knotted along the short edges. It is a great second project for beginners, because the stitch work is simple and the fringe does most of the decorative work. It looks especially lovely on a wooden coffee table with dried pampas grass, woven baskets and plenty of greenery.
2. Granny Square Runner
A granny square runner is cheerful, nostalgic and wonderfully customizable. You crochet a stack of small squares, then join them in a long strip, usually two squares wide, and finish with a simple border. It is perfect for using up leftover yarn and for crocheting on the go, since each square is small enough to carry in your bag. A vintage palette of mustard, sage, dusty rose and cream joined with cream yarn looks charming on a white farmhouse table, while all-neutral squares feel modern and calm.
3. Vintage Pineapple Lace Runner
Pineapple lace is one of the most beloved traditional crochet designs, named for the pineapple-shaped motifs formed by rows of chain spaces and shells. Worked in fine white or ecru cotton thread, these runners have an heirloom elegance that instantly makes a room feel graceful and timeless. They are best for confident crocheters who enjoy following charts, since they use a steel hook and a lot of counting. A pineapple runner looks breathtaking on a dark wood table, sideboard or buffet, where the lace stands out beautifully.
4. Filet Crochet Diamond Runner
Filet crochet creates pictures and patterns using a simple grid of filled and open squares, so it looks intricate but is actually based on just chains and double crochets. A runner with a row of solid diamonds or geometric shapes against an open mesh background feels both vintage and surprisingly modern. Worked in ecru thread or a light sport weight cotton, it is a lovely step up for beginners who are ready to follow a chart. It suits dressers, consoles and narrow hall tables where its pattern can be seen clearly.
5. Coastal Shell Stitch Runner
The shell stitch creates rows of fan-shaped scallops that look like little seashells, which makes it perfect for a breezy, coastal-inspired home. Alternate stripes of crisp white and soft ocean blue, and finish the edges with a scalloped border. The shell stitch is simple to learn once you are comfortable with double crochet, and it works up faster than single crochet stitches. Style it on a whitewashed table with a glass bowl of seashells, a hurricane lantern and a few sprigs of greenery for a relaxed beach-house feel.
6. Fall Harvest Leaf Runner
A fall runner brings the warmth of autumn to your table from September through Thanksgiving. Try a runner in warm stripes of rust, mustard and olive, then sew small crocheted maple leaves onto each end for a sweet seasonal touch. The leaves are quick little projects that make great practice for working in the round. Surround the runner with mini pumpkins, pinecones and candles, and you will have a cozy harvest table that is ready for family dinners and gatherings.
7. Christmas Stripe Runner
A Christmas runner is one of the most festive and rewarding projects you can make, and it often becomes the decoration your family looks forward to unpacking every year. A deep cranberry red runner with cream and forest green stripes near each end looks classic and cozy, especially with a scalloped edge. Make it early in the fall so it is ready for December, or make a few extras as handmade gifts for friends and family. Style it with pine garland, pinecones, gold candlesticks and twinkling fairy lights.
8. Spring Flower Motif Runner
A flower motif runner is made by joining small hexagon or round motifs, each with a little flower at its center, into a long, airy strip. Using the join-as-you-go method, you connect each new motif to the previous ones on its final round, which means no sewing at the end. Soft cream motifs with pastel flower centers in blush pink, lilac and butter yellow feel fresh and romantic for spring brunches, Easter tables and garden parties. It is a lovely project for advanced beginners who want to try motifs.
How to Style Your Crochet Table Runner
A runner is most beautiful when it becomes part of a thoughtful little scene. These simple styling ideas help your handmade piece look like it came straight out of a home decor magazine.
Create a centerpiece vignette. Group three items of different heights in the middle of the runner, such as a vase of flowers or greenery, a candle or candlestick and a low bowl or tray. Odd numbers and varied heights look natural and balanced, and keeping the arrangement low means everyone can still see each other across the table during meals.
Layer it over other textiles. For a cozy, collected look, lay your crochet runner over a linen tablecloth in a slightly different shade, or layer two runners across the table in a cross shape so they also act as placemats for the people sitting at each side. Layering works especially well on round tables, where a single runner can look a little lonely.
Use it beyond the dining table. Runners look gorgeous on coffee tables, sideboards, entryway consoles, dressers, the top of a piano, a kitchen island or a bench at the foot of the bed. A shorter runner on a bookshelf or mantel adds softness to hard surfaces and makes the room feel lived-in and warm.
Change it with the seasons. Keep a neutral runner as your everyday base and simply swap the items on top: fresh tulips in spring, lemons and herbs in summer, mini pumpkins in fall and pine garland in winter. If you love crocheting, you can also build a small collection of seasonal runners and rotate them through the year.
Repeat its colors around the room. Pick one color from your runner and echo it elsewhere, such as in your napkins, a vase, a throw pillow or a candle. This small trick makes the whole space feel pulled together and intentional.
How to Care for a Crochet Table Runner
A cotton runner is easy to care for, and a little attention will keep it looking fresh for many years.
Wash it gently. Hand wash your runner in cool water with a mild detergent, or machine wash it on a gentle cold cycle inside a large mesh laundry bag. Avoid bleach on colored yarns, and skip fabric softener, which can leave cotton limp and less absorbent.
Dry it flat. Gently press out the water, roll the runner in a towel and lay it flat to dry, reshaping it to its original size as you go. Avoid the dryer, because heat can shrink cotton and make the runner warp, felt or lose its shape. If the edges need a little help, pin it out as you did when blocking.
Treat spills quickly. Blot spills right away with a clean cloth rather than rubbing, which can push the stain deeper into the fibers. For candle wax, place the runner in the freezer for an hour, then gently crack and peel the hardened wax away.
Protect it from heat. Always use a trivet under hot dishes and pans. A runner adds a soft layer of protection but is not designed to handle direct heat from cookware.
Store it rolled. When your runner is not in use, roll it around a cardboard tube or a rolled-up towel instead of folding it. This prevents creases and keeps the stitches smooth, and storing it in a breathable cotton bag protects it from dust and moths.
Troubleshooting Common Crochet Table Runner Problems
Every crocheter runs into a few hiccups, especially on a long project. Here is how to recognize and fix the most common ones.
| Problem | Why It Happens | How to Fix It |
|---|---|---|
| The runner gets wider or narrower | Stitches are being added or skipped at the row ends, usually by missing the last stitch or working twice into the first. | Use a stitch marker in the first sc of each row and count your single crochets every 10 rows. Rows should alternate between 28 and 27 sc. |
| The side edges look wavy or bumpy | Tension changes at the ends of rows, or the turning chain is too tight or too loose. | Keep your ch-1 at the start of each row relaxed but not loose. The border and blocking will smooth small bumps. |
| The runner curls at the edges | Your tension is tight, which pulls the fabric inward. | Try a hook half a size or one size larger, and always wet block the finished runner. |
| The moss stitch has large holes | Your hook is too large or your chain-1s are too loose. | Go down a hook size and keep your chain-1s snug, about the same height as your single crochets. |
| The border ruffles | Too many stitches are worked along the long sides. | Skip a row end every 10 rows or so, and check that only 3 sc are worked in each corner. |
| The border pulls in and puckers | Too few stitches are worked along the edges. | Add an extra sc every 10 row ends until the border lies flat. |
| The runner looks slanted or twisted | Uneven tension over many rows, or the runner was blocked crooked. | Wet block it again, measuring both long sides and both short ends so they match, and pin it straight. |
| The tassels look messy | Strands are uneven, or the yarn is kinked from the cardboard. | Lightly steam the tassels with an iron held above them, then trim the ends evenly. |
Frequently Asked Questions
Can a complete beginner make a crochet table runner? Yes. A table runner is one of the best first big projects, because it is a simple rectangle with no shaping. The moss stitch pattern in this guide uses only chains and single crochets, and the repeating rows are easy to memorize after the first few inches. Start with a light-colored cotton yarn so you can see your stitches clearly.
How much yarn do I need for a crochet table runner? For a 14 x 48 inch runner in worsted weight cotton, plan on about 850 yards for the runner and border and about 90 yards for tassels, so roughly 1,000 yards in total. Longer or wider runners need more, and lace runners in thread use a completely different amount, so always check the yardage listed in your pattern and buy an extra ball from the same dye lot.
What is the best stitch for a crochet table runner? For a flat, solid runner, the moss stitch is a wonderful choice because it lies flat, does not curl and has a beautiful woven texture. The shell stitch, granny stripe and waffle stitch are also popular. For an airy, elegant look, filet crochet and pineapple lace are classic favorites.
How long does it take to crochet a table runner? A worsted weight runner of about 14 x 48 inches typically takes 15 to 25 hours, depending on your speed and the stitch. Lace runners in fine thread can take much longer, often 30 hours or more. Working for half an hour each evening, most beginners finish a runner in three to six weeks.
How do I make my crochet runner lie flat? Choose cotton yarn, keep your tension even, and always block your finished runner. Wet blocking, where you soak, pin and dry the runner flat to the correct measurements, is the single most effective way to get crisp, flat edges.
Can I use acrylic yarn for a table runner? You can, especially for a decorative runner on a coffee table or dresser. However, acrylic does not lie as flat as cotton, it can look shiny and it is less heat resistant, so 100% cotton or a cotton blend is the better choice for a dining table that sees daily use.
Can I machine wash my crochet table runner? Most cotton runners can be machine washed on a gentle cold cycle inside a mesh laundry bag, then laid flat to dry. Delicate lace runners and anything made with vintage thread should be hand washed to protect the fine stitches.
Final Thoughts
A crochet table runner is proof that a simple project can make a big difference in your home. With just one stitch pattern, some soft cotton yarn and a little patience, you can create a piece that brings warmth and character to every meal, changes beautifully with the seasons and might even be passed down for generations.
Start with the easy moss stitch runner in this guide, take your time with the first few rows, and do not worry about small imperfections, since the border and blocking will make it shine. Once you have finished your first one, you may find yourself planning a granny square runner for spring, a lace runner for your sideboard or a festive stripe runner for the holidays. Happy crocheting, and enjoy your beautiful handmade table.