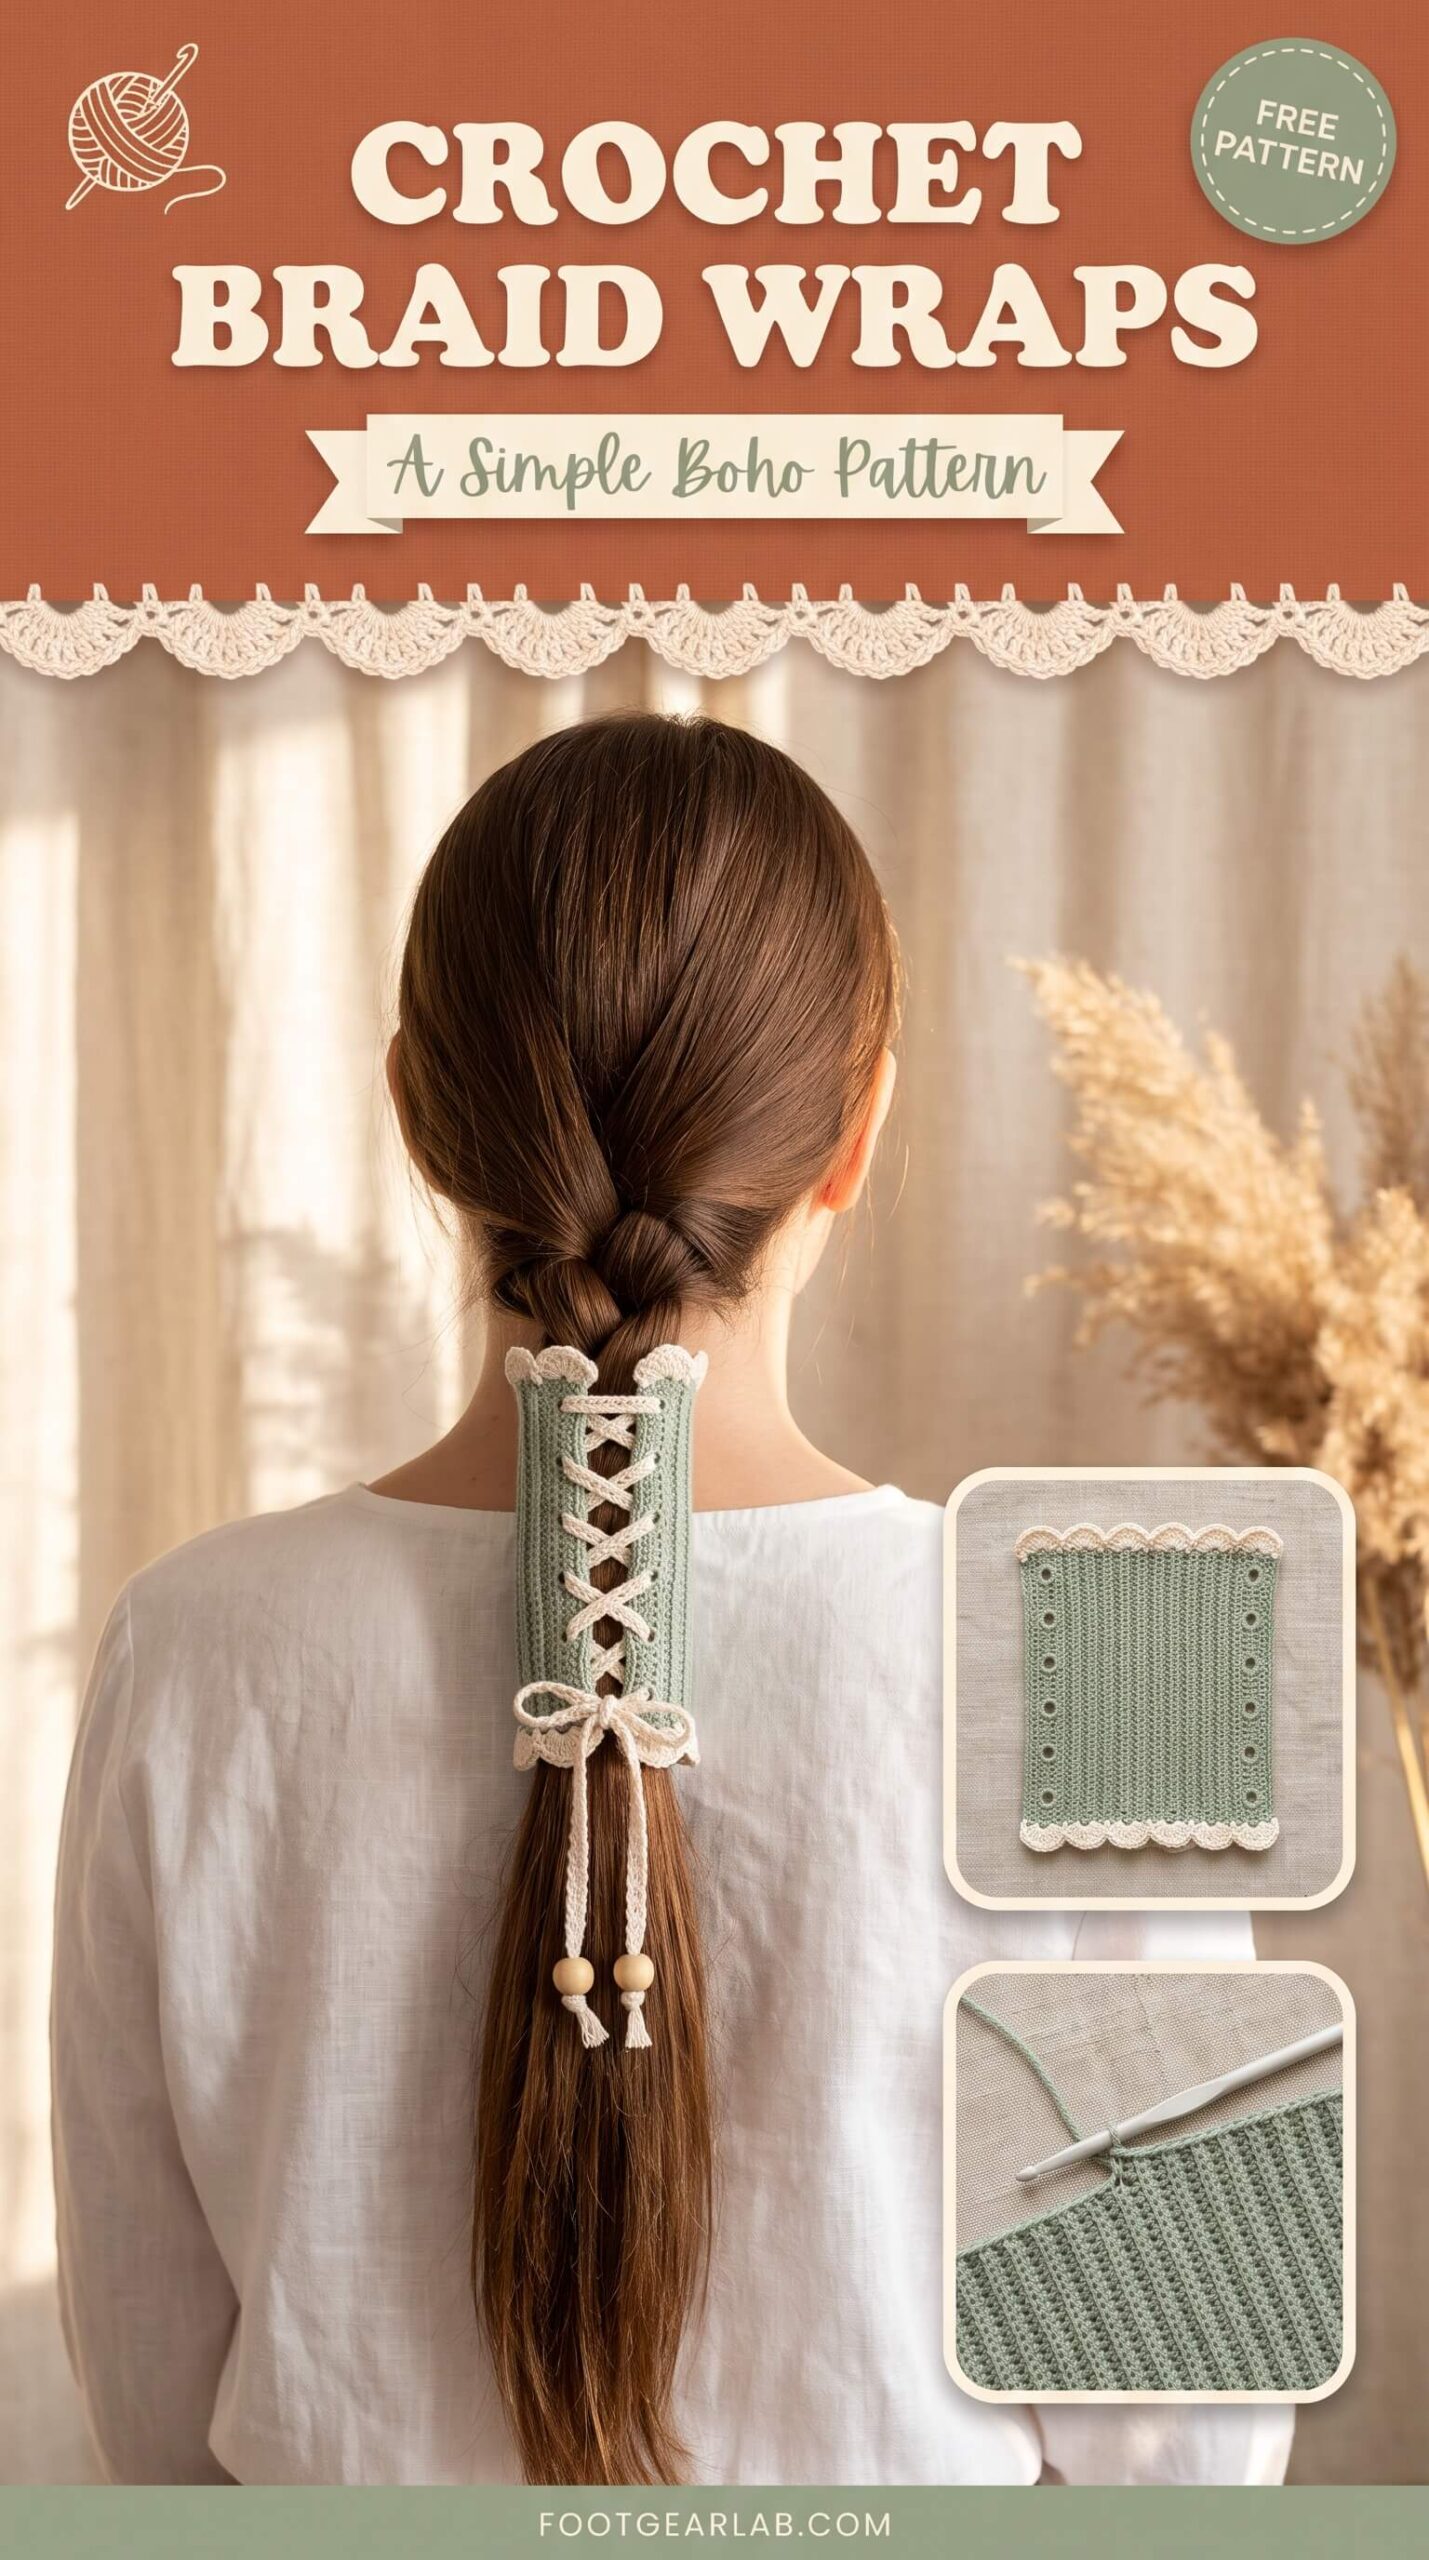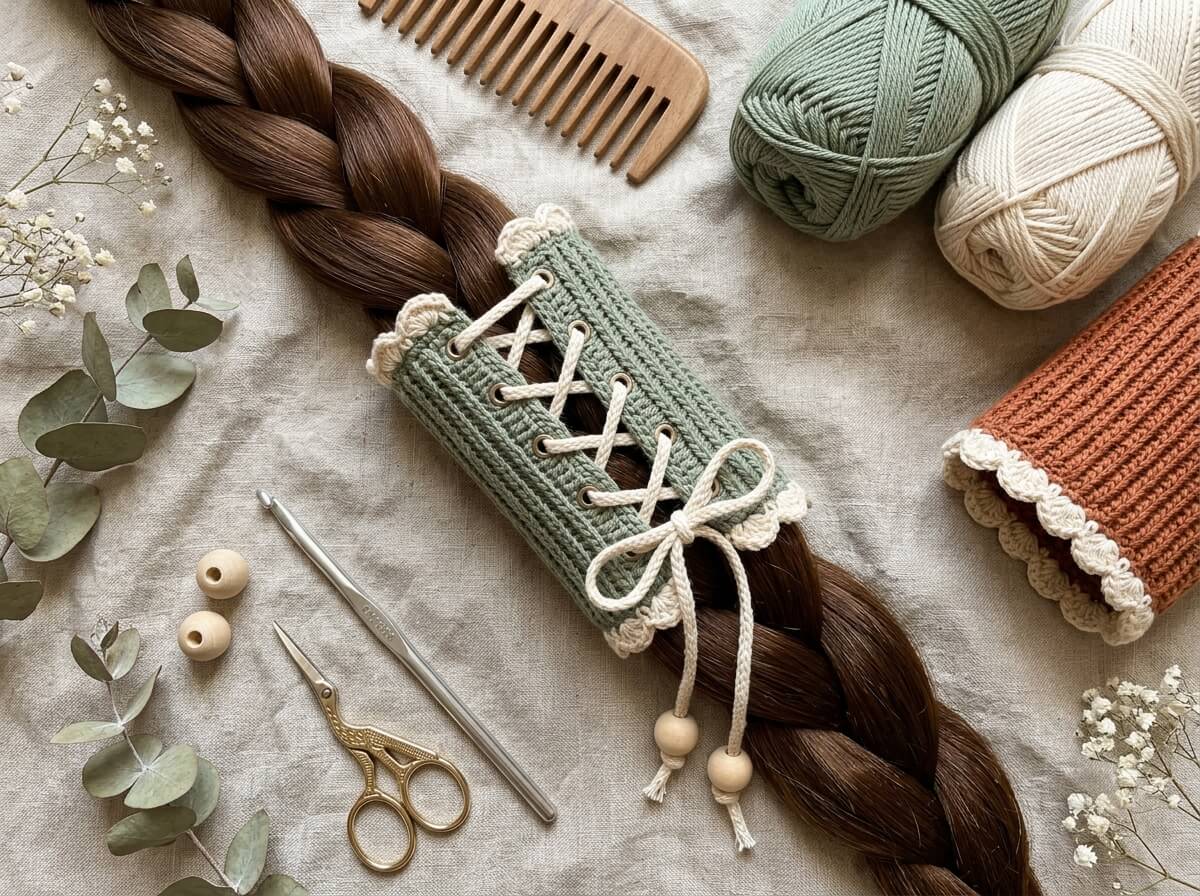
A plain braid is pretty, but a braid with a handmade accent is the kind of hairstyle people stop to compliment. Crochet braid wraps are small crocheted sleeves that hug your braid and lace up like a tiny corset, adding color, texture and a soft boho feel to your hair in seconds. They are one of the quickest and most satisfying crochet projects you can make, and they turn an everyday braid into a look that feels styled and intentional.
In this guide, you will learn how to crochet a lace-up braid wrap from start to finish, even if you have only just learned the basic stitches. You will also find a sizing chart for thin, medium and thick braids, color palette ideas, easy variations like mini cuffs for box braids and locs, styling tips, and answers to the most common questions. By the end, you will be ready to make one for every outfit.
What Is a Crochet Braid Wrap?
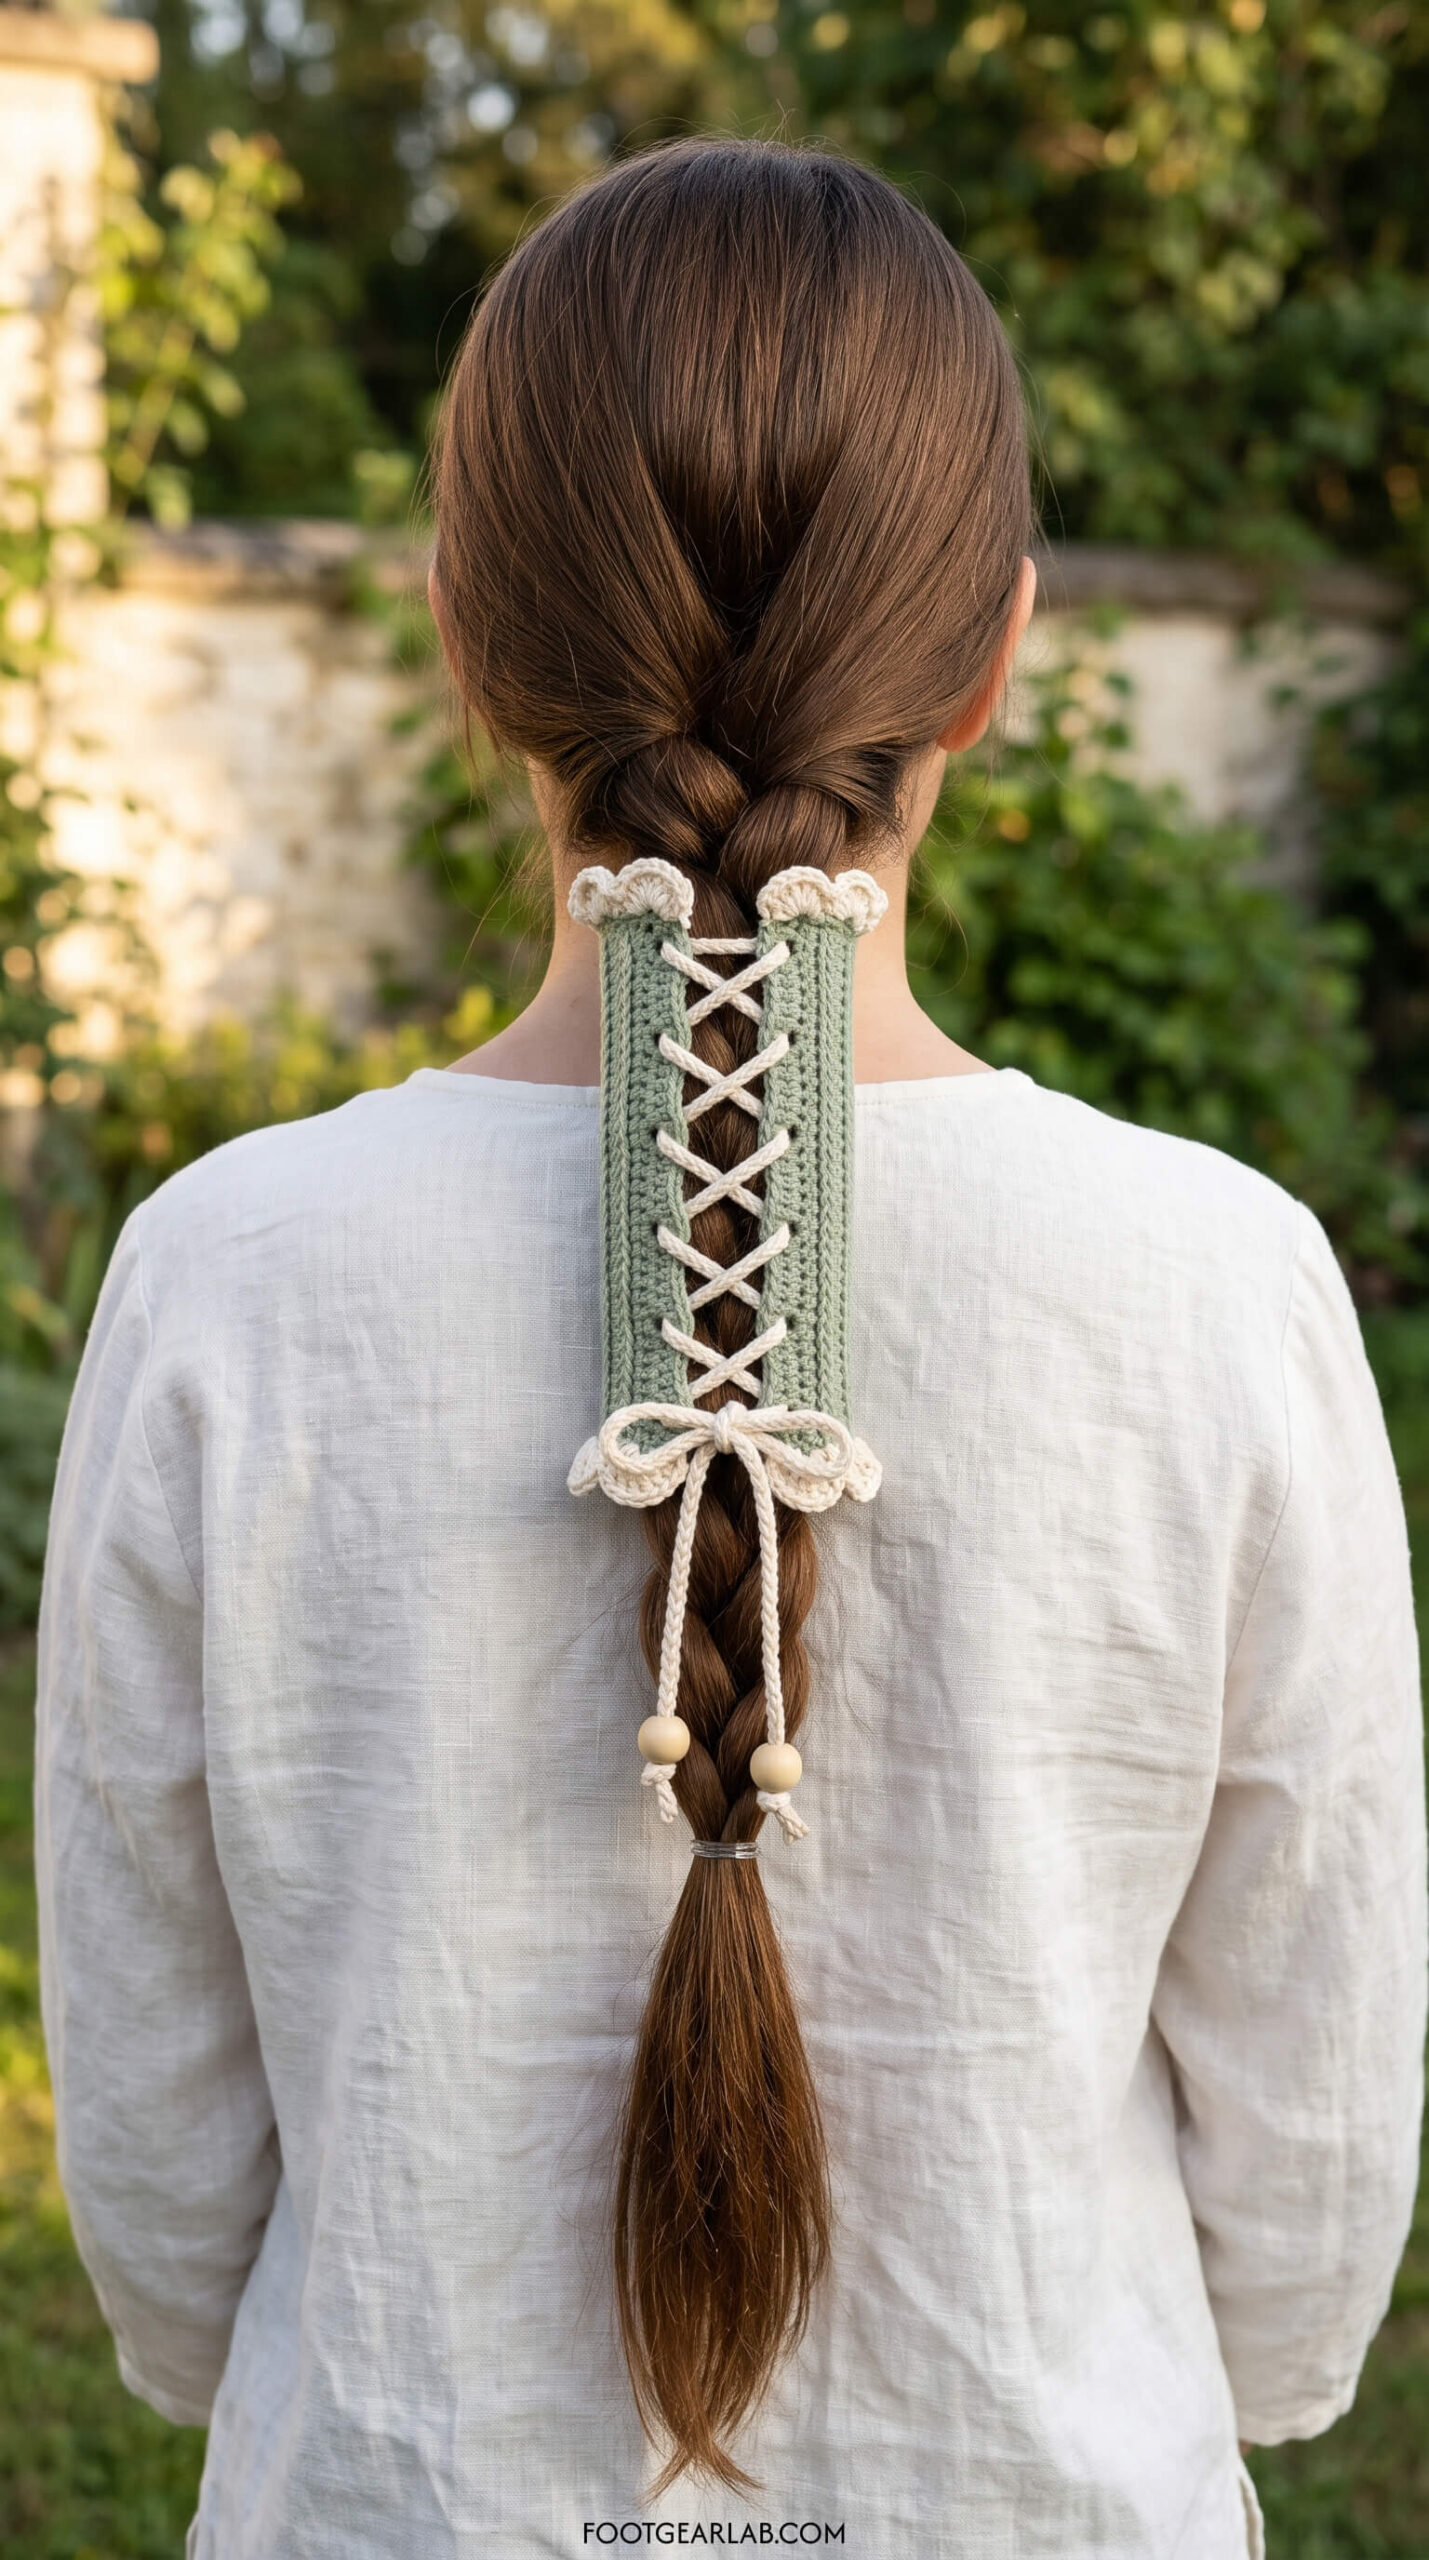
A crochet braid wrap is a small rectangle of crochet fabric that wraps around a braid and closes with laces, buttons or ties, so it sits on your hair like a soft decorative cuff. Unlike a hair tie, it is not there to hold the braid together. Its job is purely to decorate, adding a band of color and texture wherever you place it, whether that is just below the nape of your neck, in the middle of your braid, or right at the end over your hair elastic.
The version in this pattern has a ribbed body that looks almost knitted, a column of eyelets along each side edge for lacing, and a pretty scalloped trim at the top and bottom. Once it is laced around your braid, the scallops form a gentle ruffle at each rim, and the crisscross lacing becomes a detail of its own. It works with natural hair, straight hair, curly hair, box braids gathered into one big braid, and even simple ponytails.
Why You Will Love Making Crochet Braid Wraps
The best thing about this project is how fast it comes together. Most beginners finish a full wrap, lace included, in about one to two hours, and once you know the pattern, you can make one in an evening while watching a show. The stitches are basic (chain, single crochet and half double crochet), so it is a perfect next step if you have just mastered your first dishcloth or scarf and want to make something wearable and cute.
Braid wraps also use very little yarn, usually less than 20 grams in total, which makes them a wonderful way to use up leftover cotton from bigger projects. They make sweet handmade gifts for sisters, friends and daughters, matching sets for bridesmaids or a girls’ trip, and they sell well at craft markets because they are small, colorful and affordable. Best of all, you can make a different one for every season and outfit without spending much at all.
Materials You Will Need
Gather everything before you start so you can work without stopping. The list is short, and if you already crochet, you probably have most of it at home.
- Main color yarn: About 15 grams (roughly 35 meters or 40 yards) of DK or light worsted cotton yarn (weight category 3). Cotton is the best choice because it is smooth on your hair, holds its shape well and shows the ribbed texture beautifully. The sample in this guide uses a soft sage green.
- Contrast color yarn: About 5 to 8 grams of the same weight cotton in a second color for the scalloped edging and the lace cord. The sample uses a warm cream, which looks fresh against almost any main color.
- Crochet hook: A 3.5 mm (US E-4) hook. If your yarn label recommends a slightly larger hook, that is fine too, but your wrap will come out a little bigger, so check the sizing section before you start.
- Two wooden beads: Round beads about 10 to 12 mm wide with a hole of at least 3 mm, so your lace cord can pass through. They add a lovely boho finish to the lace tails and keep the ends from fraying.
- Tapestry needle: A blunt needle with a large eye for weaving in your yarn ends neatly so they do not poke out or rub against your hair.
- Small scissors and a soft measuring tape: The tape is important for measuring the thickness of your braid, which decides how wide your wrap should be.
- Optional extras: A hair elastic to secure your braid, and a few bobby pins if you want extra hold on very silky hair.
A Quick Note on Crochet Terms
This pattern uses US crochet terms. If you learned with UK patterns, a US single crochet (sc) is a UK double crochet, a US half double crochet (hdc) is a UK half treble, and a US double crochet (dc) is a UK treble. The stitches are exactly the same; only the names change, so simply swap the names as you read.
Here are the abbreviations you will see in the pattern: ch (chain), st/sts (stitch/stitches), sc (single crochet), hdc (half double crochet), dc (double crochet), sl st (slip stitch), sk (skip), sp (space), and BLO (back loop only, which means you insert your hook under the back loop of the stitch instead of under both loops). Working in the back loop only is what creates the pretty ribbed ridges on the body of the wrap.
Sizing Your Braid Wrap
Every braid is different, so taking two minutes to size your wrap is the secret to a cuff that sits snugly without sliding down or feeling tight. Your wrap has two measurements. The height is how tall the wrap is along your braid, and it is decided by your starting chain. The width is how far the wrap goes around your braid, and it is decided by how many ribbed rows you work in the middle.
To find your width, braid your hair the way you normally wear it and wrap a soft measuring tape around the braid at the spot where you want the wrap to sit, usually the thickest upper part. Your finished panel should be about 1 to 2 cm (½ to ¾ in) smaller than that measurement, because the lacing pulls the two edges together and holds the wrap snugly in place.
Choose your height (starting chain):
| Wrap Style | Starting Chain | Stitches per Row | Eyelets per Side | Approximate Height |
|---|---|---|---|---|
| Petite (short or fine braids) | Ch 19 | 18 | 4 | 9 cm (3.5 in) |
| Classic (sample in this guide) | Ch 27 | 26 | 6 | 13 cm (5 in) |
| Statement (long, thick braids) | Ch 35 | 34 | 8 | 17 cm (6.75 in) |
Choose your width (ribbed rows):
| Braid Circumference | Ribbed Body Rows | Approximate Panel Width |
|---|---|---|
| 8–10 cm (3–4 in), fine braid | 6 rows | 7.5 cm (3 in) |
| 10–13 cm (4–5 in), medium braid | 10 rows | 10.5 cm (4.25 in) |
| 13–16 cm (5–6.25 in), thick braid | 14 rows | 13.5 cm (5.25 in) |
These measurements are based on the sample tension with DK cotton and a 3.5 mm hook. Everyone crochets a little differently, so treat the row counts as a starting point and always hold the panel around your braid before you finish the second border. The sample in this guide is the Classic height with 10 ribbed rows, for a medium braid.
Step 1: Chain and Work the First Eyelet Border
The wrap is worked flat in rows, starting with one side edge. The first three rows create a firm border with a neat line of eyelets, which is where your lace will go later.
With your main color, make a slip knot and ch 27.
Row 1: Sc in the 2nd ch from the hook and in each ch across. You should have 26 sc. Ch 1 and turn.
Row 2 (eyelet row): Sc in the first 2 sts, ch 2, sk the next 2 sts, sc in the next 2 sts. Repeat from * to the end of the row. You will have 6 chain-2 spaces with 2 solid stitches at each end. Ch 1 and turn.
Row 3: Sc in each sc and work 2 sc into each ch-2 space across. You should be back to 26 sc. Ch 1 and turn.
Look at your strip now. You should see a straight line of six small, evenly spaced holes running down its center, with a little solid section above the first hole and below the last one. If your holes are not even, count your stitches in Row 2 again, because that row decides how neatly your lacing will sit at the end.
Step 2: Crochet the Ribbed Body
This is the relaxing part of the pattern. The body is worked in half double crochet through the back loops only, which creates soft vertical ridges that look like knitted ribbing once the wrap is on your braid. The ribbing also gives the wrap a little stretch, so it hugs your hair comfortably.
Rows 4 to 13: Hdc BLO in each st across (26 hdc). Ch 1 and turn at the end of each row. The ch 1 does not count as a stitch, so always work your first hdc into the very first stitch of the row.
Work 10 rows for the sample, or the number of rows from the sizing table that matches your braid. After about half of your body rows, it is a good idea to wrap the piece around your braid to check the size. Remember that the border on the other side will add about 1.5 cm (½ in), so the panel does not need to reach all the way around yet. Keep your stitch count at 26 on every row, because losing or adding stitches will make your eyelets on the other side line up badly.
Step 3: Work the Second Eyelet Border
Now you will mirror the first border on the opposite side, so the wrap has a line of eyelets along both edges. When the wrap is on your braid, these two lines of eyelets meet side by side, and the lace pulls them together.
Row 14: Sc in each st across, working under both loops this time (26 sc). Ch 1 and turn.
Row 15 (eyelet row): Sc in the first 2 sts, ch 2, sk the next 2 sts, sc in the next 2 sts. Repeat from * to the end (6 ch-2 spaces). Ch 1 and turn.
Row 16: Sc in each sc and 2 sc in each ch-2 space across (26 sc). Fasten off and weave in the ends with your tapestry needle.
Lay the panel flat and check that the six eyelets on the right side sit directly across from the six eyelets on the left side. If they line up nicely, your lacing will look straight and even. Your panel should now be a neat rectangle, slightly taller than it is wide, with ribbing in the center and an eyelet border on each side.
Step 4: Add the Scalloped Edging
The scalloped trim is what turns a simple ribbed panel into something truly pretty. It goes along the top and bottom edges of the panel (the short edges where you see the ends of your rows), and once the wrap is laced around your braid, these scallops become soft ruffles at each rim.
Edging base: With the panel’s top edge facing you, join your contrast color in the top right corner with a sl st. Ch 1 and work sc evenly across the row ends to the other corner. For the sample, work 21 sc. The number does not need to match exactly, but it must be a multiple of 4 plus 1 (such as 13, 17, 21, 25 or 29), so pick whichever of those numbers looks smooth and flat on your edge. Ch 1 and turn.
Scallop row: Sc in the first st, sk the next st, 5 dc in the next st, sk the next st, sc in the next st. Repeat from * to the end. With 21 stitches, you will have 5 even scallops. Fasten off.
Repeat the edging base and scallop row along the bottom edge of the panel, using the same number of stitches so both edges match. Weave in all your ends. Leave the two eyelet sides plain, because they need to meet neatly when you lace the wrap.
Step 5: Make the Lace Cord
The lace cord is made with a simple chain that is reinforced with slip stitches, so it is firm enough to thread through the eyelets and strong enough to tie into a bow without stretching out of shape.
With your contrast color, ch 120, which makes a cord of about 55 cm (21½ in). Then sl st into the back bump of the 2nd ch from the hook and into the back bump of each chain all the way back to the start. Fasten off, leaving a 5 cm tail at each end, and trim neatly.
If your braid is very thick or you made the Statement height, add 20 to 30 extra chains so you have enough lace for a full bow. Set the two wooden beads aside for now. They are added after lacing, because they are too big to pass through the eyelets.
Step 6: Lace It and Slide It On
Lacing a wrap behind your own head is tricky, so the easiest method is to lace it loosely in front of you first, then slide it onto your braid like a sleeve and tighten it.
Fold the panel into a tube with the right side facing out, so the two eyelet borders meet side by side. Starting at the top pair of eyelets, thread the lace through both holes so a short straight bar sits across the top and both ends are pulled even. Now lace it just like a sneaker, crossing the ends over each other and bringing each one through the next eyelet on the opposite side, all the way down to the bottom pair. Keep the lacing loose for now, so the tube is wide open.
Braid your hair and secure the end with an elastic. Slide the loose tube up from the end of your braid to the spot where you want it, with the lacing facing out. Gently pull the lace ends from the top to the bottom to tighten the crosses until the wrap feels snug but not tight, then tie a bow below the bottom pair of eyelets. Finally, thread one wooden bead onto each lace tail and tie a small knot below it so the bead stays in place.
How to Wear Your Crochet Braid Wrap
Once you have one wrap, you will find yourself reaching for it with almost every outfit. Here are the most flattering ways to wear it.
- The classic upper wrap: Place the wrap on the upper part of your braid, about a hand’s width below the nape of your neck. This is the most eye-catching spot, because it frames the braid and sits right where people notice it when you walk past. It works beautifully with a single three-strand braid, a French braid or a Dutch braid.
- The end cuff: Slide the wrap down so it covers your hair elastic at the end of the braid, with the bow and beads hanging just below your hair. This is a great trick for shorter braids, because the lace tails add length and movement, and it hides a plain elastic with something much prettier.
- The stacked look: Make two or three wraps in coordinating colors and place them at even intervals down a long braid. Sage, cream and terracotta together create a soft boho rainbow, while three shades of pink look romantic and girly.
- The side braid: Sweep a loose braid over one shoulder and place the wrap at collarbone height, with the lacing facing forward. This is a lovely, relaxed look for brunch, picnics and vacation photos.
- The ponytail cuff: No time to braid? Slide the wrap over a low ponytail, just below the hair tie, for an instant polished finish. It also works on a gathered bundle of box braids, twists or faux locs pulled into a ponytail.
Color Palette Ideas
Color is where you can really make your braid wraps your own. Because they use so little yarn, you can experiment freely and build a whole collection that matches your wardrobe. Here are some combinations that look beautiful in braids and photograph well on Pinterest.
| Palette | Main Color | Edging and Lace | Bead Finish | Best For |
|---|---|---|---|---|
| Soft Boho (sample) | Sage green | Cream | Natural wood | Everyday wear, linen outfits, spring |
| Desert Sunset | Terracotta | Mustard yellow | Natural wood | Summer festivals, earthy outfits |
| Romantic Blush | Dusty pink | Ivory | Pearl | Weddings, date nights, bridesmaids |
| Ocean Breeze | Seafoam blue | White | White ceramic | Beach days, vacations, swimwear cover-ups |
| Cozy Autumn | Rust orange | Chocolate brown | Dark wood | Fall outfits, sweaters, pumpkin patch photos |
| Classic Chic | Black | Gold metallic cotton | Gold | Evening events, minimalist outfits |
| Sweet Lavender | Lilac | Cream | Clear glass | Easter, garden parties, soft pastel looks |
A helpful rule of thumb is to choose a main color that contrasts with your hair. Light colors like cream, sage and blush pop beautifully against dark hair, while deeper shades like rust, navy and black stand out on blonde or light brown hair.
Easy Variations to Try
Once you have made the basic pattern, these simple changes will help you create a whole range of different looks.
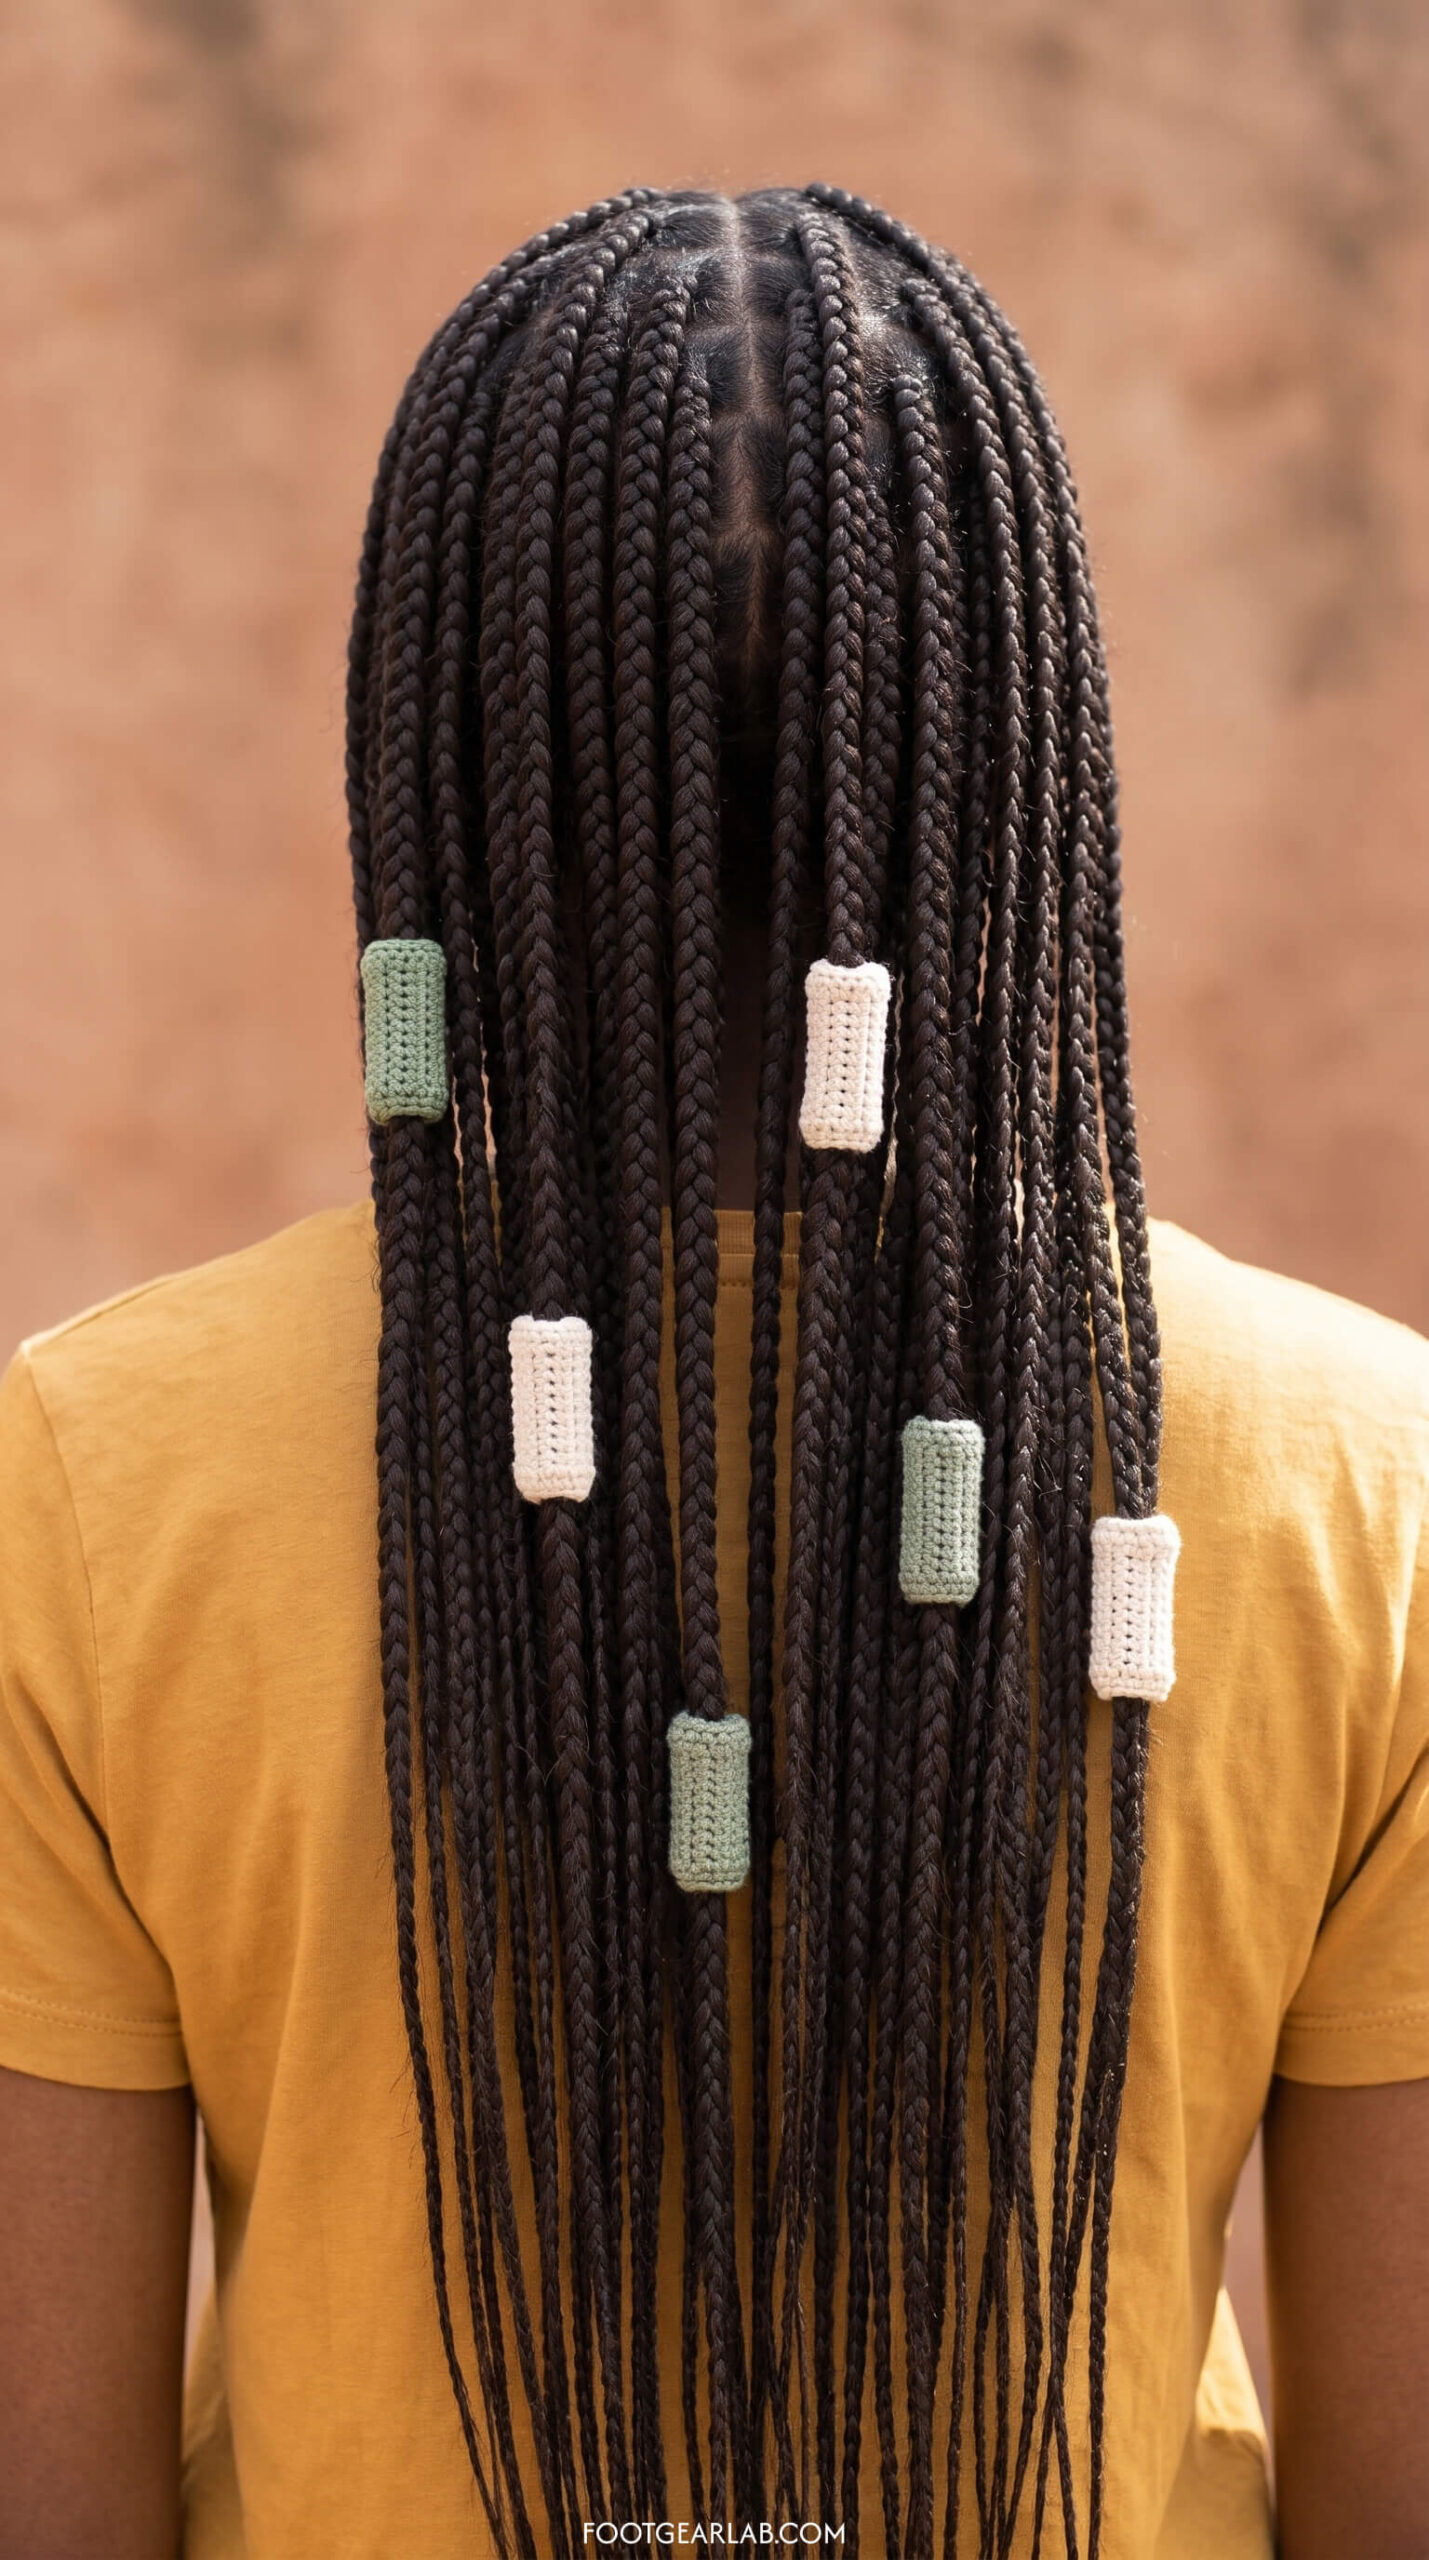
Mini cuffs for box braids and locs: For individual braids, twists or locs, make tiny cuffs instead of one big wrap. Ch 7 and work sc in the 2nd ch from the hook and across (6 sc). Then work sc BLO rows until the strip wraps around one braid, usually 4 to 6 rows. Sl st the last row to the foundation chain to form a small tube, fasten off and weave in the ends. Slide the cuffs onto several braids at different heights for a playful, scattered look. Make sure the cuff slides on easily, because a tight cuff can rub and pull on your hair.
Spiral cord wrap: For a quick no-lace option, make a long cord like the lace in Step 5, about 80 to 100 cm long, and wrap it in a spiral around a section of your braid, tucking the ends under the last wrap. Add a tassel or bead to one end so it hangs prettily from the braid.
Flower-topped wrap: Crochet a small five-petal flower in a contrasting color and sew it onto the front of the wrap, just beside the lacing. This turns your wrap into a romantic accessory that is perfect for weddings, garden parties and spring photoshoots.
Beaded wrap: Thread a few small wooden or pearl beads onto your contrast yarn before you start the scallop row, and pull one bead up into the center of each scallop as you work. The beads catch the light and add a subtle sparkle.
Striped wrap: Change colors every two rows in the ribbed body for a candy-striped look that is great for using up scraps. Because the ribs run along the braid, the stripes will run along the braid too, which makes it look longer.
Hair-Friendly Tips and Care
A braid wrap should feel as good as it looks, so keep your hair’s health in mind. Always lace the wrap snugly enough to stay in place but loose enough that you can slide a finger under it. Wraps that are laced too tightly can create tension on the hair and feel uncomfortable after a few hours. If your hair is very silky and the wrap slides down, place it directly over your hair elastic or slip a bobby pin through the inside of the wrap into the braid for extra hold.
Take your wrap off before sleeping, swimming or washing your hair, and avoid wearing it on freshly installed braids that already feel tight at the scalp. To clean your wraps, hand wash them in cool water with a drop of gentle soap, squeeze out the water without wringing, and lay them flat to dry on a towel. Gently pull the scallops back into shape while the wrap is still damp so they dry neat and even.
Troubleshooting Common Problems
| Problem | Why It Happens | Easy Fix |
|---|---|---|
| The eyelets on both sides do not line up | The stitch count changed during the ribbed rows | Count your stitches at the end of every row and keep them at 26 |
| The wrap slides down the braid | The panel is too wide or the lace is too loose | Remove a few ribbed rows or tighten the lacing, and place it over your elastic |
| The wrap feels too tight | The panel is too narrow for your braid | Add 2 to 4 more ribbed rows, or lace it more loosely so the gap is wider |
| The scallops look wavy or crowded | Too many base stitches for the edge length | Use the next smaller multiple of 4 plus 1 in the edging base |
| The scallops look stretched and flat | Too few base stitches for the edge length | Use the next larger multiple of 4 plus 1 in the edging base |
| The lace cord stretches out | The chain was not reinforced | Work the slip stitch row back along the chain for a firmer cord |
| The panel edges look uneven | The first stitch of the row was skipped | Remember the ch 1 does not count, so work into the very first stitch |
Frequently Asked Questions
Are crochet braid wraps beginner friendly? Yes, they are one of the best beginner projects you can choose. The pattern uses only chain, single crochet, half double crochet and double crochet, all worked in simple rows. It is also small, so mistakes are quick to fix, and you get a finished, wearable accessory in about an hour or two.
Can I use acrylic yarn instead of cotton? You can, but cotton is the better choice for hair accessories. It is smoother, it does not create static or frizz, and it holds the ribbed texture and scallops crisply. If you prefer acrylic, choose a smooth, non-fuzzy yarn and expect the wrap to be a little softer and stretchier.
Will a braid wrap work on short hair? Absolutely. For short braids, choose the Petite height and wear the wrap at the end of the braid as an end cuff, so the bow and bead tails add length. On very short hair, you can also wear it on a small half-up braid or a tiny ponytail.
Can I wear a braid wrap with box braids or locs? Yes. You can gather your braids or locs into one big braid or ponytail and use the full-size wrap, or make several mini cuffs for individual braids. Just make sure the cuffs slide on easily and never squeeze the hair.
How long does it take to make one? Most beginners finish a full wrap, including the lace and beads, in one to two hours. Once you are comfortable with the pattern, you can make one in about 45 minutes, which makes them ideal for last-minute gifts.
Can I sell the braid wraps I make? Handmade braid wraps are a popular craft-market item because they are small, colorful and affordable. Offering them in matching sets, seasonal colors or bridal palettes is a great way to make them stand out.
Final Thoughts
Crochet braid wraps prove that the smallest projects can make the biggest difference. In about an hour, you can turn a few grams of leftover cotton into a pretty, personal accessory that makes every braid feel special, whether you are heading to brunch, a summer festival, a wedding or simply running errands with a little more style.
Start with the classic sage and cream version in this guide, then play with colors, beads, flowers and mini cuffs until you have a whole collection to match your moods and outfits. Save this pattern to your crochet board so it is ready the next time you want a quick, joyful make, and do not be surprised if your friends start asking you to make one for them too.