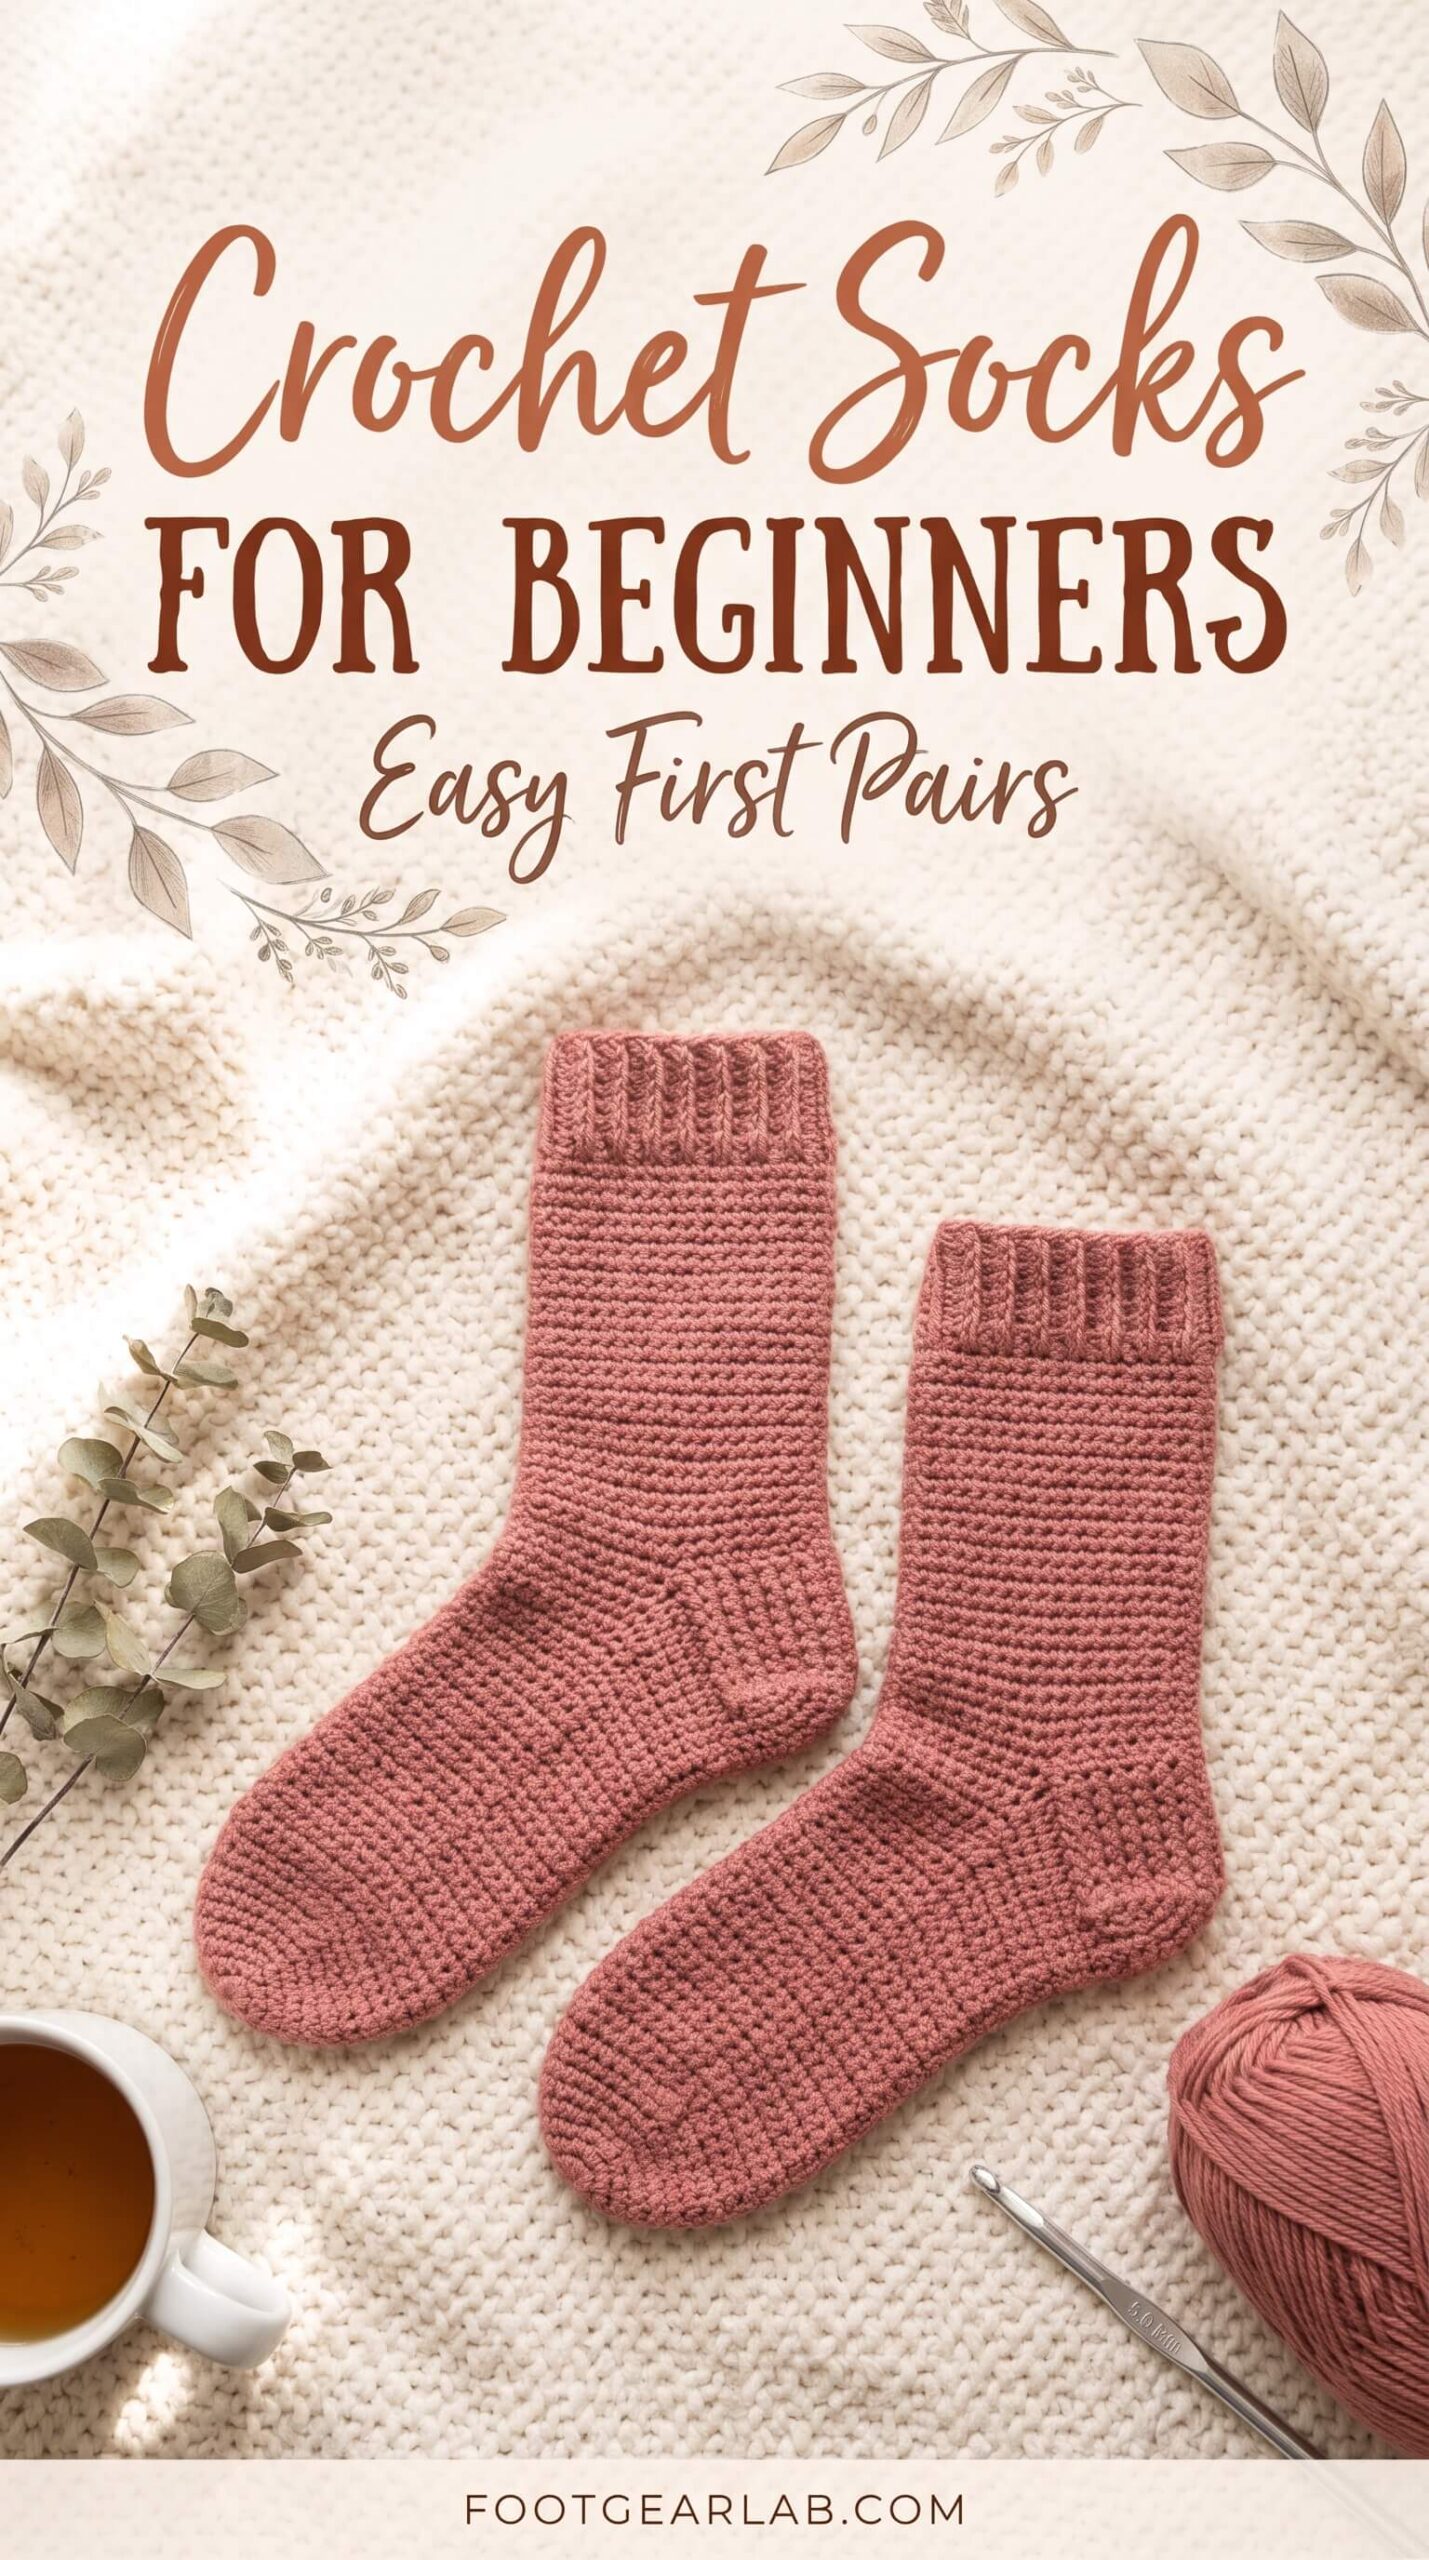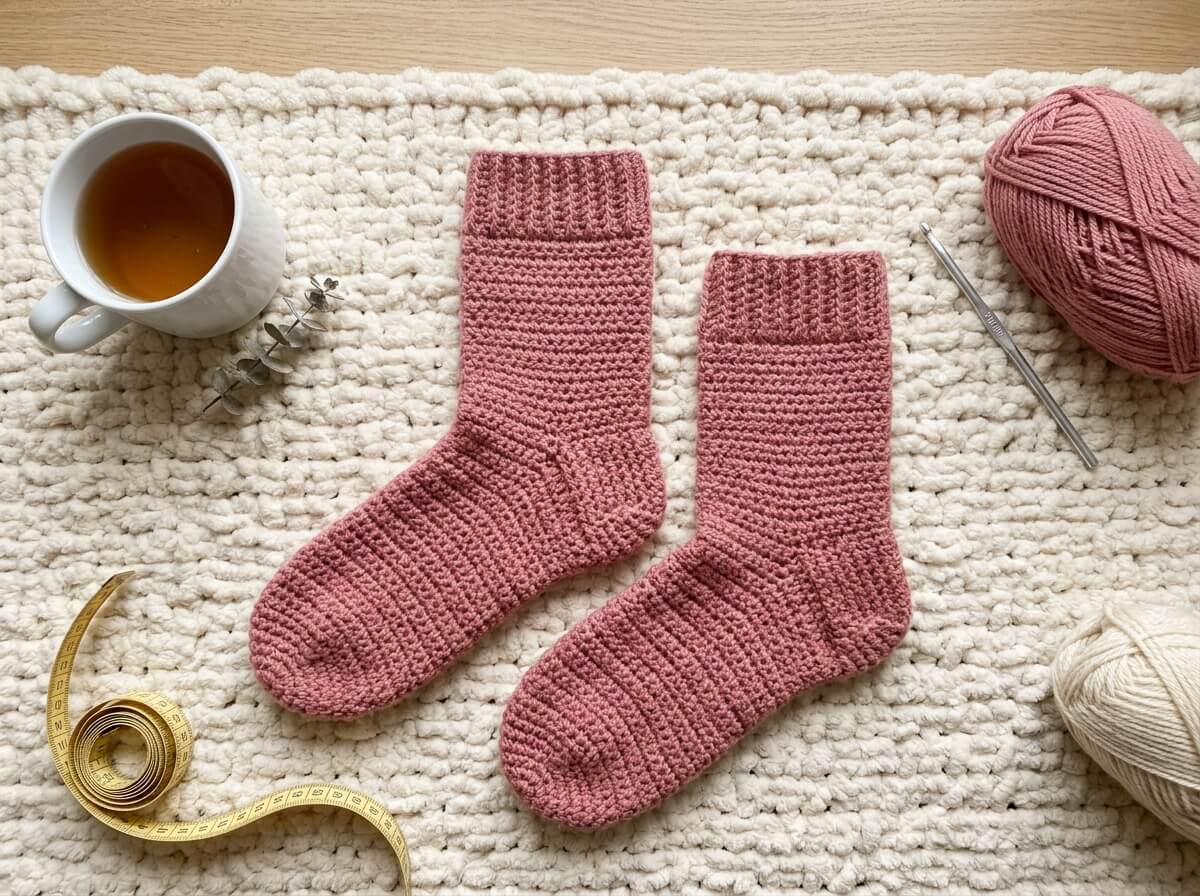
There’s something wonderfully satisfying about slipping your feet into a pair of socks you made yourself. If you’ve already crocheted a scarf, a dishcloth, or a simple beanie, you have every skill you need to make your first pair of crochet socks — even if socks have always seemed like a “someday” project reserved for advanced makers.
This guide walks you through a beginner-friendly, toe-up sock pattern that uses only basic stitches and lets you try the sock on as you go, so you never have to guess whether it will fit. You’ll learn how to choose the right yarn, find your personal “magic number” for sizing, and add an easy heel that is worked exactly like the toe. At the end, you’ll find four easy variations so your first pair can be cozy and classic, playful and striped, or thick enough to wear as bed socks on winter nights.
One honest note before we begin: crochet fabric is naturally thicker than knitted fabric. That makes crochet socks perfect for lounging at home, wearing with slippers, layering inside roomy boots, or sleeping in on cold nights. They’re usually too thick for snug sneakers or dress shoes, so think of them as your new favorite cozy-at-home socks.
Why Crochet Socks Are a Great Beginner Project
Socks sound intimidating, but they’re actually small, portable, and quick compared to most garments. A sock is essentially a tube with a little cup at each end, and once you understand that, the whole project becomes much less mysterious. Because each sock uses just one or two skeins of yarn, they’re also an affordable way to practice working in rounds and reading a pattern.
The toe-up method used here is especially kind to beginners. You start at the toes and work toward the cuff, which means you can slip the sock on at any point to check the fit. If it’s too snug, too loose, too short, or too long, you’ll know right away instead of discovering the problem after hours of work. That built-in “test as you go” feature takes most of the stress out of making a first pair.
Finally, the heel in this pattern — called an afterthought heel — is made after the rest of the sock is finished, and it uses the exact same shaping as the toe, just in reverse. There’s no tricky heel flap or turning technique to learn. If you can make the toe, you can make the heel.
Pattern at a Glance
- Skill level: Advanced beginner. You should be comfortable with chains, single crochet, half double crochet, and joining rounds with a slip stitch. The cuff introduces post stitches, which are explained below and are easier than they look.
- Sizes: Adjustable to fit most women’s feet. You’ll customize the fit using your foot measurements and a simple stitch-count system, rather than following fixed sizes.
- Yarn: About 250–300 yards (230–275 m) of worsted-weight (medium #4) yarn for a pair of ankle-to-crew-length socks. Buy an extra skein if you plan to make taller socks or aren’t sure.
- Hook: 5.0 mm (US H-8). If your fabric feels stiff and board-like, go up to a 5.5 mm (US I-9) hook.
- Time: Most beginners can finish a pair over a weekend or across a few relaxed evenings, depending on sock length and how quickly you crochet.
- Terms: This pattern uses US crochet terms throughout.
Choosing the Right Yarn
Yarn choice matters more for socks than for almost any other project, because your socks will be stretched, rubbed, and washed far more often than a scarf. For a first pair, choose a smooth, light-to-medium solid color so you can clearly see each stitch. Dark colors, fuzzy yarns like mohair, and textured novelty yarns make it very hard to count stitches and spot mistakes, so save those for later projects.
| Yarn Type | How It Feels and Performs | Best For |
|---|---|---|
| Superwash wool/nylon blend | Warm, springy, and breathable; the nylon adds strength at the heel and toe, and “superwash” means it can usually be machine washed | Top pick for everyday house socks that last |
| Merino/acrylic blend | Very soft, budget-friendly, and easy to care for, with good warmth and a little natural stretch | Comfortable lounge socks on a budget |
| 100% acrylic | Inexpensive and machine washable, but less breathable, so feet may feel warm or damp after long wear | Practice pairs and bed socks |
| 100% cotton | Heavy, has almost no stretch, and tends to sag and lose shape after washing | Best avoided for socks |
Always check the yarn label for the weight symbol (look for the number 4 or the word “worsted” or “aran”) and the care instructions. If the label says “hand wash only,” your socks will need gentle hand washing to avoid shrinking or felting.
Tools You’ll Need
Besides yarn and a hook, gather a few small tools before you start. Having them within reach makes the project smoother and helps you avoid the most common beginner mistakes.
- Locking stitch markers: You’ll use one to mark the first stitch of each round, which is the single most helpful habit for keeping your stitch count accurate as the sock grows.
- Soft tape measure: You’ll measure your foot before you start and check your progress as you work, so a flexible fabric tape is much more useful than a ruler.
- Tapestry needle: A blunt, large-eye needle is used to close the heel seam and weave in your yarn tails neatly so they don’t rub against your skin.
- Scissors: Any small, sharp pair works well for snipping yarn cleanly without fraying the ends.
- Notebook or phone notes: You’ll write down your round counts for the first sock so the second sock comes out exactly the same size.
Stitches and Abbreviations
Every stitch in this pattern is a basic crochet stitch. If any of them are new to you, practice a small swatch first — ten minutes of practice will make the sock feel much easier.
- ch (chain): Yarn over and pull through the loop on your hook. Chains are used to start the toe and to create the heel opening.
- sl st (slip stitch): Insert your hook into the stitch, yarn over, and pull through both the stitch and the loop on your hook. You’ll use it to join each round neatly.
- sc (single crochet): Insert hook, yarn over, pull up a loop, then yarn over and pull through both loops. This short, dense stitch is used for the toe and heel, where socks get the most wear.
- hdc (half double crochet): Yarn over, insert hook, yarn over and pull up a loop, then yarn over and pull through all three loops. It’s slightly taller and stretchier than single crochet, so it’s used for the foot and leg.
- sc2tog (single crochet two together): Insert hook in the next stitch and pull up a loop, insert hook in the following stitch and pull up a loop, then yarn over and pull through all three loops. This decreases one stitch and shapes the heel.
- FPdc (front post double crochet): Yarn over, insert your hook from front to back to front around the post (the vertical “body”) of the stitch below, and complete a double crochet. It makes the raised part of the ribbing.
- BPdc (back post double crochet): Yarn over, insert your hook from back to front to back around the post of the stitch below, and complete a double crochet. It makes the recessed part of the ribbing.
Step 1: Measure Your Feet
Good socks start with two quick measurements, and taking them before you begin saves you from guessing later. Measure your feet in the evening if you can, since feet tend to be very slightly larger at the end of the day.
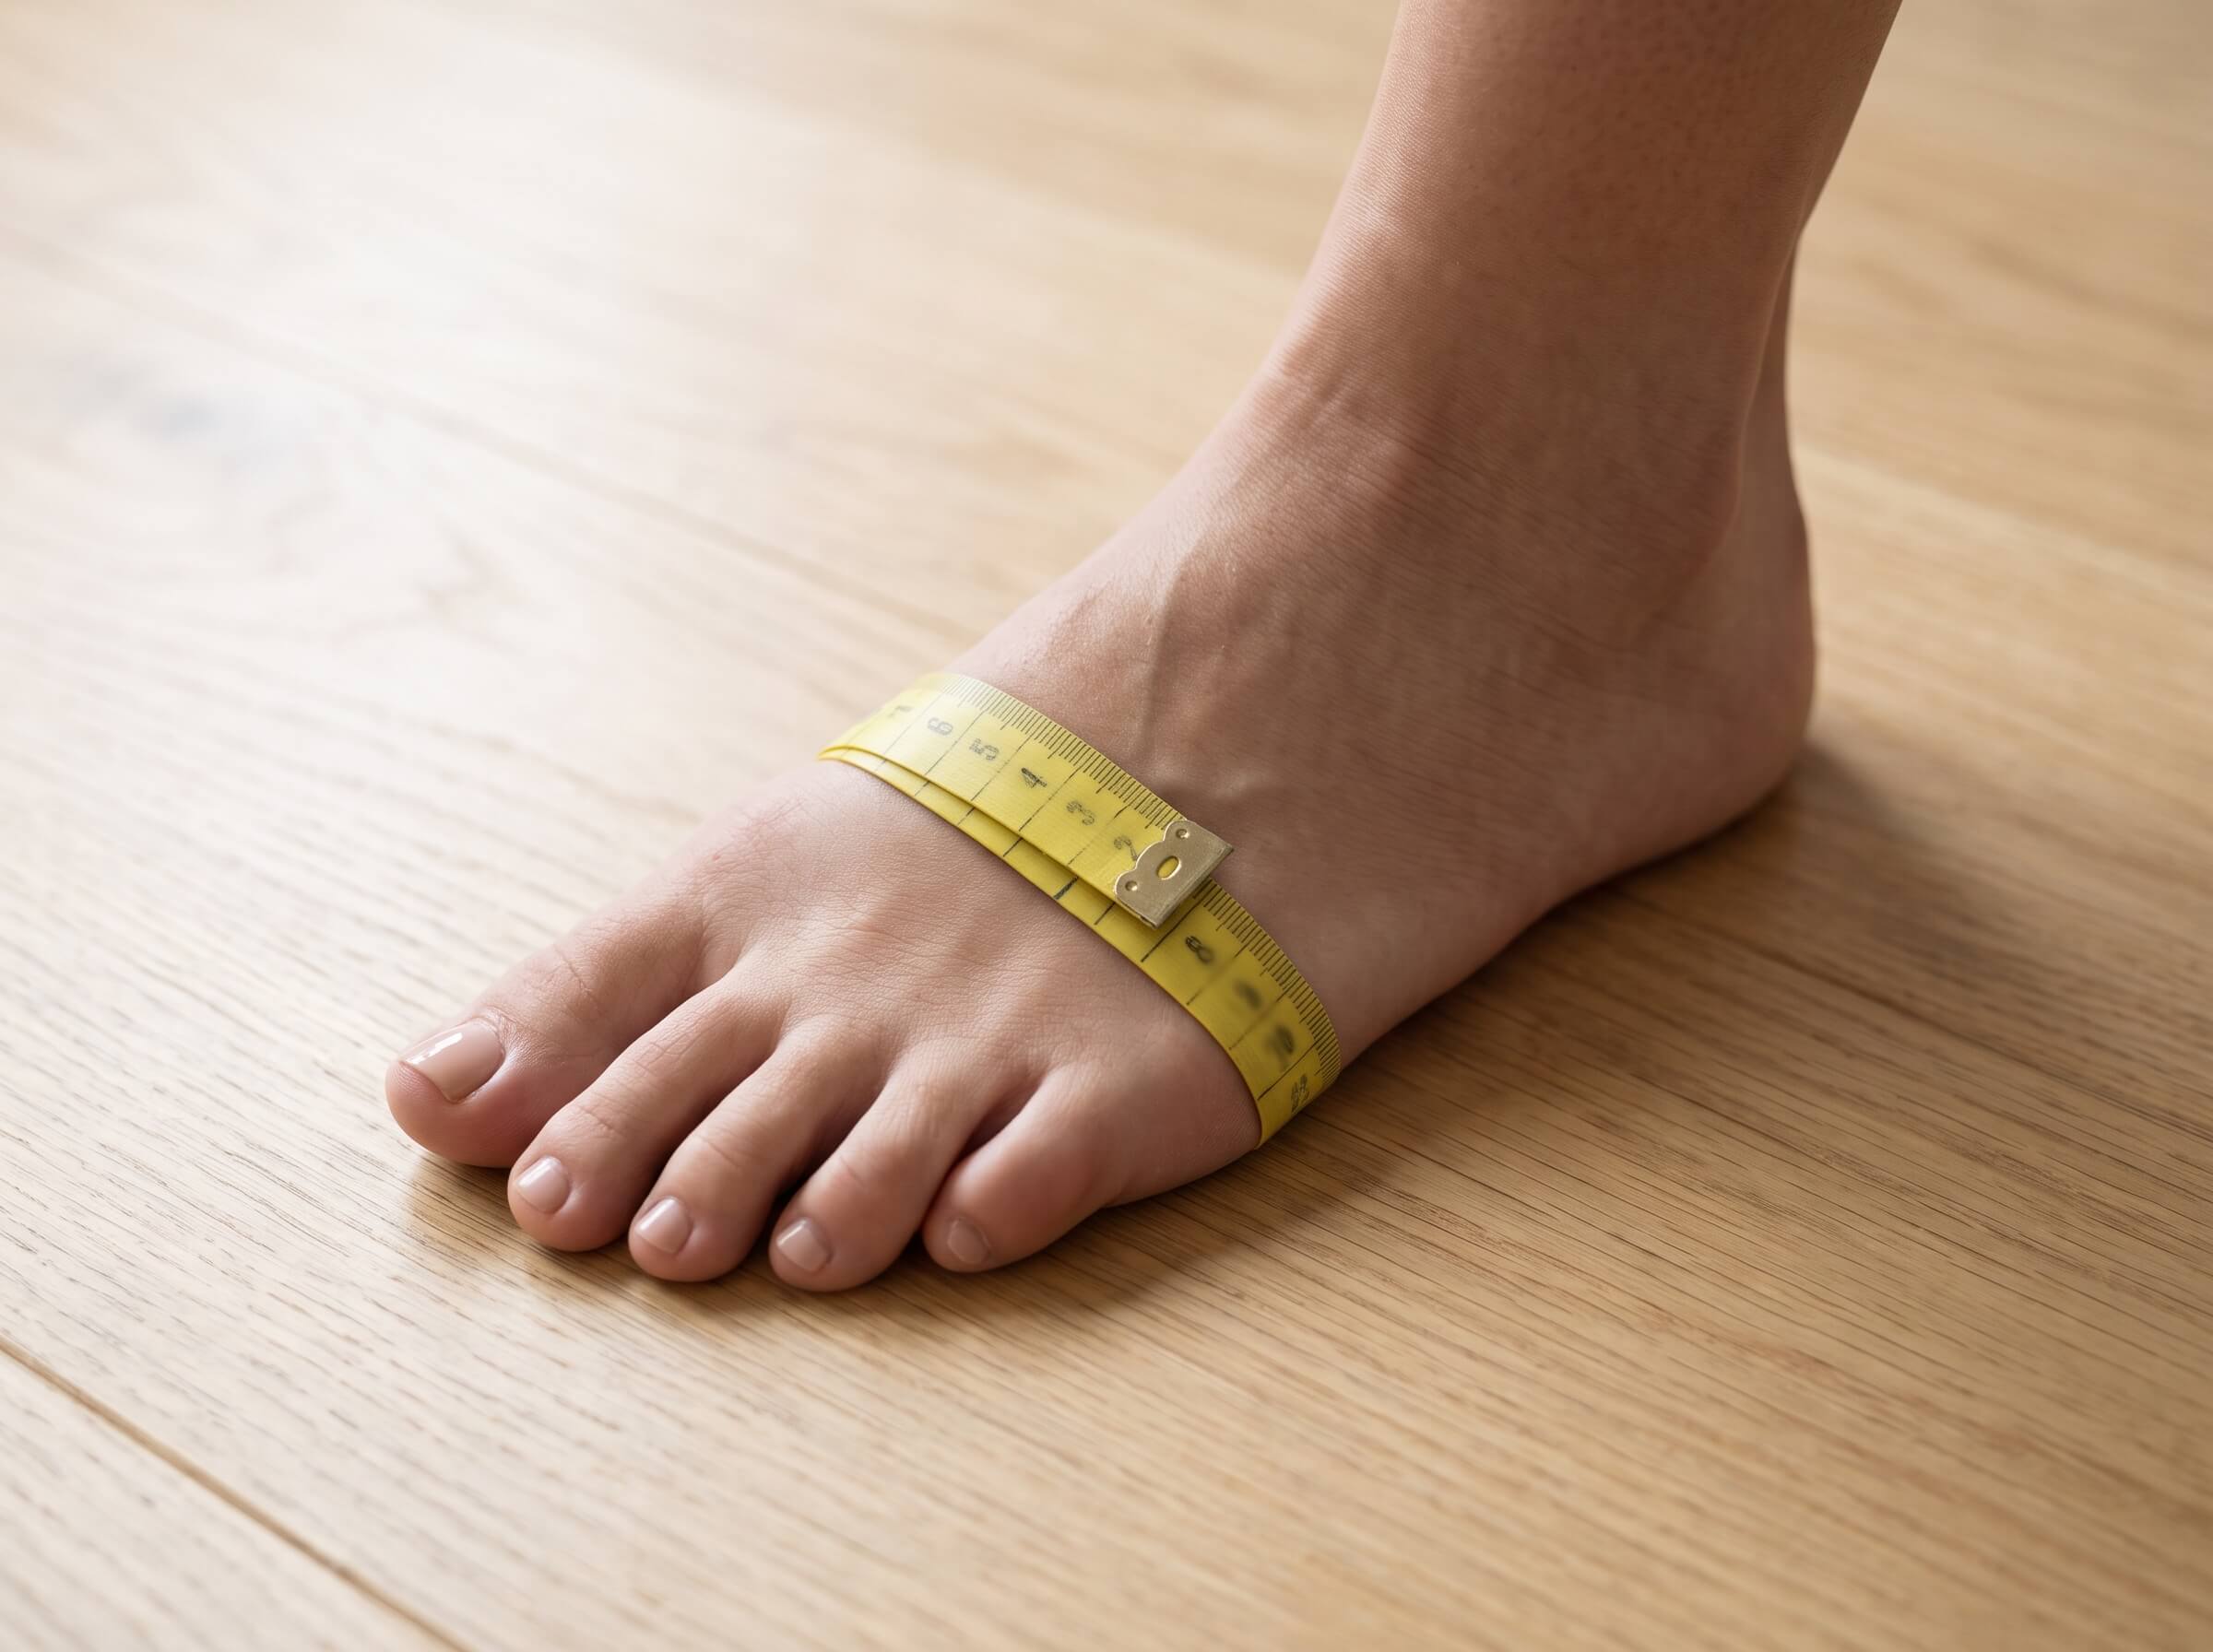
Foot circumference: Wrap a soft tape measure around the widest part of your foot, which is the ball of the foot just behind your toes. Keep the tape snug but not tight. Most women measure somewhere between 8 and 9.5 in (20–24 cm). You’ll use this number to check the toe of your sock.
Foot length: Stand on a sheet of paper, mark the back of your heel and the tip of your longest toe, and measure the distance between the marks. You’ll use this to decide when to start the heel opening.
Step 2: Make the Toe (and Find Your Magic Number)
The toe is worked in joined rounds of single crochet around a short starting chain. It begins as a tiny oval and grows into a small cup as you add four stitches in every round. You’ll keep increasing until the toe fits snugly around the ball of your foot — and the stitch count you end up with becomes your magic number, the number that controls the size of the whole sock.
At the end of every round, join with a slip stitch to the first stitch, then chain 1 (this chain does not count as a stitch) and make the first stitch of the next round in the same stitch as the join. Place your stitch marker in the first stitch of each round and move it up as you go, so you always know where the round begins.
Starting chain: Ch 6. Leave a 4 in (10 cm) tail at the start so you can tidy the toe tip later.
Round 1: Sc in the 2nd ch from the hook and in the next 3 ch (4 sc). Work 3 sc in the last ch. Now rotate your work so you can crochet along the other side of the chain, sc in the next 3 ch, then work 2 sc in the same ch where you made your very first sc. Join with a sl st to the first sc. (12 stitches) You’ll now have a small oval with straight sides and two rounded ends.
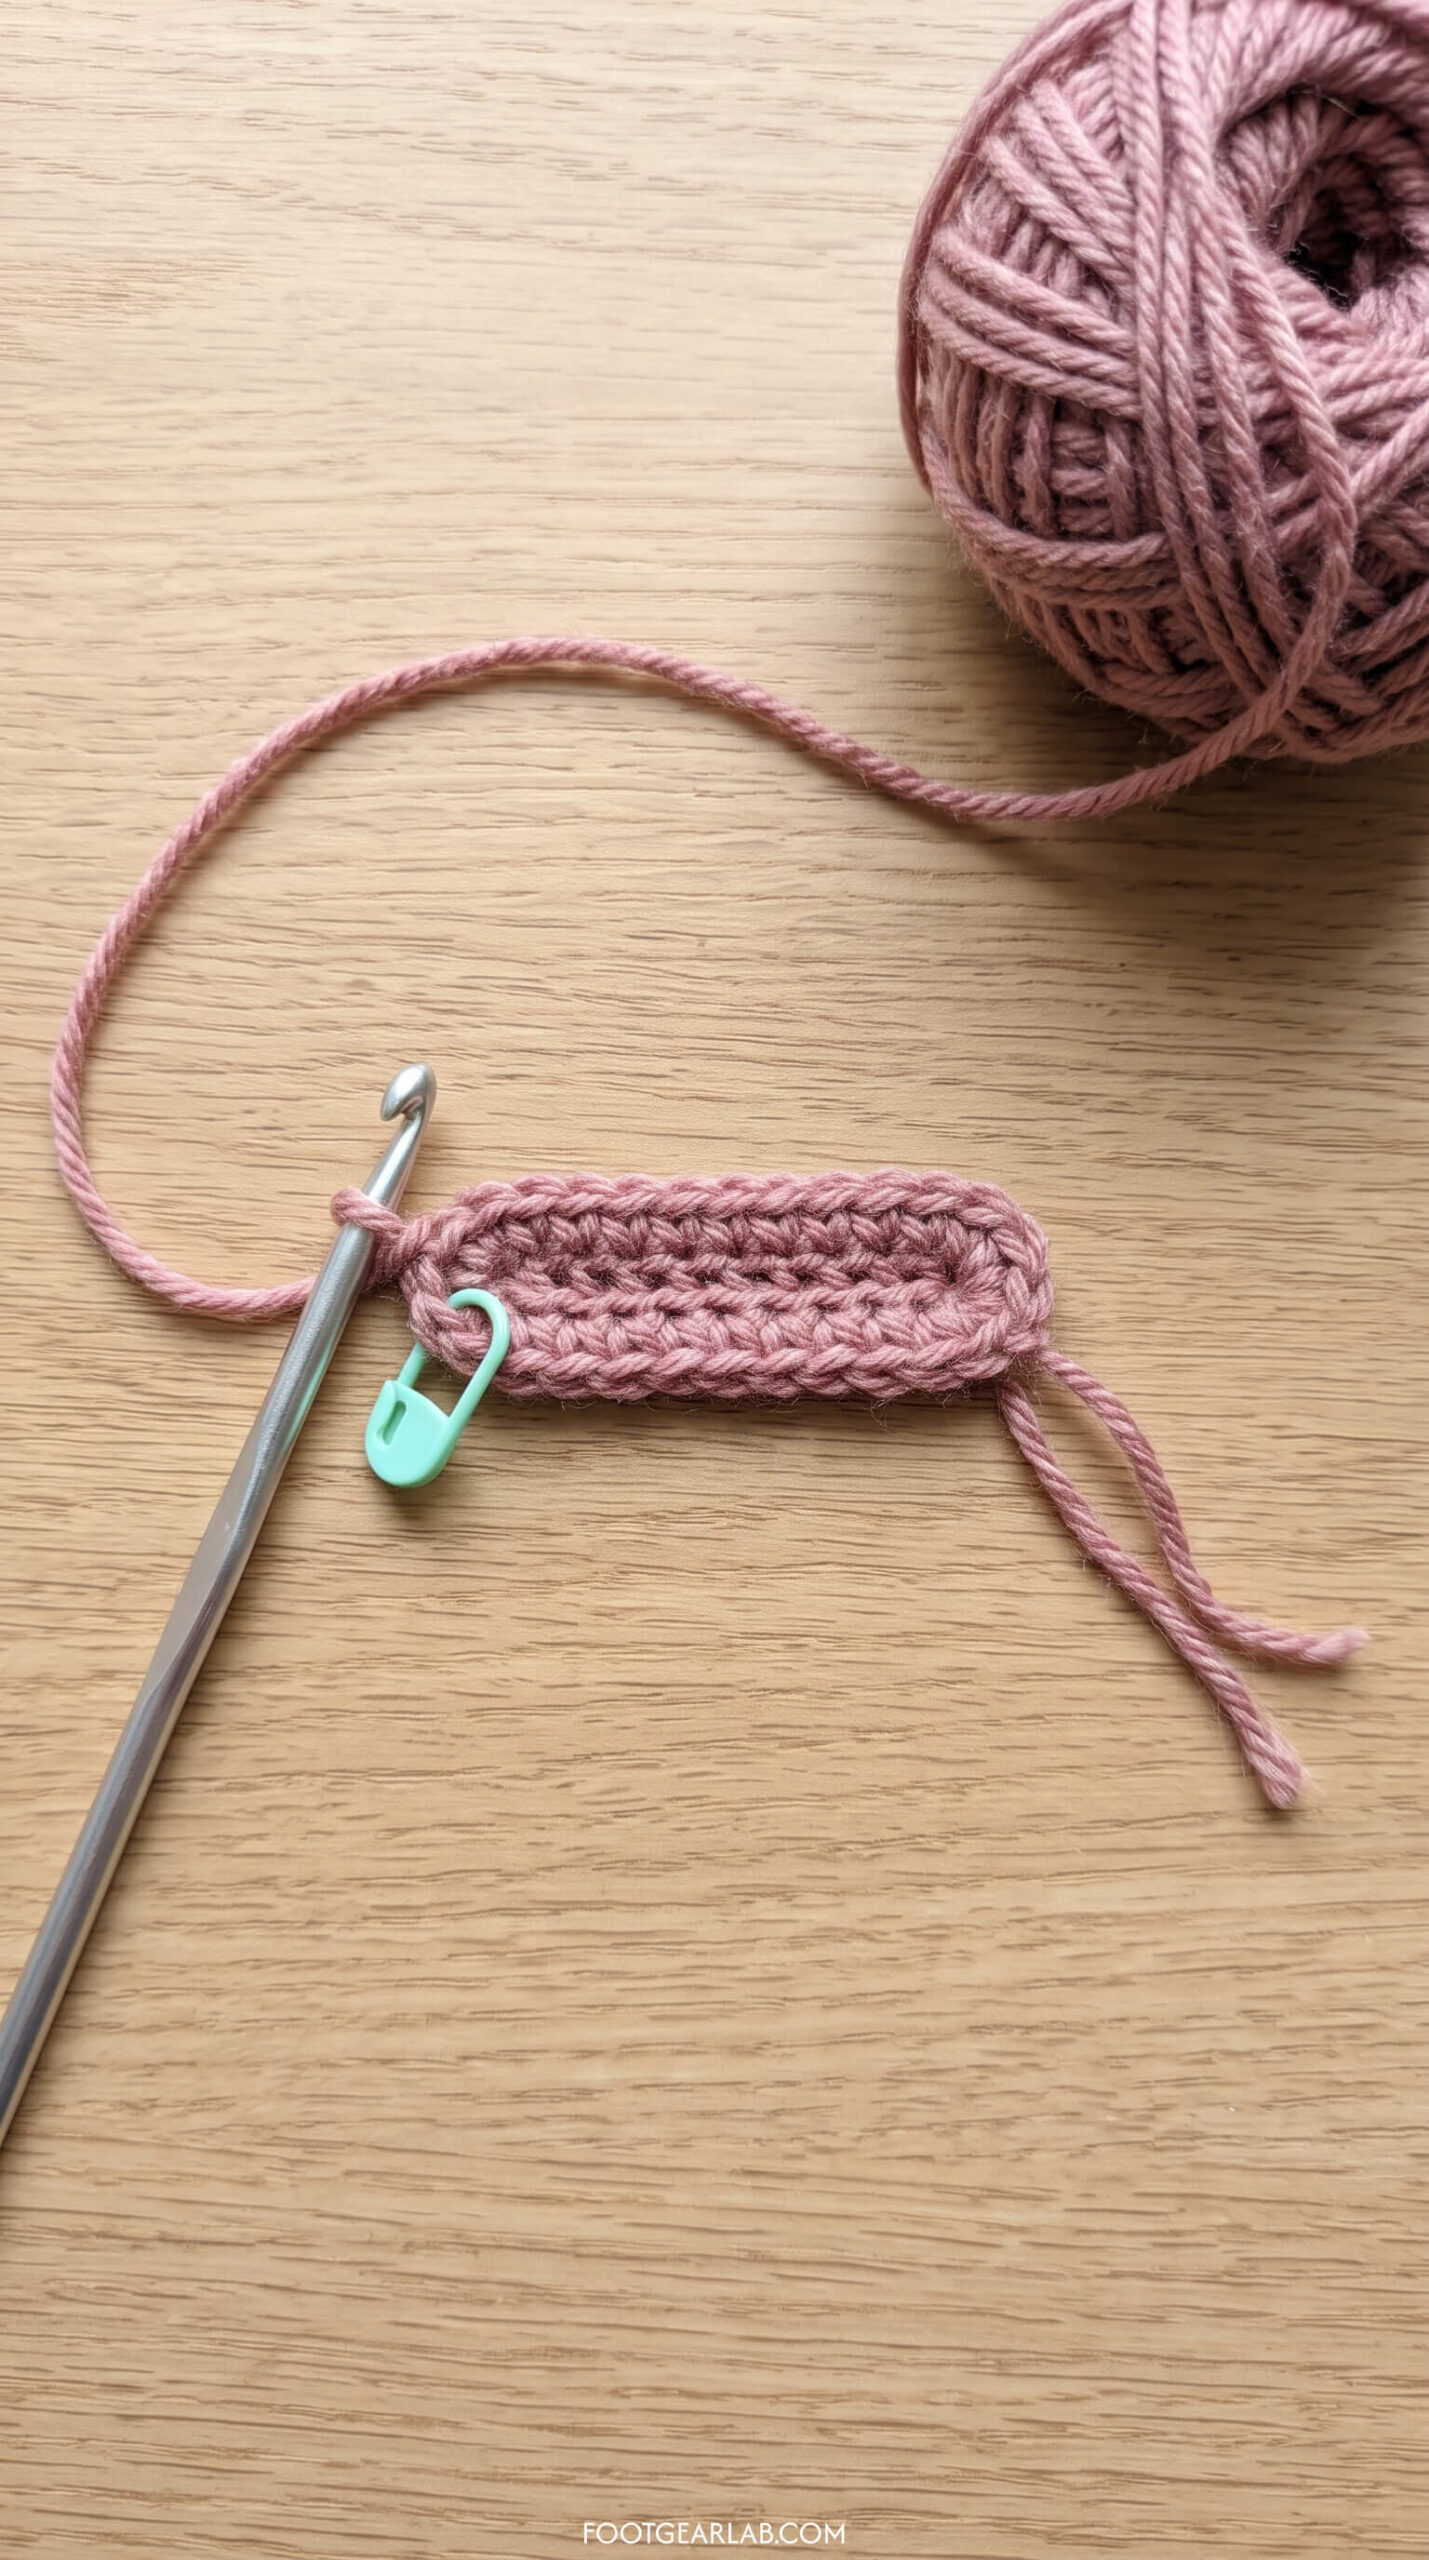
Round 2: Ch 1, 2 sc in the next st, sc in the next 4 sts, 2 sc in the next st; repeat from * to * once more. Join. (16 stitches) Notice that the increases always land at the two rounded ends of the oval — these will become the sides of your foot.
Round 3: Ch 1, 2 sc in the next st, sc in the next 6 sts, 2 sc in the next st; repeat once more. Join. (20 stitches)
Round 4: Ch 1, 2 sc in the next st, sc in the next 8 sts, 2 sc in the next st; repeat once more. Join. (24 stitches)
Round 5: Ch 1, 2 sc in the next st, sc in the next 10 sts, 2 sc in the next st; repeat once more. Join. (28 stitches)
Check the fit: Slip the toe over your toes. It should feel snug and cover your toes comfortably without squeezing them, and the edge should stretch gently around the ball of your foot. For most women, 28 stitches is the right magic number. If your foot circumference is under about 8 in (20 cm) and the toe already feels loose at 24 stitches, stop after Round 4 — your magic number is 24. If your foot is over about 9.5 in (24 cm) and 28 feels tight, work one more round (2 sc in the next st, sc in the next 12 sts, 2 sc in the next st, twice) for a magic number of 32.
Write your magic number down. The rest of the pattern is written for 28 stitches, with notes for 24 and 32 where they differ.
Step 3: Work the Foot
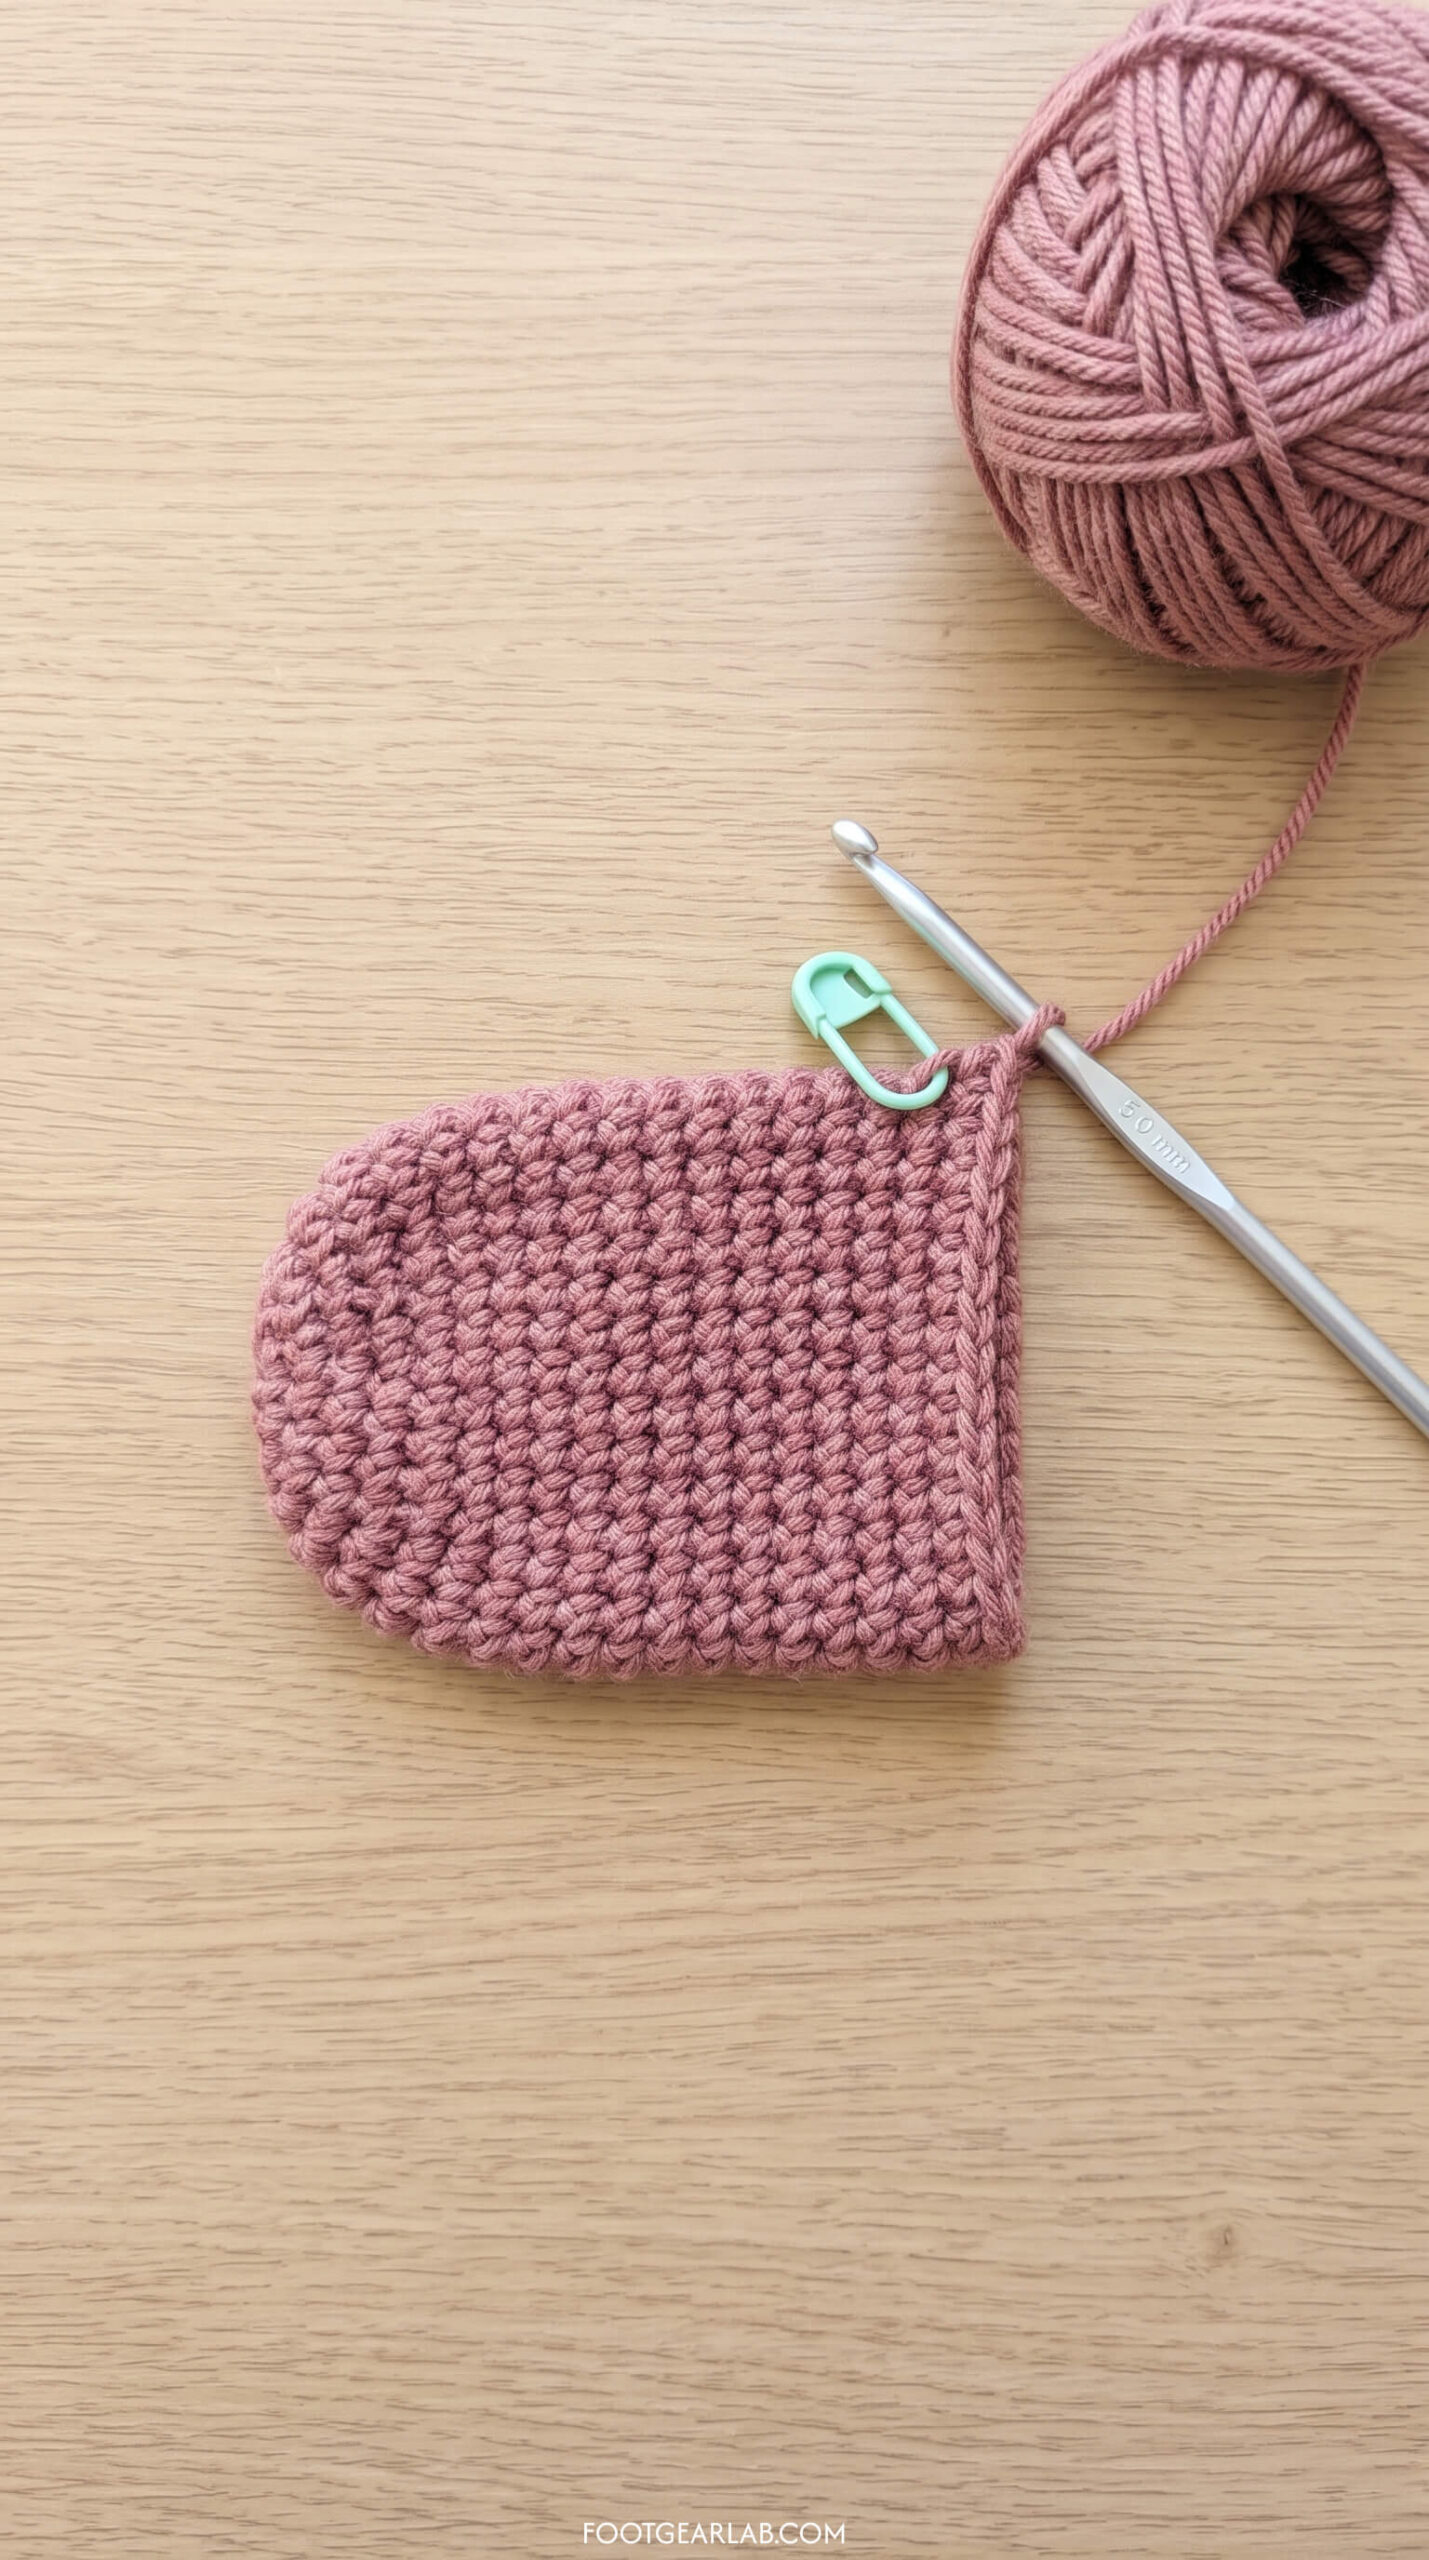
Now you’ll switch from single crochet to half double crochet. This slightly taller stitch builds the foot faster and adds a little more stretch, which helps the sock feel comfortable rather than stiff. Keep joining each round and moving your marker up, just as you did for the toe.
Foot rounds: Ch 1 (does not count as a stitch), hdc in the same st as the join and in each st around. Join with a sl st to the first hdc. (28 stitches, or your magic number)
Repeat this round until the sock measures about 2 in (5 cm) less than your full foot length, measured from the very tip of the toe. For example, if your foot is 9.5 in (24 cm) long, work until the sock measures 7.5 in (19 cm). When you try it on, the edge of your work should land just in front of the padded part of your heel — the heel you add later fills in that last 2 inches.
Count the number of foot rounds you worked and write it down. Matching this number on your second sock is the easiest way to make a perfectly even pair.
Step 4: Create the Heel Opening
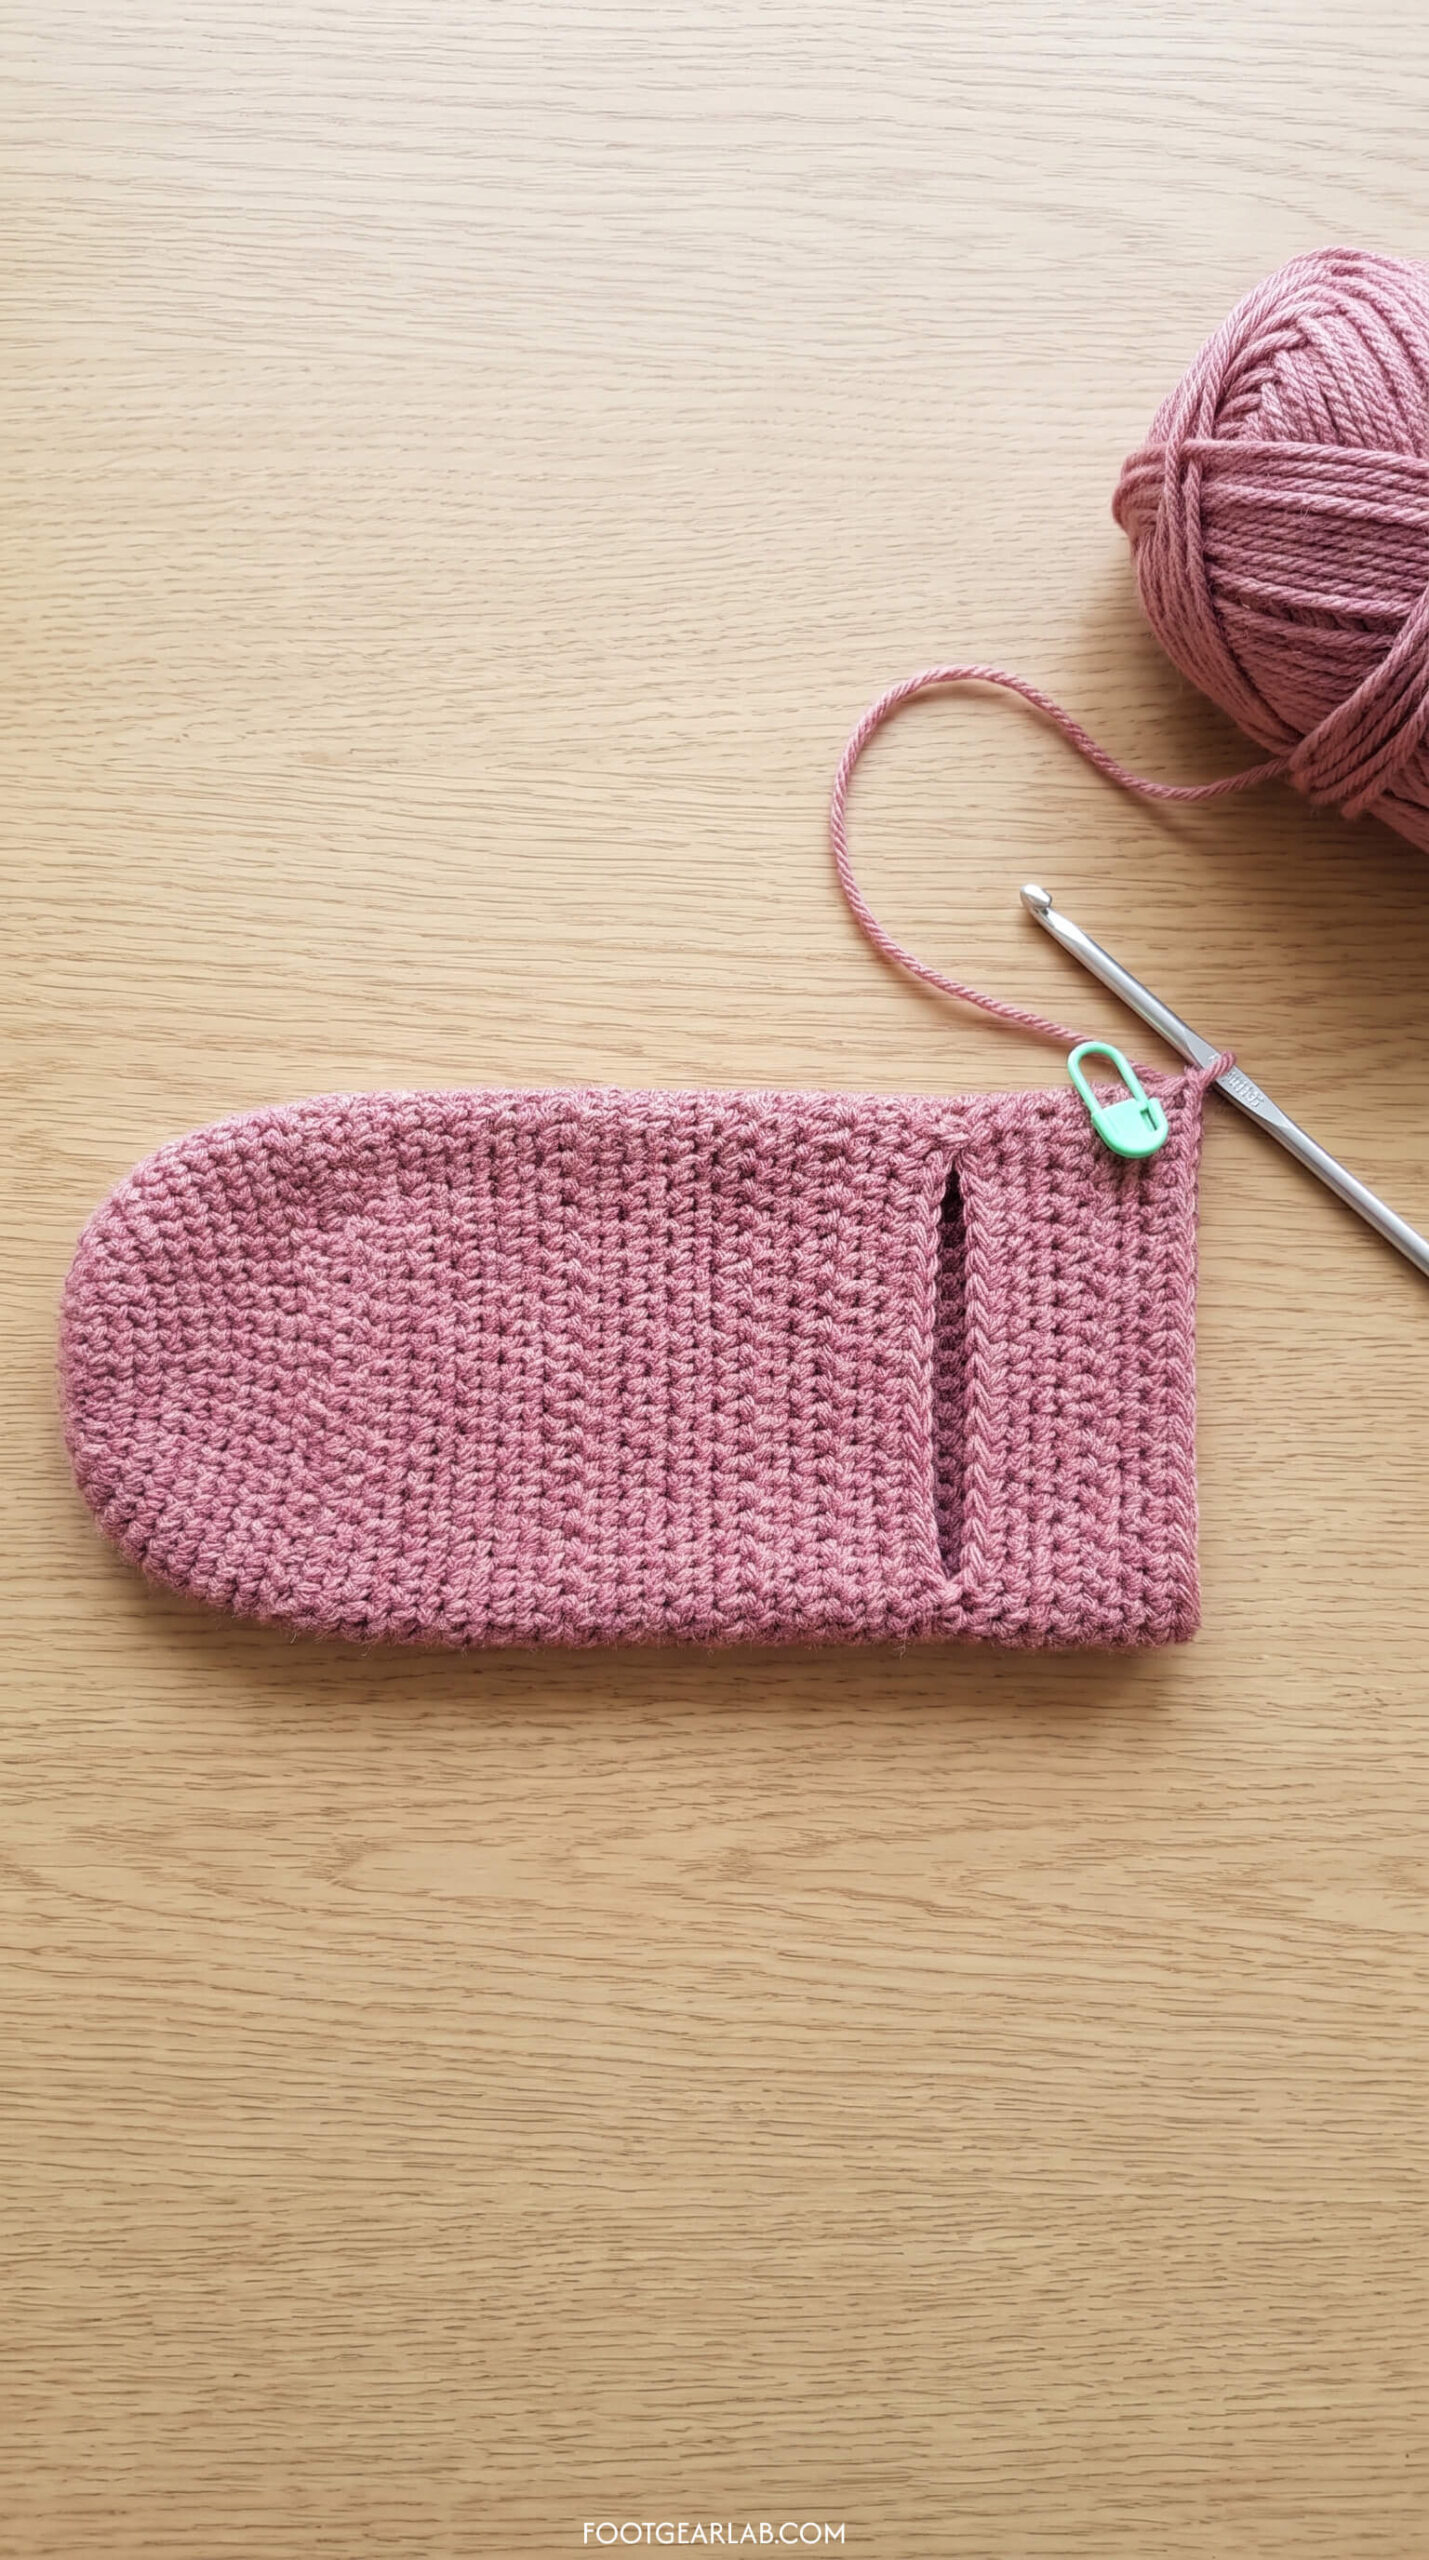
This is the clever part of the afterthought heel. Instead of shaping a heel now, you’ll simply leave a gap across the bottom half of the sock by chaining over some stitches. Later, you’ll come back and crochet the heel into that gap.
Heel opening round: Ch 1, hdc in the next 14 sts, ch 14, skip the next 14 sts, and join with a sl st to the first hdc. The chain stretches across the skipped stitches, creating a slit that runs straight across the sole, from one side of the foot to the other. (For a magic number of 24, use 12 hdc and ch 12; for 32, use 16 hdc and ch 16 — it’s always half your magic number.)
Next round: Ch 1, hdc in each of the 14 hdc, then hdc in each of the 14 chains. Join. (28 stitches) Work into the chains through one loop as you normally would — the leftover loops on the other side of the chain are where you’ll attach the heel later.
Don’t worry about which half becomes the sole. Up to this point, the sock is perfectly symmetrical, so either side works, and your two socks will be identical — there’s no “left” or “right” sock.
Step 5: Work the Leg and Check the Fit
Just above the heel, your ankle and the top of your foot need a little more room, so you’ll add a few stitches before working the leg. This extra space also helps the sock slide comfortably over your heel when you put it on, since crochet doesn’t stretch as much as knitting.
Leg increase round: Ch 1, hdc in the next 6 sts, 2 hdc in the next st; repeat from * 3 more times. Join. (32 stitches) For a magic number of 24, work hdc in the next 5 sts, 2 hdc in the next st four times (28 stitches); for 32, work hdc in the next 7 sts, 2 hdc in the next st four times (36 stitches).
Leg rounds: Ch 1, hdc in each st around. Join. Repeat until the leg measures about 1.5 in (4 cm) above the heel opening for ankle socks, or 4–5 in (10–13 cm) for crew socks. The ribbed cuff will add about 2 more inches.
Try it on now. Slide your foot into the sock with your toes in the toe cup and your heel poking out through the opening. The leg should pull up over your heel and around your ankle without a struggle. If it feels tight going over your heel, work another increase round (adding four stitches evenly, as above) before the cuff, or rework the leg with a hook one size larger. It’s far easier to fix this now than after the cuff is done.
Step 6: Make the Ribbed Cuff
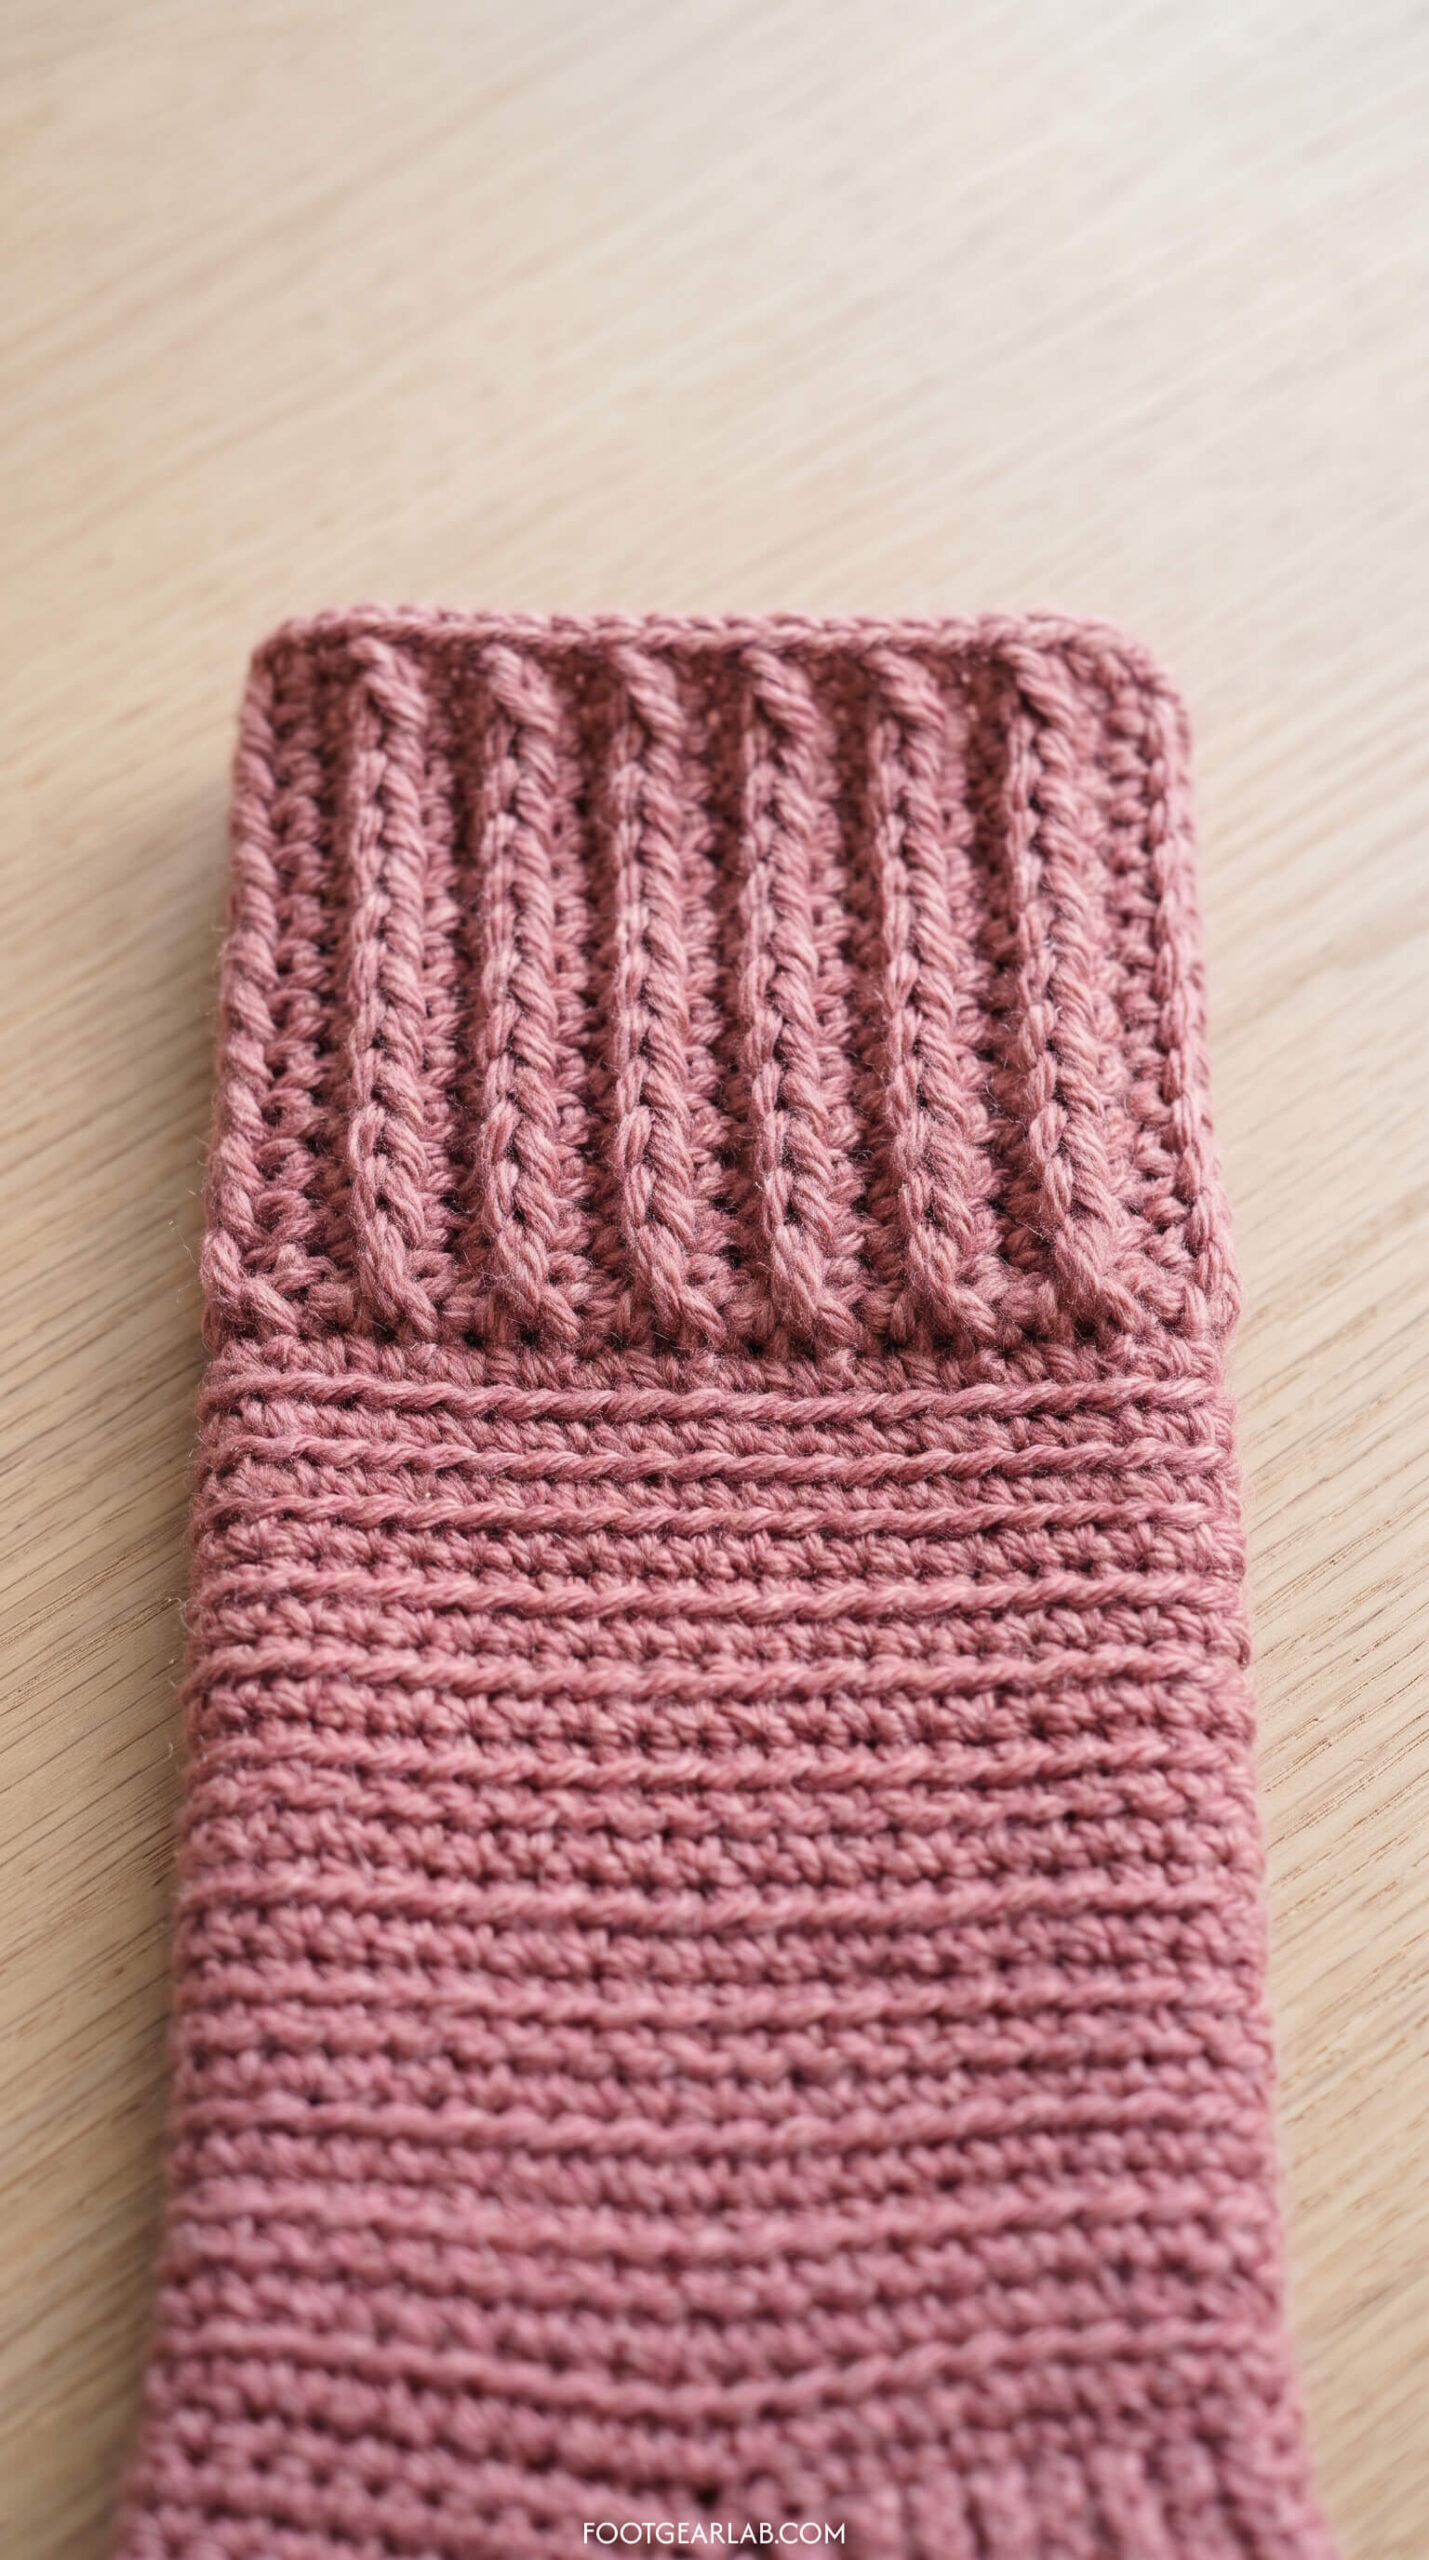
The cuff uses front post and back post double crochet to create stretchy, raised ribs that look polished and help the sock stay up. Working around the post of a stitch feels unusual the first time, but after a few stitches you’ll fall into an easy rhythm.
Ribbing round 1: Ch 2 (does not count as a stitch), FPdc around the next st, BPdc around the next st; repeat from * around. Join with a sl st to the first FPdc. (32 stitches)
Ribbing rounds 2–4: Ch 2, FPdc around the next FPdc, BPdc around the next BPdc; repeat around. Join. Always work a front post stitch around a front post stitch and a back post stitch around a back post stitch, so the ribs line up into neat vertical columns.
Work 3 to 5 ribbing rounds, depending on how tall you want the cuff. Fasten off and weave in the tail inside the sock.
Step 7: Add the Afterthought Heel
Here’s where it all comes together. The heel is crocheted into the opening you left in Step 4, using the same shaping as the toe — only this time, you decrease instead of increase. Use single crochet again for a firm, durable heel.
Turn the sock so the heel opening faces you. You’ll see two edges: on the foot side, the tops of the 14 stitches you skipped, and on the leg side, the 14 free loops left on the underside of your chain.
Round 1: Join the yarn with a sl st at one corner of the opening. Ch 1, sc in each of the 14 stitches along one edge, then sc in each of the 14 stitches along the other edge. Join. (28 stitches)
Round 2: Ch 1, sc2tog, sc in the next 10 sts, sc2tog; repeat from * once more. Join. (24 stitches) Because you started at a corner, your decreases land at the two sides of the heel, just as the toe increases landed at the sides of the toes.
Round 3: Ch 1, sc2tog, sc in the next 8 sts, sc2tog; repeat once more. Join. (20 stitches)
Round 4: Ch 1, sc2tog, sc in the next 6 sts, sc2tog; repeat once more. Join. (16 stitches)
Round 5: Ch 1, sc2tog, sc in the next 4 sts, sc2tog; repeat once more. Join. (12 stitches)
For a magic number of 24, start Round 1 with 24 stitches and work three decrease rounds; for 32, start with 32 and work five. In every size, keep decreasing until 12 stitches remain, mirroring the toe.
Close the heel: Fasten off, leaving a 12 in (30 cm) tail. Flatten the heel so the 12 remaining stitches line up into two rows of 6, with the decrease corners at each side. Thread the tail onto your tapestry needle and whipstitch the two edges together. Before weaving in the tail, use it to close any tiny gaps at the two corners of the heel opening — this is very common and takes just a couple of stitches to fix.
Step 8: Make the Second Sock
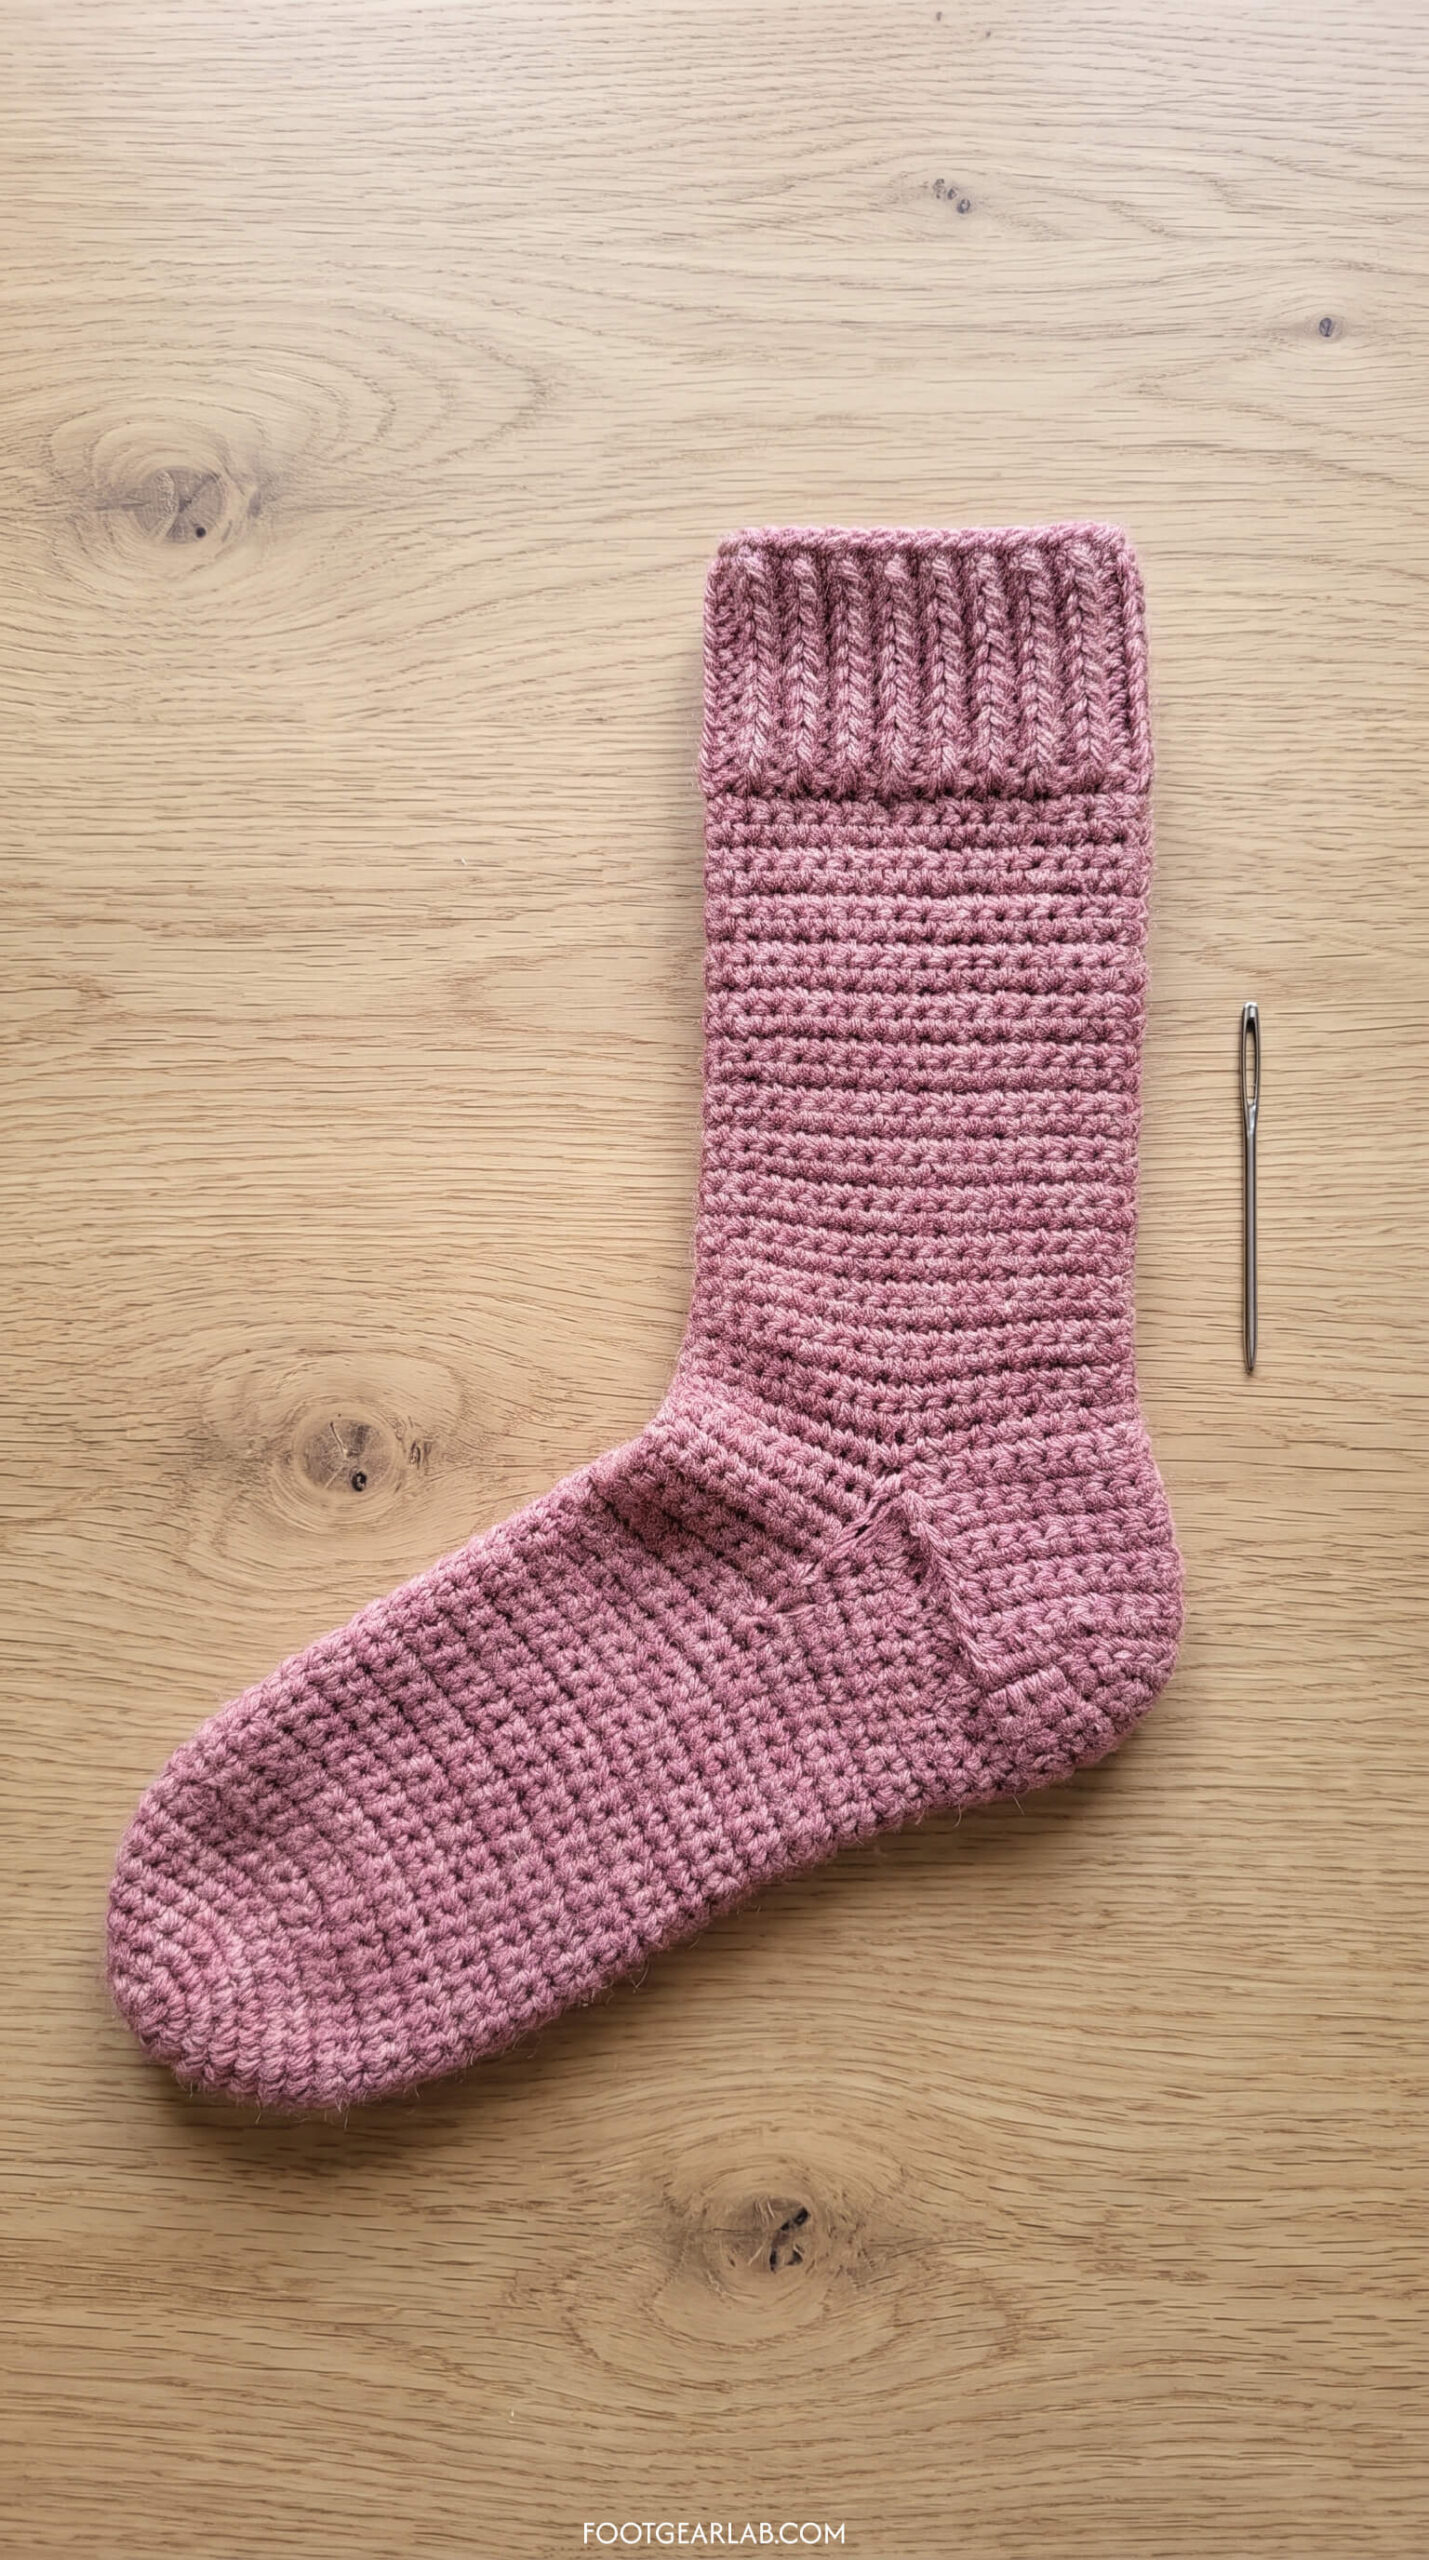
Many makers joke about “second sock syndrome” — the temptation to stop after one sock. The best cure is to start the second sock right away while the pattern is fresh in your mind. Use the same hook, the same yarn, and the notes you wrote down: your magic number, the number of foot rounds, and the number of leg rounds.
If you can, try to crochet both socks in a similar mood and setting. Your tension can change slightly when you’re tired, stressed, or relaxing in front of a movie, and matching your round counts exactly is the most reliable way to keep both socks the same size. When both are done, lay them side by side and compare — small differences usually disappear after the first wash.
Easy First Pairs: Four Beginner Variations
Once you know the basic pattern, you can create completely different looks without learning any new skills. These four variations all use the exact same steps above, with just one or two simple changes.
1. The Classic Cozy Sock
This is the pattern exactly as written, in one solid color. It’s the best choice for a very first pair because you can focus entirely on your stitches and fit without managing extra yarn. Try a soft neutral like oatmeal, blush, sage, or heather gray for socks that go with every pair of pajamas and lounge pants you own.
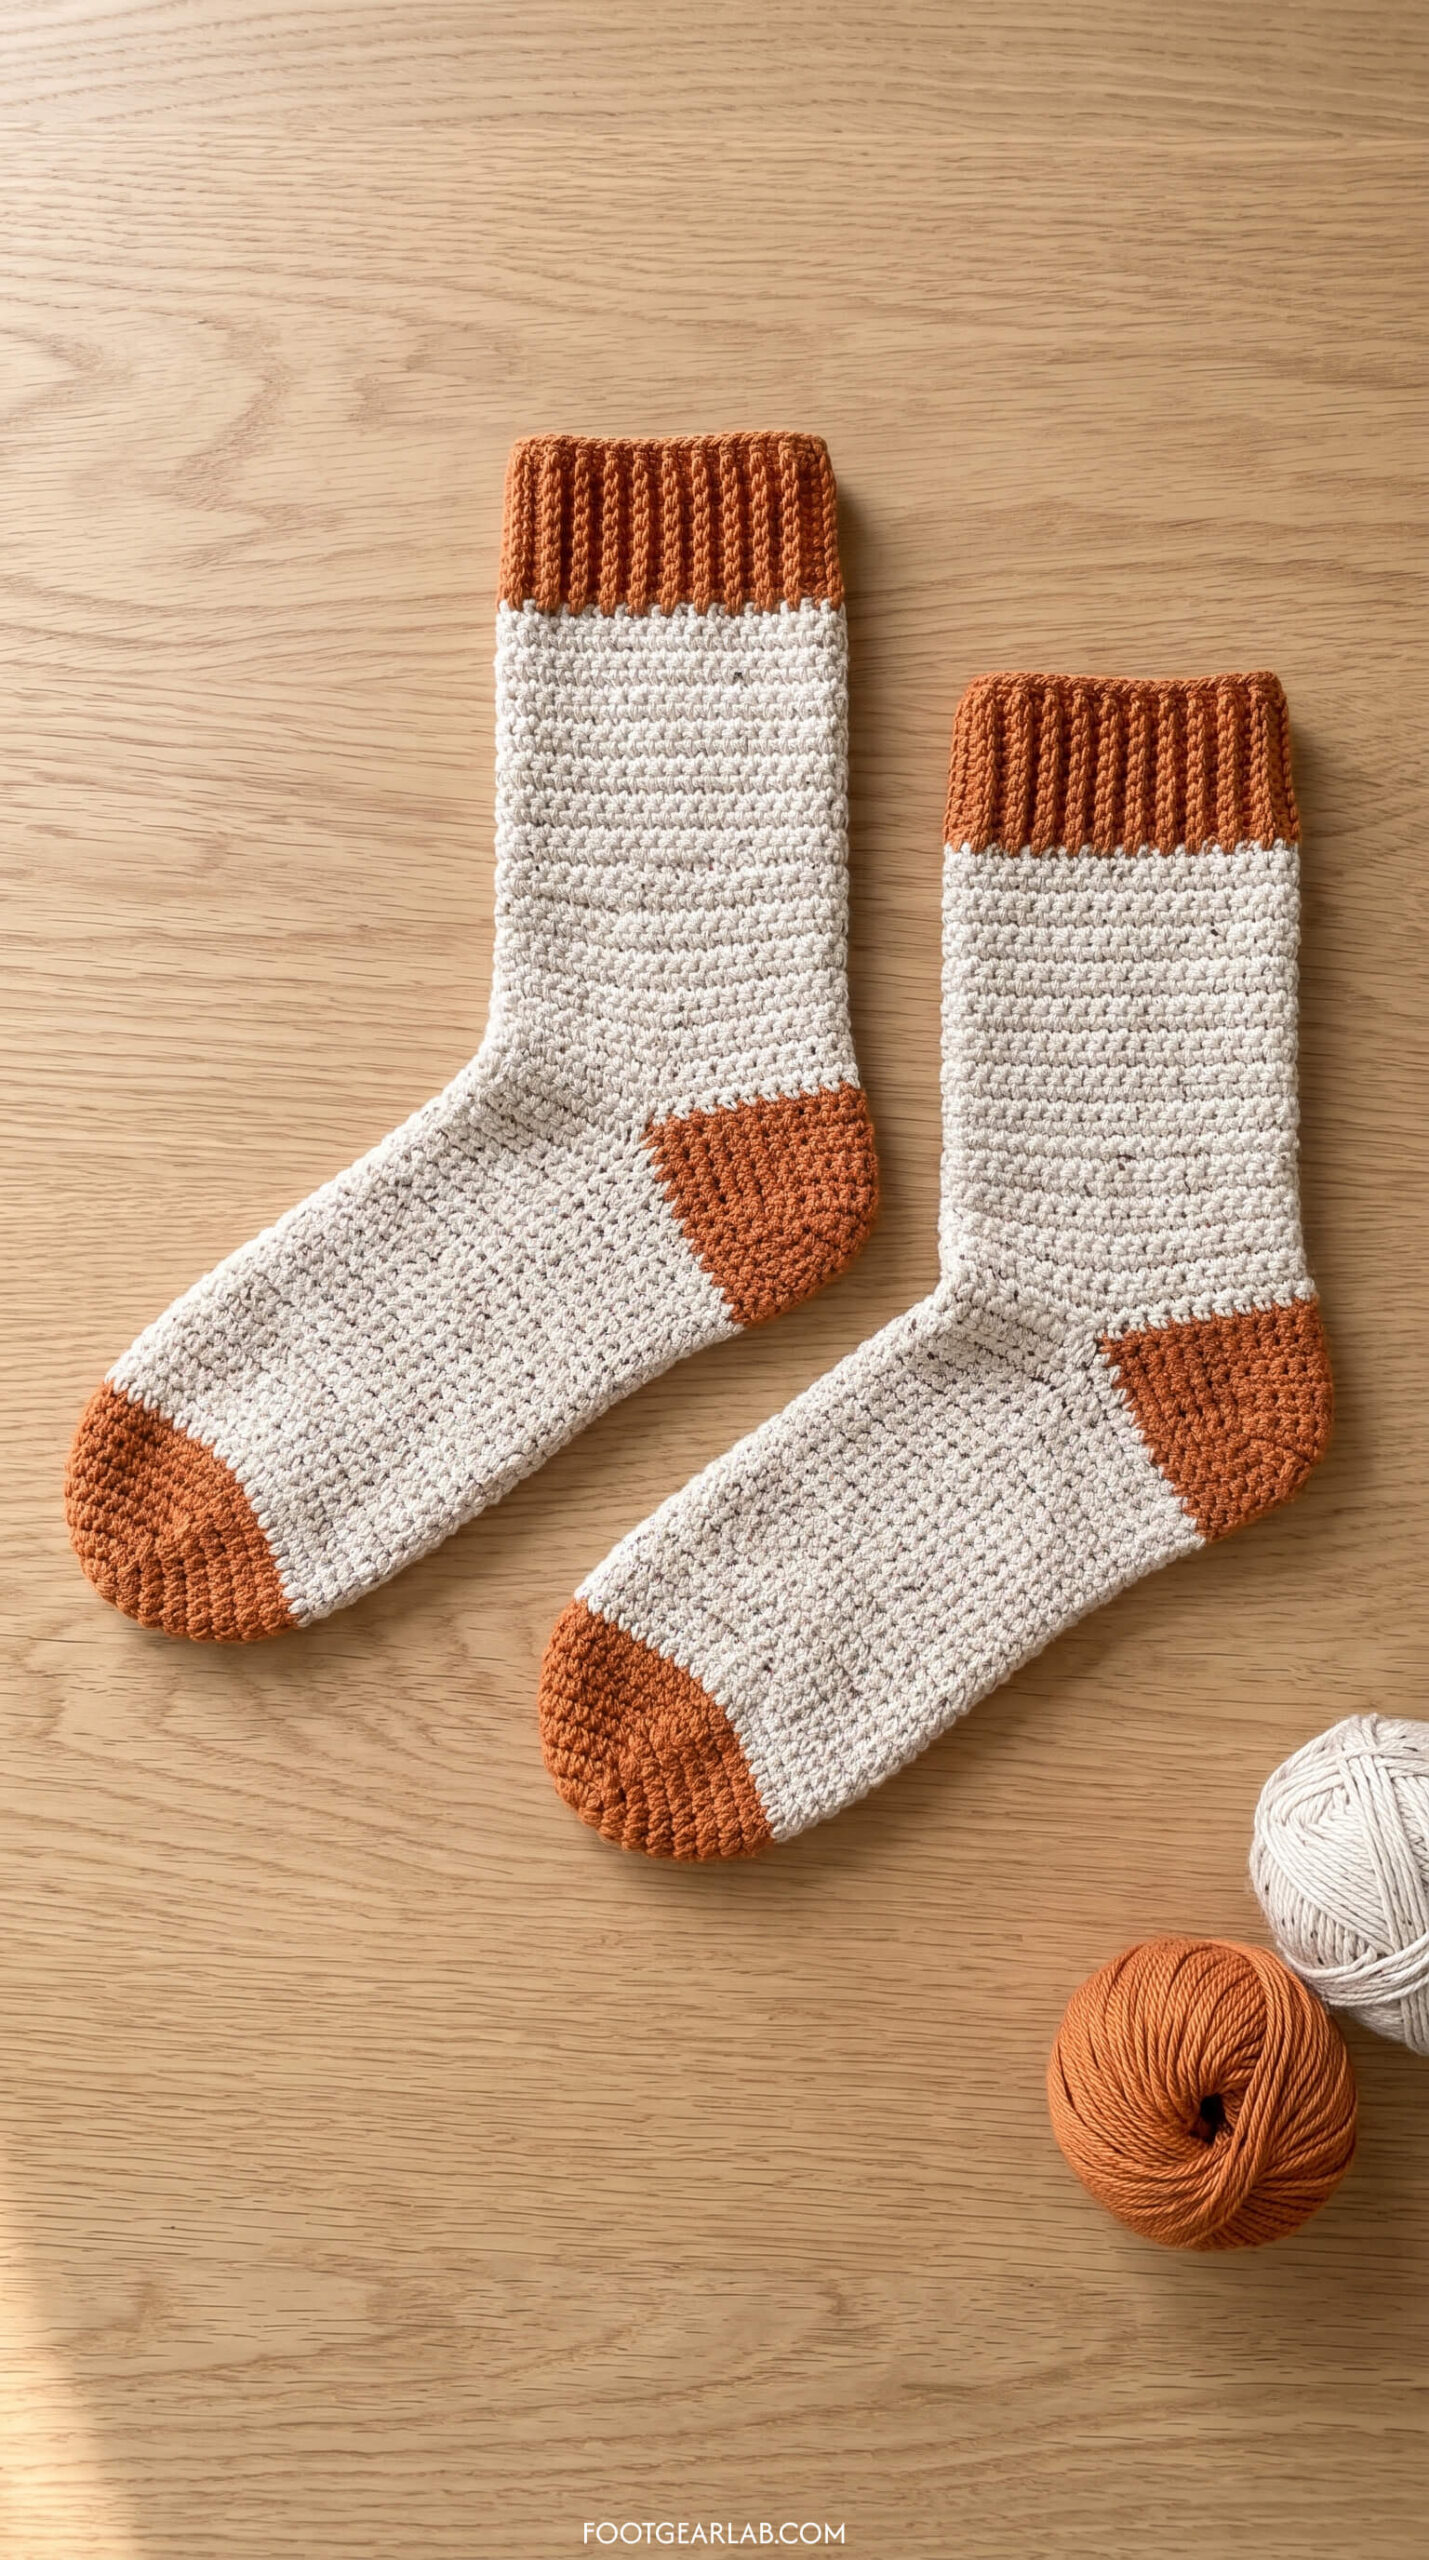
2. The Color-Block Sock
Make the toe, heel, and cuff in a second color for a charming, vintage-inspired look. Because the afterthought heel is worked separately, this is one of the easiest color changes you’ll ever make — you simply start the toe with your contrast color, switch to your main color for the foot, and attach the contrast color again for the heel and cuff. Pairings like cream with terracotta, gray with mustard, or ivory with dusty rose look especially sweet.
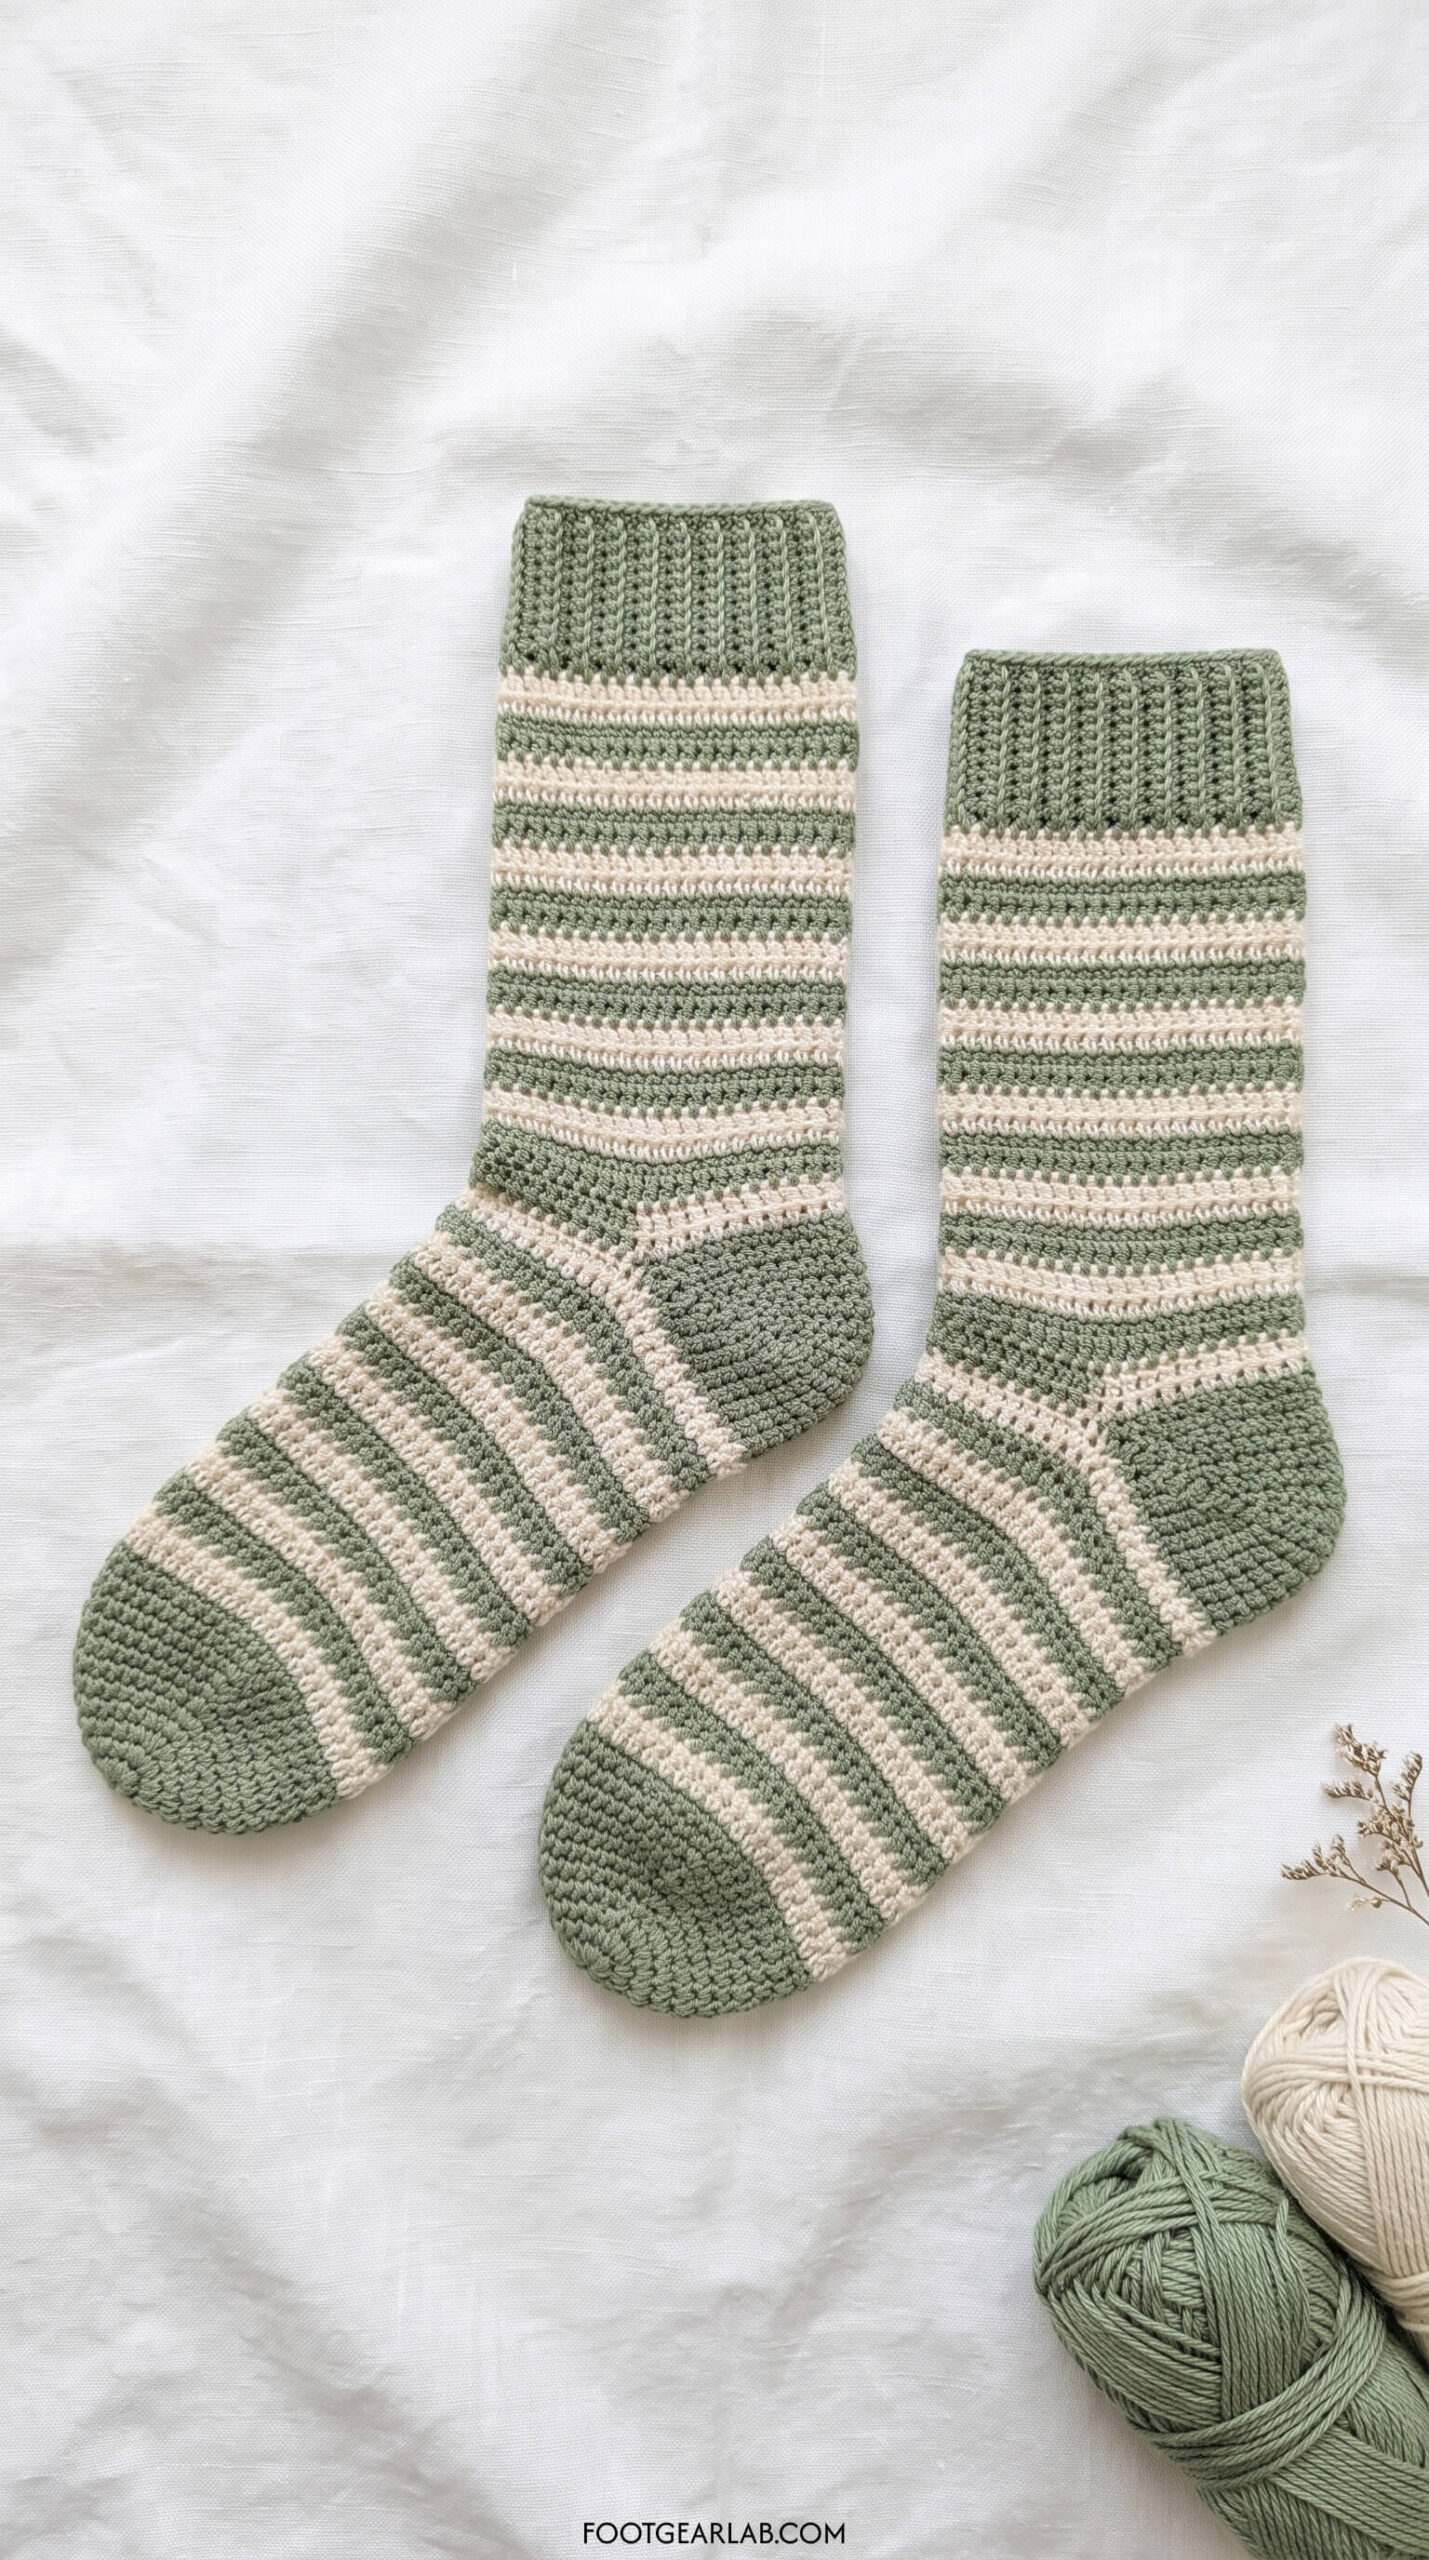
3. The Simple Stripe Sock
Stripes look impressive but are surprisingly beginner-friendly in joined rounds. On the foot and leg, change color every two rounds by finishing the last stitch of a round with the new color: work the stitch until two loops remain, then pull the new color through to complete it before joining. Instead of cutting the yarn each time, carry the unused color loosely up the inside of the sock at the joining point, so you only have two ends to weave in. Keep the toe, heel, and cuff in one solid color to keep the look clean.
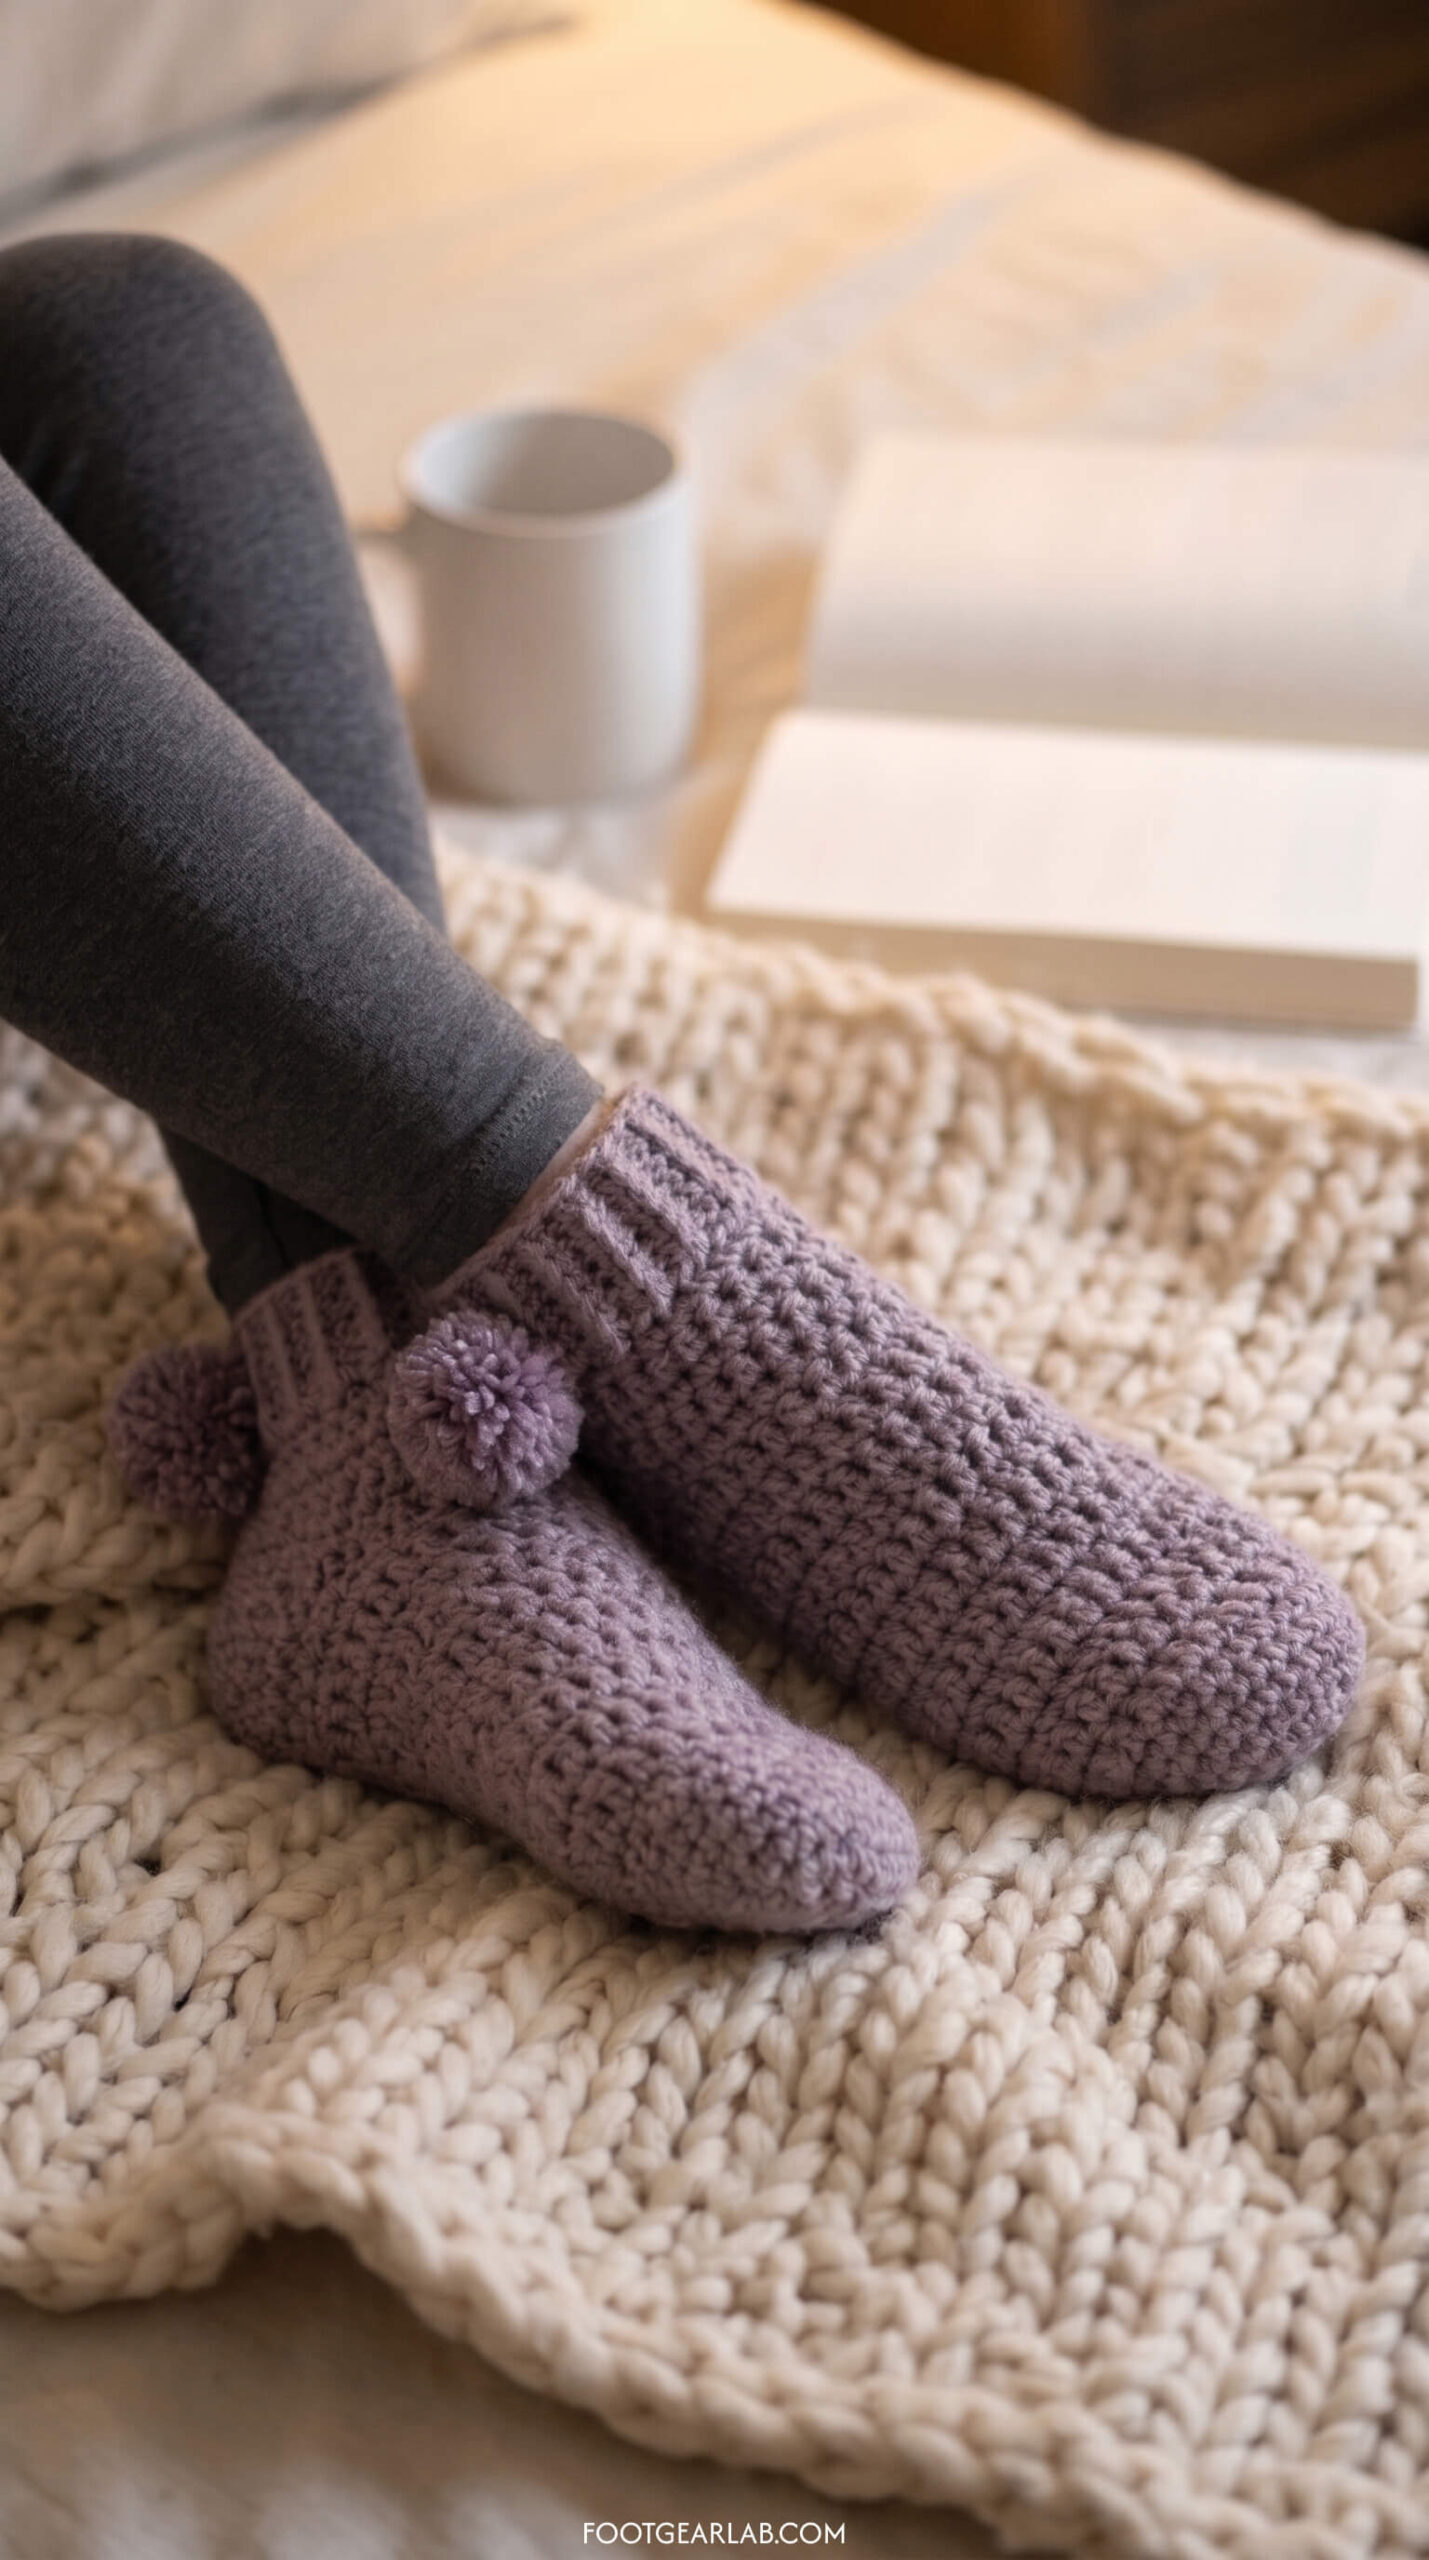
4. The Chunky Pom-Pom Bed Sock
For extra-warm sleeping socks, use bulky-weight (#5) yarn and a 6.5 mm (US K-10.5) hook. Because the stitches are bigger, your magic number will be smaller — usually 20 or 24 stitches — so measure your toe cup against your foot just as before. Work a short leg of about 1 in (2.5 cm) above the heel opening, add a three-round ribbed cuff, and sew a fluffy pom-pom to the back of each cuff. These work up in a single cozy evening and make a lovely handmade gift.
Common Beginner Mistakes (and Easy Fixes)
Every sock maker runs into a few hiccups along the way, so don’t be discouraged if your first sock isn’t perfect. Most problems have a simple fix, and many can be avoided entirely once you know what to watch for.
| Problem | Why It Happens | How to Fix It |
|---|---|---|
| Stitch count keeps changing | Working into the slip stitch join, or missing the first stitch of the round | Always make the first stitch in the same stitch as the join, never in the slip stitch itself, and count every round using your marker |
| Sock won’t pull over the heel | Crochet fabric has less stretch than knitting, especially with tight tension | Add an extra increase round in the leg, go up one hook size for the leg, or loosen your grip on the yarn |
| Small holes at the heel corners | The corners of the heel opening naturally leave tiny gaps | Use the heel’s yarn tail to stitch the gaps closed before weaving it in |
| The join line slants to one side | Joined rounds of half double crochet often drift slightly as you work | This is normal; just make sure it sits along the side of the foot, where it won’t be noticeable |
| Fabric feels stiff and thick | Tight tension or a hook that’s too small for your yarn | Switch to a 5.5 mm hook and focus on relaxed, even loops |
| Two socks are different sizes | Different round counts or a change in tension between socks | Write down every round count on the first sock and match it exactly on the second |
Caring for Your Crochet Socks
The right care will keep your handmade socks soft and in good shape for years. Always follow the instructions on your yarn label first, because they’re written for that specific fiber. As a general guide, superwash wool and acrylic blends can usually be machine washed on a cold, gentle cycle, ideally inside a mesh laundry bag to prevent snagging.
Non-superwash wool should always be hand washed in cool water with a gentle wool wash. Squeeze the water out gently — never wring or twist — then roll the socks in a towel to remove excess moisture. Lay them flat to dry, away from direct heat, and skip the dryer to prevent shrinking or felting.
If you’ll be wearing your socks on hard floors, keep in mind that crochet socks can be slippery. A simple fix is to add dots or lines of fabric paint, or iron-on silicone grips, to the soles. This small step makes them much safer for padding around the kitchen or walking downstairs.
Frequently Asked Questions
Can I wear crochet socks with shoes? Crochet socks are thicker than store-bought or knitted socks, so they usually feel too bulky in fitted shoes. They’re best for lounging at home, wearing inside slippers, layering in roomy winter boots, or sleeping in on cold nights.
Do I need a left and a right sock? No. This pattern creates two identical socks, and either one fits either foot. The heel opening can be placed on either half of the tube, because the sock is completely symmetrical until the heel is added.
What if I don’t want to make a heel? You can skip the heel opening entirely and make a simple tube sock by working straight from the foot into the leg. Tube socks are comfortable for sleeping, but they tend to bunch at the ankle, so the afterthought heel is worth the small extra effort.
Can I use thinner yarn? Yes, but your magic number will be larger and the socks will take longer to make. For a first pair, worsted-weight yarn is the sweet spot between speed and comfort. Once you’re confident, you can try DK or sport-weight yarn with a smaller hook for thinner socks.
How do I make the socks longer or shorter? Simply work more or fewer leg rounds before starting the ribbed cuff. Just remember that longer socks need more yarn, so check that you have enough before you begin.
Final Thoughts
Your first pair of crochet socks might have a slightly uneven stitch here or a tiny gap there, and that’s perfectly fine — it’s part of what makes them yours. With the toe-up method, a personal magic number, and a heel that mirrors the toe, you have a simple, reliable pattern you can come back to again and again.
Once you’ve made one pair, try a color-block or striped version, or whip up a chunky pair with pom-poms for a cozy winter gift. Before long, you’ll have a drawer full of handmade socks, and you’ll wonder why socks ever seemed so intimidating.
Save this guide to your crochet board so you can find it easily when you’re ready to cast on your next pair.