Some mornings you have time for a full face, a curled lash, and a carefully blended eyeshadow. Most mornings you don’t. Between the alarm, the coffee, and the “where are my keys” hunt, makeup often gets skipped or rushed into something that looks heavier than you wanted. The good news is that you don’t need twenty products or a skill set from a tutorial to look awake, polished, and like yourself, only a little more rested.
This guide walks you through a five-minute everyday makeup routine built on a simple idea: do only the steps that make the biggest visible difference, and use products that do more than one job. You’ll find a minute-by-minute breakdown, the short kit you actually need, shade advice for every skin tone, tweaks for oily, dry, and mature skin, and easy fixes for the most common mistakes. Once you’ve done it a few times, it becomes muscle memory, and five minutes may even start to feel generous.
Why a 5-Minute Routine Works So Well
A quick routine isn’t a compromise. It’s a smart edit. When you look at a face, the eye goes first to the overall evenness of the skin, then to the eyes and brows, and then to the warmth in the cheeks and lips. A short routine that targets those three areas gives you most of the polished effect of a full makeup look, without the time, the weight on your skin, or the risk of it looking cakey by lunchtime.
A lighter routine also tends to wear better through the day. Thin layers of cream and liquid products move with your skin instead of settling into lines or separating around the nose. It’s also kinder to your budget and your bathroom shelf, because you’ll use up a small set of products rather than buying more and more.
Most of all, a routine you can do quickly is a routine you’ll actually keep. Consistency matters more than complexity: the woman who does five steps every morning will look more put-together day to day than the one who saves a full face for special occasions and skips everything otherwise.
The Only Five Products You Need
The secret to speed is using fewer products that each work harder. You can absolutely add to this list later, but this is the core kit that makes the routine possible in five minutes.
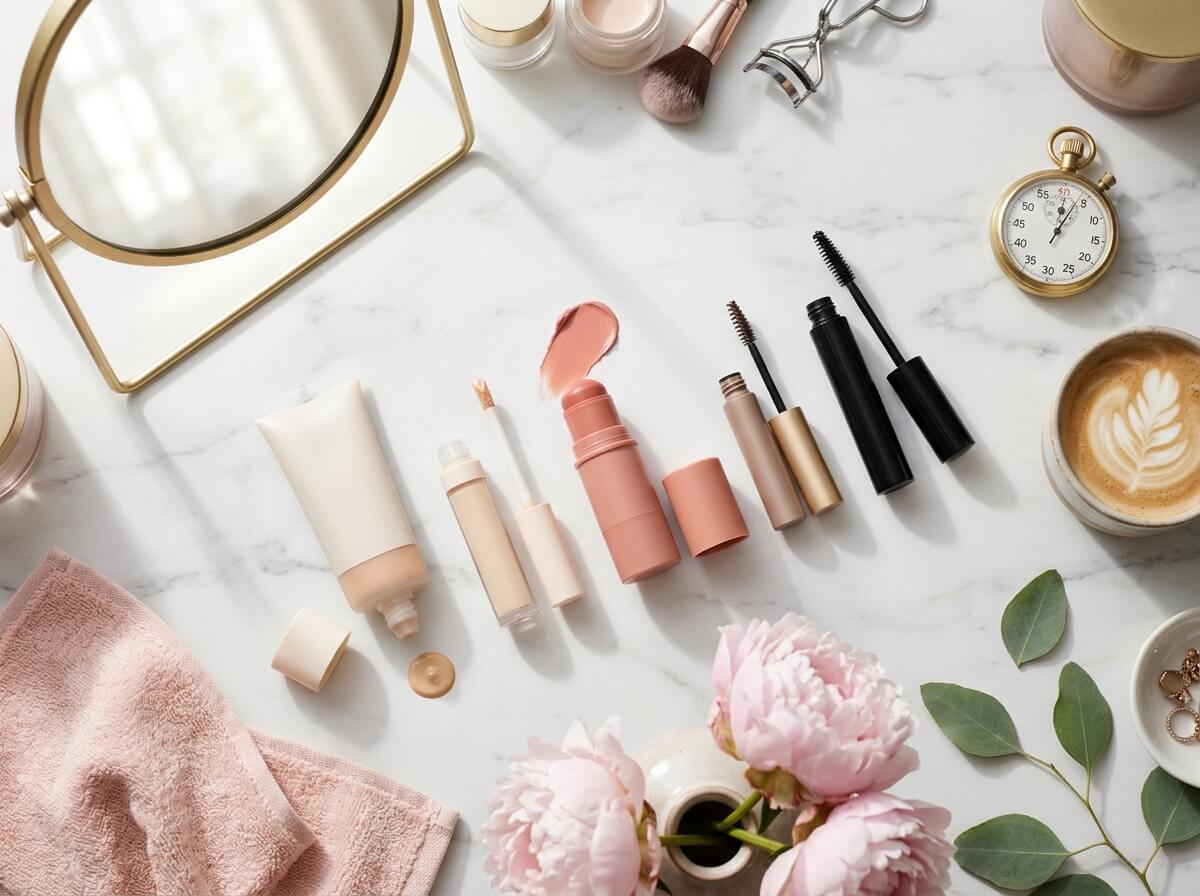
1. A tinted moisturizer or skin tint with SPF. This replaces three steps at once: moisturizer, sunscreen, and foundation. It evens out redness and dullness while letting your real skin show through, which is exactly the look you want for everyday wear. Choose one that matches your neck rather than your face, so there’s no visible line at the jaw. If your tint doesn’t contain SPF or has a low number, apply a regular SPF 30 or higher first, since most of us don’t use enough makeup to get the full protection printed on the label.
2. A creamy concealer. You don’t need full coverage everywhere, only on the few spots that pull focus, like the inner corners of the eyes, around the nose, or a blemish. A creamy formula blends easily with your fingertip and won’t crease the way a thick, dry one can. Pick a shade that matches your skin for spots, or one only half a shade lighter if you want to brighten under the eyes.
3. A multi-use cream blush stick. This is the hardest-working product in the bag. One swipe gives your cheeks a healthy flush, and a tiny dab on the lips ties the whole look together, so your face looks coordinated without any thought. Cream blush melts into skin and looks far more natural than powder for a quick routine, especially if you use your fingers.
4. A tinted brow gel. Brows frame the face, and groomed brows instantly make you look more awake. A tinted gel fills sparse areas, adds a little color, and holds the hairs in place in a single motion. It’s much faster than a pencil and nearly impossible to overdo.
5. A lengthening mascara. One coat of mascara opens up the eyes more than any other single step. A lengthening, buildable formula separates lashes cleanly and is less likely to clump when you’re working fast. Brown-black or soft black looks natural on most people, while jet black gives a slightly more defined effect.
Optional extras: A tinted lip balm for moisture and sheen, a small amount of translucent powder for the T-zone if you get shiny, and a mini setting spray if you want extra staying power. These are nice to have, but the routine works without them.
The 5-Minute Routine at a Glance
Before diving into the details, here’s how the five minutes break down. Keep this table in mind (or screenshot it) for the first few mornings until it becomes automatic.
| Time | Step | Products | Goal |
|---|---|---|---|
| 0:00 – 1:00 | Prep and protect | Moisturizer (optional), SPF | Smooth, hydrated, protected base |
| 1:00 – 2:00 | Even the skin | Tinted moisturizer, concealer | Fresh, even skin with spots softened |
| 2:00 – 3:00 | Add warmth | Cream blush stick | Healthy flush on cheeks |
| 3:00 – 4:00 | Define the eyes | Brow gel, mascara | Awake, framed eyes |
| 4:00 – 5:00 | Finish and set | Blush or balm on lips, powder | Coordinated, long-lasting look |
Step-by-Step: Your 5-Minute Everyday Makeup
Step 1: Prep and Protect (0:00 – 1:00)
Start with clean skin, whether that means a quick cleanse or simply rinsing with water if you washed thoroughly the night before. Apply a light moisturizer if your skin feels tight, then your sunscreen, and give it about thirty seconds to settle while you brush your hair or sip your coffee. This short pause matters: makeup applied on top of a wet, slippery layer tends to slide and look patchy.
If you have oily skin, a gel moisturizer or a mattifying sunscreen will give you a smoother base. If your skin is dry, pat a little extra moisturizer around the nose and mouth, where flaking often shows first. A well-prepped base is what makes every following step look effortless, so don’t skip this minute even when you’re in a rush.
Step 2: Even the Skin (1:00 – 2:00)
Squeeze a pea-sized amount of tinted moisturizer onto the back of your hand. Dot it on your forehead, nose, cheeks, and chin, then blend outward with your fingertips using quick, light strokes. Fingers warm the product so it melts into the skin and looks like skin, not a mask. Focus most of the product on the center of the face, where redness usually lives, and let it fade thinly toward the hairline and jaw.
Next, take a small amount of concealer on your ring finger, which naturally applies the lightest pressure. Tap it onto the inner corner of each eye, around the sides of the nose, and on any blemish or dark spot. Don’t swipe; tap until the edges disappear. The goal isn’t perfect coverage everywhere, only softening the few things that catch the eye, so you look rested rather than “made up.”
Step 3: Add Warmth (2:00 – 3:00)
Smile gently and swipe your cream blush stick onto the apples of your cheeks, then blend it upward and back toward your temples with your fingertips. Placing blush slightly higher than the very center of the apple gives a fresher, lifted look, while placing it too low can drag the face down. Start with a small amount, since it’s easier to add than to take away.
If you want to look extra fresh, tap whatever is left on your fingertip lightly across the bridge of your nose and the top of your forehead. This mimics the natural flush you’d get after a walk outside in cool air. Blend the edges until there are no visible lines, and you’re done with the step that does the most to make you look healthy and happy.
Step 4: Define the Eyes (3:00 – 4:00)
Brush the tinted brow gel upward through your brows, starting at the inner edge and moving to the tail. Then use the spoolie to softly tidy the tails outward. Upward strokes make brows look fuller and lift the whole eye area. If you have a sparse patch, press the brush into it once or twice to deposit a little extra color.
For mascara, look slightly down into a mirror so you can see your lash roots. Place the wand right at the base of the upper lashes and wiggle it side to side for a second before sweeping it up to the tips. That little wiggle deposits most of the product at the root, which is what makes lashes look thicker and lifted. One coat is enough for everyday wear. If you have time and want more drama, add a second coat to the outer lashes only, which opens the eye without clumping.
Step 5: Finish and Set (4:00 – 5:00)
Tap a little of your cream blush onto the center of your lips and press them together, or swipe on a tinted lip balm instead. Using the same color on cheeks and lips is a makeup-artist trick that makes your face look instantly coordinated, even though it took you only seconds.
If you tend to get shiny, press a small amount of translucent powder onto your forehead, nose, and chin only, leaving the cheeks dewy. A quick mist of setting spray, held at arm’s length, helps everything melt together and last longer. Take one last look in natural light if you can, blend any harsh edges with a clean fingertip, and you’re out the door.
Choosing the Right Blush Shade for Your Skin Tone
Because the blush does double duty on cheeks and lips, choosing the right shade makes a big difference. The aim is a color that looks like your own natural flush, only a little brighter. Use this table as a starting point and trust what looks best in daylight.
| Skin Tone | Most Flattering Blush Shades | Why It Works |
|---|---|---|
| Fair | Soft pink, light peach, baby rose | Mimics a gentle natural flush without looking harsh or overly bright |
| Light to medium | Peach, warm rose, soft coral | Adds warmth and life without competing with the skin’s natural tone |
| Medium and olive | Apricot, terracotta rose, warm coral | Brings out golden undertones and prevents an ashy or grey effect |
| Tan to deep | Berry, brick red, deep coral, plum | Rich pigment shows up clearly and looks vibrant rather than chalky |
If you’re unsure about your undertone, look at the veins on the inside of your wrist in natural light. Bluish veins often suggest cool undertones, which pair beautifully with pinks and berries, while greenish veins suggest warm undertones, which glow with peaches and corals. If you can’t tell, you likely have neutral undertones and can wear almost anything, with rosy-peach shades as a safe favorite.
Adjusting the Routine for Your Skin Type
The basic five steps work for everyone, but small adjustments help them work better for your skin.
| Skin Type | What to Change | Product Tip |
|---|---|---|
| Oily | Use a mattifying primer or sunscreen, keep tint light, and powder the T-zone | Look for oil-free, non-comedogenic tints and a lightweight brow gel |
| Dry | Add an extra layer of moisturizer and skip powder entirely | Choose dewy skin tints and creamy, hydrating blush sticks |
| Combination | Moisturize the cheeks well, powder only the forehead, nose, and chin | A satin-finish tint balances both areas without making either look off |
| Sensitive | Keep the routine short and stick to fragrance-free formulas | Patch-test new products on your jaw for a couple of days before full use |
| Mature | Use less product, especially under the eyes, and keep everything creamy | Place blush higher on the cheekbones for lift and skip heavy powder |
For mature skin, less really is more. Thin layers and cream textures keep the skin looking soft and luminous, while heavy powder and thick concealer can settle into fine lines and emphasize them. A dewy, fresh look is often far more flattering than a fully matte one.
Quick Variations for Different Days
Once you have the core routine down, you can tweak it in seconds to suit your day.
The 2-minute emergency version. When you’re truly short on time, skip the tint and use only concealer where you need it, then swipe on blush and one coat of mascara. These three steps alone take you from tired to fresh, and they’re the ones to prioritize when every second counts.
The polished office look. Follow the full routine, then add a soft brown pencil smudged along the upper lash line and blended with your fingertip. It gives your eyes a little extra definition for meetings and video calls without looking dramatic. Swap the blush-on-lips trick for a satin lipstick in a nude rose or soft mauve for a more finished feel.
The weekend glow. Skip the powder completely, add a touch of cream highlighter or a dab of balm on the tops of your cheekbones, and finish with a glossy tinted balm. The result is fresh, sun-kissed, and perfect for brunch, errands, or a relaxed day out.
For glasses wearers. Frames can cast shadows on the under-eye area and hide the brows, so put a little more care into concealer under the eyes and make sure your brows are well defined. Mascara is especially important behind lenses, because it keeps the eyes from looking smaller through the glass.
Common Mistakes (and Easy Fixes)
Using too much tint. Even sheer products can look heavy if you apply a lot. Start with a pea-sized amount for your whole face and add more only where you need it. If you overdo it, press a clean, damp sponge over the area to lift the excess.
Choosing a shade based on your hand. The skin on your hands is often a different color from your face. Test tint and concealer on your jawline in natural daylight, and pick the shade that seems to disappear into your skin.
Placing blush too low. Blush placed at the bottom of the cheek can make the face look tired or heavier. Keep it on the apples and blend upward toward the temples to create a natural lift.
Skipping the brows. Many people skip brows when they’re rushing, but they frame the entire face. A ten-second swipe of brow gel makes more difference than you’d expect, especially if your brows are light or sparse.
Pumping the mascara wand. Pushing the wand in and out of the tube pumps air inside, which dries the formula and causes clumps. Twist the wand gently while pulling it out instead, and wipe any excess on the rim of the tube.
Forgetting to blend the edges. Harsh lines around the jaw or the edges of blush are the quickest giveaway of rushed makeup. Before you leave, take a few seconds to soften all the edges with a clean fingertip.
Tips to Make Your Makeup Last All Day
Start with well-moisturized skin, because dehydrated skin produces more oil to compensate, which breaks down makeup faster. Give your sunscreen and moisturizer a few moments to absorb before applying anything on top.
Apply thin layers rather than one thick one. Two light layers of tint in the spots that need it will last far longer than a heavy single layer, which tends to slide and separate around the nose. The same goes for blush: build it up slowly.
Blot instead of re-powdering. If you get shiny by the afternoon, press a blotting paper or a clean tissue on the oily areas first. Adding more powder on top of oil can look cakey, while blotting removes the shine and keeps your makeup looking fresh.
Keep a tiny touch-up kit in your bag. Your cream blush stick and a lip balm are all you need for a midday refresh. A quick swipe on the cheeks and lips revives the whole look in under thirty seconds.
Keep Your Makeup Clean and Fresh
Clean products and tools keep your skin happy and your makeup looking its best. Wash your hands before applying, especially since this routine relies on fingertips. Replace your mascara roughly every three months, because it’s the product most likely to collect bacteria, and toss it sooner if it smells odd or turns dry and clumpy.
Wipe your cream blush stick with a clean tissue every so often, and keep caps tightly closed so formulas don’t dry out. If you use a sponge or brush for powder, wash it weekly with gentle soap and let it air dry completely. If a product ever causes stinging, redness, or breakouts, stop using it and consult a dermatologist if the irritation doesn’t settle.
Frequently Asked Questions
Can I really do a full makeup look in five minutes? Yes, as long as you keep the routine to products that each do more than one job. The first few times may take a little longer while you get used to the order, but within a week most people finish comfortably in five minutes or less.
Do I need brushes for this routine? No. Everything in this routine can be applied with clean fingertips, which is part of what makes it so fast. Fingers warm cream products and help them melt into the skin naturally. You only need a brush or sponge if you choose to use powder.
What if I don’t like the look of mascara? You can swap mascara for a clear or tinted brow-and-lash gel, which adds a subtle lift and definition without any clumps. Alternatively, simply curling your lashes can open up the eyes with no product at all.
Is tinted moisturizer enough coverage for everyday wear? For most people, yes. Tinted moisturizer evens out redness and dullness while letting your natural skin show through, which looks fresh and modern. Concealer takes care of the specific spots that need a little more help, so you get coverage exactly where you want it.
Can I use the same cream blush on my lips? Most cream blush sticks are designed to be multi-use and are safe for cheeks and lips. Check the packaging to confirm it’s labeled for lip use, and if your lips tend to get dry, apply a thin layer of balm first.
Final Thoughts
A five-minute everyday makeup routine is about working smarter, not harder. By choosing a few multi-tasking products and focusing on the steps that make the biggest difference, an even base, a healthy flush, and defined eyes, you can look fresh, polished, and confident every single morning without the stress or the time commitment of a full face.
Start with the five core products, follow the minute-by-minute steps, and adjust the shades and textures to suit your skin. Within a few days, the routine will feel second nature, and you’ll have a reliable, beautiful look ready whenever you need it, whether that’s for work, errands, a coffee date, or a busy day with no time to spare.