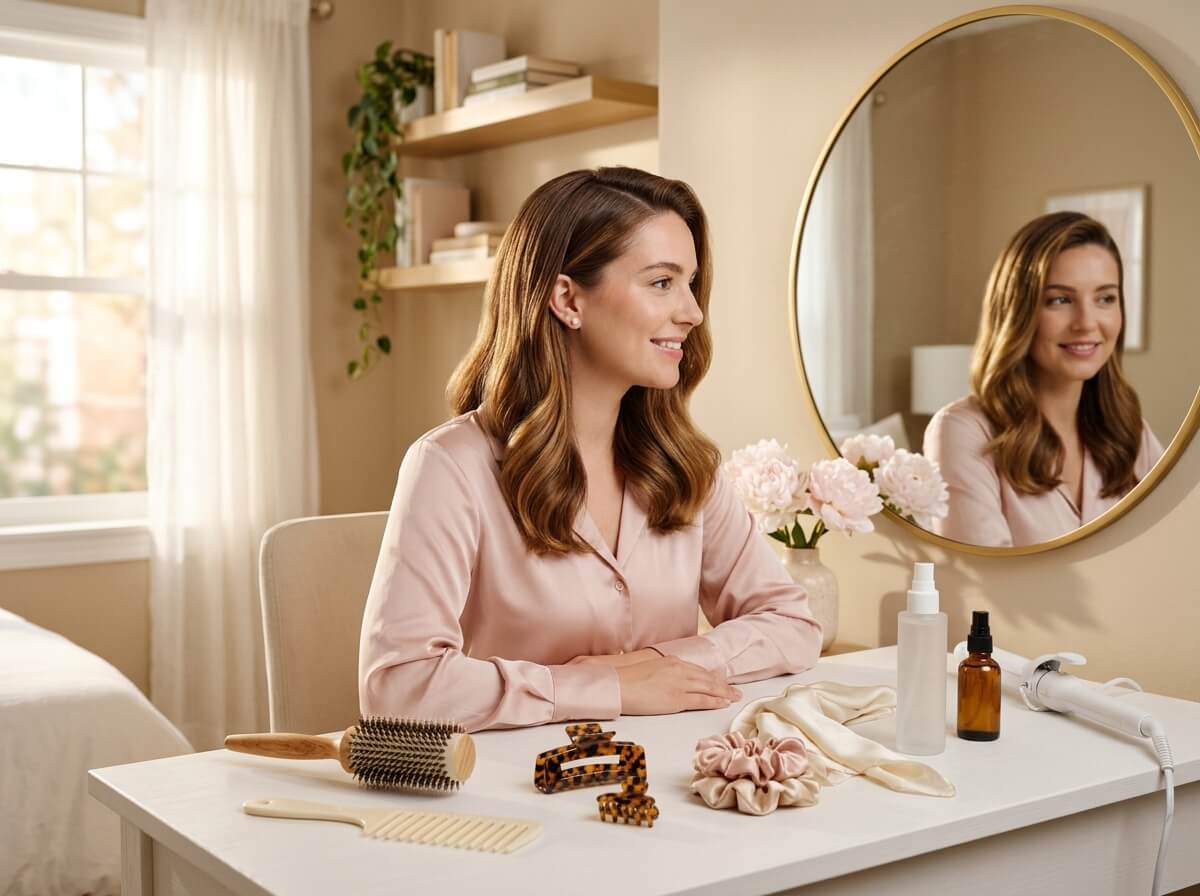
Medium-length hair is the most versatile length you can have. It’s long enough to braid, twist, curl and pin up, yet short enough to dry quickly, feel light on your shoulders and look polished without hours of effort. Whether your hair just grazes your collarbone or falls a few inches past your shoulders, you have more options than you might think, and many of them take less than ten minutes.
In this guide, you’ll find 20 medium-length hairstyles grouped by occasion: easy everyday looks, polished office styles, pretty braids, glam date-night ideas and heatless styles you can do while you sleep. Each one comes with simple step-by-step instructions, the hair types it suits best, and practical tips so it actually holds all day. You’ll also find a face-shape guide, the most flattering haircuts for this length, and the tools that make styling easier.
Why Medium-Length Hair Is the Sweet Spot
Medium-length hair usually means anything from the collarbone to a few inches below the shoulders. This in-between length gives you the best of both worlds. Short hair can feel limiting when you want an updo or a braid, and very long hair can feel heavy, take forever to dry and lose volume at the roots. Medium hair sits right in the middle, so it holds curls better than long hair and still has enough length for buns, ponytails and half-up styles.
It’s also one of the easiest lengths to keep healthy. Because the ends are younger and haven’t been exposed to years of heat, brushing and sun, they’re usually less dry and less prone to split ends. Regular trims keep the shape fresh, and the weight of the hair is light enough that natural waves and curls can spring up without being pulled flat.
Finally, medium length flatters almost every face shape. It frames the jaw and cheekbones, draws the eye toward the face, and can be adjusted with layers, bangs or a different part to soften or sharpen your features.
Before You Style: Match the Look to Your Face Shape
You can wear any hairstyle you love, but knowing your face shape helps you choose the part, volume and texture that will flatter you most. Pull your hair back, look straight into a mirror, and notice which part of your face is widest: forehead, cheekbones or jaw.
| Face Shape | What Flatters It | Styles to Try | Tip |
|---|---|---|---|
| Oval | Almost everything, since proportions are balanced | Sleek blowout, beach waves, top knot | Experiment freely; a center part looks especially elegant |
| Round | Height at the crown and length below the chin | Half-up top knot, deep side part, long layers | Avoid volume at the cheeks; keep the sides smoother |
| Square | Soft movement that blurs a strong jawline | Loose waves, curtain bangs, side-swept styles | Add curls starting at chin level to soften the angles |
| Heart | Fullness around the jaw to balance a wider forehead | Flipped ends, lob with waves, low side bun | Side bangs or curtain bangs help balance the forehead |
| Long / Oblong | Width at the sides and less height on top | Bouncy blowout, textured waves, bangs | Skip high buns and teased crowns; they lengthen the face |
| Diamond | Width at the forehead and jaw, softness at the cheekbones | Tucked lob, chin-length layers, side part | Tucking one side behind the ear shows off cheekbones beautifully |
Your hair texture matters too. Fine hair benefits from texturizing spray and styles that add volume at the roots, while thick hair holds updos well but may need extra pins and a lightweight serum to stay smooth. Curly and coily hair often looks best when styled with its natural pattern rather than against it, so many of the styles below include tips for working with curls.
Easy Everyday Hairstyles
These are the styles you’ll reach for on busy mornings, school runs, errands and casual days. They take five to ten minutes and look effortless in the best way.
1. Effortless Beach Waves
Beach waves are the signature look of medium-length hair because the length is perfect for loose, lived-in bends that don’t drop out after an hour. Unlike tight curls, these waves look relaxed and slightly undone, which makes them feel modern and easy to wear with anything from jeans to a summer dress.
How to do it:
- Start with dry hair and spray a heat protectant from mid-lengths to ends, then divide your hair into two or three horizontal sections and clip the top layers out of the way.
- Using a 1 to 1¼ inch curling iron or flat iron, wrap 1 to 2 inch sections away from your face, leaving the last inch of each section out of the barrel so the ends stay straight and look natural.
- Alternate the direction of the curls on the top layer so the waves blend together instead of forming uniform ringlets, and let each section cool in your hand for a few seconds before releasing it.
- Once your whole head is done, run your fingers through the waves to break them up, then mist a texturizing or sea salt spray and scrunch gently for that lived-in finish.
Best for: Straight and slightly wavy hair of any thickness. If your hair is very fine, add a light volumizing mousse before curling so the waves hold longer.
2. Sleek Low Ponytail
A sleek low ponytail looks expensive and intentional, even though it’s one of the simplest styles you can do. On medium-length hair, the tail is long enough to look elegant without being heavy, and it works just as well with a blazer as with a T-shirt.
How to do it:
- Brush your hair completely smooth and decide on your part; a sharp center part looks modern, while a deep side part feels softer and more classic.
- Apply a small amount of smoothing cream or gel along the hairline and sides, then brush everything back toward the nape of your neck using a boar-bristle brush for a glassy finish.
- Secure the ponytail low at the nape with a strong elastic, then wrap a small piece of hair from underneath the tail around the elastic and pin it in place so the band is hidden.
- Finish by spraying a little hairspray on a toothbrush or spoolie and smoothing down any flyaways along the part and around your ears.
Best for: All hair types. Curly hair can be smoothed at the roots while leaving the ponytail curly for a beautiful contrast.
3. Half-Up Top Knot
The half-up top knot gives you the polish of a bun with the softness of hair worn down. It’s especially flattering for round and oval faces because it adds height at the crown, and it keeps hair out of your face without looking too formal.
How to do it:
- Gather the top third of your hair, from the temples back to the crown, and brush it loosely toward the top of your head; leaving it slightly messy adds volume.
- Secure it into a small ponytail with a thin elastic, then twist the ponytail and wrap it around its base to form a small bun.
- Pin the bun in place with two or three bobby pins, inserting them at an angle through the edge of the knot and into the hair underneath.
- Pull out a few thin strands near your temples to frame your face, and add a little texture spray to the hair hanging down so it looks full and bouncy.
Best for: All hair types, and a great second-day hair option. Thick hair may need a few extra pins to keep the knot secure.
4. Tucked Lob with a Deep Side Part
This is one of the simplest ways to make medium hair look styled without curling or tying anything. A deep side part adds instant volume, and tucking one side behind the ear creates a chic, asymmetrical shape that shows off your cheekbones and earrings.
How to do it:
- Flip your hair over to the opposite side from your natural part to lift the roots, then create a deep side part roughly in line with the arch of your eyebrow.
- On the side with less hair, smooth the hair back and tuck it neatly behind your ear, securing it with a crisscross of two bobby pins hidden behind the ear if it tends to slip.
- On the fuller side, add a light bend to the ends with a flat iron or round brush so the hair curves gently toward your face.
- Finish with a drop of hair oil on the ends for shine, and add a statement earring on the tucked side to complete the look.
Best for: Straight, wavy and blunt-cut hair. It’s especially flattering on diamond and heart-shaped faces.
5. Claw Clip French Twist
The claw clip twist has become a modern classic because it looks polished in seconds and is gentle on your hair. Medium-length hair is ideal for this style, since there’s enough length to twist but not so much that the clip struggles to hold it.
How to do it:
- Brush your hair back and gather it all at the nape of your neck as if you’re making a low ponytail, keeping the sides smooth but slightly relaxed.
- Twist the hair upward in one direction, folding the ends back toward the crown so they sit vertically against the back of your head.
- Secure the twist with a medium or large claw clip placed vertically, catching both the twist and the hair underneath it so it feels firm.
- Let the ends fan out softly above the clip, and pull out two face-framing pieces at the front if you want a softer, more romantic finish.
Best for: Thick, wavy and straight hair. Fine hair holds better with a little dry shampoo or texture spray added first for grip.
Polished Office Hairstyles
These styles look neat, professional and put-together, yet they’re comfortable enough to wear through a long workday.
6. Low Twisted Chignon
A low chignon is timeless and elegant, and medium-length hair has just the right amount of length to create a neat, compact bun at the nape. The twisted version adds subtle texture so it looks refined rather than severe.
How to do it:
- Divide your hair into three sections: one on the left side, one on the right side and one in the back.
- Tie the back section into a low ponytail, then twist it and coil it into a small bun, securing it with bobby pins or a U-shaped hair pin.
- Twist the left section away from your face toward the bun, wrap it around the base and pin it, then repeat with the right section so both twists meet and hide the pins.
- Lightly tug the twists to soften them, and set the finished style with a flexible-hold hairspray so it stays tidy all day without feeling stiff.
Best for: Straight, wavy and curly hair of medium to thick density. Layered hair may need a few extra pins to catch shorter pieces.
7. Classic Blowout with Flipped Ends
Inspired by retro styles, a smooth blowout with ends flipped slightly outward is a playful, polished look that has made a big comeback. On medium-length hair, the flip lands right around the shoulders, which draws attention to your neck and jawline.
How to do it:
- Apply a volumizing mousse to damp roots and a heat protectant through the lengths, then rough-dry your hair until it’s about 80 percent dry.
- Using a large round brush, dry each section from root to end, pulling the hair upward at the crown for lift and keeping the dryer nozzle pointed down the hair shaft to smooth the cuticle.
- When you reach the ends, rotate the brush outward instead of under, holding it for a few seconds and then hitting it with the cool-shot button to set the flip.
- Finish with a light-hold hairspray and run your fingers through gently so the style looks bouncy and soft rather than helmet-like.
Best for: Straight and slightly wavy hair. It’s a lovely choice for heart-shaped and long faces because the flipped ends add width at the jaw.
8. Polished Half-Up Barrette
This style is quietly elegant and perfect for meetings, interviews or any day you want to look neat but not overly done. A simple barrette or decorative clip turns a basic half-up style into a finished look.
How to do it:
- Smooth your hair with a brush or a flat iron, then take a section of hair from each temple and bring both sections toward the back of your head.
- Twist each section once or twice as you bring it back, which adds detail and helps the hair stay in place.
- Meet the two sections at the center of the back of your head, just below the crown, and secure them with a sleek gold, pearl or tortoiseshell barrette.
- Use a small amount of serum on the hair hanging down to keep it glossy, and smooth any bumps at the crown with your fingertips.
Best for: All hair types and lengths within the medium range. It also works beautifully over natural curls.
9. Ribbon Low Ponytail
Bows and ribbons are one of the prettiest hair trends, and a silk or velvet ribbon tied around a low ponytail instantly makes a simple style feel feminine and special. It’s polished enough for the office and charming enough for brunch.
How to do it:
- Brush your hair back into a low ponytail at the nape, keeping it smooth at the sides and slightly lifted at the crown for shape.
- Secure it with a clear or color-matched elastic so the band disappears under the ribbon.
- Tie a satin, silk or velvet ribbon around the elastic in a neat bow, adjusting the loops so they’re even and the tails hang to similar lengths.
- Trim the ribbon ends at an angle so they don’t fray, and add a gentle curl to the ponytail if you want a softer, more romantic look.
Best for: All hair types. Choose black, cream or navy ribbon for work, and blush, burgundy or emerald for special occasions.
Pretty Braided Styles
Braids are a wonderful way to keep medium hair out of your face, add texture and create a style that lasts all day.
10. Dutch Braid Crown
A Dutch braid crown wraps around your head like a halo and looks impressive, yet it’s very secure and comfortable. Medium-length hair is long enough to reach around the head when braided from the side, especially if you start the braid low.
How to do it:
- Part your hair down the center and start a Dutch braid (where you cross strands under instead of over) just behind one ear, braiding upward along the hairline toward the top of your head.
- Continue braiding across the top of your head, adding hair as you go, until you reach the opposite ear, then finish with a regular three-strand braid and secure the end with a small elastic.
- Tuck the end of the braid under the starting point behind your first ear and pin it firmly in place so it disappears.
- Gently pull the edges of the braid outward to make it look fuller, and loosen a few strands around your face for a softer, romantic finish.
Best for: Medium to thick hair. Second-day hair is easier to braid because it has more grip than freshly washed hair.
11. Double Dutch Braids
Also called boxer braids, two Dutch braids running from the forehead to the nape are sporty, practical and ideal for workouts, travel or busy days. They also create beautiful heatless waves when you take them out.
How to do it:
- Part your hair straight down the middle from your forehead to the nape and clip one side out of the way.
- Starting at the front hairline, braid the first side in a Dutch braid, crossing strands under the middle and adding small amounts of hair with each cross, keeping the braid close to your scalp.
- When you reach the nape, finish with a three-strand braid and tie it off, then repeat the same process on the other side so both braids match in tension and placement.
- Smooth any flyaways with a little edge gel or hairspray, and pancake the braids slightly if you want them to look thicker.
Best for: All hair types, including curly and coily hair. Applying a leave-in conditioner or light cream first makes braiding easier and keeps the hair moisturized.
12. Side Fishtail Braid
A fishtail braid looks intricate but uses just two sections, making it easier than it appears. Worn over one shoulder, it’s boho, relaxed and perfect for weekends, vacations and outdoor events.
How to do it:
- Sweep all your hair over one shoulder and secure it loosely with an elastic just below the ear so it stays in place while you work, then split it into two equal sections.
- Take a thin strand from the outer edge of the left section, cross it over and add it to the inner edge of the right section, then repeat from the right side to the left.
- Keep alternating sides with thin strands until you reach the end of your hair, then secure it with a small elastic and carefully remove the first elastic near your ear.
- Gently pull the edges of the braid outward to give it a fuller, more relaxed shape, and pull out a few face-framing pieces.
Best for: Medium to thick hair that reaches at least a few inches past the shoulders. Layered hair benefits from a texturizing spray so shorter pieces stay put.
13. Half-Up Waterfall Braid
The waterfall braid is one of the most romantic styles you can create on medium hair. Strands “fall” through the braid as it travels across the back of your head, creating a delicate cascade effect.
How to do it:
- Curl your hair loosely first for the prettiest effect, then take a small section near your front hairline on one side and divide it into three strands.
- Cross the strands as if making a regular braid, but each time the top strand is supposed to cross over, drop it and let it fall, then pick up a new strand of hair from directly above to replace it.
- Continue braiding horizontally across the back of your head, dropping and picking up strands as you go, until you reach the center or the opposite side.
- Secure the end with a small elastic and hide it under the hair with a bobby pin, then gently loosen the braid for a dreamy finish.
Best for: Straight and wavy hair with medium thickness. It’s a stunning choice for weddings, garden parties and holiday events.
Glam Date-Night and Special Occasion Styles
These hairstyles bring a little extra drama and polish for dinners, parties, weddings and celebrations.
14. Old Hollywood Glam Waves
Glossy, sculpted waves that sweep to one side are timeless and glamorous. On medium-length hair, they look especially elegant because the waves sit right around the jaw and collarbone, framing the face beautifully.
How to do it:
- Create a deep side part and curl your entire head with a 1-inch curling iron, curling every section in the same direction (away from the face) and pinning each curl in a loop to cool.
- Once all the curls are completely cool, remove the pins and brush through the curls thoroughly with a paddle or boar-bristle brush until they merge into smooth, uniform waves.
- Use duckbill clips to press in the “S” shape of each wave at the front and sides, mist with hairspray and leave the clips in for ten to fifteen minutes.
- Remove the clips, add a touch of shine spray, and tuck the less voluminous side behind your ear for that classic red-carpet silhouette.
Best for: Straight and wavy hair. Fine hair holds this style best with a setting lotion applied before curling.
15. Messy Textured Updo
A loose, textured updo looks soft and effortless, and it’s forgiving because it’s meant to look a little undone. It’s ideal for weddings, formal dinners and any occasion where you want your hair up without looking stiff.
How to do it:
- Curl your hair loosely and spray it with texture spray or dry shampoo to give it grip and volume.
- Gather your hair at the back into a loose low ponytail, leaving out two face-framing pieces at the front, and secure it with an elastic.
- Take small sections of the ponytail, loosely twist or loop them, and pin each one around the base of the ponytail in a random, slightly uneven pattern.
- Gently tug at the crown and around the updo to add volume, and lightly curl the face-framing pieces so they blend with the rest of the style.
Best for: Wavy, curly and thick hair. Layered hair also works well because the shorter pieces add to the effortless texture.
16. Voluminous Bouncy Blowout
The big, bouncy blowout, often inspired by 1990s supermodel hair, is full of movement and volume. It’s glamorous without being formal, and medium length is perfect for creating those big, rounded curls at the ends.
How to do it:
- Apply a volumizing mousse to damp roots and a heat protectant throughout, then dry your hair with a large round brush, lifting each section straight up at the roots.
- Once dry, wrap 2-inch sections around large velcro rollers or a large round brush, rolling them away from your face, especially at the front.
- Hit each roller with warm air from your dryer, then let your hair cool completely in the rollers for at least ten to fifteen minutes.
- Remove the rollers, flip your head over and shake out your roots gently, then flip back and shape the curls with your fingers and a light hairspray.
Best for: Straight and slightly wavy hair, especially fine hair that tends to fall flat.
17. Braided Low Bun
This style combines the softness of a braid with the elegance of a bun, making it perfect for formal events, holidays and bridesmaid looks. It’s also very secure, so it will hold through dancing and long evenings.
How to do it:
- Gather your hair into a low ponytail at the nape and secure it, leaving a few soft face-framing pieces out at the front.
- Braid the ponytail into a regular three-strand braid and tie the end, then gently pull the edges of the braid outward to make it look wider.
- Wrap the braid around the base of the ponytail to form a bun, tucking the end underneath, and pin it securely with bobby pins or U-pins.
- Add a decorative pin, pearl clips or a small sprig of dried flowers beside the bun for a special-occasion touch.
Best for: Medium to thick hair. If your hair is fine, add a small hair donut or bun filler under the braid for extra fullness.
Heatless and Low-Effort Styles
These styles are kind to your hair because they use little or no heat, and many of them can be done the night before.
18. Overnight Braid Waves
Sleeping in braids is one of the easiest ways to wake up with soft, natural waves without a curling iron. It’s a great option if you want to reduce heat damage while still having textured hair.
How to do it:
- In the evening, start with hair that is slightly damp (not soaking wet), and apply a light leave-in conditioner or curl cream to the lengths.
- Divide your hair into two sections for loose waves or four to six sections for tighter waves, then braid each section and secure the ends with soft scrunchies or snag-free elastics.
- Sleep on a silk or satin pillowcase to reduce frizz, and leave the braids in until your hair is completely dry.
- In the morning, unravel the braids carefully, separate the waves with your fingers rather than a brush, and add a drop of oil to tame any frizz.
Best for: Straight and wavy hair. Thick hair may need to be braided while slightly drier so it dries fully overnight.
19. Heatless Robe-Belt Curls
The robe-belt method (also done with a soft heatless curling rod) creates bouncy, defined curls that look like they were made with a curling iron. It’s one of the most popular heatless techniques for medium-length hair.
How to do it:
- Place a soft robe belt or heatless curling rod across the top of your head like a headband, with equal lengths hanging down on each side, and secure the center with a clip.
- Starting near your face on one side, take a section of slightly damp hair and wrap it around the belt, adding more hair as you go down, similar to a French braid wrapped around a rope.
- Secure the end of each side with a scrunchie, then repeat on the other side so both wraps are even.
- Leave it in overnight or for several hours, then unwind gently, separate the curls with your fingers and finish with a light hairspray.
Best for: Straight and wavy hair of any thickness. It’s an excellent way to get glam curls before an event without any heat.
20. Silk Scarf and Headband Styles
A silk scarf or padded headband is the quickest way to dress up second-day hair or a casual style. It adds color, hides oily roots and makes even the simplest style look intentional.
How to do it:
- Fold a square silk scarf into a long, narrow strip, or choose a padded or knotted headband in a color that complements your outfit.
- For a headband look, smooth your hair behind your ears and place the band about an inch behind your hairline, pulling up a little volume at the crown for shape.
- For a scarf look, tie the scarf around a low ponytail, wrap it around your head like a headband and knot it at the nape, or weave it through a braid for a playful touch.
- Let a few soft pieces fall around your face, and finish with a little texture spray so the style looks relaxed rather than flat.
Best for: All hair types and textures. It’s especially handy on busy days, travel days and between washes.
The Most Flattering Haircuts for Medium-Length Hair
The right cut makes styling easier because it does half the work for you. If you’re planning a salon visit, these are the medium-length cuts that look great and adapt to many of the styles above.
| Haircut | What It Looks Like | Best For | Styling Ease |
|---|---|---|---|
| Long Bob (Lob) | A bob that falls between the chin and collarbone, blunt or softly layered | Fine to medium hair, oval and heart faces | Very easy; looks great straight or wavy |
| Shoulder-Length Layers | Soft layers that add movement and remove bulk | Thick and wavy hair | Easy; air-dries well with a little cream |
| Curtain Bangs | Center-parted bangs that sweep toward each side of the face | Square, long and heart faces | Moderate; bangs need a quick blow-dry |
| Butterfly Cut | Short face-framing layers with longer lengths behind | Medium to thick hair wanting volume | Moderate; shines with a bouncy blowout |
| Blunt Cut | One length with a strong, straight edge | Fine hair that needs to look fuller | Very easy; sleek styles look polished |
| Modern Shag | Choppy layers, textured ends and often bangs | Wavy and curly hair | Easy; designed to look tousled |
Whichever cut you choose, ask your stylist how it will look when air-dried as well as when blow-dried. A cut that only works with daily heat styling may not suit a busy routine.
Tools and Products That Make Styling Easier
You don’t need a drawer full of gadgets, but a few well-chosen tools make every style in this guide faster and longer-lasting.
- A 1 to 1¼ inch curling iron or a flat iron: These sizes are ideal for medium hair because they create natural waves that suit the length. A flat iron is especially versatile since it can straighten, wave and flip the ends.
- A large round brush and a hair dryer with a nozzle: Together they give you smooth, bouncy blowouts and volume at the roots. The nozzle directs airflow down the hair shaft, which helps reduce frizz.
- Heat protectant spray: Always apply it before using hot tools. As a general guide, keep fine or color-treated hair at lower temperatures (around 300°F / 150°C) and thick or coarse hair no higher than about 400°F / 200°C.
- Texturizing spray or dry shampoo: These add grip, which helps braids, buns and updos hold, especially on fine or freshly washed hair. They also refresh second-day hair.
- Claw clips, bobby pins and U-pins: Bobby pins grip tightly for secure styles, U-pins are better for loose, soft updos, and claw clips give you instant, gentle hold.
- Silk or satin scrunchies and pillowcase: They reduce friction, breakage and frizz, and they won’t leave dents in your hair the way tight elastics can.
- Lightweight hair oil or serum: A drop on the ends adds shine, seals split ends temporarily and smooths flyaways at the end of any style.
Tips for Keeping Medium-Length Hair Healthy and Easy to Style
Get regular trims. Medium hair shows split ends quickly because the ends sit right at the shoulders, where they rub against clothing and bags. A trim every eight to twelve weeks keeps the shape crisp and stops damage from traveling up the hair shaft.
Don’t wash every day if you don’t need to. Many medium-length styles, especially braids, buns and textured waves, actually look better on second-day hair because it has more grip. Washing every two to three days also helps preserve your scalp’s natural oils.
Use a deep conditioning mask once a week. Even healthy hair benefits from extra moisture, especially if you use hot tools or color your hair. Focus the mask on your mid-lengths and ends, leave it on for at least ten minutes, and rinse with cool water.
Be gentle with wet hair. Hair is weaker when wet, so detangle with a wide-tooth comb from the ends upward, and blot with a microfiber towel or cotton T-shirt instead of rubbing.
Vary your styles. Wearing the same tight ponytail or bun in exactly the same place every day can cause breakage at that point. Switching between low, mid and high positions, or alternating with half-up styles and hair worn down, protects your hair over time.
Protect your hair at night. Sleeping on a silk or satin pillowcase, or loosely braiding your hair before bed, reduces tangles and frizz, so you’ll spend less time styling in the morning.
Frequently Asked Questions
What length counts as medium-length hair? Medium-length hair generally falls between the collarbone and a few inches below the shoulders. Hair that sits at the chin is usually considered a bob, and hair that reaches the middle of the back or longer is considered long.
What is the easiest hairstyle for medium-length hair? The tucked lob with a deep side part, the claw clip twist and the half-up top knot are the easiest. Each one takes under five minutes and requires only a brush, a clip or a few pins.
Which hairstyles make medium-length hair look thicker? Beach waves, the bouncy blowout and pulled-apart braids all add visual volume. A blunt cut, volumizing mousse at the roots and texturizing spray through the lengths also make fine hair look fuller.
Can I do updos with medium-length hair? Absolutely. Medium hair is actually easier to put up than very long hair because it’s lighter and holds pins better. Low chignons, braided buns and messy textured updos all work beautifully at this length.
How can I style medium hair without heat? Overnight braids, robe-belt curls, claw clip twists, sleek ponytails using a smoothing cream, and scarf or headband styles all work without any heat. These options help you keep your hair healthy while still looking styled.
How often should I trim medium-length hair? Every eight to twelve weeks is ideal for keeping the shape and preventing split ends. If you’re growing your hair longer, you can stretch it to twelve weeks and ask for a “dusting,” which removes only the very ends.
Final Thoughts
Medium-length hair truly offers the best of both worlds. It’s short enough to be low-maintenance and long enough to braid, twist, curl and pin into almost any style you can imagine. From quick claw clip twists on busy mornings to glossy Hollywood waves for a special night out, there’s a look here for every mood and every moment.
Start with two or three styles that fit your routine, practice them a few times until they feel natural, and then gradually add new ones. With the right cut, a few simple tools and healthy hair habits, your medium-length hair can look beautiful and polished every single day.
Save this pin to your hair inspiration board so you always have fresh ideas for styling your medium-length hair.