If you’ve ever scrolled past a gorgeous braided hairstyle and thought, “I could never do that myself,” this guide is for you. Braids look complicated, but almost every style you admire is built on a few simple movements that anyone can learn with a little patience and practice. Once your fingers learn the basic rhythm, you can turn it into side braids, crowns, ponytails, and polished updos that work for school runs, office days, weddings, and lazy weekends alike.
In this beginner-friendly guide, you’ll learn how to prep your hair, master the classic three-strand braid, and then build up to ten easy braided hairstyles, starting with the easiest. You’ll also find tips for different hair types, the most common beginner mistakes (and how to fix them), and simple tricks to make your braids last longer.
Why Braids Are the Perfect Beginner Hairstyle
Braids are one of the most forgiving hairstyles you can learn. A slightly uneven braid usually looks relaxed and romantic rather than messy, so you don’t need perfect technique to get a pretty result. In fact, many of the most popular braided looks on Pinterest are purposely loose, textured, and a little undone.
They’re also incredibly practical. A braid keeps hair off your face during workouts, protects your ends from rubbing against collars and scarves, and can save a second- or third-day hair wash by hiding oil at the roots. Braiding damp hair overnight even gives you soft, heatless waves the next morning, which is a gentle alternative to curling irons.
Best of all, braiding is a skill that builds on itself. Once you understand the three-strand braid, every other style on this list is just a small variation: adding hair as you go, crossing strands under instead of over, or splitting hair into two sections instead of three.
What You Need Before You Start
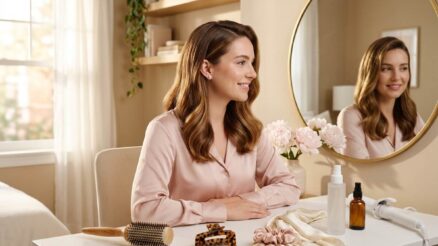
You don’t need a drawer full of products to braid your hair, but a few basic tools make the process much easier and the results much neater.
- A detangling brush or wide-tooth comb: Knots are the biggest enemy of a smooth braid. Brushing your hair completely before you start means your strands separate cleanly and won’t snag halfway down, which is when most beginners lose their grip.
- A rat-tail comb: The thin, pointed end is perfect for drawing clean parts and splitting off even sections. It’s especially helpful for French and Dutch braids, where neat parting makes the finished style look far more polished.
- Small clear elastics: Clear or hair-colored elastics disappear into the end of your braid, so the style looks finished rather than tied off. Keep a handful nearby, because they’re easy to drop mid-braid.
- Bobby pins: You’ll need these for crown braids, half-up styles, and milkmaid braids. Choose pins that match your hair color and have a slightly wavy side, which grips hair better.
- Texturizing spray or dry shampoo: Freshly washed, silky hair tends to slip out of your fingers. A light mist of texturizing spray or dry shampoo adds grip, makes sections easier to hold, and gives your braid a fuller look.
- A light hold hairspray or smoothing cream: A small amount of cream tames flyaways before you braid, while a light hairspray at the end keeps everything in place without making your hair stiff or crunchy.
- A handheld mirror: Using a second mirror to see the back of your head is a game changer when you’re learning braids that start at the crown.
How to Prep Your Hair for Braiding
Good prep is the secret most tutorials skip. The condition of your hair before you start has a huge effect on how easy it is to braid and how long your style lasts.
Start with second-day hair if you can. Hair that was washed the day before has a little natural grip and texture, which makes strands easier to separate and hold. If your hair is freshly washed and very slippery, spray texturizer or dry shampoo through the lengths and work it in with your fingers.
Detangle thoroughly from the ends up. Begin brushing at the ends and slowly work your way up to the roots. This prevents breakage and makes sure there are no hidden knots that will catch as you braid.
Decide between damp and dry hair. Braiding dry hair gives a fuller, fluffier braid that’s great for day wear. Braiding slightly damp hair gives a sleeker, tighter braid and creates soft waves when you take it out the next day. Avoid braiding soaking wet hair, since hair is at its weakest when wet and tight braids can stretch and stress it.
Smooth flyaways before you begin. Rub a pea-sized amount of smoothing cream or a drop of hair oil between your palms and lightly glide it over the surface of your hair. This keeps short, frizzy strands tucked into the braid instead of sticking out.
Master the Classic Three-Strand Braid First
Every style in this guide starts here. If you’ve never braided before, practice this braid on a ponytail first. Securing your hair in a ponytail holds everything in place at the top, so you can focus completely on the hand movements without your sections falling apart.
- Divide your hair into three equal sections. Hold the left section in your left hand, the right section in your right hand, and let the middle section rest between them. Try to keep all three about the same thickness, because uneven sections create a lopsided braid.
- Cross the right section over the middle. Bring the right strand over the top of the middle strand. The right strand has now become the new middle strand, and the old middle strand moves to the right.
- Cross the left section over the middle. Now bring the left strand over the new middle strand. Again, it becomes the new middle, and the old middle moves to the left side.
- Repeat the pattern all the way down. Keep alternating right over middle, then left over middle, pulling gently on each section to keep consistent tension. Think of it as a simple rhythm: right, left, right, left.
- Secure the end. When you have about two inches of hair left, wrap a small clear elastic around the end of the braid two or three times until it feels secure.
Beginner tip: If you lose track of which strand moves next, pause and look at your hands. The strand that just moved is now in the middle, so the next move always comes from the opposite side. Practicing for just five minutes a day for a week will make the motion feel completely natural.
10 Easy Braided Hairstyles for Beginners
The styles below are arranged from easiest to slightly more challenging, so you can work your way down the list as your confidence grows.
1. The Simple Side Braid
Best for: Medium to long hair | Time: 5 minutes
The side braid is the easiest way to put your new skill into practice, because you can see the whole braid in the mirror as you work. It looks soft and effortless, and it suits everything from jeans and a sweater to a summer dress.
Brush all of your hair over one shoulder, then divide it into three equal sections just below your ear. Braid it using the classic three-strand method all the way to the ends and secure it with a clear elastic. For a fuller, more romantic look, gently pull the outer edges of each loop outward with your fingertips. This technique is called “pancaking,” and it instantly makes a thin braid look thicker and more styled.
Make it your own: Leave a few face-framing pieces loose at the front, or wrap a silk scarf or ribbon around the elastic for a sweet finishing touch.
2. The Braided Ponytail
Best for: All lengths that can reach a ponytail | Time: 5 to 7 minutes
This is the perfect everyday style for busy mornings, workouts, and hot days. Because the ponytail holds the hair in place, it’s also the easiest braid to do on yourself without your sections slipping.
Gather your hair into a ponytail at your desired height, from a sleek high pony to a relaxed low one at the nape of your neck. Secure it with an elastic, then braid the ponytail using the three-strand method and tie off the end. To hide the hair tie at the base, take a small piece of hair from underneath the ponytail, wrap it around the elastic a few times, and secure the end with a bobby pin tucked underneath.
Make it your own: Pancake the braid for volume, or try braiding two small sections of the ponytail separately and then twisting them together for a fun textured finish.
3. The Half-Up Braided Crown
Best for: Medium to long hair | Time: 10 minutes
This style looks like a delicate crown braid, but it’s actually two simple three-strand braids pinned together at the back. It keeps hair out of your face while showing off your length, which makes it a favorite for brunches, dates, and bridesmaid looks.
Take a section of hair about two inches wide from just above your left ear and braid it with a three-strand braid to the ends. Repeat on the right side, so you have two thin braids. Bring the left braid across the back of your head, just below the crown, and pin it in place. Then bring the right braid across on top of it, slightly above or below, and pin it so the ends are hidden underneath. Loosen both braids slightly for a softer, more romantic finish.
Make it your own: Add tiny pearl pins, small flowers, or a decorative clip where the two braids meet.
4. The Bubble Braid
Best for: All hair types, especially fine or layered hair | Time: 5 minutes
Technically, the bubble braid isn’t a braid at all, which is exactly why it’s perfect for beginners. It gives you a playful, braided look using only hair elastics, so you can wear a trendy style while you’re still practicing your braiding skills.
Start with a ponytail and secure it with an elastic. About two inches below that, add another small elastic around the ponytail. Gently pull the hair between the two elastics outward on both sides to create a rounded “bubble.” Keep adding elastics every two inches and puffing out each section until you reach the ends of your hair.
Make it your own: Use colorful elastics for a fun, youthful feel, or wrap a thin strand of hair around each elastic to make the style look more polished.
5. The Rope Twist Braid
Best for: Medium to long hair, great for slippery hair | Time: 7 minutes
The rope braid uses only two sections instead of three, so it’s one of the quickest braided looks to learn. It creates a sleek, spiral pattern that looks impressive but holds well even on silky hair.
Pull your hair into a ponytail and divide it into two equal sections. Twist each section to the right (clockwise) until it feels tight. Then cross the two twisted sections over each other in the opposite direction, to the left (counterclockwise). This opposite twisting is the secret that locks the rope in place. Keep twisting each section to the right and crossing them to the left until you reach the end, then secure it with an elastic.
Make it your own: For a softer look, gently loosen the twists after securing, or wrap the finished rope into a twisted bun at the nape of your neck.
6. The Fishtail Braid
Best for: Medium to long hair | Time: 10 to 15 minutes
The fishtail looks intricate, but it uses only two sections and one repeated movement. It takes a little longer than a classic braid, so it’s a lovely style to practice while watching a show or listening to a podcast.
Bring your hair over one shoulder and divide it into two equal sections. Take a thin piece of hair, about half an inch wide, from the outside edge of the left section and cross it over to join the inside of the right section. Then take a thin piece from the outside edge of the right section and cross it over to join the left section. Keep repeating this, alternating sides and keeping your pieces small, until you reach the ends. Secure with an elastic and gently pancake the edges for a full, boho look.
Beginner tip: The thinner your crossed pieces, the more detailed and “woven” your fishtail will look. Thicker pieces are faster but create a chunkier braid that looks closer to a regular three-strand braid.
7. The French Braid
Best for: Medium to long hair | Time: 10 to 15 minutes
The French braid is the classic that many women want to learn, and once you get it, you’ll use it forever. It starts at the top of your head and gathers hair as it travels down, creating a smooth, flat braid that hugs your scalp.
Brush your hair straight back and take a section of hair from the top of your head, near your hairline. Divide that section into three strands and make one regular crossover: right over middle, then left over middle. Now, before each new crossover, pick up a small section of loose hair from the side and add it to the outer strand. So, gather a little hair from the right side, add it to the right strand, and cross it over the middle. Then gather hair from the left side, add it to the left strand, and cross it over. Keep adding hair from each side as you work down your head. When you reach the nape of your neck and there’s no more loose hair to add, finish with a classic three-strand braid and secure it.
Beginner tip: Keep your added sections about the same size each time, and try to pick them up in a straight line from your hairline to the braid. This keeps the finished French braid neat and symmetrical.
8. The Dutch Braid
Best for: Medium to long hair | Time: 10 to 15 minutes
The Dutch braid is often called the “inside-out” French braid. The steps are exactly the same, with one key difference: you cross each strand under the middle strand instead of over it. This makes the braid pop up and sit on top of your hair, creating a bold, three-dimensional look.
Start just as you would for a French braid, taking a section from the top of your head and dividing it into three strands. Cross the right strand under the middle, then the left strand under the middle. Then keep adding small sections of hair from each side to the outer strands before crossing them under. Continue down to the nape, finish with a regular braid crossed under, and secure the end. Pancaking a Dutch braid makes it look especially full and dramatic.
Beginner tip: If you’ve already learned the French braid, practice the Dutch braid by saying “under, under” out loud as you work. It helps break the habit of crossing over.
9. Double Dutch Braids (Boxer Braids)
Best for: Medium to long hair, active days | Time: 15 to 20 minutes
Double Dutch braids are sporty, secure, and very popular for the gym, festivals, travel days, and beach holidays. They stay put for hours and look just as good on day two.
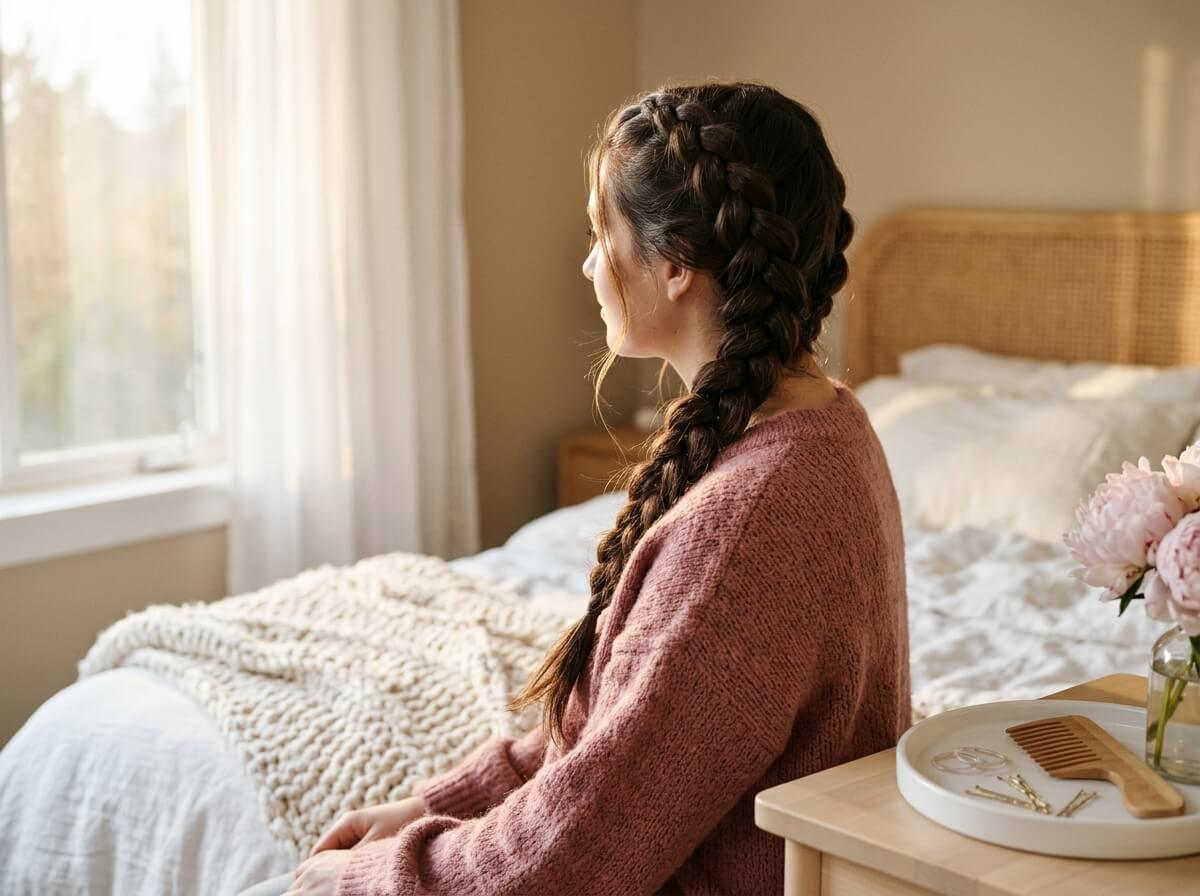
Use a rat-tail comb to part your hair straight down the middle, from your forehead to the nape of your neck. Clip one side out of the way. On the free side, create a Dutch braid starting at your hairline, adding hair only from that side of the part. Finish with a regular braid and tie it off. Then unclip the other side and repeat. Try to start both braids at the same height and keep similar tension so they match.
Make it your own: Leave the ends loose and wavy, or tuck them into two small low buns for a neat look.
10. The Milkmaid Braid
Best for: Long hair | Time: 15 minutes
The milkmaid braid wraps around your head like a soft halo. It looks elegant and old-world romantic, yet it’s made from just two regular braids, so it’s a perfect “graduation” style for beginners who’ve mastered the basics.
Part your hair down the middle and divide it into two sections. Braid each side with a three-strand braid, starting just behind your ears and ending at the tips, then secure both ends. Lift the left braid up and over the top of your head, laying it just behind your hairline, and pin it in place every few inches. Bring the right braid up and over in the same way, laying it just behind the first braid and tucking its end underneath. Pancake the braids gently and add extra pins wherever the style feels loose.
Beginner tip: If your hair isn’t quite long enough to meet at the top, cross the braids at the back of your head instead and pin them there for a pretty half-crown.
Quick Comparison: Which Braid Should You Try First?
| Hairstyle | Difficulty | Time Needed | Minimum Hair Length | Best Occasion |
|---|---|---|---|---|
| Simple Side Braid | Very easy | 5 minutes | Shoulder length | Everyday, casual |
| Braided Ponytail | Very easy | 5–7 minutes | Shoulder length | Workouts, busy mornings |
| Bubble Braid | Very easy | 5 minutes | Shoulder length | Weekends, fun looks |
| Half-Up Braided Crown | Easy | 10 minutes | Shoulder length | Dates, events, weddings |
| Rope Twist Braid | Easy | 7 minutes | Shoulder length | Work, slippery hair |
| Fishtail Braid | Moderate | 10–15 minutes | Below the shoulders | Boho, vacation |
| French Braid | Moderate | 10–15 minutes | Shoulder length | Work, everyday polish |
| Dutch Braid | Moderate | 10–15 minutes | Shoulder length | Statement, active days |
| Double Dutch Braids | Moderate | 15–20 minutes | Shoulder length | Gym, festivals, travel |
| Milkmaid Braid | Moderate | 15 minutes | Mid-back length | Special occasions |
Braiding Tips for Your Hair Type
Fine or thin hair: Use texturizing spray before you braid, because it adds grip and makes your hair look thicker. Pancaking is your best friend, as gently pulling the loops outward can make a small braid look twice as full. Dutch braids are especially flattering on fine hair because they sit on top of the head and create the illusion of volume.
Thick hair: Work with smaller sections than you think you need, especially for French and Dutch braids, so the braid stays neat and doesn’t get bulky. A smoothing cream helps keep the surface sleek, and strong elastics or a second hair tie will stop the end from loosening during the day.
Curly and coily hair: Braid on detangled hair that’s lightly moisturized with a leave-in conditioner or cream, which reduces friction and breakage. Many curly-haired women find braids easier on slightly damp hair, since the curls are softer and more manageable. Take your time detangling, and use your fingers to separate sections gently instead of pulling with a fine comb.
Short or shoulder-length hair: Focus on small styles near the face, such as a single French or Dutch braid along the hairline or two thin braids pinned back in a half-up style. Bobby pins will become your best tool, holding ends that are too short to reach an elastic.
Layered hair: Shorter layers tend to poke out of braids. Prevent this by applying a little smoothing cream or styling paste to the lengths first, and choose styles like Dutch braids or bubble braids, which hide layers well. A light mist of hairspray at the end will tame any pieces that escape.
Common Beginner Mistakes (and How to Fix Them)
Using uneven sections. When one strand is much thicker than the others, your braid will twist and look lopsided. Take a moment at the start to divide your hair as evenly as possible, and check your sections again if the braid starts to lean to one side.
Losing tension halfway down. Beginners often start with a tight, neat braid that gets looser as their arms tire. Try to keep a gentle, steady pull on every strand, and rest your elbows on a table if your arms get tired during longer styles.
Braiding tangled hair. Even a small knot can split your section and throw off the whole braid. Always brush thoroughly first, and if you hit a snag while braiding, pause and gently work it out with your fingers rather than pulling through it.
Adding uneven amounts of hair in French and Dutch braids. Grabbing a big chunk on one side and a tiny piece on the other creates a crooked braid. Aim to pick up similar-sized sections each time, and use the end of a rat-tail comb if you need help separating them neatly.
Giving up too soon. Your first few braids probably won’t look like the photos you’ve saved, and that’s completely normal. Braiding is muscle memory, so the more you practice, the faster and smoother it becomes. Many women find it easier to practice on a friend, a family member, or even a doll head before braiding their own hair.
How to Make Your Braids Last Longer
A well-made braid can easily last all day, and some styles can last into the next day with a little care.
Start with the right prep, because texturized, second-day hair holds braids much longer than freshly washed, silky hair. Secure the ends with good-quality elastics and, for updos, use more bobby pins than you think you need, crossing two pins in an “X” for extra grip.
Finish with a light mist of flexible hairspray to lock in the shape without making your hair stiff. At night, protect your braids by sleeping on a silk or satin pillowcase or wrapping your hair in a silk scarf, which reduces friction and frizz. In the morning, smooth any flyaways with a little cream, re-pin loose sections, and refresh with a spritz of dry shampoo at the roots.
Keep Your Hair Healthy While You Braid
Braids are a gentle style when done correctly, but very tight braids worn often can put stress on your scalp and hairline. If your braid causes pain, a headache, or small bumps along your hairline, it’s too tight and should be loosened. Constant tension in the same spot over time can lead to hair thinning, especially around the edges, so it’s wise to change your part and braid placement regularly and give your hair rest days in a loose, low style.
Always remove elastics gently instead of pulling them out, and take your braids down with care, starting at the ends and working upward with your fingers. Avoid braiding very wet hair too tightly, and keep your scalp and lengths moisturized, particularly if you have dry or curly hair. If you notice ongoing hair loss, scalp irritation, or thinning, speak with a dermatologist or hair care professional for personalized advice.
Frequently Asked Questions
What is the easiest braid for a complete beginner? The classic three-strand braid on a ponytail is the easiest place to start, because the ponytail holds your hair in place while you learn the movement. Once that feels comfortable, move on to a simple side braid and then a braided ponytail without the elastic at the top.
What’s the difference between a French braid and a Dutch braid? Both braids start at the top of your head and add hair as they go. In a French braid, you cross each strand over the middle, which creates a smooth, flat braid. In a Dutch braid, you cross each strand under the middle, which makes the braid stand out on top of your hair with a raised, three-dimensional look.
How long does it take to learn how to braid your own hair? Most women can learn the basic three-strand braid within a few practice sessions. French and Dutch braids usually take a week or two of regular practice before they feel natural, especially when braiding at the back of your own head. Short daily practice sessions work better than one long, frustrating session.
Can I braid short hair? Yes. If your hair is at least chin length, you can try small French or Dutch braids along your hairline, side braids pinned behind the ear, or two thin braids pulled back in a half-up style. Bobby pins and a little texturizing spray help hold shorter pieces in place.
Is it better to braid hair wet or dry? It depends on the look you want. Dry hair creates a fuller, softer braid with more volume, while slightly damp hair creates a sleeker braid and gives you heatless waves when you take it out. Avoid braiding soaking wet hair tightly, since hair is more fragile when wet.
How do I make my braid look thicker? Use texturizing spray or dry shampoo before braiding, then gently pull the outer edges of each braid loop outward after you secure the end. This pancaking technique adds instant volume and makes even fine hair look full and styled.
Final Thoughts
Learning to braid your own hair is one of the most rewarding beauty skills you can pick up. It costs almost nothing, works for nearly every hair type and occasion, and opens up dozens of hairstyles once you understand the basics. Start with the classic three-strand braid, practice a little each day, and slowly work your way through the styles in this guide.
Before long, you’ll be creating side braids, French braids, and pretty milkmaid crowns without even thinking about it. Save this guide to your hair inspiration board so you can come back to each step whenever you’re ready to try a new look.