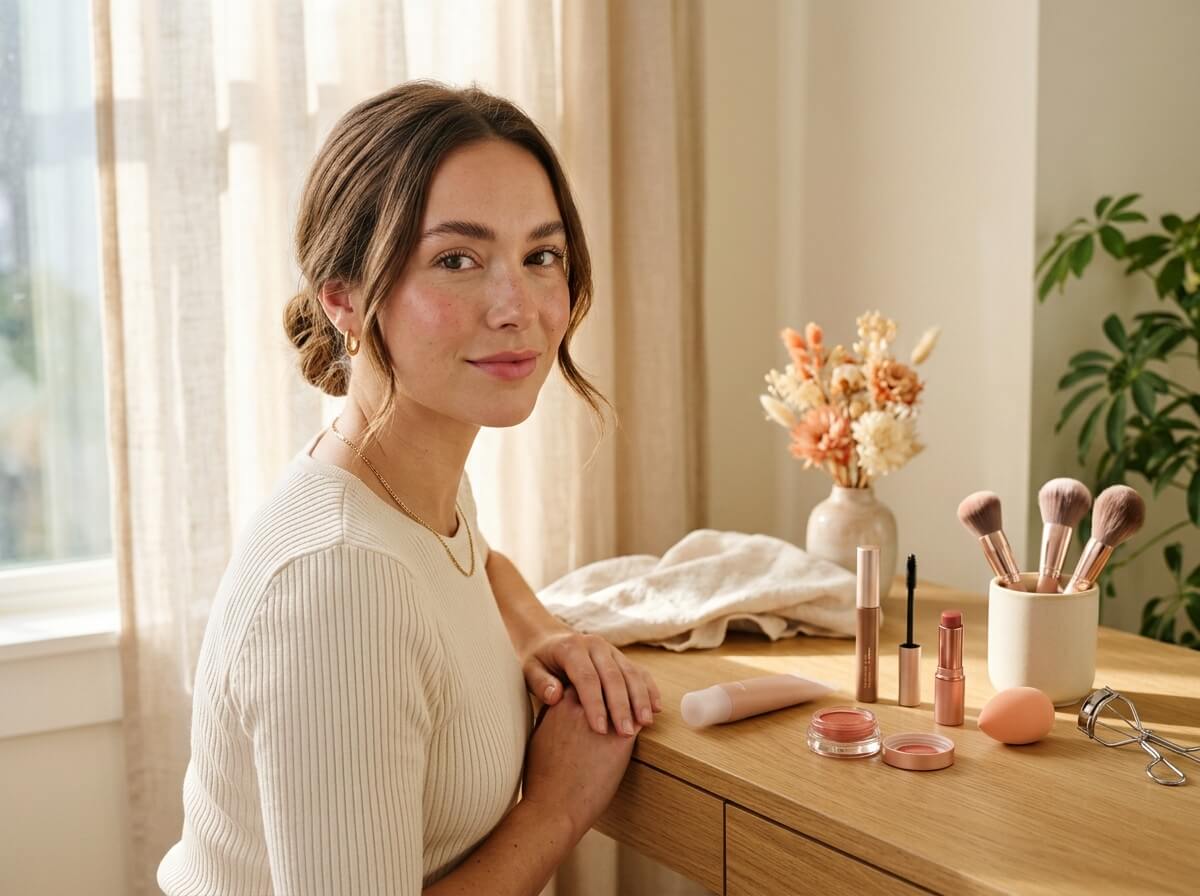
You know that friend who always looks fresh, rested and glowing, even on a Monday morning? Chances are she isn’t skipping makeup. She’s wearing just enough of it, in the right places, so it melts into her skin and never looks “done.” That’s the magic of the no-makeup makeup look: you still look like yourself, just a well-slept, hydrated, sun-kissed version of yourself.
This look has become a favorite for good reason. It’s quick, it’s comfortable, it works for the office, school runs, brunch and first dates, and it’s far more forgiving than a full glam face. There are no sharp lines to perfect, no heavy foundation to blend, and nothing that looks strange in daylight.
In this guide, you’ll learn exactly how to create a natural makeup look from start to finish: the skin prep that does most of the work, a 10-step routine with simple techniques, smart product swaps, shade-matching tips, tweaks for every skin type, a 5-minute version for busy mornings, and the most common mistakes that make makeup look obvious.
What Is the “No-Makeup” Makeup Look?
The no-makeup makeup look is a soft, minimal style that enhances your natural features instead of covering or reshaping them. The goal isn’t to look like you’re wearing nothing at all. The goal is for people to notice you (your bright eyes, healthy skin and rosy cheeks) rather than your makeup.
Instead of full-coverage foundation, you use a sheer base only where you need it. Instead of carved contour, you add gentle warmth. Instead of dramatic liner and lashes, you define your eyes with a curled lash and a single coat of mascara. Brows are brushed up and fluffy rather than drawn on, and lips look like your own lips, just a little rosier and smoother.
The secret ingredients are texture and restraint. Creamy, dewy products move with your skin and catch the light naturally, while powders and heavy layers tend to sit on top and look flat. And because you’re applying less, every product has to earn its place.
Why You’ll Love This Look
- It saves time on busy mornings. Once you’ve practiced it a few times, the full routine takes about 10 to 15 minutes, and the shortened version can be done in five. You don’t need to blend a full face of foundation or perfect a winged liner, so it fits easily into a hectic morning.
- It looks good in every kind of light. Heavy makeup can look great in photos but harsh in daylight, under office lights or up close. A natural look is designed to be seen face to face, so it looks just as good at a coffee date as it does on a video call.
- It’s kinder to your skin. Lighter layers mean less product sitting on your pores all day, which many women find helps their skin feel more comfortable and breathe better, especially in warm weather.
- It’s budget-friendly. You only need a handful of multi-tasking products, such as a cream blush that also tints your lips, a skin tint that also hydrates, and a tinted brow gel. There’s no need for a drawer full of palettes.
- It boosts your confidence. Many women find that once they learn to enhance rather than hide their features, they start to genuinely like their bare skin more. This look celebrates freckles, natural texture and your real face shape.
Start With Skin Prep: The Real Secret
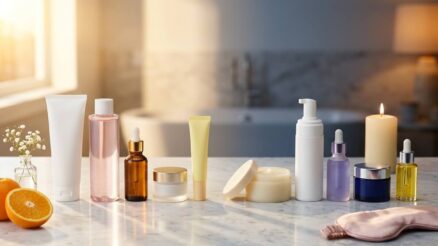
Here’s the truth about natural makeup: about 70% of the result comes from your skincare. When your skin is hydrated, smooth and calm, you need very little coverage, and what you do apply blends seamlessly. When your skin is dry or flaky, even the lightest skin tint can cling to patches and look obvious.
1. Cleanse Gently
Start with a gentle, non-stripping cleanser in the morning, or simply splash with lukewarm water if your skin is dry or sensitive. Avoid harsh foaming cleansers that leave your face feeling tight, because tight, dehydrated skin tends to produce extra oil later in the day and makes makeup separate.
2. Add Hydration in Light Layers
Pat on a hydrating toner or essence while your skin is still slightly damp, then follow with a lightweight serum containing hyaluronic acid, glycerin or niacinamide. These watery layers plump the skin’s surface so fine lines and texture look softer, and they create a smooth canvas for your base. Press products in with your palms instead of rubbing to keep everything calm.
3. Moisturize, Then Give It a Minute
Apply a moisturizer suited to your skin type: a gel cream if you’re oily, a richer cream if you’re dry. Massage it in with upward strokes for 30 seconds, which helps boost circulation and gives your cheeks a natural flush. Then wait two to three minutes before applying makeup, so the moisturizer can settle and your base won’t slide around.
4. Never Skip Sunscreen
Finish with a broad-spectrum SPF 30 or higher. Sunscreen is the single most important step for keeping your skin even-toned over time, since sun exposure is a major cause of dark spots and uneven texture. If you choose a tinted sunscreen, it can even replace your base on good-skin days.
5. Prep Your Lips and Under-Eyes
Swipe on a lip balm now so your lips are soft and smooth by the time you reach the final step. If your under-eye area tends to get dry or crepey, tap on a small amount of eye cream with your ring finger so concealer glides on rather than settling into lines.
Quick tip: Exfoliate gently two to three times a week (not on the same morning you’re doing your makeup if your skin is sensitive). Removing dry, dull surface cells is what gives skin that “lit from within” look that makeup alone can’t fake.
Your Step-by-Step Natural Makeup Routine
Step 1: Prime Only Where You Need It
Most people don’t need to prime their whole face for a natural look. Instead, use a small amount of smoothing or pore-blurring primer only on areas that need it, usually the nose, the center of the forehead and the chin, where pores are larger and oil builds up. If your skin is dry, skip mattifying primers entirely and use a hydrating or glow primer on the high points of your face instead. Less product means a lighter, more skin-like finish.
Step 2: Choose a Sheer Base
Swap heavy foundation for a skin tint, tinted moisturizer, BB cream or a sheer serum foundation. Apply a few dots to the center of your face (around the nose, the inner cheeks and the chin), where redness and uneven tone usually gather, and blend outward with your fingertips or a damp sponge. The warmth of your fingers helps the product melt in, and a damp sponge sheers it out even further.
Notice what you’re not doing: you’re not covering every inch of your face, and you’re not trying to erase freckles or natural texture. Let the outer edges of your face stay mostly bare. This is one of the biggest secrets to making makeup look like real skin.
Step 3: Conceal Strategically
Now look in the mirror in natural light and decide where you actually need extra coverage. For most women, that’s the inner corner of the under-eye (where darkness is deepest), the sides of the nose, and any individual blemishes or dark spots. Use a creamy concealer that matches your skin tone (or is one shade lighter for under-eyes) and apply it in tiny dots.
Tap it in with your ring finger or the tip of a small brush rather than swiping, which keeps the coverage exactly where you placed it. Avoid the big inverted triangle under the eyes that’s popular for glam looks, since it tends to look heavy and creasy in daylight.
Step 4: Add a Flush of Cream Blush
Blush is what makes this look come alive. Choose a cream or liquid blush in a shade close to your natural flush, the color your cheeks turn after a brisk walk. Soft pinks and peaches suit fair skin, warm rose and apricot suit medium skin, and deep berry, brick and plum shades look beautiful on deep skin.
Smile slightly and dab a small amount onto the apples of your cheeks, then blend it up and back toward your temples with your fingertips. For a fresh, youthful effect, tap a tiny bit across the bridge of your nose as well, the way the sun naturally warms your face. Build slowly: it’s much easier to add a second layer than to take one away.
Step 5: Warm Up With Soft Bronzer
Bronzer in a natural look isn’t about sculpting cheekbones. It’s about adding back the warmth that a skin tint can sometimes mute. Pick a cream or soft powder bronzer just one to two shades deeper than your skin, with no orange tones and very little shimmer.
With a large, fluffy brush or your fingers, sweep it lightly where the sun would naturally hit: the top of the forehead along the hairline, the tops of the cheekbones and the jawline. Use a “3” shape on each side of your face and blend until you can’t see where it starts or stops.
Step 6: Highlight Without Glitter
Skip chunky glitter and frosty highlighters. Instead, use a balm, a dewy stick or even a tiny bit of facial oil or clear lip balm to create a natural sheen. Tap it on the tops of your cheekbones, the inner corners of your eyes, the center of your nose bridge and your Cupid’s bow. The result should look like healthy, hydrated skin catching the light, not like a stripe of shimmer.
If you have oily skin, you can skip this step entirely, because your skin will produce its own natural glow by midday.
Step 7: Brush Up Fluffy Brows
Natural, fuller brows frame your face and instantly make you look more awake. Start by brushing your brow hairs upward and slightly outward with a clean spoolie. Then use a clear or tinted brow gel to set them in place.
If you have gaps, fill them in with a fine-tipped brow pencil, using tiny, hair-like strokes in the direction your hairs grow. Choose a shade that matches your hair roots or is one shade lighter, since a too-dark brow is one of the quickest ways to make a natural look feel heavy. Keep the front of your brows the softest part and save the most definition for the tail.
Step 8: Define Your Eyes Softly
You don’t need eyeshadow for this look, but a few small steps make your eyes look brighter and bigger:
- Add a wash of color (optional). Sweep a matte shadow close to your skin tone, or a soft taupe or warm brown, across your lids with your finger. This evens out redness or veins on the eyelid and adds subtle depth without looking “done.”
- Tightline your upper lash line. Gently press a brown or dark-brown pencil into the roots of your upper lashes from underneath. This makes your lashes look thicker at the base without any visible eyeliner, and it’s one of the most underrated tricks in natural makeup.
- Curl your lashes. Use a lash curler at the base of your lashes, holding for five seconds, then move it halfway up and squeeze again for a soft, natural curve. Curled lashes open up the eyes more than any amount of mascara.
- Apply one coat of mascara. Choose a brown or brown-black lengthening mascara and wiggle the wand at the roots before pulling it through to the tips. Focus on the upper lashes and use only the tip of the wand on the lower lashes, or skip them completely to avoid smudging.
Step 9: Finish With “Your Lips, But Better”
The perfect natural lip looks like your own lip color on its best day. Try a tinted lip balm, a sheer lip oil, a lip stain or a dab of your cream blush pressed onto your lips with your fingertip. Matching your lips and cheeks gives you a pulled-together look with almost no effort.
For extra definition, line your lips lightly with a pencil that matches your natural lip color, then smudge the line inward with your finger so there’s no hard edge. Avoid very dark, bright or completely matte lipsticks, which draw attention to the makeup rather than to you.
Step 10: Set Lightly (Only Where Needed)
Powdering your whole face can undo all the dewy work you’ve just done. Instead, use a small, fluffy brush to press a tiny amount of translucent setting powder only on your T-zone and under your eyes, where makeup tends to crease or shine. Then mist your face with a hydrating setting spray to melt everything together and remove any powdery look. Your makeup should feel weightless and look like skin.
Heavy vs. Natural: Smart Product Swaps
If you already own makeup, you don’t need to start from scratch. Here’s how to swap or adapt what you have for a lighter, more natural finish.
| Instead of… | Try… | Why It Works |
|---|---|---|
| Full-coverage foundation | Skin tint, tinted moisturizer, BB cream, or your foundation mixed 1:1 with moisturizer | Lets freckles and natural skin texture show through, so skin looks real |
| Matte powder all over | Translucent powder on the T-zone only | Controls shine where needed while keeping a healthy glow elsewhere |
| Sculpted contour | Soft cream bronzer on the high points of the face | Adds warmth without visible lines or stripes |
| Powder blush | Cream or liquid blush | Melts into skin for a flush that looks like it comes from within |
| Glittery highlighter | Highlighting balm or a dab of lip balm | Looks like natural, dewy skin instead of shimmer |
| Black liquid eyeliner | Brown pencil tightlined at the lash roots | Defines your eyes with no visible line |
| Volumizing black mascara, several coats | One coat of brown or brown-black lengthening mascara | Separated, natural-looking lashes with no clumps |
| Pomade-drawn brows | Tinted brow gel and a few hair-like pencil strokes | Fluffy, fuller brows that still look like your own hair |
| Matte or bold lipstick | Tinted balm, lip oil, stain, or cream blush on lips | Rosy, hydrated lips that look naturally healthy |
How to Choose Shades That Disappear Into Your Skin
The natural look only works if your shades match your skin closely. Here’s how to get them right:
- Find your undertone first. Look at the veins on the inside of your wrist in daylight. Green-looking veins usually mean warm undertones (golden, peachy), blue or purple veins usually mean cool undertones (pink, rosy), and a mix of both suggests neutral undertones. You can also compare how gold and silver jewelry look against your skin.
- Test on your jawline, not your hand. The skin on your hand is often a different shade from your face. Swatch two or three shades along your jawline and blend them out. The one that seems to disappear completely into both your face and neck is your match.
- Always check in natural light. Store lighting and bathroom bulbs can be very misleading. Step near a window or outside with a mirror to see the real color before you buy or before you leave the house.
- Go sheerer if you’re between shades. With a skin tint, being slightly off is less noticeable than with a full-coverage foundation, but if you’re between two shades, choose the sheerer formula or mix the two together.
- Remember your skin changes with the seasons. Many women are a shade deeper in summer and lighter in winter. Keeping two skin tints and mixing them as needed is an easy way to match your skin all year long.
Tweaks for Your Skin Type
Oily Skin
Choose oil-free, water-based products, and use a mattifying primer on your T-zone only. Skip highlighter, since your skin’s natural shine will create its own glow by the afternoon. Set your T-zone with translucent powder and keep blotting papers in your bag, which remove excess oil without adding more product and making your makeup cakey.
Dry Skin
Hydration is everything. Use a richer moisturizer or a few drops of facial oil mixed into your skin tint, and stick to cream products throughout. Avoid powder except for a tiny amount under the eyes if your concealer creases. A hydrating facial mist during the day helps refresh your skin and keeps your makeup from looking dry or patchy.
Combination Skin
Treat each area according to its needs. Use a gel moisturizer on your oily zones and a richer cream on your dry cheeks, prime only your T-zone, and powder only where you shine. This “zone” approach gives you a balanced finish that looks natural all day.
Sensitive Skin
Look for fragrance-free, short-ingredient-list products and always patch test something new on your jawline or behind your ear for a day or two before using it on your whole face. Mineral sunscreens and mineral-based skin tints are often better tolerated. Using clean fingertips instead of brushes also reduces friction on reactive skin.
Mature Skin
Creamy, hydrating textures are your best friends because they won’t settle into fine lines the way powders do. Use as little concealer as possible under the eyes, place blush slightly higher on the cheekbones for a lifted effect, and avoid heavy shimmer on the eyelids. Defining your brows and curling your lashes has an especially big impact, since both tend to become lighter and straighter with age.
Acne-Prone Skin
Choose non-comedogenic products and spot-conceal individual blemishes rather than layering a heavy base over your whole face. A green-tinted color corrector tapped on very red spots before concealer can neutralize redness with less product. Keep your brushes and sponges very clean, washing them at least once a week to avoid spreading bacteria.
The 5-Minute Version for Busy Mornings
On days when you’re short on time, focus on the steps that make the biggest difference. This mini-routine still gives you a fresh, polished look:
- Tinted sunscreen or skin tint (1 minute). Apply a tinted SPF all over as your skincare and base in one step. It protects your skin and evens your tone at the same time, so you can skip the separate sunscreen and foundation steps.
- Concealer where it counts (1 minute). Tap a little concealer on the inner corners of your under-eyes and on any blemishes. This alone makes you look more awake and well-rested.
- Cream blush on cheeks and lips (1 minute). Use one cream blush for both cheeks and lips. It brings color back into your face instantly and gives you a matching, pulled-together finish.
- Brow gel (1 minute). Brush your brows up with a tinted gel. Defined brows frame your face and make the whole look feel intentional.
- Lash curl and mascara (1 minute). Curl your lashes and add one coat of mascara to open up your eyes. If you only have time for one eye step, make it the lash curler.
Tools You’ll Actually Use
You don’t need a huge brush collection for this look. These few tools cover everything:
- Your fingertips. For a natural look, your clean fingers are often the best tool. Their warmth melts cream products into the skin, giving a seamless, skin-like finish that brushes can’t always match.
- A damp makeup sponge. A slightly damp sponge sheers out skin tint and concealer, pressing them into your skin so they look lighter and more natural. Squeeze out all excess water so it’s damp, not wet.
- A fluffy powder or bronzer brush. A soft, loose brush deposits only a little product at a time, which keeps bronzer and setting powder diffused and natural rather than streaky.
- A small concealer brush. A small, pointed brush lets you place concealer precisely on blemishes and in the inner corners of your eyes without spreading it over areas that don’t need it.
- A spoolie. This small mascara-style brush is essential for grooming brows, softening pencil strokes and separating lashes if mascara clumps.
- An eyelash curler. Curled lashes make your eyes look bigger and brighter with or without mascara. Replace the rubber pad every few months so it curls evenly and never pinches.
Common Mistakes That Make Makeup Look Obvious
- Skipping skin prep. Applying makeup to dry, unprepared skin causes it to cling to flaky patches and look heavy. Always hydrate first, and give your moisturizer time to absorb before you start.
- Using too much product. The biggest difference between a natural look and a “done” look is quantity. Start with half the amount you think you need, and add more only if necessary.
- Covering your whole face evenly. Real skin has variation. Applying base only in the center of the face and letting it fade toward the edges looks far more natural than an even layer from hairline to jaw.
- Wrong shade or undertone. A base that’s too light, too dark, too pink or too yellow is the fastest way to give yourself away. Always shade-match in daylight along your jawline.
- Over-powdering. A full face of powder makes skin look flat and can emphasize texture and fine lines. Powder only the areas that get shiny or crease.
- Drawing harsh brows. Brows that are too dark, too sharp or too uniform look painted on. Use light, hair-like strokes and keep the front of the brow soft.
- Forgetting to blend the edges. Visible lines around the jaw, hairline or the edges of blush and bronzer instantly reveal that you’re wearing makeup. Blend until there’s no visible starting or stopping point.
- Choosing very bold lips. A bright or very dark lipstick shifts the whole look into “makeup” territory. Keep lips within a few shades of your natural lip color.
How to Make It Last All Day
Light makeup can fade faster than full coverage, but a few habits keep it looking fresh from morning to evening:
- Let each layer set before adding the next. Waiting a minute between skincare, sunscreen and base helps each layer grip the skin instead of sliding around and breaking down.
- Layer cream and powder versions of the same product. For extra staying power, apply a cream blush and then a light dusting of powder blush in a similar shade on top. The cream gives a glow, and the powder locks it in.
- Use a setting spray. A hydrating or long-wear setting spray melts your layers together and helps them stay put, without adding a powdery finish.
- Touch up smartly. Rather than adding more makeup at midday, blot oil with blotting paper, refresh your lips with tinted balm, and tap a little blush back onto your cheeks. Adding more base on top of old makeup usually looks heavy.
- Keep your hands off your face. Touching your face throughout the day moves makeup around and transfers oil. It’s an easy habit to forget, but it makes a real difference.
Frequently Asked Questions
Can I do a no-makeup look if I have acne or dark spots?
Absolutely. The key is to conceal only where you need it instead of covering your entire face with heavy foundation. Use a sheer skin tint all over to even out your tone, then tap a creamy concealer directly onto individual blemishes or dark spots. This gives you coverage exactly where you want it, while the rest of your face still looks like natural skin.
Do I need foundation for this look?
No. Many women skip foundation altogether and use a tinted moisturizer, skin tint, BB cream or tinted sunscreen instead. If you love your current foundation, you can mix a drop of it with your moisturizer to make it sheer and lightweight.
How long does the full routine take?
Once you’re comfortable with the steps, the complete routine takes about 10 to 15 minutes, including skin prep. The 5-minute version above covers the most important steps for busy days.
Is the no-makeup look suitable for every skin tone?
Yes, it’s beautiful on every skin tone. The most important thing is choosing shades that match your skin and undertone exactly, and choosing blush and bronzer colors that look like your natural flush and warmth. Deeper skin tones often look stunning with rich berry, brick or plum blushes and warm, glowing balms.
Can I wear this look to work or on special occasions?
It’s perfect for work, interviews, school, weekend plans and casual dates. For evenings or special occasions, you can build on the same base by adding a bit more mascara, a soft smudge of brown shadow along the lash line, or a slightly deeper lip color, while keeping your skin fresh and natural.
How do I keep my natural makeup from looking dull by the afternoon?
Dullness is usually caused by dehydration or too much powder. Keep a hydrating facial mist in your bag, blot instead of re-powdering, and tap a little cream blush or balm onto your cheeks to bring back the glow.
Final Thoughts
The natural no-makeup makeup look isn’t about hiding who you are. It’s about celebrating your real skin, your real features and your real face, with just a little help where you want it. Start with good skin prep, use lighter textures, place each product with intention, and let your natural beauty do the rest.
Try the full routine on a slow weekend morning so you can practice without rushing, then switch to the 5-minute version during the week. Within a few days, it will feel completely effortless, and you might find yourself reaching for less makeup than ever before.