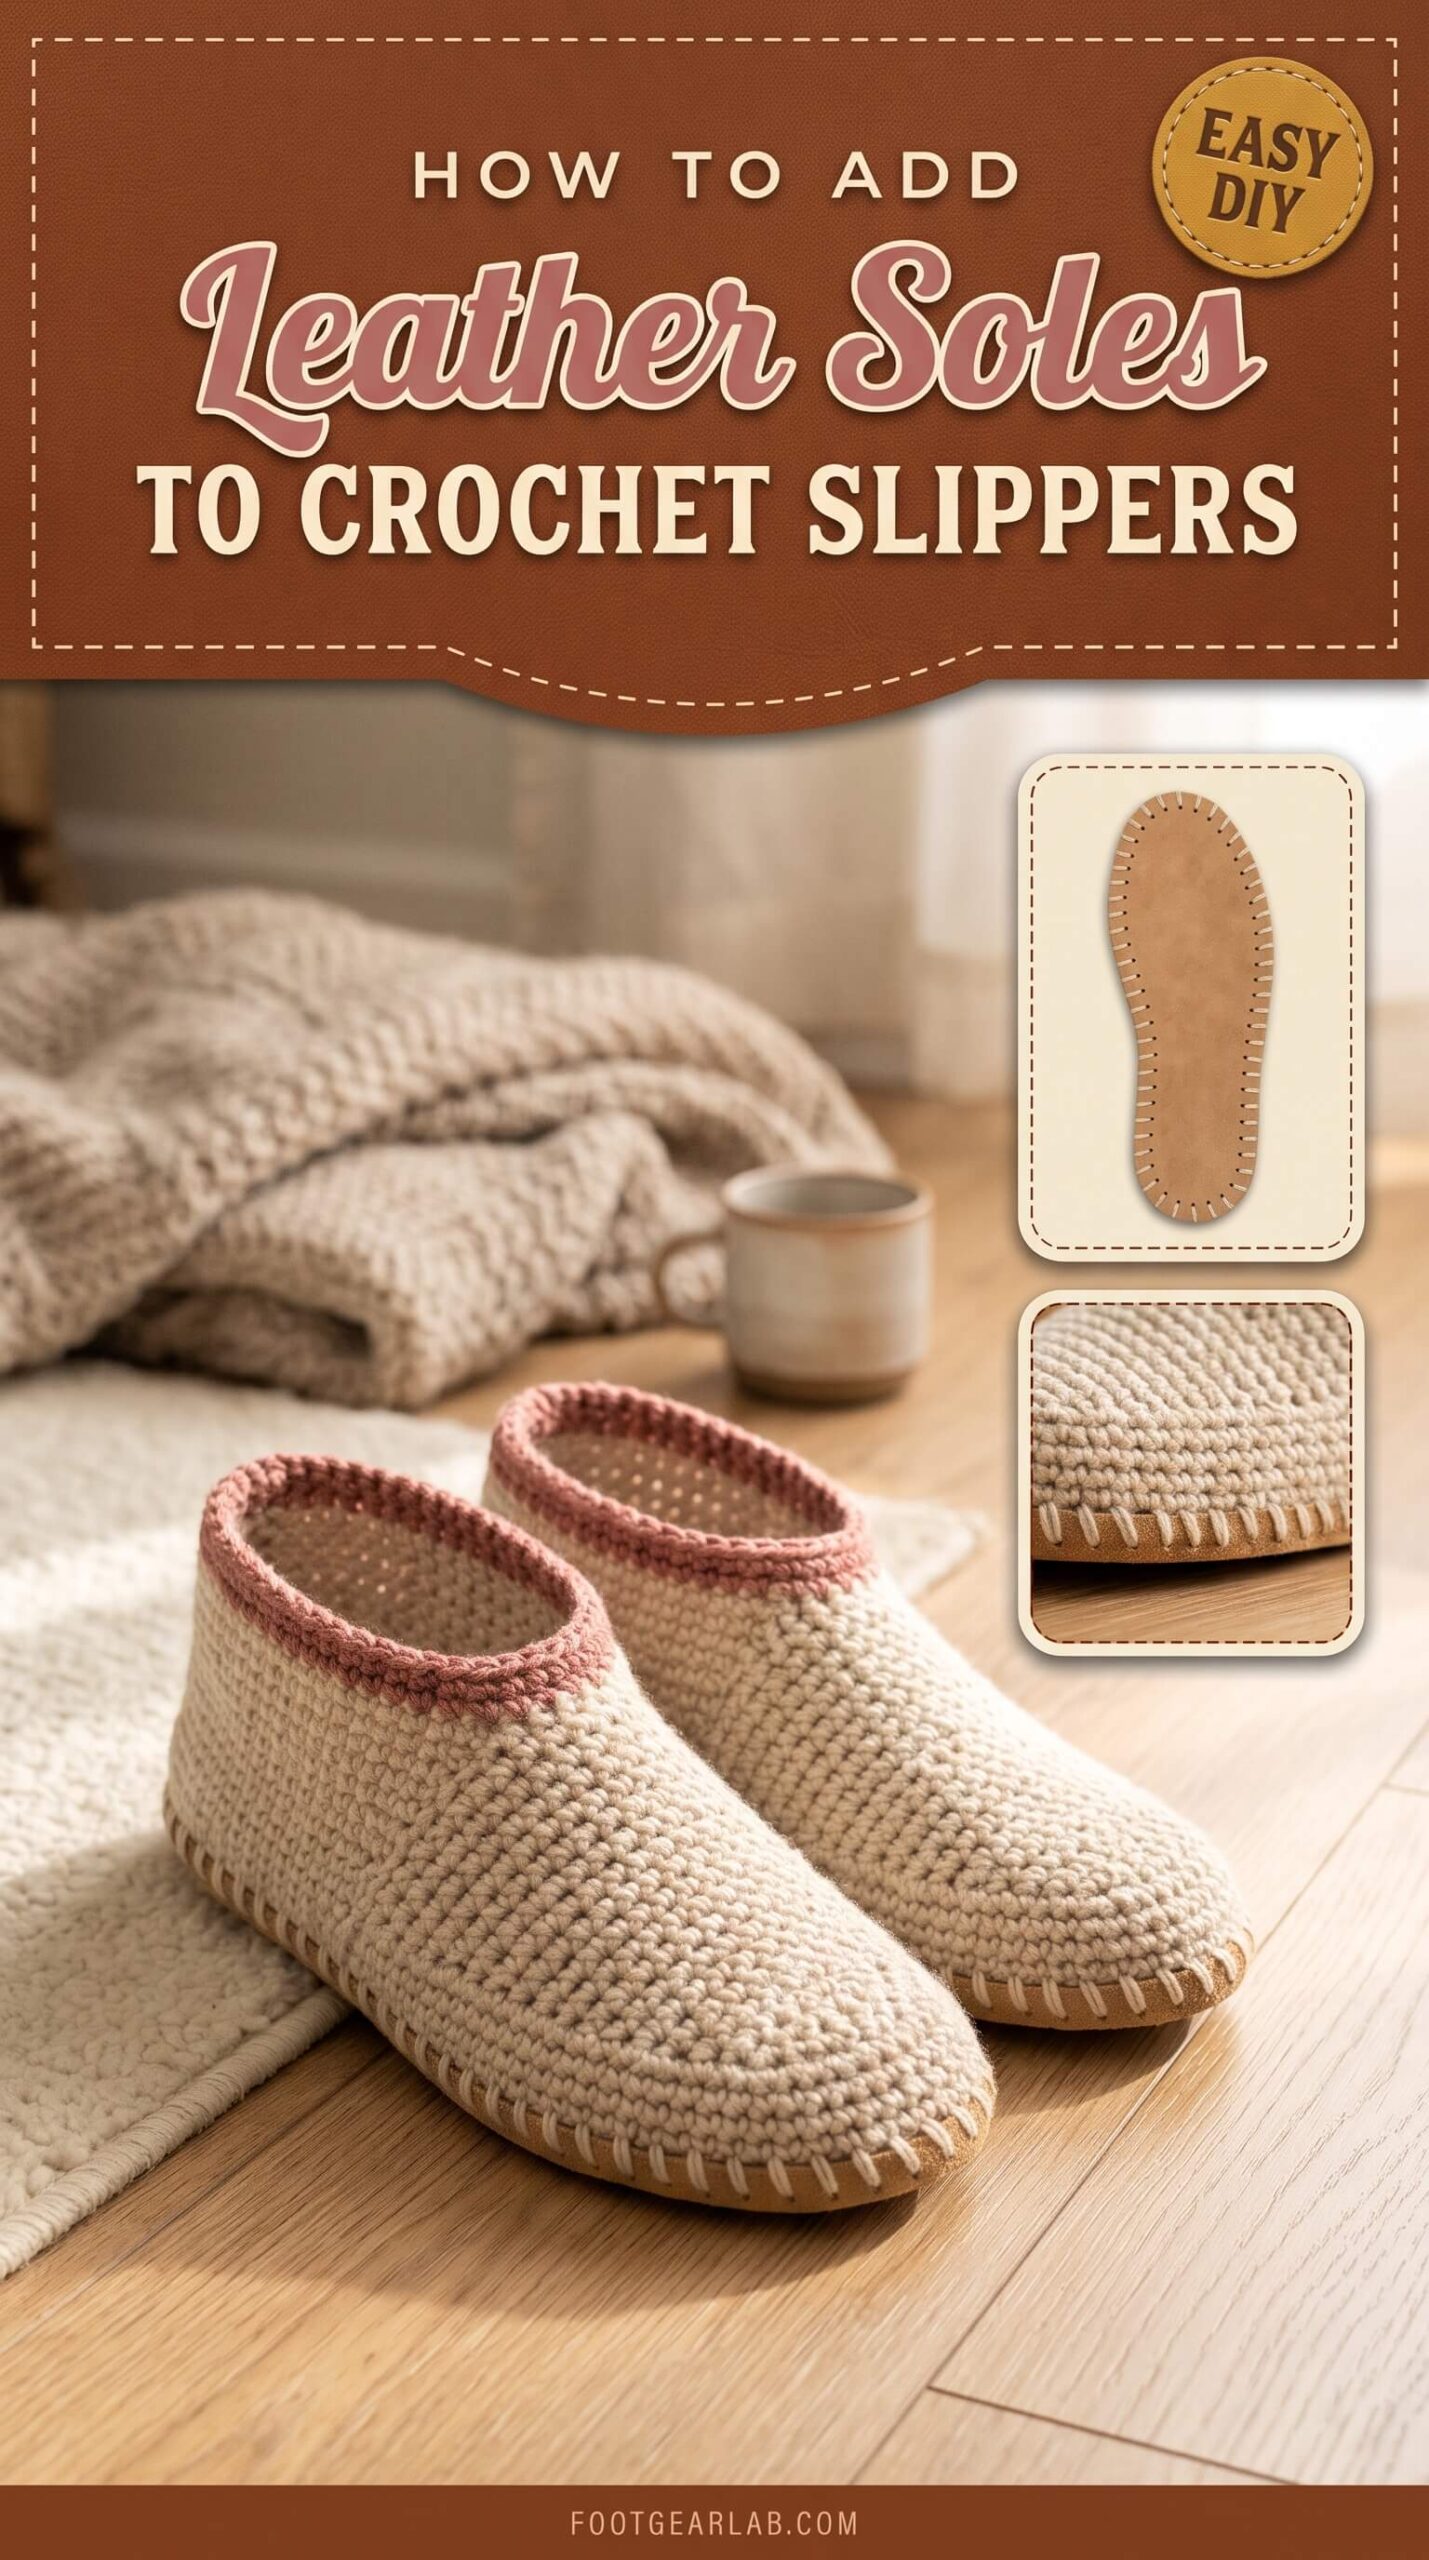
There is something special about slipping your feet into a pair of handmade crochet slippers. They are soft, cozy, and made exactly the way you like them. But if you have ever worn crochet slippers for a few weeks, you already know their weak spot: the bottom. Yarn soles wear thin at the heel and the ball of the foot, they slide around on wood and tile floors, and they pick up every crumb and bit of dust in the house.
The good news is that you don’t have to give up on your favorite handmade slippers. Adding a leather sole is one of the easiest upgrades you can make. It turns a delicate project into a sturdy pair you can wear every day for years. In this guide, you’ll learn how to choose the right leather, size it to your foot, punch the holes, and attach it in two different ways: by crocheting a brand-new slipper directly onto the sole, or by sewing a sole onto slippers you have already made.
Why Add Leather Soles to Crochet Slippers?
Before you pick up your hook, it helps to know exactly what a leather sole will do for your slippers. It is not only about making them last longer; leather changes the way your slippers feel and behave every time you wear them.
- They last much longer. Yarn rubs against the floor with every step, so the heel and the ball of the foot are always the first places to wear through. A leather layer takes that friction instead of your stitches, which means the crochet stays smooth and intact while the sole slowly softens and molds to your foot.
- They give you better grip on carpets and rugs. Suede, the soft fuzzy side of leather, grips rugs and carpet far better than yarn does. This makes walking around the house feel steadier and more secure, especially on stairs covered with carpet. (For tile and wood floors, you can add non-slip dots too, which we cover later in this guide.)
- They keep their shape. Crochet stretches a little more each time you wear it. A leather sole acts like a stable base, so your slippers don’t spread out, twist sideways, or become loose and floppy after a month of wear.
- They add warmth and a layer of protection. Leather blocks the cold that comes up from hard floors in winter, and it protects your feet from small sharp things like a dropped earring back or a crumb of dry cat food.
- They look polished and professional. A neat leather sole with even stitches around the edge makes handmade slippers look like a boutique purchase. This is a lovely touch if you plan to give your slippers as a gift or sell them at a craft market.
Choosing Your Leather Sole
You have three main options for the leather itself. Each one works well, so the right choice depends on your budget, the time you want to spend, and how custom you want the fit to be.
Ready-made pre-punched soles are the easiest place to start, especially for your first pair. These are suede or leather slipper soles sold in shoe sizes, with holes already punched evenly around the edge. You simply choose your size and start stitching. The only downside is that the fit is standard, so if your feet are especially narrow or wide, they may not match perfectly.
Cutting your own soles from a leather hide gives you a custom fit for any foot and is often cheaper if you plan to make several pairs. Look for soft, flexible leather about 2 to 4 oz in weight (roughly 0.8 to 1.6 mm thick). Chrome-tanned leather, deerskin, and suede splits are all good choices because they bend easily with your foot. Very thick or stiff leather, like the kind used for belts, is harder to punch and sew and makes the slippers feel like hard shoes.
Upcycled leather from an old leather jacket, skirt, or large handbag is a budget-friendly and eco-friendly option. This leather is usually quite thin, so it is a good idea to glue two layers together, back to back, before cutting your soles. This gives you enough thickness to resist wear without losing softness.
| Option | Best For | Fit | Effort | Durability |
|---|---|---|---|---|
| Ready-made pre-punched soles | Beginners and quick projects | Standard shoe sizes | Very low | Good to very good |
| Cut-your-own leather hide (2–4 oz) | Custom fit and making several pairs | Made to your foot | Medium | Very good |
| Upcycled leather (doubled) | Budget and eco-friendly projects | Made to your foot | Medium to high | Good |
What You’ll Need
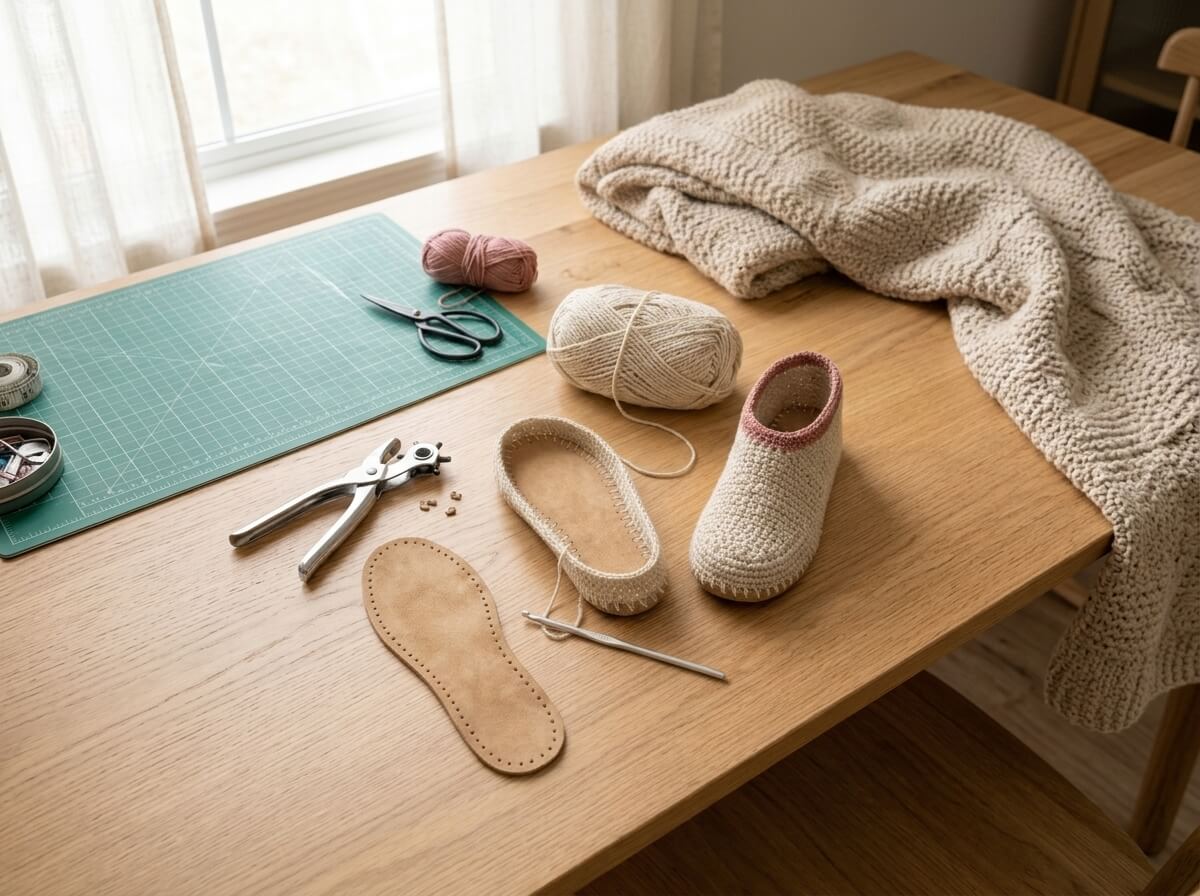
Gathering everything before you begin makes the process smooth and stress-free. Most of these supplies are inexpensive, and many of them you may already have in your craft drawer.
- Leather soles or leather hide. Use ready-made pre-punched soles, or a piece of 2 to 4 oz flexible leather large enough for two soles. Check that the leather has no thin spots or deep scratches where your feet will press hardest.
- Yarn. Use the yarn for your slippers, plus a little extra for the blanket stitch edge. Worsted weight or DK cotton, wool, or acrylic blends all work well. Wool and wool blends are especially cozy and naturally breathable.
- Crochet hook. Use the hook size your yarn label recommends for the upper, often 4.0 to 5.0 mm. A smaller hook (around 3.0 to 3.5 mm) is helpful for the first round, because it slides more easily into tight spaces near the leather.
- Large-eye tapestry needle or leather needle. A blunt tapestry needle works for the blanket stitch with yarn. If you are sewing with waxed thread, a leather needle or a sharp large-eye needle is easier to use.
- Waxed thread (optional). This strong, slightly sticky thread is ideal for Method 2, because it holds tension well and doesn’t fray easily. Choose a color that matches either your leather or your yarn.
- Leather hole punch. A rotary punch with a 2 to 3 mm setting is the easiest tool for beginners. A punch set with a mallet also works, as long as you protect your table with a cutting board or scrap wood.
- Sharp scissors or a craft knife and cutting mat. Heavy-duty fabric scissors cut thin leather well. For thicker leather, a craft knife or rotary cutter on a self-healing mat gives cleaner edges.
- Paper, pencil, and a ruler. You’ll use these to trace your foot and create a sole template. A clear quilting ruler is especially helpful for marking even hole spacing.
- Fabric clips or binder clips. Small clips hold the leather and crochet together while you sew, without leaving pinholes in the leather.
- Stitch markers. Two markers per slipper help you keep track of the center of the toe and the center of the heel.
- Flexible leather glue (optional). A thin layer in the center of the sole stops it from shifting while you stitch in Method 2. Choose a glue labeled as flexible and suitable for leather.
- Non-slip grip (optional). Silicone fabric grip paint or liquid latex adds traction to the bottom of the sole for smooth floors.
Get the Sizing Right First
A good fit is the secret to slippers that feel comfortable and stay on your feet. It takes only a few minutes, and it saves you from unpicking a whole slipper later.
Trace your foot while standing. Place a sheet of paper on a hard floor, stand on it with your full weight, and hold the pencil straight up and down as you trace around your foot. Your foot spreads when you stand, so tracing while sitting gives you a sole that is too small. Trace both feet, because most people have one foot that is slightly larger than the other.
Smooth and add a small allowance. Draw a clean, smooth line about 1/8 inch (3 mm) outside your tracing all the way around. This tiny bit of extra room accounts for the thickness of the yarn and the stitching, so your toes don’t press against the edge. Cut out this template and label it “left” or “right.”
Check ready-made soles against your template. If you are using pre-punched soles, lay each one on top of your template. The sole should cover your tracing completely, with the edge falling close to your smoothed line. If the sole is noticeably longer than your foot, size down; if your toes extend past it, size up.
For Method 2, trace the slipper instead. If you are adding soles to slippers you have already made, lay each slipper flat, sole side down, on paper, and trace around the bottom of the slipper itself. This gives you a sole that matches the shape of the crochet exactly. A sole crocheted in rounds is usually a racetrack-style oval, and your leather sole should follow that same oval shape rather than a foot shape.
How to Cut and Punch Your Own Leather Soles
If you bought pre-punched soles, you can skip straight to the method you’d like to use. If you are cutting your own soles, follow these steps carefully, because neat, even holes make every later step easier.
Step 1: Trace the Template Onto the Leather
Lay your leather suede side down (smooth side up) on a flat surface. Place your left template on the leather and trace around it with a pencil or a silver gel pen, which shows up well on dark leather. Then flip the same template over to trace the right sole, or use your separate right-foot template. Flipping is important; if you trace the same side twice, you will end up with two left soles. Leave at least 1/2 inch of space between the two soles so you have room to cut cleanly.
Step 2: Cut Out the Soles
Cut along the traced line slowly and smoothly with sharp scissors, or use a craft knife against your cutting mat for thicker leather. Try to cut in long, steady movements rather than short snips, which can leave a jagged edge. Once both soles are cut, lay them back to back (suede to suede) to check that they mirror each other. Trim any uneven spots so they match. If your leather edge looks rough, you can lightly rub it with a little water and a smooth wooden tool to burnish it, though this is optional for slipper soles.
Step 3: Mark the Hole Line
Using your ruler, make small dots about 1/4 inch (6 mm) in from the edge, spaced about 3/8 inch (1 cm) apart all the way around the sole. Start with one dot at the very center of the toe and one at the very center of the heel, then fill in the spaces along each side, keeping the spacing as even as you can. Holes placed closer than 1/4 inch from the edge can tear when you pull your stitches tight, so it is better to stay slightly farther in than too close.
Count the dots on your first sole, then mark the second sole with exactly the same number of dots. Matching counts mean both slippers will have the same number of foundation stitches, so they turn out the same size.
Step 4: Punch the Holes
Set your rotary punch to a 2 to 3 mm hole and punch each marked dot. Hold the punch straight so the holes come out round and clean. If you are using a punch and mallet, place the leather on a scrap board, position the punch on each dot, and give it one firm tap. After punching, gently rub away any pencil marks with a soft eraser or a damp cloth.
Method 1: Crochet Your Slippers Directly Onto the Leather Sole
This is the best method when you are starting a new pair. The leather becomes the base of the slipper, and you build the crochet upper right up from its edge. The result is incredibly sturdy, and the join between leather and yarn looks seamless and professional.
Step 1: Blanket Stitch Around the Edge
Thread a tapestry needle with about 2 1/2 times the length of the sole’s outline in yarn. Starting at the center of the heel, work a blanket stitch around the whole sole, using one stitch per hole. To make each stitch, bring the needle up through the hole from the bottom, loop the yarn over the edge of the leather, and pass the needle through the loop before pulling it snug. Keep the tension even, firm enough to sit neatly against the edge but not so tight that the leather curls.
When you reach the starting point again, weave the yarn tail under a few stitches on the bottom of the sole and trim it. You now have a neat row of yarn loops running along the top edge of the sole, and these loops are exactly what you will crochet into. This blanket stitch edge is the key to Method 1, because it gives your hook an easy place to work without forcing it through the leather itself.
Step 2: Crochet the Foundation Round
Place one stitch marker at the center of the toe and one at the center of the heel, so you always know where you are. Using the smaller hook, join your yarn with a slip stitch into the blanket stitch loop at the center of the heel. Chain 1, then work single crochet into each blanket stitch loop all the way around. Join with a slip stitch to the first single crochet.
If your holes are spaced 3/8 inch (1 cm) apart and you are using DK or light worsted yarn, you may find that 2 single crochets in each loop gives a smoother edge that doesn’t pull. A good rule is to look at the edge after the first few inches: if the leather starts to curl upward, add more stitches; if the crochet ruffles or waves, use fewer. Count your stitches at the end of the round and write the number down so you can match it exactly on the second slipper.
Step 3: Build the Side Wall
Switch to your regular hook size. For the next round, work single crochet in the back loop only of each stitch. Working in the back loop creates a clean ridge that makes the crochet turn upward from the sole, the same way the side of a shoe rises from the bottom. Then work 2 to 4 more rounds of regular single crochet, without increasing, until the side wall is about 3/4 inch to 1 inch (2 to 2.5 cm) tall. This short wall cradles the sides of your foot and gives the upper a strong base to grow from.
Step 4: Shape the Toe and Finish the Upper
From here, you can follow almost any crochet slipper pattern that starts with a crocheted sole. The trick is to compare stitch counts. Look at the last round of the sole in your pattern and compare it with the number of stitches in your side wall. If your count is a little higher or lower, add or skip a few increases or decreases evenly along the sides so the toe shaping still lines up with your toe marker.
For a simple and classic shape, work the toe cap by decreasing gradually across the front stitches over several rows, then work the heel and sides straight up until they reach the height you like around the ankle. Finish with two rounds of a contrast color, like dusty rose, around the foot opening for a pretty, polished trim. Make the second slipper the same way, using the same stitch counts you wrote down.
Method 2: Sew Leather Soles Onto Finished Crochet Slippers
This method is perfect when you already have a pair of crochet slippers you love and you simply want to make them sturdier. You’ll create a sole that matches the bottom of your slipper, then stitch it securely in place.
Step 1: Make a Matching Sole
Lay one slipper flat, bottom side down, on paper and trace around the very bottom edge of the sole. Because crochet soles are usually worked in rounds, your tracing will probably be a racetrack-style oval with straighter sides and rounded ends. That is perfectly fine; your leather sole should follow the shape of the crochet, not the shape of a foot. Cut out this template right on the line or a hair inside it, so the leather doesn’t stick out past the yarn once it is attached. Trace and cut two soles from your leather, flipping the template for the second one.
Step 2: Punch the Holes
Mark and punch holes about 1/4 inch (6 mm) from the edge and about 3/8 inch (1 cm) apart, exactly as described in the section above. Use the same number of holes on both soles. Then count the stitches in the outer round of your crochet sole. Ideally, you’ll sew through one crochet stitch per hole or one stitch for every two holes, so a quick count now helps you keep your spacing even as you go.
Step 3: Glue the Center (Optional)
Applying a thin layer of flexible leather glue to the center of the leather sole stops it from sliding around while you sew. Keep the glue about 1 inch away from the edge on all sides, because glue near the holes makes sewing difficult and can harden the edge. Press the slipper onto the sole, lining up the toe and heel, and let the glue dry completely as directed on the package before you start stitching. If you prefer not to use glue, the clips in the next step will still keep everything in place.
Step 4: Clip and Align
Place the slipper on the leather sole with the suede side facing down toward the floor. Line up the center of the toe and the center of the heel first, then work your way along each side so the edges match evenly. Hold everything together with 6 to 8 fabric clips spaced around the edge. Take a moment to look at the slipper from underneath; the leather should sit evenly all the way around, without peeking out on one side or falling short on the other.
Step 5: Stitch the Sole in Place
Thread a leather needle with waxed thread (or a tapestry needle with your slipper yarn). Start at the center of the heel. Bring the needle up through a hole from the bottom, then pass it through the outer edge of the nearest crochet stitch and back down through the same hole, pulling it snug. Repeat for the first hole once more to anchor your thread securely.
Continue around the sole with a whipstitch: come up through the next hole, catch the crochet stitch directly above it, and wrap back around the edge to the next hole. Remove each clip only when you reach it, so the sole can’t shift. Keep your stitches firm and even. When you arrive back at the heel, make two extra stitches through the first hole to lock everything in place.
Step 6: Finish and Hide the Ends
Pass the needle to the inside of the slipper and weave the thread back through several stitches on the inside of the crochet sole, changing direction once or twice so it can’t work loose. Trim the end close to the fabric. Repeat the whole process for the second slipper, using the same spacing so they match.
How to Make Leather Soles Non-Slip
Suede facing down grips rugs and carpet nicely, but leather of any kind can still feel slippery on polished wood, tile, and laminate floors. This is easy to fix with a few simple additions.
Add silicone grip dots. Silicone fabric grip paint, the kind used for socks and baby shoes, works very well on suede. Turn the slippers upside down, dot the paint across the ball of the foot and the heel in small, evenly spaced dots or short lines, and let it cure fully for the time listed on the bottle, usually at least 24 hours. Avoid covering the whole sole, because a few spots of grip are all you need and too much can make the sole stiff.
Try liquid latex. Brushing a thin layer of liquid latex onto the bottom of the sole creates a rubbery coating with excellent grip. Apply two or three thin coats, letting each one dry before adding the next. Keep in mind that latex is not suitable for anyone with a latex allergy.
Choose suede side down. If you’re cutting your own soles, always place the fuzzy suede side facing the floor. Smooth, finished leather is the slipperiest surface you can choose for indoor floors.
Common Problems and How to Fix Them
Even experienced crocheters run into a few hiccups the first time they work with leather. Here are the most common issues and simple ways to solve them.
| Problem | Why It Happens | How to Fix It |
|---|---|---|
| The leather curls up at the edge | Too few stitches in the foundation round, so the crochet pulls the leather inward | Add more stitches, such as 2 single crochets per hole, until the edge lies flat |
| The crochet edge ruffles or waves | Too many stitches for the number of holes | Work 1 stitch per hole, or skip an increase every few holes |
| Holes stretch or tear | Holes punched too close to the edge, or very thin leather | Keep holes at least 1/4 inch from the edge, or double thin leather before cutting |
| The leather sticks out past the slipper | Sole cut too large in Method 2 | Trim the leather edge carefully with sharp scissors, a little at a time |
| The slipper twists on the sole | Toe and heel were not lined up before stitching | Use stitch markers or clips at the exact toe and heel centers before you start |
| Slippers feel tight across the toes | No allowance added around the foot tracing | Add about 1/8 inch around your tracing, and remember crochet relaxes slightly with wear |
How to Care for Leather-Soled Crochet Slippers
Leather and yarn need slightly different care, so a little attention keeps both looking lovely for a long time.
- Avoid the washing machine. Machine washing can stiffen, shrink, or crack leather, and it may loosen your stitches. Instead, spot clean the crochet upper with a damp cloth and a drop of gentle wool wash, and gently pat it dry with a towel.
- Brush the suede regularly. A soft suede brush lifts dirt and restores the soft texture of the sole. Brush in one direction and do this every few weeks if you wear your slippers daily.
- Dry slowly and naturally. If your slippers get damp, stuff them lightly with paper towels and let them air dry at room temperature. Never place them on a radiator or in direct sunlight, because high heat can make leather brittle and cause the crochet to lose its shape.
- Condition smooth leather occasionally. If you used smooth leather for your soles, a light coat of leather conditioner every few months keeps it soft and flexible. Suede soles don’t need conditioner.
- Check the stitching now and then. Look over the edge every month or so. If a stitch starts to loosen, re-stitch that small section right away before it spreads.
Make Them Your Own
Once you know how to add leather soles, you can create slippers that feel truly personal. Try a contrast blanket stitch, like a dusty rose edge on a cream slipper, to make the join a decorative feature instead of something to hide. Choose dark chocolate leather with a forest green or burgundy upper for a rich, cozy cabin look, or pair light tan suede with soft pastel yarns for a sweet, airy style. You can also add small details to the finished upper, such as a little crochet bow at the toe, a faux-fur cuff, or a row of tiny pom poms around the ankle.
Leather-soled slippers also make thoughtful handmade gifts. Trace a loved one’s foot (or ask for their shoe size and choose ready-made soles), and you’ll give them a pair that is both beautiful and built to last for many winters.
Frequently Asked Questions
Can I use faux leather instead of real leather? Yes, but choose a soft, flexible faux leather with a fabric backing. Faux leather doesn’t breathe as well as real leather and may wear faster at the heel, so consider doubling it for extra strength.
Do I need a special hook to crochet onto leather? Not if you use the blanket stitch method. The blanket stitch gives you yarn loops to crochet into, so a regular aluminum hook works perfectly. A small steel hook is only needed if you crochet directly into the holes.
Can I wear leather-soled crochet slippers outside? They are designed for indoor wear. A quick trip to the mailbox on a dry day is fine, but wet or rough ground will wear the leather and soak into the yarn quickly.
How many holes should a slipper sole have? It depends on the size of the sole, but for an adult woman’s slipper with holes spaced about 3/8 inch (1 cm) apart, you can expect roughly 50 to 70 holes per sole. The exact number matters less than making both soles match.
Can I remove the leather sole later? Yes, if you used Method 2 without glue, you can carefully snip the stitches and remove the sole to replace it. Soles attached with Method 1 are part of the slipper’s structure and are not meant to be removed.
Final Thoughts
Adding leather soles to crochet slippers is one of those small finishing touches that makes a big difference. It protects all the hours you put into your stitches, gives you steadier footing around the house, and turns a cozy handmade project into something that truly lasts. Whether you start fresh by crocheting directly onto a pre-punched sole or give an old favorite pair a sturdy new base, the process is simple, relaxing, and deeply satisfying.
So pick out your prettiest yarn, choose a soft leather you love, and give your next pair of crochet slippers the solid foundation they deserve. Your feet will thank you every single morning.